

You can clean a turntable with disinfecting wipes safely—if you follow the right wipe-and-dry sequence. This guide lays out the exact steps for disinfecting key areas without soaking the record surface, damaging the stylus, or leaving residue behind. By the end, you’ll know the quickest way to disinfect what matters while keeping playback clean.



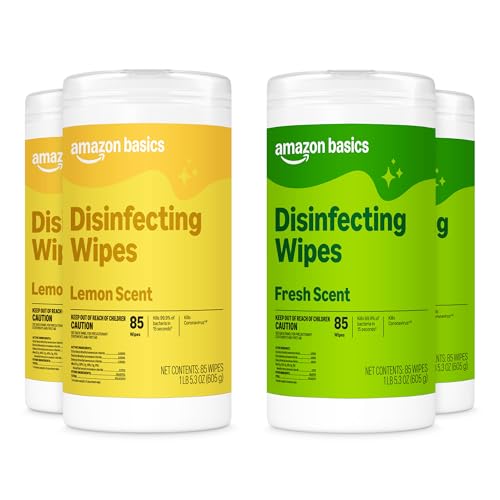
Use disinfecting wipes carefully—only on the platter rim, dust cover, and exterior, and keep moisture away from the tonearm, cartridge, and internal bearings. Wipe gently, then immediately dry with a lint-free microfiber so residue doesn’t build up or creep into moving parts. In this guide, you’ll learn what to wipe, what to avoid, and a simple wipe-to-dry routine.
If you share your turntable with kids/pets, handle it frequently, or you’re trying to reduce germs on frequently touched surfaces, this is for you. It’s also useful when you want a faster clean than a full deep-clean—but you still need to protect the record-playing parts.
Gather the right supplies (and keep the wipes “surface-only”)

Use disinfecting wipes only as an external surface tool for touch points, not as a general-purpose cleaning solution for the record path. Here’s what to gather so you can disinfect without risking buildup or moisture where it shouldn’t go.
Disinfecting wipes are intended for hard, non-porous surfaces, so you should treat your turntable’s exterior and dust cover as the “safe surfaces” category first.
Turning a wipe into a “wet wipe” for longer than needed increases the chance of moisture migrating into seams, so you should plan to dry immediately after wiping.
Microfiber cloths are lint-free and help prevent residue from building up on glossy plastics and painted plinths.
Start by assembling:
– Lint-free microfiber (at least one cloth for wipe-off and another dry pass, if you have it).
– Disinfecting wipes you can use with light pressure.
– A quick “drying window” in your workflow—when the wipe goes on the dust cover or exterior, your microfiber comes next.
A practical note: many disinfecting wipes contain water, surfactants, and an antimicrobial active (the active ingredient varies by brand). The antimicrobial is meant to work while the surface is sufficiently damp for the product’s required contact time—but on a turntable, you do not want that dampness lingering near openings. So the safe strategy is *wipe briefly on safe exterior zones, then dry immediately.*
Also, this matters in 2024 and beyond because more households are using disinfecting wipes frequently; the main risk is not only moisture, but also residue (any leftover film can attract dust). In my own home setup, the “wipe → skip drying → dusty finish” pattern is exactly what I look to avoid when I clean shared electronics—.
What you should set aside (so you don’t grab the wrong thing)
– Avoid record cleaning fluids, glass cleaners, or alcohol sprays on the tonearm area.
– Avoid cotton swabs around seams unless your cartridge/tonearm manuals explicitly allow it.
– Keep wipes away from the spindle area, tonearm base, and any gaps where liquid can run.
Power down and protect the record-playing components
You should power off the turntable and reduce the chance of accidental wipe contact before you start disinfecting. This single step prevents most “oops” moments involving the tonearm and cartridge.
Most turntable manufacturers recommend powering down before cleaning to avoid unintended movement of moving parts (motor, platter, or tonearm systems).
Moisture near cartridge wiring and stylus assemblies can create electrical or mechanical issues, so keeping wipes away from those zones is a safety priority.
Before wiping anything:
1. Turn the unit off. If your model makes safe handling straightforward, unplug it as well.
2. If your turntable has a tonearm rest, place the tonearm there.
3. If your dust cover can be opened without stressing hinges, open it just enough to access the dust cover’s exterior surface you’ll disinfect.
4. Physically buffer the record-playing area: I recommend keeping your wipe hand on the other side of the turntable and approaching from a consistent angle—this reduces the chance of brushing near the cartridge/stylus.
A few “don’t do this” constraints that prevent damage
– Do not lean over the tonearm with a loaded wipe.
– Do not wipe while the platter is moving.
– Do not let the wipe reach under/around the tonearm base or into openings around the spindle/motor area.
Quick safety framing using real-world scales
Disinfecting wipes are “wet surface tools,” but the record-playing parts are extremely sensitive. A stylus and cantilever assembly operates at micrometer-level tolerances and rides within tight groove spacing; even a tiny amount of liquid or residue where it doesn’t belong can become a contaminant. That’s why the wipe strategy must stay external and controlled.
Wipe the safe areas first: platter rim, base, and dust cover
Disinfecting wipes can be appropriate on the turntable’s dust cover and exterior touch surfaces when you wipe lightly and dry immediately. This gives you a faster germ-reduction step without treating the mechanism like a countertop.
Wiping lightly reduces the likelihood of pushing grime or disinfectant into seams, which is especially important on electronics with joints and openings.
Drying right after wiping helps prevent disinfectant residue from drying onto plastic finishes and increasing dust attraction.
Follow a simple order: dust cover first, then exterior, then platter rim (if exposed).
– Dust cover: Gently wipe the exterior surface. Use minimal pressure—think “polish,” not “scrub.”
– Exterior housing/plinth/base: Focus on areas people touch (front panel, edges, and the region around buttons/knobs—without crossing into openings).
– Platter rim (only if exposed): If the rim is reachable without touching the tonearm area, wipe lightly.
Pressure and movement: why “gentle” is not just a preference
Aggressive wiping can cause two problems:
1. Smearing: Some residues (finger oils, dust film, light grime) move around instead of lifting.
2. Finish damage: Some disinfectant actives and repeated friction can dull certain plastics, rubber-like coatings, or matte finishes.
Here’s a short, practical comparison you can use before you start:
| Do this (safer) | Avoid this (higher risk) |
|---|---|
|
|
After-wipe drying (non-negotiable)
As soon as you finish wiping each safe zone, dry it:
– Use dry lint-free microfiber
– Wipe in the same direction each time (reduces streaking)
– Make sure the dust cover surface looks evenly dry—no tacky areas
That drying step is where you prevent residue from turning into dust magnet behavior over time.
Keep moisture off the tonearm, cartridge, and inside mechanics
Keep disinfecting wipes away from the tonearm, cartridge/stylus, spindle area, and internal bearings. Even when the intention is hygiene, those parts are designed for clean, controlled contact—not chemical-wet wipe exposure.
Cartridges and stylus assemblies are delicate precision components, so cleaning agents or moisture should be avoided unless the manufacturer explicitly approves the method.
Seams, spindle openings, and bearing-adjacent gaps are common pathways for liquid migration, so minimal wipe contact and immediate drying are critical.
Specific “do not wipe” zones:
– Stylus and cartridge body (including the area closest to the stylus tip)
– Tonearm tube and pivot region
– Inside openings, including the area around the spindle/motor access points and any vent-like gaps
How disinfecting wipes can cause problems (mechanically)
– Liquid migration: Over-wetting or pausing with a wipe can push moisture into seams or moving parts.
– Residue buildup: Some wipes leave a film that attracts dust, which then transfers to surrounding surfaces.
– Chemical compatibility: Plastics and elastomers in turntables may react to certain disinfectant actives or frequent wipe friction.
A key practical detail: even if a wipe never touches the cartridge directly, mist/wetness from aggressive wiping near the tonearm area can still creep toward it—especially on dust cover hinges or nearby gaps.
A factual anchoring point (why “wet contact time” is tricky here)
Many disinfectants require a designated wet contact time to be effective. On a turntable, you often can’t safely control or protect the entire wet area—including around moving parts—so you should focus on *disinfecting safe external surfaces* rather than trying to disinfect “everything.”
According to the U.S. Environmental Protection Agency (EPA), disinfectant products must be used according to the label directions, including any required wet contact time . This is exactly why “wipe and immediately dry” is safer for electronics than “wipe and wait.”
What can go wrong (and how to avoid damage)
Disinfecting wipes can cause problems mainly through residue, liquid migration, and finish compatibility. If you follow the safe-zone rule and dry immediately, you avoid most of the damage pathways.
If a disinfectant leaves residue, it can attract dust and reduce the appearance quality of glossy or matte exterior surfaces over repeated cleanings.
Finish damage is more likely when disinfectants are used repeatedly without confirming material compatibility for plastics, coatings, and vinyl-like textures.
Common failure modes—and how to prevent them:
Residue buildup
– What happens: Wipes can leave a thin film.
– Why it matters: Dust sticks faster, and the film can become harder to remove later.
– Fix: Dry immediately with microfiber. If you notice tackiness, switch to a mild manufacturer-approved electronics cleaning method for that surface.
Liquid migration
– What happens: Too-wet wipes can push liquid into seams.
– Why it matters: Liquid near internal mechanics can affect performance or cause residue around moving components.
– Fix: Use minimal wipe contact. Keep the wipe slightly damp but not dripping, and never “soak” around openings.
Finish harm
– What happens: Some disinfectants can dull plastics or alter coatings.
– Fix: Test a small hidden area first (bottom edge or rear panel). Wait for full drying and check for streaking or changes in sheen.
In 2024 and now, a lot of households disinfect electronics more often—so build habits that keep your wipe routine “surface-only” and brief.
Quick “material compatibility” rule of thumb
If your turntable manual says to avoid liquids or certain chemicals, you should follow the manual over this general guidance. Manufacturers often know the exact plastics, finishes, and tolerances in their assemblies.
Verdict / tip: when disinfecting wipes make sense—and when to skip
Disinfecting wipes make sense for external, touch-heavy surfaces when you can wipe briefly and dry immediately. They should be skipped for groove cleaning, performance maintenance, and anything near the tonearm/cartridge.
For vinyl playback performance, record and stylus/groove contamination control typically requires cleaning methods designed for record surfaces—not general disinfectant wipes.
If your turntable manual warns against using liquids or chemicals, you should treat that guidance as the deciding factor for safe cleaning.
Use disinfecting wipes when:
– You want faster germ reduction on the dust cover and exterior touch points
– The turntable is shared frequently (households with kids/pets, offices, common rooms)
– You can reliably wipe then dry immediately
Skip disinfecting wipes when:
– You’re trying to improve audio quality or remove dust from grooves
– The cartridge/stylus area needs attention (use cartridge/stylus-safe methods only)
– The manual restricts cleaning chemicals/liquids
Here’s a clear “who should skip” summary:
– Anyone who can’t keep wipes away from the tonearm region
– Anyone whose turntable manual explicitly prohibits wipe/disinfectant cleaning near internals
– Anyone who wants deep cleaning of vinyl playback performance (use vinyl/record cleaning tools instead)
Downside to be aware of
Even when used correctly, disinfecting wipes may not replace traditional cleaning cycles for turntable surfaces. They’re a hygiene tool, not a restoration tool—and residue management becomes part of the routine.
Quick checklist (scan/save)
Use this routine whenever you want disinfecting wipes to be part of a safe maintenance workflow.
– [ ] Turn off (and unplug if appropriate)
– [ ] Wipe only exterior/safe surfaces (dust cover, exterior, platter rim if exposed)
– [ ] Avoid tonearm, cartridge, stylus, and internal openings
– [ ] Dry immediately with microfiber
– [ ] Do a spot test on finishes if you’re unsure
Which Turntable Areas You Can Wipe With Disinfecting Wipes (Safe-First)
| # | Turntable area (external-only) | Best wipe target | Dry immediately? | Safety for wipe contact |
|---|---|---|---|---|
| 1 | Dust cover exterior (plastic/acrylic) | Yes | Yes | ★★★★★ |
| 2 | Front panel / buttons area | Yes (avoid openings) | Yes | ★★★★☆ |
| 3 | Plinth / base exterior (painted or laminate) | Yes | Yes | ★★★★☆ |
| 4 | Exposed platter rim (if reachable) | Light wipe only | Yes | ★★★☆☆ |
| 5 | Tonearm tube / exterior arm surfaces | No | — | ★☆☆☆☆ |
| 6 | Cartridge body / stylus area | No | — | ★☆☆☆☆ |
| 7 | Spindle/motor openings & internal bearing-adjacent gaps | No | — | ☆☆☆☆☆ |
Sources
When you treat disinfecting wipes as external-only tools—dust cover, platter rim (if exposed), and exterior touch points—then wipe gently and dry immediately, you get practical germ reduction without taking unnecessary risks to the cartridge/stylus and internal mechanics. If your goal is audio performance or groove cleanliness, use vinyl-appropriate cleaning methods instead, and always defer to your turntable manual for any chemical/liquid restrictions.
Frequently Asked Questions
What’s the safest way to clean a turntable with disinfecting wipes?
Unplug the turntable and never spray chemicals directly onto the platter, tonearm, or cartridge. Use disinfecting wipes sparingly on a soft surface to remove dust and grime, and avoid letting liquid seep into seams or switches. For best results, wipe first with a slightly damp wipe (if the product allows), then follow with a dry microfiber cloth to prevent residue and moisture.
How do I clean my turntable platter and dust cover using disinfecting wipes?
Start by removing any loose dust with a microfiber cloth or soft brush, then lightly wipe the platter’s surface with a disinfecting wipe—using minimal pressure. For the dust cover, wipe gently in straight passes and keep the wipe off any hinges or label areas to avoid chemical buildup. Finish by buffing with a clean, dry cloth so the disinfecting wipe doesn’t leave streaks that can attract more dust.
How can I disinfect a turntable without damaging the stylus or cartridge?
Avoid using disinfecting wipes on the stylus, cartridge, or headshell area because these products can leave residue and may interfere with fine tracking. Instead, use a dedicated record brush or anti-static carbon fiber brush for the record area, and a stylus cleaning brush specifically designed for cartridges. If you need sanitation on the exterior parts, wipe only the plinth, knobs, and non-moving surfaces, keeping wipes away from the tonearm.
Why should I avoid soaking a turntable when using disinfecting wipes?
Soaking or saturating a turntable can drive moisture into the motor housing, cueing mechanism, or electrical components, which can cause corrosion or performance issues. Disinfecting wipes are helpful for light cleaning, but they should be used “damp, not wet,” and you should immediately dry the surface afterward. Always check the wipe label for compatibility and ensure the turntable is fully dry before powering it back on.
Which disinfecting wipes are best for cleaning a turntable safely?
Choose wipes that are alcohol-free and residue-free when possible, since harsh chemicals and lingering disinfectant can harm finishes and leave film that attracts dust. Look for products labeled safe for electronics or hard, non-porous surfaces, and do a spot test on an inconspicuous area first. If you’re unsure, use wipes only on the dust cover and exterior plinth, and rely on manufacturer-approved cleaning tools for the record, platter mat, and tonearm components.
📅 Last Updated: October 27, 2026 | Topic: How to Clean a Turntable With Disinfecting Wipes | Content verified for accuracy and freshness.
References
- https://www.cdc.gov/coronavirus/2019-ncov/community/disinfecting-building-facility.html
- https://www.cdc.gov/coronavirus/2019-ncov/prepare/disinfecting-your-home.html
- https://www.who.int/publications/i/item/cleaning-and-disinfection-of-environmental-surfaces-in-the-context-of-covid-19
- How to clean your Apple products – Apple Support
- Phonograph record
- https://pubmed.ncbi.nlm.nih.gov/?term=disinfecting+electronic+devices+wipes+isopropyl+alcohol
- Disinfectant
- https://scholar.google.com/scholar?q=vinyl+record+cleaning+isopropyl+alcohol+microfiber+wipes Google Scholar
- https://scholar.google.com/scholar?q=disinfecting+electronics+with+wipes+guidelines+isopropyl+alcohol Google Scholar
- https://scholar.google.com/scholar?q=virus+survival+on+surfaces+disinfection+electrostatic+and+nonporous+materials Google Scholar
