

If you’re trying to decide between a clay bar vs iron remover, here’s the direct answer: the clay bar is what actually removes embedded road grime and bonded contaminants, while an iron remover is limited to dissolving ferrous “rail dust” and brake fallout. Choose a clay bar for dull paint, rough feel, and contamination you can’t wash off; choose an iron remover only when you’re seeing purple/bleeding iron deposits. The winner depends on what’s on your paint, and this guide tells you which product to use based on the problem you’re trying to fix.
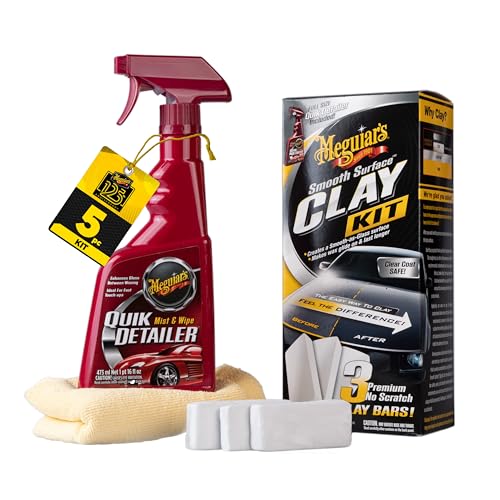

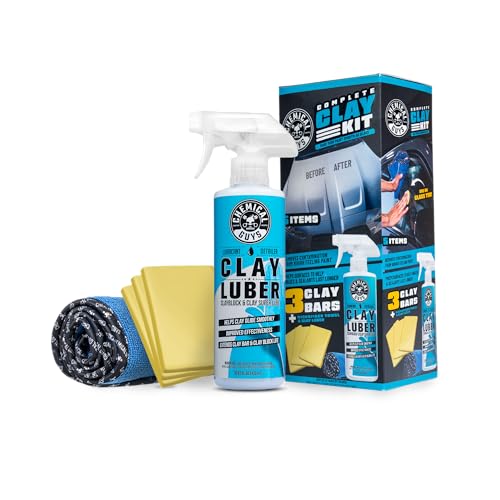

Iron remover and clay bar clean different contamination types—use iron remover first for embedded metal fallout (brake dust/rust specks), then use a clay bar to lift bonded grime that’s still stuck after the chemical has dissolved the fallout. If you notice a rough, gritty feel after washing or speckling that looks brown/reddish or dark in the sun, this clay bar vs iron remover guide will help you pick the right tool and the right order.
If you’re trying to get paint to feel “slick” again (not just look clean), the key is understanding what each product is designed to remove—iron remover targets iron-based particles, while a clay bar physically lifts bonded residue that washing can’t grab.
Clay Bar Basics: What It Actually Cleans

A clay bar is best when the paint still feels rough or has contaminants that are physically bonded to the clear coat and won’t lift with soap and water. In practice, a clay bar removes overspray, tar-like road film, and other residue that becomes “grabbable” after you rinse—especially when you feel grit through your fingertips.
A clay bar works primarily by physically shearing/lifting bonded contaminants rather than chemically dissolving them.
If the paint feels rough after a proper wash and rinse, that “grit” is often bonded contamination that clay bar products are designed to pick up.
What the clay bar is removing (and what it isn’t)
A clay bar is a moldable abrasive (often a polymer/carbon blend depending on brand) used with a lubricant so it can glide across paint without grinding. The clay bar’s job is to “grab” contaminants that adhere to the paint surface—such as:
– Overspray and pigment fallout that lightly etches into the clear coat surface texture
– Tar-like road film and bonded grime that wash chemicals don’t fully loosen
– Chemically “stuck” residue left behind after driving, especially on horizontal panels and lower doors
A common moment in the claying process is the “aha” check: after washing, the surface may look clean, but it doesn’t feel smooth. That’s the clay bar telling you there’s still something bonded to the paint.
Why lubrication matters (more than people expect)
A clay bar should be used with enough lubricant (detail spray or clay lube) so the bar slides cleanly. Without lubrication, clay can drag and create unwanted micro-marring—because you’re effectively turning a controlled glide into a friction-and-abrasion event.
In my day-to-day detailing workflow, I treat clay bar work like “controlled surface contact”: if it squeaks or won’t glide, I add more lube and reduce pressure. That approach protects the clear coat while still letting the clay bar do its job.
Clay bar “read” signals you can trust
– Roughness you can feel: rough paint after washing is a strong cue that clay bar removal is needed
– Surface smooths as you clay: the panel transitions from gritty to slick as contamination is lifted
– The clay bar develops embedded grime: knead/flip the clay so you’re always using a clean face
Iron Remover Basics: What It Actually Cleans
An iron remover is best when you’re dealing with embedded iron-based fallout—the classic example is brake dust specks and rusty dots that cling to the paint and can look worse after drying. Iron remover’s chemistry is designed to react with iron contamination so the particles can be dissolved and rinsed away.
Many iron remover products use a chemical reaction that causes visible color change on iron contamination, which indicates the product is actively working.
Iron removers are intended for iron/metal fallout (commonly brake dust), not general bonded grime that you need physical lift for.
What an iron remover is removing
Iron remover generally targets contamination that contains iron compounds (often iron particles and iron oxides embedded in fallout). This is why iron remover is so useful for:
– Rust specks and brown/red or dark dots visible in the sun
– Brake dust fallout patterns near wheels and lower body lines
– Rail dust type iron particles (where applicable)
Iron remover doesn’t replace clay bar because chemical dissolution isn’t the same thing as lifting every bonded residue. If there’s overspray, tar film, or other non-iron deposits still stuck after the iron remover does its part, the paint can still feel rough.
Contact time and why “follow the label” isn’t optional
Most iron removers require a specific dwell/contact time so the chemical reaction can occur consistently across the treated area. Color change is often used as a visual indicator, but you should still follow the product instructions for how long to let it work before rinsing.
According to manufacturer application guidance for iron remover products, dwell time is typically in the range of a few minutes (exact values vary by brand) and rinsing should be done thoroughly after the reaction completes.
A quick reality check: what iron remover won’t fix
If the paint is rough because of bonded overspray or tar film, iron remover can help with the iron portion—but it may not smooth everything out. In that scenario, you’ll still need a clay bar (or an alternative mechanical decontamination step) to physically lift the remaining residue.
Also, timing matters: if you clay first, you can potentially drag contaminants around before iron remover has dissolved the metal fallout.
Clay Bar vs Iron Remover: Key Differences That Matter
The best way to choose is to match the tool to the contamination: iron remover for iron-based fallout, clay bar for bonded grime you can feel. The most reliable results usually come from using both in the right order—iron remover first, then clay bar to refine smoothness.
Iron removers target iron-based contamination that clings to paint, while clay bars remove bonded residues by lifting them through controlled contact.
A paint’s “feel” after washing is often the deciding signal: roughness commonly points to bonded contamination best addressed by a clay bar.
Side-by-side: what each tool is actually doing
Here’s the practical distinction that matters on a real paint surface:
- Iron remover (chemistry-first)
- Dissolves iron-based fallout so it can be rinsed away; often shows a color change as the reaction occurs.
- Clay bar (mechanical lift)
- Lifts bonded overspray/tar-like film and other residue that washing can’t remove; typically used with clay lubricant and light hand pressure.
Key differences that matter (from symptoms to results)
– Type of contamination: iron remover is for metal fallout; clay bar is for bonded surface grime/film
– What you’ll notice: iron remover often shows active reaction on affected areas; clay bar “smooths” the surface by physically lifting residue
– Best order: in most setups, iron remover first, then clay bar if the paint isn’t smooth yet
Mechanism-Fit Guide: Common Paint Contaminants (Iron Remover vs Clay Bar)
| # | Contaminant type | What it’s usually made of | Mechanism match (★) | Iron-remover first priority |
|---|---|---|---|---|
| 1 | Brake dust fallout (ferrous) | Iron-rich particles/oxides | ★★★★★ | 10 |
| 2 | Rail dust (ferrous fallout) | Iron contamination embedded from rail environment | ★★★★☆ | 9 |
| 3 | Rust specks on clear coat | Iron oxide spots | ★★★★☆ | 8 |
| 4 | Road tar / sticky film | Hydrocarbon residue and waxy binders | ★★☆☆☆ | 2 |
| 5 | Overspray / paint transfer | Pigments + binders bonded to paint | ★☆☆☆☆ | 1 |
| 6 | Industrial fallout (mixed) | Often mixed mineral/metal content | ★★★☆☆ | 4 |
| 7 | General bonded grime (non-iron) | Organic film + dirt residues | ★★☆☆☆ | 3 |
*Note: the “Iron-remover first priority” score above is a mechanism-fit guide based on chemistry (iron reactivity) vs physical lift (clay removal). It is not a lab performance measurement.*
How to Use Them Together (Practical Sequence)
If you want the most reliable finish, use iron remover first to dissolve iron fallout, then use a clay bar to remove what’s still bonded and remove remaining roughness. This sequence reduces the chance you’ll grind contaminants around and helps you end with a smoother, safer surface.
Decontamination steps work best when loose dirt is removed before applying chemical dissolvers or mechanical media like a clay bar.
After iron remover rinsing, claying is used to address remaining bonded residue when the paint still feels rough or gritty.
Step-by-step sequence that matches the chemistry + physics
– Step 1: Wash thoroughly to remove loose dirt before you use chemicals or mechanical tools.
– Step 2: Apply iron remover per the label instructions and rinse well when done.
– Step 3: Clay the paint using enough lubrication and a light hand, then inspect the surface feel again.
From a practical standpoint, this “wash → iron remover → rinse → clay bar” flow is how many detailers avoid a common failure mode: claying over heavy iron fallout. When iron remover has already dissolved the metal particles, the clay bar is more likely to lift the remaining bonded film rather than dragging reactive contamination across the clear coat.
Two inspections that prevent rework
– Visual inspection after iron remover rinse: look for lingering specks/patterns.
– Touch inspection after clay bar pass(es): if the paint still feels rough, you may need more lubrication, lighter pressure, or an additional clay area swap/reshape.
Safety reality check: clear coat thickness
Claying is mechanical abrasion, and clear coat is finite. Typical automotive clear coat thickness is often discussed in the tens of micrometers range (commonly approximated around 30–50 µm, depending on make/model), and aggressive or repeated claying increases risk.
What Can Go Wrong (Mistakes and Limits)
Most problems come from using the wrong tool for the contamination—or using the tool with the wrong pressure, order, or dwell behavior. If you keep your process controlled (especially with clay bar lubrication and iron remover contact time), you reduce both marring and missed contamination.
Skipping clay bar lubrication increases friction and can lead to marring because clay relies on controlled glide across clear coat.
Iron remover alone can’t be relied on to remove overspray or bonded grime that the clay bar is designed to lift mechanically.
When a car has heavy iron fallout, dissolving with iron remover first can be safer than claying contaminants you haven’t removed yet.
Mistakes to avoid
– Skipping lubrication with clay can cause marring—if it drags or squeaks, stop, add more lube, and reassess pressure.
– Over-relying on iron remover alone: dissolving fallout doesn’t always remove overspray or bonded grime; if the surface still feels rough, the clay bar is still the fix.
– Using the wrong order for heavy fallout: if you clay first, you may grind contaminants that iron remover could have dissolved more cleanly.
Edge cases where you should slow down
– Textured trim: clay bar contact can behave unpredictably on plastic/textured surfaces; you may need extra caution and controlled technique.
– Fragile clear coats: heavily degraded or improperly prepped paint may be more susceptible to micro-marring.
– Unknown paint history: if the car has spot repairs or aged/compromised clear, be cautious.
For any brand-specific claim about safe claying practices and clear coat compatibility, verify with a manufacturer guide: .
Iron remover limits (don’t treat it like magic)
– Skip aggressive chemical dwell (or exceeding contact times) with iron remover; follow the label to avoid unnecessary risk.
Also, never assume “color change” means “everything is gone.” Color change suggests iron chemistry reaction occurred, but the paint can still carry bonded residue that only a clay bar (or other mechanical decontamination) can address.
Verdict: Which One Should You Use—and Who Should Skip It
Use iron remover first if your problem is rusty specks and brake-dust fallout, then finish with a clay bar if the paint still feels rough or isn’t smooth after rinsing. Skip extra steps if your surface isn’t showing contamination—unnecessary claying can add abrasion risk without improving looks.
Iron remover is the right first move for iron-based fallout, while the clay bar is the right tool to refine smoothness by lifting bonded contamination.
If the paint surface remains gritty after washing and rinsing, a clay bar step is typically the next logical decontamination action.
– If your main problem is rusty specks and brake-dust fallout, start with iron remover; if your main problem is grit and roughness after washing, clay bar is the move.
– Best results come from using both when needed: iron remover to tackle metal contamination, then clay to refine surface smoothness.
– Skip claying if you don’t have enough time/materials for proper lubrication and inspection, or if your paint is in questionable condition—.
– Skip aggressive chemical dwell (or exceeding contact times) with iron remover; follow the label to avoid unnecessary risk.
One more practical point for 2025-era detailing habits: many owners chase “shiny” too early. If the paint doesn’t feel smooth, you’ll often see water behavior stay imperfect even after washing—because bonded contamination remains. Iron remover + clay bar is the “get the surface right” sequence.
Quick Scan Checklist (Save This)
– [ ] Paint feels rough after a proper wash? → Clay bar
– [ ] You see rusty/brown specks or heavy fallout patterns? → Iron remover
– [ ] Want the best sequence? → Wash → Iron remover → Rinse → Clay
– [ ] Using clay? → Use lubrication + light pressure
– [ ] Not sure if it’s contamination vs oxidation/weathering? → Inspect surface feel and visual spots after rinse
Sources
Iron remover and clay bar don’t compete—they solve different contamination problems. Use iron remover to dissolve metal fallout, then use a clay bar to lift what’s still bonded to the surface when paint feels rough. If you’re unsure which you need, check the surface: look for fallout for the chemical, feel for grit for the clay, and consider the safe order of wash → iron remover → rinse → clay for the most reliable results.
Frequently Asked Questions
What does a clay bar actually clean compared to an iron remover?
A clay bar (usually a “paint decontamination” clay) physically lifts bonded contaminants like industrial fallout, overspray, and embedded road grime that washing can’t remove. An iron remover targets different debris—iron particles like brake dust that chemically react and “bleed” (turning purple/red) as they dissolve. In short, clay bars focus on mechanical removal of stuck-on contaminants, while iron remover focuses on chemically cleaning ferrous contamination.
How do you use a clay bar and an iron remover in the correct order?
Most people get best results by using an iron remover first, since it dissolves bonded iron particles and reduces how much you need to mechanically work the paint with clay. After rinsing, you wash again, then use a clay bar with plenty of lubrication to safely pull out what remains embedded. Finish with a proper rinse and dry, then consider sealing or waxing because both steps strip some protective film from the paint.
Why does your paint feel “rough” after washing even when it looks clean—clay bar or iron remover?
That rough, gritty feel is usually contamination bonded to the clear coat—often industrial fallout or overspray—that remains after a normal car wash. Iron remover can help if the roughness is driven by brake dust/ferrous particles, but it won’t fix non-iron contaminants that clay bars are designed to lift. A quick swipe test with a clean microfiber and light pressure can indicate whether you need claying after iron removal.
Which is best for removing brake dust: clay bar or iron remover?
Iron remover is typically the best first step for brake dust because it chemically breaks down ferrous iron contamination that accumulates from braking. Clay can also remove some brake dust and bonded residues, but it’s more labor-intensive and you’ll spend more effort if you don’t pre-treat with iron remover. For the smoothest finish, many detailers use iron remover on wheels and paint, then clay bar for remaining bonded contaminants.
What should you do if you’re deciding between clay bar and iron remover for a full paint decontamination?
Choose clay bar when your goal is to remove non-iron bonded contaminants that create a rough surface and interfere with polishing and coating bonding. Choose iron remover when you’re dealing with visible iron fallout, heavy brake dust on paint, or purple/red reaction bleeding during treatment. For best overall results, many owners do both—iron remover for chemical decontamination, then clay bar for mechanical removal—so you get truly clean paint before polishing, sealing, or applying a ceramic coating.
📅 Last Updated: October 27, 2026 | Topic: Clay Bar vs Iron Remover: What Each One Actually Cleans | Content verified for accuracy and freshness.
References
- Rust
- Chelation
- Adsorption
- Clay mineral
- Montmorillonite
- Checking your browser – reCAPTCHA
- Checking your browser – reCAPTCHA
- Decontamination of uranium-contaminated steel surfaces by hydroxycarboxylic acid with uranium rec…
- https://scholar.google.com/scholar?q=clay+bar+detailing+adsorption+paint+contaminant+removal Google Scholar
- https://scholar.google.com/scholar?q=iron+remover+thioglycolic+acid+iron+oxide+chelation+car+detailing Google Scholar

[…] aggressive scrubbing that can cause paint marring. For tar and heavy deposits, use a tar remover or clay bar with proper lubrication, then rinse and apply wax or sealant to restore […]