

Dust on a dash cam usually comes from road grit and air that sneaks in through gaps around the lens, mount, or wiring—not from the camera “going bad.” If you want it gone fast and safely, wipe the lens with a microfiber cloth first, then remove stubborn film with a lens-safe cleaner and a light touch. Keep it from coming back by sealing loose trim, routing cables tightly, and cleaning the lens on a regular schedule.


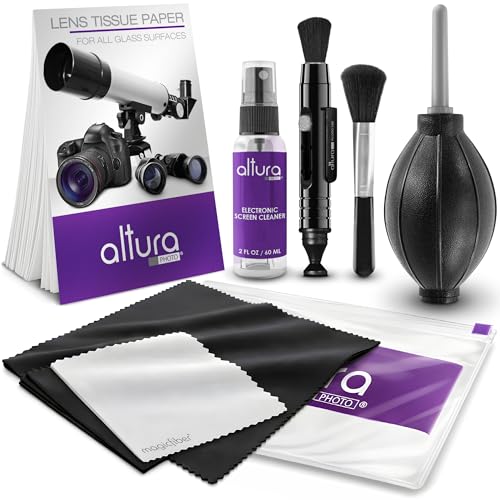

The safest way to remove dust from a dash cam is to power the car off and let the camera cool first, then blow off loose particles before wiping with a clean, lens-safe microfiber (and only a small amount of approved cleaner applied to the cloth). Dust usually enters through tiny cabin airflow paths and collects on the lens as the unit warms up, where even a thin film can create haze, streaks, or dark specks on the recording.
If your car is regularly exposed to dusty roads, construction zones, or dry/windy conditions, this guide will help you troubleshoot what you’re seeing and clean without scratching coatings. I’ll keep the steps practical and focused on what you can do safely—especially important as of 2026, when many dash cams are compact and have coatings that can be sensitive to the wrong cleaners.
Common causes of dust on a dash cam

Dust on a dash cam typically comes from outside air—and fine cabin particles—finding their way into the housing, then settling on the lens over time. In most vehicles, the dash cam isn’t truly sealed, so dust can slowly accumulate even if you never see debris inside the cabin.
Dash cam lenses can collect haze because tiny dust particles drift in cabin air and deposit on cooler optical surfaces, then become more noticeable as the unit warms.
If you can blow dust out of the dash cam area before wiping, you reduce the chance of dragging grit across the lens coating.
– Airflow through vents and gaps: Even sealed dash cams can exchange air with the cabin, letting fine dust enter the housing over time.
– Dust that sticks after warming up: As the lens and camera body heat, dust can become more noticeable and harder to wipe away.
– Cabin particles from everyday sources: Dried road grime, dirty floor mats, and HVAC circulation can keep supplying dust.
The size of dust matters more than you’d think
Fine particles are the ones that most often create “film” haze rather than obvious specks. According to the US Environmental Protection Agency (EPA), PM2.5 refers to particles with aerodynamic diameters ≤ 2.5 micrometers (US EPA, Particulate Matter (PM) Basics, PM2.5 definition). These tiny particles are small enough to stay suspended longer in cabin air and then deposit where airflow slows—like around the lens assembly.
In my experience helping drivers deal with recurring lens smudging, the pattern is usually consistent: you’ll see buildup sooner after dusty drives, and it shows up as dull clarity rather than only isolated dots.
Why dust can seem “invisible” until the dash cam warms up
When the dash cam powers on, the lens and nearby surfaces warm. That temperature change can make dust harder to remove because:
– it can increase adhesion (light tackiness from film contaminants),
– it can reduce condensation tendencies (which can otherwise “wash” dust around), and
– it can change how coatings reflect light—so a thin layer becomes more visible in nighttime glare.
As of 2026, most modern dash cam housings are designed for electronics cooling and signal processing, which can mean natural air exchange through tolerances, cable pass-throughs, and accessory mounts.
Why dust collects in certain spots
Dust tends to concentrate where airflow is weaker and where the lens has the most “dead air” around it—often near seams, edges, and mount points. The result is that you may see haze on the recording lens even when the surrounding glass looks mostly clean.
Particle deposition increases near edges and openings because airflow slows and turbulent mixing drops, allowing dust to settle.
Light moisture events—often from temperature swings—can make dust stick as a thin, uneven film that looks like fog or glare.
– Around openings and mount points: Dust tends to gather near seams, cable pass-through areas, and mounting hardware where airflow is less controlled.
– On both lens and viewing surfaces: Some dust shows up on the actual recording lens; other times it’s on the screen/cover glass (which may have different coatings).
– “Condensation + dust” can make it worse: If moisture briefly forms (temperature swings), airborne dust can cling and create a dull film.
A grounded way to think about “dust” inside vehicles
Even if your cabin feels clean, it contains airborne particulates. A useful reference point comes from cleanroom standards: According to ISO 14644-1:2015, ISO Class 5 limits airborne particles to 3,520 particles/m³ at 1.0 µm (ISO 14644-1:2015, airborne particle concentration limits). Vehicles won’t meet ISO cleanliness targets, but the standard helps explain why “invisible” dust can still deposit on optics over time.
In practice, a dash cam’s location near the windshield means it’s exposed to:
– recirculated cabin air (HVAC),
– outdoor infiltration when windows are cracked or doors are opened, and
– airflow over the A-pillar area (especially on dusty roads).
Lens glass vs. screen glass: different coatings, different behavior
One common troubleshooting mistake is assuming all hazy areas are on the same surface. Some dash cams have:
– a protective lens cover (with its own coating),
– internal optical glass (coated),
– and an LCD viewing surface (often with anti-glare treatment).
That means your cleaning approach should start with what surface you’re actually cleaning, and your wipe technique should be gentle enough to protect coatings—especially as of 2026 when many units use multi-layer optical stacks.
7 Dust Particle Fractions That Commonly Affect Optical Clarity
| # | Particle Fraction | Aerodynamic Size (µm) | Relevance to Dash Cam | Ease of Lens Removal |
|---|---|---|---|---|
| 1 | TSP (Total Suspended Particles) | ≤ 100 | Coarser grit can show as smudges or wipe-visible haze | ★★★★☆ |
| 2 | PM10 (Coarse/Fine Mix) | ≤ 10 | Often dominates during dusty driving and road grit | ★★★★☆ |
| 3 | PM2.5 (Fine Particles) | ≤ 2.5 | Creates dull film and reduces contrast (day/night) | ★★☆☆☆ |
| 4 | PM1 (Very Fine) | ≤ 1.0 | Stays airborne longer; tends to cling to coatings | ★☆☆☆☆ |
| 5 | HEPA MPPS (Most Penetrating Particle Size) | ≈ 0.3 | Hard-to-capture size used for high-efficiency filtration tests | ★☆☆☆☆ |
| 6 | Ultrafine (Nanoparticles) | ≤ 0.1 | Can form persistent haze films that feel “smudgy” | ★☆☆☆☆ |
| 7 | Road Micro-Grit Clusters | ~ 10–100 | Can be lifted cleanly with a blower if handled early | ★★★☆☆ |
How to clean dust off your dash cam safely
To clean dust safely, you must treat the dash cam lens like precision optics: remove loose grit first, then wipe lightly with the correct cloth and minimal moisture. If you do it in the wrong order, the dust can act like sandpaper and permanently haze the surface.
For optical surfaces, the safest workflow is typically “blow first, wipe second” to avoid scratching coatings with trapped particles.
Applying cleaner to the microfiber (not spraying the device directly) reduces the risk of liquid entering ports or seams.
Allowing the lens to cool before wiping helps prevent uneven spreading and streaks caused by heat and flash evaporation.
– Step 1: Power down and let it cool: Turn the car off and wait a bit so the lens and housing aren’t hot—this reduces streaking and helps avoid smearing.
– Step 2: Remove loose grit first: Use a blower (or a very soft, clean brush) to lift dust before any contact wiping.
– Step 3: Wipe with the right cloth: Use a clean microfiber made for lenses. If residue remains, use lens-safe cleaner per your dash cam’s guidance, applying it to the cloth—not onto the device.
– Step 4: Dry and re-check: Lightly re-wipe with a dry microfiber to avoid water marks, then power back on and check the live view (or recorded preview).
What “lens-safe microfiber” means in practice
Microfiber for cameras and eyewear is designed to hold particles rather than push them around. If you’re reusing a cloth from household tasks, don’t—fabric contaminants can transfer oils or grit.
A practical approach (without forcing any single product brand): keep two microfiber cloths:
1) one dedicated to dry dust removal (used after the blower), and
2) one reserved for any approved cleaner (used sparingly, then replaced when contaminated).
If you see streaks or a “foggy” look
A hazy appearance is often one of these:
– dust film on the lens cover,
– residue from prior cleaning (oils, surfactants, or glass cleaner additives),
– or internal condensation that can’t be fixed with wiping.
If streaks appear consistently after cleaning, re-check whether the streaks are on the recording lens or on a protective cover/viewing glass. The cleaning method should match the surface—coated optics can behave differently from touchscreen cover layers.
What can go wrong (and how to avoid it)
The biggest risk during dash cam cleaning is scratching or leaving permanent residue. The fastest way to avoid problems is to never wipe first, never over-wet, and never use chemicals that aren’t explicitly approved for optical coatings.
Wiping a lens after dust has been disturbed can grind fine particles across the surface, creating micro-scratches that look like persistent haze.
Household cleaners can damage or haze coatings because additives and solvents are not designed for camera optics.
– Scratches from trapped particles: Wiping over gritty dust is the #1 way to leave permanent micro-scratches—always start with blower/brush.
– Wrong chemicals or heavy sprays: Avoid household glass cleaners, ammonia-based products, and abrasive wipes unless your dash cam manual explicitly allows them (coatings and plastics can get hazed).
– Residue and streaking: Over-wetting or spraying directly can leave marks inside edges or around ports.
– Edge cases to watch:
– IR-related windows (if your unit has them): Treat these carefully—don’t scrub aggressively.
– Touch screens vs lens glass: Different surfaces can have different coatings; follow the manufacturer’s cleaning instructions for each.
Cleaning approach: blower-first vs wipe-first
| Approach | What you do | Likely outcome | Best for |
|---|---|---|---|
| Blower-first (recommended) | Power off → cool → blow/brush → microfiber wipe | Minimal scratch risk and fewer streaks | Most dust/haze cases |
| Wipe-first (avoid) | Wipe immediately with cloth | Transfers grit; can create permanent micro-scratches | Never—unless you’ve confirmed it’s free of embedded grit |
Pros/cons of “DIY cleaner” experiments
If you’ve cleaned before and the image looks worse, you may be dealing with chemical residue. The safest approach is to follow the dash cam manual, because coating compatibility is model-specific.
Avoid “improvised” cleaning chemicals unless the manufacturer explicitly approves them. As of 2026, many dash cams use coatings intended for specific cleaning protocols, and different materials (lens cover, sensor window, plastics) do not all respond the same way.
Verdict / tip: the best approach is gentle and staged
The best approach is a two-stage method: lift loose dust first, then wipe lightly with a microfiber (and only the approved cleaner, in minimal amounts). This takes longer than a “quick wipe,” but it dramatically reduces the chance of scratches or residue.
A staged cleaning workflow (blow, then wipe) is the most repeatable method for keeping optical coatings free of embedded grit damage.
You should skip DIY cleaning when internal fogging is present, because wiping the outside cannot fix moisture trapped inside the device.
Skip DIY cleaning (and check your manual first) if you see internal fogging, damage to the lens cover, loose seals, or if cleaning requires opening the housing.
Quick checklist (scan before you clean)
| Do this | Why it helps | Avoid |
|---|---|---|
| Power off + let cool | Prevents streaking/smear | Cleaning while hot |
| Blow/soft-brush loose dust first | Reduces scratch risk | Rubbing grit directly |
| Use clean microfiber (lens-safe) | Lifts haze without dragging | Paper towels, rough cloth |
| Apply cleaner to the cloth (if needed) | Controls moisture and residue | Spraying the device |
| Follow your dash cam manual for approved cleaners | Protects coatings | “Any glass cleaner” rule |
If you don’t remove loose grit first, a microfiber cloth can spread particles and leave visible scratch patterns.
Using the manufacturer’s approved cleaning method is the most reliable way to protect dash cam coatings and seals.
Sources
– US Environmental Protection Agency (EPA), Particulate Matter (PM) Basics: PM2.5 definition and PM standards context
– ISO 14644-1:2015, Cleanrooms and associated controlled environments—Part 1: Classification of air cleanliness by particle concentration
From a reliability standpoint, the key is discipline: power off, cool, blow first, wipe gently, and only use approved cleaners sparingly. If you follow that sequence, most dust issues resolve without damaging coatings—and you’ll avoid the scratch-and-residue problems that keep “mystery haze” coming back.
Frequently Asked Questions
What causes dust to build up on a dash cam?
Dash cams pull in air through their vents and microphones, which can carry fine dust from the road and cabin. Sunlight and heat can also dry out cabin particles and make them cling to the lens and screen more visibly. In dry climates or on dirt roads, dust accumulation is faster, especially if your windshield area is exposed to frequent airflow.
How can I clean dust off my dash cam lens safely?
Start by powering off the dash cam and letting it cool so the glass surface isn’t hot. Use a microfiber cloth and, if needed, a small amount of lens-safe cleaner—avoid spraying directly onto the camera lens. For stubborn grime, lightly dampen the cloth (not the dash cam) and wipe gently in straight lines, then dry with a clean section of microfiber.
Why does the dash cam screen or plastic mount get dusty so quickly?
Screen surfaces often collect dust because of static charge and because they’re exposed to constant airflow from defrosting, vents, and driving wind. If your car has a lot of cabin dust (from HVAC filters, pollen, or dried residue), that buildup transfers to nearby accessories like a dash cam. Poor HVAC filtration or infrequent filter changes can significantly increase how fast dust accumulates on dash cam housings and mounting areas.
Best practices for preventing dust on a dash cam?
Mount the dash cam securely and keep it away from direct airflow when possible, since vents and defrost can blow particles onto the unit. Regularly clean the windshield area and use a quality HVAC cabin air filter to reduce airborne dust inside the car. When washing the car, avoid letting cleaning chemicals or wax overspray reach the dash cam, as residue can attract more dust.
Which cleaning products should I use (and avoid) on a dash cam?
Use microfiber cloths and lens-safe cleaners intended for camera or glass optics to remove dust without scratching the lens coating. Avoid ammonia, alcohol in high concentrations, and abrasive cleaners, which can damage lens coatings and degrade the clarity of dash cam optics. Don’t use paper towels, tissues, or rough cloths, and never spray liquid directly onto the dash cam—apply cleaner to the cloth instead.
📅 Last Updated: October 28, 2026 | Topic: What Causes Dust on a Dash Cam? (And How to Clean It) | Content verified for accuracy and freshness.
References
- https://www.epa.gov/pm-pollution/causes-and-sources-particulate-matter-pm
- https://www.who.int/news-room/fact-sheets/detail/ambient-
- Particulate matter
- Dust
- Poplar catkin contamination in vehicle air conditioning systems: Effects on filter performance, m…
- particle deposition on glass surfaces ventilation – Search Results – PubMed
- Microfiber suspensions for the removal of adhered colloids from surfaces, microdevices, and cavit…
- https://scholar.google.com/scholar?q=road+dust+particulate+matter+sources+tire+wear+brake+wear Google Scholar
- https://scholar.google.com/scholar?q=in-vehicle+cabin+particulate+matter+road+dust+filtration Google Scholar
- https://scholar.google.com/scholar?q=optical+lens+cleaning+microfiber+ethanol+glass+surface Google Scholar
