

Cleaning the evaporator in a car’s AC system removes grime and moisture buildup from the cooling core, helping you regain stronger, cleaner air and more reliable cooling. With the right evaporator cleaner, a few basic hand tools, gloves, and access to the HVAC housing, you can complete the job in a careful, step-by-step afternoon. Follow the process here and you will know what to inspect, how to apply cleaner safely, and how to confirm proper drainage afterward.



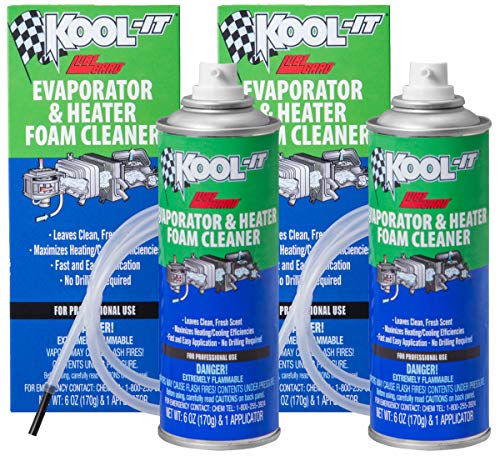
Cleaning the evaporator is mainly about removing built-up debris and checking drainage/airflow so the AC can cool without “stale air” or poor performance. In this guide, you’ll learn how to access the evaporator area, safely clean it (without damaging fins or seals), and verify the system is working afterward—so you don’t just mask symptoms that will come back.
If your car’s AC smells musty, struggles to get cold, or seems to lose cooling after running for a bit, the evaporator may be clogged with dust, microbial growth, or gunk. This is most relevant for passenger cars where the evaporator is behind the dashboard HVAC box, and where you’re comfortable following careful, safety-first steps—especially in 2026 when many vehicles include more sensors and electrical routing inside the HVAC housing than they did a decade ago.
What You’ll Need Before You Start

You’ll get better results (and fewer mistakes) if you prep the right materials before you touch the HVAC housing. Use evaporator-safe cleaners and basic protection so you can remove contaminants without damaging delicate aluminum fins, foam seals, or plastic ducts.
– Gather the right cleaners and tools for delicate HVAC components (avoid harsh chemicals that can harm plastics, coatings, or seals).
– Plan for access and protection: glove/eye protection, ventilation, and covering surrounding interior parts so cleaner residue doesn’t spread.
Before you start, also plan how you’ll protect the cabin from overspray. Automotive evaporator cleaners are designed for HVAC coils, but they still behave like solvents/foams—so lay down painter’s tape and plastic sheeting around the cabin filter opening and any exposed interior trim.
Symptoms That Suggest the Evaporator Needs Cleaning
If you’re noticing odor or air-cooling quality issues, the evaporator is a logical first check. Dust and moisture on the evaporator surface can create the “stale” smell customers interpret as mold, and airflow restriction can reduce sensible cooling.
– Musty or “moldy” odor from the vents, especially after the AC has been off for a while.
– Reduced cooling performance or uneven airflow, sometimes paired with wetness issues around the HVAC area.
Condensation is normal on an evaporator, but prolonged dampness increases biological growth risk. According to the U.S. CDC, mold can begin growing within 24–48 hours after water exposure (2019). That’s why a clogged drain path (or repeatedly wet evaporator fins) can turn “one-time mustiness” into an ongoing problem.
Common contaminants you can dislodge (and why it matters)
In practice, you’re usually cleaning for a mix of airborne particulate and organic buildup—then confirming that the evaporator can drain and dry normally afterward.
Typical Buildup Types on Car AC Evaporators (Based on Particle Size Ranges)
| # | Contaminant | Typical size (µm) | Why it sticks | Removal ease |
|---|---|---|---|---|
| 1 | Pollen grains | 10–100 | Traps in condensate films | ★★★★☆ |
| 2 | Mold spores | 2–30 | Adhere to damp fins | ★★★☆☆ |
| 3 | Bacterial cells | 0.5–5 | Biofilm formation | ★★☆☆☆ |
| 4 | PM2.5 soot/urban dust | 0.1–2.5 | Fine residue builds up | ★★☆☆☆ |
| 5 | Pet dander flakes | 2.5–10 | Sticky organic film | ★★★☆☆ |
| 6 | Dust-mite debris | 10–40 | Particles hold moisture | ★★★☆☆ |
| 7 | Brake/tire dust | 0.2–2.5 | Hydrophobic residue | ★★☆☆☆ |
Accessing the Evaporator (And Why It Matters)
Accessing the evaporator is the critical step that determines whether your cleaning actually reaches the coil surfaces. The evaporator is usually inside the HVAC housing, so access often requires partial dash/HVAC disassembly depending on make/model, but many cars allow at least cabin-filter or intake-area access without removing the full HVAC case.
– The evaporator is usually inside the HVAC housing, so access often requires partial dash/HVAC disassembly depending on make/model.
– Prevent damage: take care around blend doors, cabin air filter housing, sensor wires, and vacuum lines (where applicable).
In many passenger cars and crossovers built in the late 2000s through 2026, the cabin air filter sits on the passenger side behind the glovebox or in a lower-dash compartment. You can often remove that filter housing and gain partial access to the HVAC air intake area. However, true evaporator-coil contact usually demands more disassembly—especially if you want to clean the upstream and downstream surfaces evenly.
If you’re unsure of your layout, rely on your service manual or OEM diagrams rather than guessing. The HVAC box frequently includes temperature sensors, blend-door actuators, and wiring harnesses routed tightly near the coil—so a “quick peek” can turn into a reassembly job that takes hours.
Cleaning the Evaporator Safely (Step-by-Step)
Safe evaporator cleaning means removing loose debris first, then treating microbial buildup with an evaporator-specific product—without flooding the housing. If you follow a controlled sequence, you’ll reduce the chance of damaging aluminum fins, electrical connectors, or adhesive foam seals.

– Use a method that matches the contamination: gentle removal first (vacuum/brush where appropriate), then controlled application of an approved evaporator cleaner or safe foam designed for AC systems.
– Avoid over-spraying: cleaner should reach the evaporator surfaces, not flood the housing or soak adjacent electronics; follow the product directions for dwell time—use the exact dwell time listed on your specific cleaner label.
Here’s a practical step-by-step sequence you can adapt to your access level:
1. Disconnect power safely (especially if you remove panels near airbags). If your disassembly gets near airbag wiring, follow the manufacturer procedure for disabling/isolating the system. Don’t improvise.
2. Remove obstructions and expose the intake/coil area. Take photos as you go. Remove the cabin air filter if accessible, and clear any visible leaves or dust where they collect upstream.
3. Pre-clean dry debris first. Use a soft brush and a vacuum with a gentle nozzle to remove loose dust from the intake and the coil face you can see. This prevents the “scrub and spread” problem where you turn dry buildup into a sticky paste.
4. Apply evaporator cleaner in controlled bursts. Aim at the evaporator surfaces you can reach, not at seams, wiring, or the blower housing. Foaming products are helpful because they tend to cling to surfaces rather than instantly run off.
5. Respect dwell time from the label. Let the chemistry do its job while the cleaner stays on the coil. Don’t reduce dwell time to “save time,” and don’t exceed it if the label warns against it.
6. Rinse only if your product instructions allow it. Some automotive evaporator cleaners are no-rinse/foam-dwell formulas; others specify an optional rinse. If rinsing is allowed, use minimal water and ensure it can drain out (which you’ll confirm in the drainage section).
7. Dry and re-check airflow paths before full reassembly. If you used foam or gel, ensure it isn’t trapped in corners where it can harden and later re-release odor.
A key concept for car AC evaporator cleaning in 2026 is airflow and drainage management. If you only “spray cleaner,” you can temporarily improve odor while leaving a persistent moisture problem—then the stale smell returns after the next humid day.
Check Drainage and Re-Test Airflow
Before you close everything up, confirm the evaporator drain is clear so water doesn’t pool and reintroduce odor. The evaporator’s cooling effect depends on maintaining airflow, and the long-term air quality depends on keeping moisture from lingering.
– Verify condensate drainage: clogged drains can cause recurring odors and water pooling, which can worsen buildup on the evaporator—confirm drainage by locating the drain tube and checking for steady outflow while the AC runs.
– Reassemble carefully and run the AC to confirm airflow, cooling, and odor improvement; if symptoms persist, the issue may be something else in the system.
A model-agnostic drainage confirmation method that usually works:
1. Start with the vehicle on a level surface. Park where you can see any drain discharge area.
2. Run the AC on MAX COOL with the cabin blower on medium-high. Let it run long enough to generate condensation (often several minutes once the system is cold).
3. Observe the drain outlet location. Many cars route the drain down near the HVAC case, often toward the engine bay or underside near the firewall. Look for water output while the AC is engaged.
4. Cross-check for pooling. If the cabin area near the HVAC seems damp or you see wetness inside, stop—your drain is likely restricted.
5. Smell test after airflow stabilizes. A cleaned evaporator may still smell “chemically” briefly right after application, but the musty odor should decrease once airflow and airflow paths dry.
Also remember: low refrigerant, compressor issues, and blower problems can produce similar “not cold enough” symptoms. Cleaning the car AC evaporator can restore performance when airflow is restricted by debris, but it won’t fix a refrigerant leak.
According to the IPCC, R-134a (a common older refrigerant) has a global warming potential of 1,430 over 100 years (2014). That’s why you should avoid practices that risk refrigerant venting during HVAC work, and why evaporator cleaning should not be treated as a substitute for proper leak diagnostics.
What Can Go Wrong (Common Mistakes)
The most common problems happen when people damage fins, skip the drainage check, or clean the wrong component for the symptom. A careful approach prevents “improved smell for two weeks” followed by recurring odor or new airflow issues.
– Damaging fins or coatings by using abrasive tools, high pressure, or the wrong chemical type.
– Causing leaks or trapping moisture by not addressing the drain path; this can lead to recurring smell or corrosion.
– Treating the evaporator when the real problem is refrigerant charge, compressor issues, blower problems, or cabin filter neglect—cleaning won’t fix those directly.
DIY vs. professional service (how to decide)
If you’re unsure about access or your HVAC layout, compare your options before you start disassembly.
| Feature | DIY evaporator cleaning | Professional evaporator service |
|---|---|---|
| Access complexity | Best when you have partial access (filter/intake area) | Handles vehicles requiring HVAC housing removal |
| Moisture management | You can confirm drain flow, but mistakes are common | More consistent drainage verification and cleanup |
| Chemical control | Depends on using evaporator-safe products correctly | Typically uses HVAC-specific chemicals and application methods |
| Risk of collateral damage | Higher if fins/sensors are stressed during disassembly | Lower due to experience with trim, wiring, and seals |
| Time investment | Can take 2–6+ hours depending on access | Often faster once the vehicle is set up |
| Diagnosis scope | May stop at “clean coil,” missing blower/refrigerant issues | More likely to confirm airflow, leak symptoms, and control logic |
| Odor recurrence | More likely if drain or cabin filter condition wasn’t corrected | Improved odds when root causes are identified |
| Safety considerations | Airbag/sensor risk if disassembly gets too close | Procedures reduce electrical and safety risk |
| Cost predictability | Lower materials cost, but reassembly surprises can add up | Higher upfront, often includes diagnostics and controlled workmanship |
| Best use case | Mild-to-moderate odor with accessible HVAC entry points | Recurring odor, poor cooling, or uncertain HVAC access/diagnosis |
| Best For | DIY-minded owners who can access the coil safely | Drivers who need a root-cause check and consistent results |
Verdict: Is DIY Evaporator Cleaning Worth It?
DIY evaporator cleaning can be worth it if you’re dealing with odor and light-to-moderate buildup and you can safely access the HVAC housing without disturbing wiring, blend doors, or sensitive sensors. Skip DIY (or plan on professional service) if your vehicle requires extensive dash disassembly, if you suspect major electrical/HVAC control issues, or if you’re not confident identifying the evaporator/drain layout—incorrect reassembly can create new leaks or blend-door problems.
From a practical standpoint in 2026: many people chase “low cooling” with cleaning when the real issue is refrigerant charge, a weak blower, or a failing compressor. In those cases, cleaning the car AC evaporator may reduce odor but won’t restore cooling capacity. If you notice symptoms improving briefly and then returning, your moisture management is likely still failing—most commonly due to the cabin filter being neglected or the drain path not clearing.
For this site’s approach:
Quick Checklist (Scan & Save)
Use this checklist to avoid missed steps that cause recurring smell or poor cooling.
– [ ] Cabin filter checked/replaced (if accessible)
– [ ] Correct evaporator-safe cleaner/chemicals on hand
– [ ] Power/airbag risk considered for your vehicle (if disassembly is involved)
– [ ] Evaporator accessed without bending fins or stressing wiring
– [ ] Drainage path checked for clogs
– [ ] AC tested after reassembly (cooling + odor + airflow)
Frequently Asked Questions
What is an evaporator in a car AC system, and how does it get dirty?
The evaporator is the cooling coil inside the HVAC housing that absorbs heat from the cabin air. Over time, it can accumulate dust, debris, and biological growth like mold and bacteria, especially when moisture is present. A dirty evaporator can cause weak cooling performance, poor airflow, and musty AC odors.
How do I clean my car’s AC evaporator without removing the dashboard?
You can often clean the evaporator by using an AC evaporator cleaner designed for in-vehicle use, sprayed through the cabin air intake or the air filter housing. Locate the cabin air filter area, remove the filter if present, and apply the cleaner according to the product instructions so it can reach the evaporator coil. After treatment, run the AC system on low fan for the time specified, then ventilate the cabin to help remove lingering cleaner odors.
Which is better for cleaning an AC evaporator: foam cleaner, aerosol spray, or professional flush?
Foam cleaners and aerosol sprays are convenient for routine maintenance because they can dissolve light contamination and help eliminate cabin AC smells. However, if the evaporator is heavily clogged with sludge or severe microbial buildup, a professional evaporator flush (often involving disassembly or specialized equipment) may be more effective. The best choice depends on symptoms like persistent odor, poor cooling, or repeated condensation problems.
Why does my car AC smell musty after cleaning the cabin air filter or running the AC?
Musty odors usually come from mold and bacteria growing on the evaporator coil, not from the cabin air filter alone. When you replace the filter, the evaporator can still release trapped microbes during cooling cycles, making the smell return quickly. Cleaning the evaporator with a dedicated evaporator coil cleaner or treatment typically addresses the source of the odor.
What’s the best way to prevent evaporator buildup and keep the car AC evaporator clean?
Replace the cabin air filter regularly and keep moisture under control by letting the AC run a short period before turning it off, or using the fan with airflow-only after driving in wet conditions. If you frequently drive in damp environments, periodic AC evaporator cleaner treatments can reduce microbial buildup. Also ensure the drain lines are clear so water can exit properly, which helps prevent sludge on the evaporator coil.
📅 Last Updated: October 31, 2026 | Topic: How to Clean the Evaporator on a Car AC System | Content verified for accuracy and freshness.
References
- https://pubmed.ncbi.nlm.nih.gov/?term=air+conditioning+evaporator+coil+cleaning
- https://pubmed.ncbi.nlm.nih.gov/?term=automotive+air+conditioning+microorganisms+evaporator
- Evaporator
- Automotive air conditioning
- https://www.cdc.gov/mold/cleanup/index.html
- Mold Cleanup in Your Home | US EPA
- https://www.energy.gov/energysaver/air-conditioner-maintenance
- https://scholar.google.com/scholar?q=car+air+conditioning+evaporator+cleaning Google Scholar
- https://scholar.google.com/scholar?q=automotive+AC+evaporator+coil+mold+remediation Google Scholar
- https://scholar.google.com/scholar?q=evaporator+coil+cleaning+techniques+HVAC+air+conditioner Google Scholar
