
A dusty car dashboard usually comes from airborne particles settling on plastic and vinyl surfaces, mixed with residue from everyday air and sun exposure. By the time you finish, you’ll know exactly what’s creating the buildup and be able to clean it safely without smearing, scratching, or leaving a dull film. You can complete the process in about 15–20 minutes using a few simple supplies, then keep it from returning as quickly.



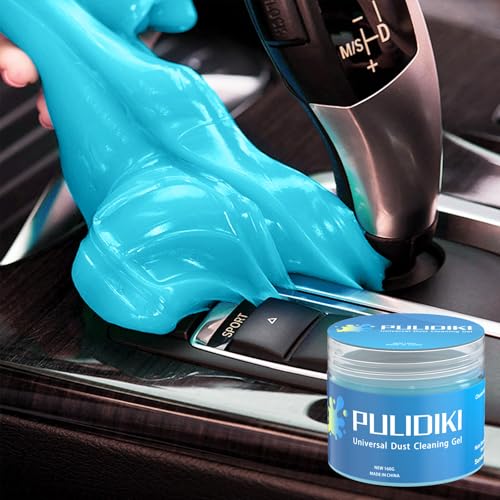
Dust on a car dashboard is mainly incoming road dust and pollen that settle on surfaces, then get redistributed by cabin airflow and static. Clean it safely with a dry microfiber wipe first, followed by a dashboard-safe cleaner applied to the cloth (not sprayed directly), and prevent it by improving filtration and reducing how much dust you bring inside. Dust on a car dashboard usually comes from a mix of everyday particles (road dust, pollen, and sand) that settle on the surface and get redistributed by airflow, sun-heated air, and opening/closing the vents. The fastest fix is to wipe with the right cleaner for dashboards—then prevent it by reducing airborne dust and using a light protectant or microfiber method.
If you notice a layer of dust building quickly (or it looks worse after driving, rain, or high pollen days), this guide breaks down the common causes and the safest cleaning approach for typical dashboard materials.
If your car is getting dusty even when you don’t drive much, you’re not imagining it—car interiors behave like a small, semi-sealed air system. This is for drivers and fleet operators who want a reliable cleaning method that won’t haze matte finishes, damage touchscreens, or accelerate dust buildup, especially as pollen seasons and road construction cycles ramp up in 2026.
Common Causes of Dashboard Dust
Dashboard dust forms because particles enter the cabin, stick to surfaces, and then get re-suspended by airflow and heat. Roadside debris settles fastest on warm, slightly static-prone materials—so your dashboard ends up looking “greasy-dusty” even when you can’t see a spill.
– Road and brake-area particles: Fine dust rides into the cabin through air intake vents and gaps around doors/windows. Brake dust is especially common after stop-and-go traffic because tiny particles can become airborne and then travel into the cabin air stream when you run the HVAC.
– Pollen and outdoor debris: Seasonal allergens and plant material can cling to surfaces, especially after driving with recirculation off. Pollen grains are often in the ~10–100 µm size range, which is large enough to land on interior surfaces but also small enough to spread during airflow events (Encyclopaedia Britannica).
– Static and airflow effects: Dash materials and cabin airflow can attract and move fine particles around. Many of the particles you’re seeing are in the same general “fine” category as common air pollution measures—PM2.5 is particulate matter with a diameter ≤ 2.5 µm (US Environmental Protection Agency (EPA)). Smaller particles follow airflow more readily and create the thin film that “reappears” after a quick wipe.
Why dashboards show dust faster than doors or seats
Dashboards are exposed to sunlight directly, so the material heats up and then releases tiny surface residues (including trace oils from hands and normal off-gassing). Heat also changes how airflow flows over the dash and into vent pathways, which can redistribute dust into the same horizontal lines every time. In 2026, that “predictable pattern” is something many owners notice during pollen spikes: the dust darkens after a short drive, even if the dashboard wasn’t touched.
How to Clean Dust Off Your Dashboard (Step-by-Step)
Cleaning works best when you remove loose grit first and only then introduce cleaner moisture. If you do it in reverse—scrubbing or wet wiping first—you’re more likely to smear dust into seams, buttons, and textured surfaces.
– Start with a gentle dry removal: Use a clean microfiber cloth to lift dust first (avoid heavy scrubbing right away). Use light pressure and fold the cloth so you always use a clean face. This step matters because it prevents fine particles from turning into paste when they meet cleaner.
– Use the correct cleaner type: Lightly mist a dashboard-safe cleaner on the cloth (not directly on screens/controls), then wipe. Keeping moisture controlled reduces the risk of runoff into seams, sensors, or switch housings.
– Finish with protection: Apply a small amount of protectant if your product recommends it, or use a final dry microfiber pass. Protection is optional, but a compatible protectant can reduce static attraction and slow re-deposition in dusty months.
A practical method that avoids streaks
1. Park in shade and let the dash cool. Sun-heated air can cause cleaners to evaporate too quickly and leave streaks.
2. Dry microfiber first: Wipe top surfaces, then edges and corners last.
3. Spot-clean stubborn areas: Only after the bulk dust is gone, use a lightly dampened (cloth-misted) dashboard-safe cleaner.
4. Dry immediately with a second microfiber cloth. This “wipe, then dry” pattern is the difference between a clean matte finish and a hazy one.
Special note for touchscreens and glossy trim
Screens and glossy trim are more likely to show micro-swirls. In general, use minimal moisture, and treat these areas separately from the rest of the dash so you don’t drag grit across the display.
Choosing the Right Products and Tools
The best tools are the ones that lift dust without scratching and the cleaners that match your dashboard material. The “wrong” product usually shows up as streaking, shine changes, or residue that actually attracts more dust.
– Microfiber cloths over paper towels: They’re less likely to scratch matte finishes. Choose a clean, soft microfiber for the final pass—if your cloth has been used on wheels or heavy grit, it’s already contaminated.
– Dashboard-safe formulas: Pick cleaners labeled for the dashboard/interior; avoid harsh solvents unless the manufacturer says it’s okay. Many dashboards use textured coatings and protectants that can haze if cleaned aggressively.
– Watch for sensitive areas: Screen bezels, buttons, vents, and glossy trim often need extra care—use minimal moisture.
Quick comparison: safer cleaning workflow vs. common shortcut
Below is a practical comparison of two approaches to car dashboard dust cleanup.
| Feature | Dry-first + dashboard-safe cloth mist | Scrub-first or spray directly |
|---|---|---|
| Scratch risk | Lower, because grit is lifted before moisture | Higher, because grit turns into abrasion paste |
| Streaking | Reduced with controlled moisture and dry-after | More likely due to overspray and rapid evaporation |
| Residue buildup | Less residue when you follow manufacturer directions | More residue from all-purpose cleaners and over-wetting |
| Control in vents/seams | Cleaner applied to cloth reduces runoff | Direct spray can seep into seams and housings |
| Touchscreen safety | Lower risk when you avoid liquid on electronics | Higher risk from liquid migrating into bezels |
| Matte finish preservation | Most matte textures stay closer to original look | Shine changes are more common after aggressive cleaners |
| Time to “first clean look” | Fast for most dust layers—dry pass does the heavy lifting | Often takes longer because smears require rework |
| Dust recurrence rate | Lower when you clean residue and use compatible protection | Higher when residue left behind attracts particles |
| Tool hygiene | Fresh microfiber face prevents re-contamination | Using one cloth face spreads fine dust across the dash |
| Best material match | Works well for typical vinyl, coated plastic, and matte textures | All-purpose cleaners vary and can react with coatings |
| Best For | Routine dashboard dust cleaning with minimal risk | Quick clean attempts (but with higher risk of smears/shine changes) |
What “fine particles” mean for your dash dust
Not all dust is the same. As a baseline, PM2.5 is ≤2.5 µm (US EPA) and ultrafine particles (UFPs) are commonly defined as <0.1 µm (US EPA). These smaller fractions are the ones that tend to float, re-circulate, and create the “even film” that makes dashboard dust visible after every drive.
Particle Size Categories That Commonly Travel as Dashboard Dust (EPA/health-relevant)
| # | Particle category | Size definition | Common cabin sources | Why it matters on the dash |
|---|---|---|---|---|
| 1 | PM2.5 (fine particles) | ≤ 2.5 µm | Combustion/soot, vehicle exhaust contributions | Moves with airflow and forms a thin film |
| 2 | PM10 (coarse + fine) | ≤ 10 µm | Road dust, tracked-in debris | Deposits quickly, especially on warm surfaces |
| 3 | UFP (ultrafine particles) | < 0.1 µm | Vehicle emissions, combustion-related aerosols | Remains airborne longer; hard to fully “clear” |
| 4 | Coarse fraction (PM10–PM2.5) | 2.5–10 µm | Dust resuspension, brake-road mix | Settles quickly; visible after short drives |
| 5 | Pollen grains | ~10–100 µm | Seasonal outdoor pollen entering via vents/openings | Clings to surfaces; increases dust “mass” fast |
| 6 | Sand/soil grains (coarser) | ~100–1000 µm | Tracked-in road grit | Acts as abrasive if you scrub before dry removal |
| 7 | Brake-related particulate dust (general fine fraction) | Commonly overlaps PM10 & PM2.5 ranges | Braking events; road dust re-suspension | Returns faster after stop-and-go driving |
Note: The table uses size definitions commonly cited by air-quality frameworks (e.g., PM2.5/PM10 and particle-size categories). For brake dust and sand/soil grains, sizes reflect typical ranges reported in environmental/particulate references; always treat your specific dashboard material with manufacturer guidance.
What Can Go Wrong (Mistakes to Avoid)
Dashboard dust becomes harder when you use the wrong technique or let moisture work its way into electronics. The most common problems—smears, haze, and “dust returning instantly”—usually trace back to overspraying, residue, or skipping the dry-first step.
– Spraying liquid directly onto the dash: Overspray can seep into seams, sensors, or switches. Even if it looks dry afterward, residue can remain and pull more fine dust.
– Using the wrong cleaner: Some all-purpose products can leave streaks or damage certain finishes. If your dashboard has a matte coating, avoid aggressive degreasers unless the label explicitly supports automotive interior surfaces.
– Forgetting the vents and intake source: Cleaning the dash without addressing cabin dust can make it return faster. If airflow is drawing particles from outside or from a clogged cabin filter, your car dashboard dust will “cycle” back onto the dash after every drive.
Pros/cons reality check: protectant tradeoffs
Pros of using a compatible protectant: it can reduce re-soiling and make future wiping easier. Cons: some protectants can alter the sheen of matte textures, attract dust if left too thick, or become slippery if applied near steering controls.
If you see gloss changes after cleaning, that’s a signal to reduce product amount or skip protectant on that material until you verify compatibility with your dashboard finish.
Verdict: Best Practice for Less Dust (and Easier Cleaning)

The best practice for car dashboard dust is a consistent, low-moisture routine: dry microfiber wipe first, then a dashboard-safe cleaner applied to the cloth, and only light protection when it’s compatible with your material. This approach removes the bulk film without spreading grit into seams, and it limits residue that accelerates dust return.
Here’s why it works: dry removal lifts loose particles; controlled moisture dissolves residue only where you apply it; and compatible protection can reduce static attraction and re-deposition in 2026-era “high dust” conditions like pollen days, road work dust, and windy dry spells. The main downside is that you can’t “out-clean” a dust entry problem—if the cabin filter is overdue or the car constantly returns from dusty roads, dashboard dust will keep coming back. In that case, cleaning helps, but prevention is what stops the cycle.
Skip protectants or stronger cleaners if your dashboard manufacturer warns against them, or if you notice smearing/gloss changes after cleaning. If you’re unsure what product is safe for your exact trim type, prioritize dry cleaning and light, labeled dashboard-safe cleaner only.
Quick Checklist (Save This)
– Dry wipe with clean microfiber first
– Clean with dashboard-safe product (spray onto cloth)
– Wipe gently; avoid seams/screens/buttons
– Finish carefully; don’t over-wet
– Prevent buildup: cabin filter, reduce incoming dust, manage vent settings
Frequently Asked Questions
What causes dust on a car dashboard even when I don’t drive much?
Car dashboard dust often comes from normal air circulation carrying fine particles from the cabin, including skin flakes, fabric fibers from seats, and dirt tracked in on shoes. Even parked cars can accumulate dust because HVAC airflow and small leaks around windows and doors let outdoor particles enter. If you have a lot of pollen or nearby construction/road dust, that can also settle quickly on smooth dashboard surfaces.
How do I clean dust off a car dashboard without damaging the finish?
Start by gently removing loose dust with a microfiber cloth or a soft detailing brush to avoid scratching textured surfaces. For residue, lightly mist an interior cleaner or dashboard-safe cleaner onto the cloth (not directly on the dashboard) and wipe with steady pressure. Avoid harsh chemicals like ammonia, alcohol-heavy glass cleaners, or abrasive sponges, since they can dull finishes and leave streaks.
Why does my dashboard get dusty faster after I vacuum or use air fresheners?
Vacuuming can re-aerosolize fine dust if you disturb it across vents and hard surfaces, especially if your vacuum has weak suction or clogged filters. Some air fresheners also release particulates or oils that can attract and “bind” dust to the dashboard, making it look like it accumulates faster. If dust appears right after HVAC use, the cabin air filter may be dirty or the system may be pulling in contaminants.
What is the best way to prevent dashboard dust from coming back?
Use a routine wipe-down with a microfiber cloth plus a dashboard protectant designed for automotive interiors to help reduce dust adhesion. Replace your cabin air filter regularly, since a clogged filter can push dirt and pollen into the cabin through the HVAC system. Keeping windows mostly closed when driving through dusty areas and avoiding oily aerosol products can also reduce how quickly dust returns.
Which products should I use to remove dust from a car dashboard safely?
Choose a dashboard-safe interior cleaner and a microfiber cloth, preferably with a gentle formula made for vinyl, plastic, or coated dashboard surfaces. Many drivers also prefer anti-static sprays or interior protectants that reduce static cling, which helps minimize new dust buildup. If you’re dealing with stubborn grime, use a diluted interior cleaner and always patch-test in a hidden area before applying it broadly.
📅 Last Updated: November 02, 2026 | Topic: What Causes Dust on a Car Dashboard? (And How to Clean It) | Content verified for accuracy and freshness.
References
- Dust
- Air filter
- Particulate Matter (PM) Basics | US EPA
- https://www.epa.gov/indoor-air-quality-iaq/air-cleaners-and-air-filtration-basics
- https://medlineplus.gov/dustmiteallergy.html
- Mold allergy – Symptoms and causes – Mayo Clinic
- https://www.who.int/news-room/fact-sheets/detail/ambient-
- https://scholar.google.com/scholar?q=automobile+cabin+air+filter+particulate+matter+dust+deposition Google Scholar
- https://scholar.google.com/scholar?q=dust+accumulation+on+interior+surfaces+automobile+dashboard+cleaning Google Scholar
- https://scholar.google.com/scholar?q=particulate+matter+settling+deposition+on+horizontal+surfaces+cleaning+methods Google Scholar
