How to Clean Kitchen Floors
To clean your kitchen floors effectively, start by choosing cleaning supplies suited to your floor type—like a microfiber mop for hardwood or a sponge mop for tile. Clear the area, then sweep or vacuum to remove dust and crumbs. Mop with warm, mild detergent or a natural vinegar solution for tough grime. Spot clean spills right away to avoid stains, and use furniture pads to prevent scratches. Keep these simple habits up, and there’s plenty more tips to help you protect and maintain your floors perfectly.
Choosing the Right Cleaning Supplies

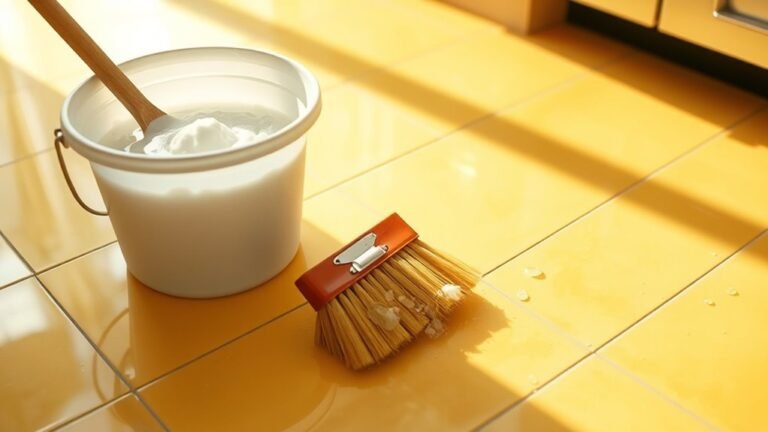
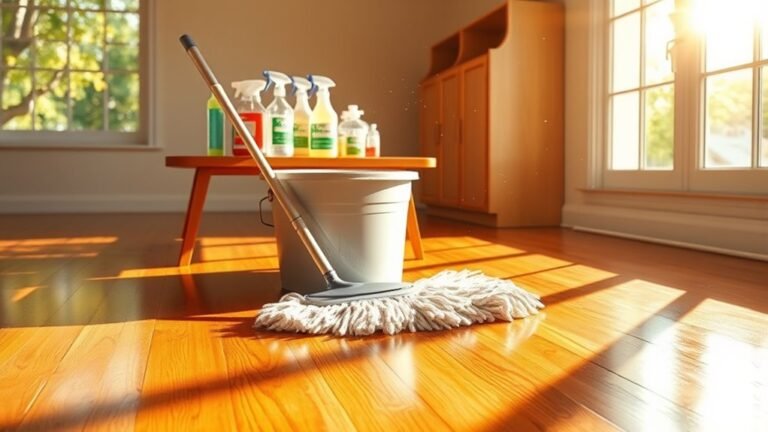
Before you start scrubbing, you’ll want to pick the right cleaning supplies for your kitchen floor type. This choice gives you freedom to maintain your space without hassle. Whether you have tile, hardwood, or vinyl, selecting cleaning products designed specifically for that material protects your floor and keeps it looking fresh. Don’t overlook eco friendly options—they’re powerful, safe, and better for your health and the planet. You can find natural cleaners that cut through grease and grime without harsh chemicals. Avoid generic products that might damage your floor or leave harmful residues. By choosing the right supplies, you’re taking control of your cleaning routine, making it efficient and environmentally responsible, so you can enjoy a spotless kitchen floor without compromise.
Preparing the Kitchen Floor for Cleaning
Before you start cleaning, make sure to clear the kitchen floor of any furniture or items. Next, sweep or vacuum thoroughly to remove dust and debris. Finally, identify your floor material to choose the best cleaning method.
Clear the Floor
Start by removing all items from the kitchen floor, including rugs, chairs, and any clutter. Clearing the floor gives you the freedom to clean every inch without restrictions. Focus on decluttering items that don’t belong there and moving furniture carefully to prevent damage. This step is essential to create an open space, making your cleaning process smoother and more effective.
Here’s how to clear the floor efficiently:
- Remove rugs and mats to avoid trapping dirt underneath.
- Move chairs and stools to the side or another room.
- Pick up any small items or clutter lying around.
- Shift lightweight furniture if needed, ensuring you don’t strain yourself.
Sweep or Vacuum
Grab your broom or vacuum and tackle the loose dirt and debris on the kitchen floor. Choosing between sweeping techniques and vacuuming options depends on your floor type and personal preference. Sweeping gives you control over corners and edges, while vacuuming quickly captures dust and crumbs. Here’s a quick guide to help you decide:
| Method | Best For | Tips |
|---|---|---|
| Traditional Broom | Hard floors, corners | Use short, controlled sweeps |
| Push Broom | Large areas | Sweep toward a dustpan |
| Upright Vacuum | Carpets, rugs, hard floors | Use attachments for edges |
| Stick Vacuum | Quick cleanups | Lightweight and easy to use |
Master these methods and enjoy the freedom of a spotless kitchen floor, ready for the next cleaning step.
Identify Floor Material
Once you’ve swept or vacuumed your kitchen floor, the next step is to identify the type of flooring you have. Knowing your floor material helps you choose the right cleaning method and products, giving you freedom from damaging your surface. Common types include:
- Ceramic and porcelain tile types, which are durable and water-resistant.
- Natural stone tiles like marble or granite that need gentle, pH-neutral cleaners.
- Hardwood floors with various wood finishes, from matte to glossy.
- Vinyl or laminate flooring that mimics wood or tile but requires specific cleaners.
Understanding these distinctions guarantees you don’t use harsh chemicals on delicate wood finishes or abrasive scrubs on stone tiles. Take a moment to check your floor’s texture and sheen—it’ll save you time and protect your kitchen’s beauty.
Sweeping and Vacuuming Techniques
Although it might seem straightforward, sweeping and vacuuming require specific techniques to effectively remove dirt and debris from your kitchen floors. To keep your space free and fresh, start with the proper techniques: sweep in one direction to gather dust without scattering it, and use short, controlled strokes. When vacuuming, choose effective tools like a vacuum with adjustable settings for hard floors, avoiding brushes that can scratch surfaces. Don’t forget corners and under cabinets where crumbs hide. Using a lightweight broom or cordless vacuum lets you move freely without hassle. Mastering these steps guarantees your kitchen floor stays clean effortlessly, giving you the freedom to enjoy your space without worrying about hidden messes. It’s all about using the right methods and tools to work smarter, not harder.
Best Mopping Methods for Different Floor Types

Mopping your kitchen floor effectively depends on knowing the right method for your specific floor type. Different floor materials require different mop types and techniques to keep them clean without damage. For example, hardwood floors need a damp mop, not soaking wet, while tile can handle a more thorough wash. Vinyl floors are forgiving but benefit from microfiber mops that trap dirt well. Here’s a quick guide:
- Hardwood: Use a microfiber mop with a lightly dampened cloth to avoid warping.
- Tile: A sponge mop with warm water and mild detergent works best.
- Vinyl: Flat microfiber mops are ideal for quick, effective cleaning.
- Laminate: Use a steam mop on low settings or a damp mop to prevent moisture damage.
Pick your mop type to match your floor materials for the best results.
Removing Tough Stains and Spills
When tough stains and spills won’t come up with regular cleaning, you’ll need targeted techniques to tackle them effectively. Start by addressing spills immediately to prevent them from setting—quick spill management is key. For stubborn stains, apply a gentle cleaner suited to your floor type and let it sit briefly before scrubbing. Use a soft brush or cloth to lift the stain without damaging your floor’s finish. Avoid harsh chemicals that could strip protective coatings. For grease or sticky messes, a mixture of warm water and mild dish soap works wonders. Remember, patience and the right tools make stain removal less of a chore, giving you the freedom to enjoy a spotless kitchen floor without extra hassle.
Maintaining Your Floors Between Deep Cleanings

To keep your kitchen floors looking fresh, you’ll want to sweep daily to remove dirt and crumbs before they cause scratches. Spot cleaning spills right away prevents stains from setting in and keeps your floors safe. Plus, taking simple steps to avoid damage, like using protective pads under furniture, will extend the life of your flooring.
Daily Sweeping Tips
Although deep cleanings are essential, daily sweeping plays a crucial role in keeping your kitchen floors looking fresh and preventing dirt buildup. Sticking to a daily cleaning schedule lets you enjoy a cleaner space without feeling burdened. Efficient sweeping techniques help you save time while ensuring every corner is free of dust and crumbs.
Here are some tips to make daily sweeping easy and effective:
- Use a broom with fine bristles to catch smaller debris.
- Sweep in one direction to gather dirt quickly.
- Focus on high-traffic areas to prevent grime buildup.
- Empty your dustpan frequently to avoid scattering dirt.
Spot Cleaning Techniques
Daily sweeping helps keep your kitchen floors tidy, but spills and stains can still happen between cleanings. When you spot a mess, quick spot treatment is your best friend. Grab a damp cloth or mop with a gentle cleaner and address the stain immediately before it sets in. For tougher stains, a mild solution of water and vinegar or a specialized stain removal product works wonders without harsh chemicals. Remember, the key is acting fast to prevent stubborn marks from ruining your floor’s look. This approach lets you enjoy your kitchen freely without waiting for a full deep clean. By mastering spot cleaning, you maintain your floors effortlessly, keeping your space fresh and inviting every day.
Preventing Floor Damage
Even if you clean your kitchen floors regularly, preventing damage between deep cleanings is essential to keep them looking their best. Being proactive with floor protection methods helps you avoid common damage causes like scratches, stains, and wear. You don’t have to limit your freedom in the kitchen to keep your floors pristine; simple habits make a big difference.
Here are some effective floor protection methods to maintain your floors:
- Use furniture pads to prevent scratches from chairs and tables.
- Wipe up spills immediately to avoid stains and warping.
- Place mats at entrances to catch dirt and moisture.
- Avoid harsh chemicals that can degrade floor finishes.
Natural and Homemade Cleaning Solutions
A few simple ingredients you probably already have at home can make effective natural cleaning solutions for your kitchen floors. Try mixing a vinegar solution—equal parts white vinegar and water—to cut through grease and grime without harsh chemicals. It’s safe, easy, and leaves your floors sparkling. For tougher spots, sprinkle baking soda directly on the floor, then scrub gently with a damp cloth or mop. Baking soda acts as a mild abrasive and deodorizer, lifting stains naturally. These homemade solutions give you control over what touches your floors and reduce exposure to synthetic cleaners. Plus, they’re budget-friendly and eco-conscious, letting you clean freely without compromising your values or your kitchen’s cleanliness. Give it a shot, and enjoy a fresh, chemical-free floor care routine that works.
Tips for Preventing Floor Damage
Keeping your kitchen floors looking great starts with simple habits that prevent damage before it happens. You don’t have to limit your freedom to enjoy a beautiful floor. With the right approach, you can protect your floors and keep them looking fresh effortlessly. Focus on floor protection by taking these easy steps:
Simple habits can protect your kitchen floors and keep them looking fresh effortlessly.
- Use furniture pads under chairs and tables to avoid scratches.
- Place shoe mats at entrances to trap dirt and grit before it reaches your floors.
- Practice moisture control by promptly wiping spills and using dehumidifiers if needed.
- Avoid dragging heavy items across the floor to prevent gouges or dents.
Frequently Asked Questions
How Often Should I Deep Clean My Kitchen Floors?
You should set your cleaning frequency based on how much traffic your kitchen floor gets, but deep cleaning every one to two weeks is a solid plan for floor maintenance. This keeps your space fresh without feeling like a chore. If you crave freedom from constant upkeep, stick to quick daily sweeps and save deep cleans for when dirt really builds up. That way, you enjoy a clean kitchen without sacrificing your time.
Can I Use a Steam Mop on All Kitchen Floor Types?
Imagine your kitchen floor as a delicate garden—each type needs special care. You can enjoy steam mop benefits like deep cleaning and sanitizing, but it’s not a one-size-fits-all tool. Hardwood or laminate floors might warp under steam’s heat, while tile and sealed stone welcome it freely. Knowing your floor type compatibility lets you roam free, cleaning confidently without fear of damage or restrictions. Choose wisely, and let your floors flourish.
What Is the Best Way to Dry Kitchen Floors After Mopping?
When it comes to drying methods, you’ll want to avoid leaving your floors wet for too long to keep them safe and spotless. Using floor drying tools like microfiber mops or absorbent towels can speed things up while giving you freedom to move quickly. A well-ventilated room helps, too—opening windows or turning on fans dries floors faster. You don’t need fancy gadgets; just simple tools and a bit of airflow will do the trick.
Are There Specific Cleaning Products to Avoid on Kitchen Floors?
Imagine your kitchen floor losing its shine or worse, getting damaged by what you thought were safe cleaning ingredients. You’ll want to avoid harsh chemicals like bleach or ammonia—they can ruin certain floor surfaces like hardwood or vinyl. Stay away from abrasive scrubs too, as they scratch. Instead, choose gentle, floor-specific cleaners that respect your floor’s natural beauty. That way, you keep your freedom to enjoy a spotless, lasting kitchen floor without worry.
How Do I Remove Pet Hair From Kitchen Floors Effectively?
To remove pet hair from your kitchen floors effectively, start by keeping up with regular pet grooming to reduce shedding. Then, use vacuum attachments designed for hard floors—they’re perfect for grabbing hair without scratching surfaces. You’ll appreciate how effortlessly these tools work, giving you more freedom and less hassle. For stubborn hair, a damp microfiber mop can help pick up what the vacuum misses, leaving your floors spotless and hair-free.


