

You can disinfect and sanitize your keyboard safely without damaging the switches, electronics, or finish by using the right tools and a controlled cleaning process. By the end of this walkthrough, you’ll know exactly what to remove, what to wipe with, and what to avoid so germs are reduced while the keyboard stays functional. Plan on about 10 to 20 minutes, and gather a microfiber cloth, isopropyl alcohol (where appropriate), cotton swabs, and compressed air.
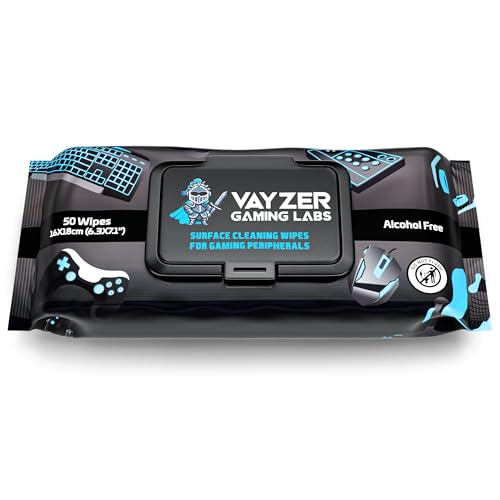



Unplug (or power off) your keyboard, remove crumbs and dust first, then disinfect using a manufacturer-approved cleaner applied to a wipe or cloth that’s barely damp—never soaked. This keeps moisture out of switches and ports while reducing germs effectively, without damaging key coatings.
If you share a workstation, deal with spills, or just want to clean after illness/flu season, this guide is for you. It’s written for typical wired, wireless, laptop, and detachable-keycap keyboards—while still stressing the one rule that matters most: follow your keyboard’s manufacturer cleaning guidance.
Who this is for (and what to double-check first)

The safest disinfection plan depends on your exact keyboard design and materials, not just “what disinfectant you have.” The core check is whether your keyboard allows any moisture and whether keycaps can be removed safely before you disinfect.
– Works for most mechanical keyboards, membrane keyboards, and laptop keyboards, as long as you avoid soaking and harsh chemicals.
– The safest method depends on your keyboard type (detachable keycaps vs. non-removable) and materials/coatings.
– Before you disinfect, confirm the manufacturer’s cleaning instructions for chemicals and whether you can remove keycaps ().
From my own experience helping coworkers clean shared keyboards during flu season, the most common failure point isn’t the disinfectant—it’s applying cleaner too aggressively (too wet, too soon, or sprayed directly). When the keyboard is still gritty, wiping can smear debris across key wells; and when liquid gets under key edges, it can create tackiness or delay drying long enough to cause long-term issues.
Also, keep the disinfectant scope clear: cleaning removes visible dirt (crumbs, skin oils, dust), while disinfecting reduces germs on surfaces. For a keyboard, you want both, in the right order.
Prep: power down, remove debris, and choose the right cleaner
Powering down first is the best way to prevent accidental shorts while you disinfect a keyboard. Then remove loose debris so you’re not dragging grime across keytops and into crevices.
– Power it off and disconnect it: unplug the cable, shut down the device, and remove batteries for standalone wireless keyboards.
– Clear loose particles first using compressed air and/or a soft brush so you’re not grinding grime deeper while wiping.
– Use a disinfectant that’s approved for electronics/non-porous surfaces; avoid bleach and anything that can leave residue or damage coatings ().
A practical way to think about keyboard disinfection prep is “dry first, damp second.” If you wipe a keyboard while crumbs are present, you’ll often create a paste-like film that’s harder to remove and can trap moisture around key stems.
Quick tool choice guide (what’s typically safest for keyboards)
Keyboard Cleaning Approaches: Moisture-Safety (General Guidance)
| # | Cleaning approach | Best for on a keyboard | Primary moisture risk | Moisture-safety score |
|---|---|---|---|---|
| 1 | Compressed air (short bursts) | Dust/crumb removal | Very low | ★★★★★★★★★ |
| 2 | Soft, dry brush | Edge/grit loosening | Very low | ★★★★★★★★☆ |
| 3 | Dry microfiber wipe | Surface oils and dust | Very low | ★★★★★★★★☆ |
| 4 | Disinfectant wipe (light pressure) | Key tops + deck | Low | ★★★★★★☆☆☆ |
| 5 | Cloth barely dampened with disinfecting solution | Controlled wipe-down | Low–medium | ★★★★★★★☆☆ |
| 6 | Swab for gaps (minimal liquid) | Between keys | Medium | ★★★☆☆☆☆☆☆ |
| 7 | Spraying liquid directly into keyboard | Avoid this approach | High | ★☆☆☆☆☆☆☆☆ |
Disinfect & sanitize steps you can follow safely
For most keyboard types, the safest reliable approach is: power off, remove debris, then disinfect using a wipe or lightly damp cloth—no spraying and no soaking. Here’s a step-by-step workflow that matches how disinfectants are meant to be applied on non-porous surfaces.
– Wipe method (best default): Lightly dampen a microfiber cloth with disinfectant (or use a disinfectant wipe) and wipe key tops, edges of keys, and the surrounding deck.
– Between keys: Use a swab or cloth corner to reach gaps, but don’t flood the space under keys.
– Do not spray directly: Never spray liquid or cleaner straight into the keyboard—apply to the cloth/wipe instead.
In my day-to-day desk maintenance, the “barely damp cloth” detail matters more than people expect. If the cloth is wet enough to drip, it’s only a matter of time before it finds a seam or port opening. For keyboard disinfection, consistency beats intensity: a slower wipe with minimal liquid is safer for switches and stabilizers than one aggressive pass.
If your keyboard has removable keycaps
Removing keycaps can improve your results, but only if your keyboard is designed for it and the manufacturer approves the process. The goal is to clean and disinfect the contact areas without exposing the switch internals to unnecessary moisture.
– Remove keycaps carefully (if your keyboard supports it) and clean the exposed area with a dry brush first.
– Disinfect keycaps separately only if your manufacturer says it’s safe; let everything dry completely before reassembly.
– Avoid soaking keycaps or submerging the switch area unless the manufacturer explicitly allows it.
If it’s a laptop keyboard (no keycap removal)
Laptop keyboards typically have tighter tolerances and more sensitive internal pathways, so the safest focus is on high-touch surfaces with minimal moisture exposure. Keep liquid away from seams, speakers, and charging/port openings.
– Focus on high-touch surfaces (key tops, trackpad/touch area if applicable) using the light-damp wipe method.
– Use swabs for tight spots, and keep liquid away from seams, speakers, and charging/port openings.
– Let it dry fully before powering on or closing the lid.
Data points to guide disinfecting choices (why “damp” matters)
According to Apple Support — How to clean your Apple products, many Apple device-cleaning methods use a soft, lint-free cloth and can include wipes with 70% isopropyl alcohol, applied to the cloth rather than sprayed (year: ).
According to CDC — Cleaning and Disinfecting Your Facility, disinfectants need proper use per the product label, including keeping the surface wet for the required contact time (year: ).
According to EPA — Disinfectants registered for specific pathogens (and label instructions), disinfectant performance depends on the labeled organism targets and directions for use (year: ).
Drying and when to sanitize again
Drying fully is where many keyboards quietly fail—because trapped moisture can cause long-term stickiness or corrosion near switch contacts. Your disinfecting cycle isn’t “done” until the keyboard is completely dry and safe to power.
– After wiping, allow the keyboard to air-dry (and keep it off until fully dry) to reduce corrosion and circuit damage risk.
– Re-sanitize after situations like shared use, visible contamination, or after handling food/drinks—especially if you can’t fully clean between keys.
– If you see sticky residue, smearing, or a tacky feel, stop and switch to the manufacturer-approved approach ().
Also remember that keyboards are high-touch surfaces. If you disinfect only once but your environment stays contaminated (for example, a shared desk in a high-traffic office), you’ll quickly reintroduce germs. As of 2026, many workplaces treat keyboard and desk surfaces as recurring hygiene responsibilities during seasonal illness peaks.
What can go wrong (common mistakes and limits)
Disinfection usually goes wrong due to excess liquid, incompatible chemicals, or skipping the “clean first” step. These are preventable issues that can damage key legends, coatings, and internal electronics.
– Soaking or dripping liquid: Too much moisture can seep under switches, into ports, or onto the keyboard controller.
– Harsh chemicals: Bleach, strong solvents, and abrasive pads can strip coatings or damage plastics.
– Missing the “first clean” step: Disinfecting over crumbs/grime is less effective and can spread dirt while you wipe.
– Contact time matters: Many disinfectants require a dwell/contact time to work—follow the product label (use ).
From a practical standpoint, there are limits: a keyboard disinfecting routine rarely replaces a deep clean with approved keycap removal. If you routinely encounter sticky residue, food spills, or visible buildup between switches, treat “wipe-and-dry” as the maintenance layer—not the total solution.
Tradeoffs: wipe-and-dry vs. keycap removal
- Pros (wipe-and-dry):
- Lower moisture exposure risk, works for most non-removable-keycap keyboards, faster turnaround for shared offices.
- Cons (wipe-and-dry):
- Won’t fully clean under every key gap; may leave hidden debris in crevices.
- Pros (keycap removal when supported):
- Better access for dust and contaminants; more thorough cleaning where approved.
- Cons (keycap removal when supported):
- Higher risk if done without manufacturer guidance; requires complete drying before reassembly.
Verdict + scanable checklist
If you want the safest, broadly applicable approach for keyboard disinfection, remove power, remove debris, then wipe with a manufacturer-approved disinfectant using a lightly damp cloth/wipe—no spraying and no soaking. The downside is that this won’t deep-clean every crevice like a full keycap removal process, and some keyboards/coatings limit what disinfectants are safe.
Who should skip or get extra guidance: If your keyboard is damaged, has warranty-specific restrictions, is covered in labels/films not meant for solvents, or you’re unsure whether it supports keycap removal—follow manufacturer instructions first ().
| Step | What to do | Safety note |
|---|---|---|
| 1 | Power off / unplug / remove batteries | Prevents short-circuit risk |
| 2 | Remove crumbs/dust | Don’t grind debris deeper |
| 3 | Wipe key tops + deck | Use lightly damp cloth/wipe |
| 4 | Reach gaps with swab | Avoid liquid pooling |
| 5 | Let dry fully | Reconnect only when completely dry |
| 6 | Repeat as needed | Use label dwell/contact time |
Frequently Asked Questions
What’s the safest way to disinfect a keyboard without damaging it?
Unplug the keyboard and turn it upside down to gently shake out crumbs before cleaning. Use a microfiber cloth lightly dampened with 70% isopropyl alcohol or a manufacturer-approved disinfectant, and avoid soaking the keys or spraying liquid directly into the keyboard. Let it fully dry before reconnecting. This approach helps disinfect high-touch areas while reducing the risk of moisture damage.
How do you sanitize a computer keyboard between deep cleanings?
For quick keyboard sanitizing, wipe visible grime first with a slightly damp cloth, then disinfect key surfaces using a cloth moistened with 70% isopropyl alcohol. Focus on the tops of keys, the spacebar, and the areas around frequently touched keys. Avoid letting liquid pool in gaps, and let the keyboard air-dry completely. Regular light sanitizing reduces buildup and helps maintain keyboard hygiene.
Why should you avoid bleach or harsh cleaners on keyboards?
Bleach and abrasive cleaners can degrade key legends, damage coatings, and corrode metal contacts inside the keyboard. Strong chemicals may also leave residues that attract dirt or cause discoloration over time. Stick to electronics-safe disinfectants, such as 70% isopropyl alcohol, and follow any care instructions from the keyboard manufacturer. This keeps your disinfection process safe and effective.
Best practices for cleaning a mechanical keyboard with disinfectant?
Start by disconnecting the keyboard and removing keycaps only if your model supports it easily, then clean the keycaps separately with a safe method recommended by the manufacturer. Use compressed air (or gentle shaking) to remove debris, then wipe exposed key surfaces with a microfiber cloth lightly dampened with 70% isopropyl alcohol. For the base, wipe with minimal moisture and avoid getting liquid under switches. This method safely disinfects a mechanical keyboard while preventing damage to switch components.
Which disinfectant is recommended for sanitizing keyboards at home or work?
The most commonly recommended option for keyboard disinfection is 70% isopropyl alcohol because it works well against many germs and evaporates faster than higher concentrations. If you’re using wipes, choose electronics-safe wipes and apply disinfectant to the cloth first to avoid spraying into the keyboard. Always ensure the keyboard is unplugged and dry before use, and follow the manufacturer’s guidance for sanitation. Using an appropriate disinfectant helps you sanitize keyboards effectively without compromising performance.
📅 Last Updated: November 04, 2026 | Topic: How to Disinfect and Sanitize a Keyboard Safely | Content verified for accuracy and freshness.
References
- https://www.cdc.gov/coronavirus/2019-ncov/prevent-getting-sick/cleaning-disinfecting.html
- https://www.who.int/publications/i/item/cleaning-and-disinfecting-environmental-surfaces-in-the-context-of-covid-19
- How to clean your Apple products – Apple Support
- Disinfectant
- https://www.britannica.com/science/disinfection
- disinfecting electronic devices – Search Results – PubMed
- SARS-CoV-2 surface disinfection ethanol isopropyl alcohol – Search Results – PubMed
- https://scholar.google.com/scholar?q=keyboard+disinfection+sanitization+guidelines Google Scholar
- https://scholar.google.com/scholar?q=electronics+cleaning+70%25+isopropyl+alcohol Google Scholar
- https://scholar.google.com/scholar?q=virus+inactivation+on+surfaces+disinfectants+alcohol+bleach Google Scholar
