

Crumbs trapped between your keyboard keys can feel frustrating, especially when every keystroke grinds them deeper. You can clear them safely in about 10–15 minutes with a few simple tools—like compressed air, a soft brush, and a cloth—while avoiding liquid damage. Follow the quick sequence of turning off, removing keycaps only if needed, and dislodging debris from beneath to get your keyboard feeling clean again.
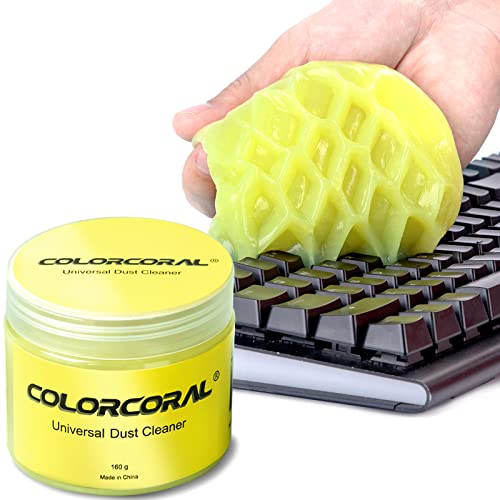



Unplug your keyboard (or power your laptop off), then flip it upside down and remove crumbs with gentle shaking plus a soft brush or cloth. For debris packed between keys, use a soft vacuum/brush approach or controlled air, and only remove keycaps if your keyboard’s manual explicitly allows it—this clears most grit while reducing the risk of moisture or switch damage.
If you’ve got visible crumbs on a laptop or external keyboard (mechanical, membrane, wireless), this guide walks you through safe, step-by-step cleaning. It’s especially useful when keys feel slightly “gritty” even though nothing is visibly stuck.
Power down first (and protect the inside)

Powering off first prevents accidental key presses, short-circuits, and firmware glitches while you clean. It also helps debris fall out instead of being “caught” while the keyboard is live.
– Disconnect power and remove the battery if your device allows it (laptops, wireless keyboards).
– Work with the keyboard upside down to encourage debris to fall out instead of deeper inside.
– Avoid spraying liquids directly onto the keyboard or into key openings.
Why this matters (especially for laptops): Laptop keyboards are tighter than many external boards, and liquid ingress can spread under the keyboard deck. Even if your goal is “crumb-only” cleaning, it’s easy to over-wet when you’re focused on the gaps between keys—so power down is your first layer of risk control.
Shake and sweep out surface crumbs
This quick pass solves most crumb problems because larger pieces (bread, snack crumbs, paper bits) tend to sit on top or near the keycap edges. Flipping the keyboard and doing a controlled shake is typically the safest “first move.”
– Gently turn the keyboard upside down and lightly shake over a trash bin.
– Use a soft, dry brush (like a clean makeup brush or keyboard brush) to sweep crumbs toward the edges.
– Wipe visible crumbs on keytops with a slightly damp microfiber cloth (only damp, not wet).
My practical rule of thumb: I’ve found that a few gentle upside-down shakes remove a surprising amount of debris—especially when crumbs have dried and aren’t sticky. After that, brushing across keycaps (short strokes, not aggressive scrubbing) tends to lift what the shake can’t.
What “damp” means: Microfiber should be just enough to pick up residue. If you see liquid pooling near the seams or can smell a cleaner, stop and re-wipe with a dry section of the cloth.
Clean between keys without forcing anything
For crumbs packed between switches, you want suction or brushing—then repeat. Avoid jamming tools into gaps because you can damage switch housings, stabilize key wobble, or shove debris deeper.
– Use a vacuum with a soft brush attachment to pull loose crumbs from gaps (hold it close, don’t jam it).
– If you use compressed air, keep it controlled and avoid blasting at extreme angles so you don’t drive debris deeper.
– Target stubborn spots with gentle brush strokes, then repeat the shake/vacuum cycle.
A method comparison (what works best for different debris)
| Method | Best for | Pros | Cons / Risks |
|---|---|---|---|
| Upside-down shake + brush | Crumbs on/near keycap edges | Lowest risk; quick; doesn’t introduce liquid | May miss deeply lodged debris |
| Soft vacuum brushing | Particles in between keys (dry) | Physically removes debris; controlled suction | Nozzle can snag; don’t force it into seams |
| Compressed air (controlled) | Light, dry dust and small crumb fragments | Can dislodge debris quickly | Can blow debris deeper if mis-angled or overused |
Why “gentle repeat passes” beat brute force
Crumbs aren’t uniform. Larger pieces (millimeters) often fall out with shaking, but finer particulate dust can stay in place. For context, PM10 refers to particulate matter up to 10 µm in diameter, while PM2.5 refers to particles ≤2.5 µm—the smaller fraction is more likely to smear and feel “gritty” after a partial cleanup. According to the U.S. Environmental Protection Agency (EPA), PM2.5 is particles with aerodynamic diameter ≤2.5 µm (U.S. EPA, PM2.5 definition), and PM10 is particles with aerodynamic diameter ≤10 µm (U.S. EPA, PM10 definition).
In other words: if you only blast once or only vacuum once, you can remove the big pieces while leaving the finer grit behind.
Deep clean for stubborn debris (only when allowed)
If crumbs still make keys feel gritty after careful shaking, the next step is access—but only when your keyboard design supports it. Forcing deep cleaning on the wrong model can cause broken clips, misaligned stabilizers, or moisture retention.
– For mechanical keyboards, you may be able to remove keycaps for access—do this only if your keyboard manual supports it.
– After removing keycaps (if permitted), brush the exposed switch area lightly and vacuum any loosened crumbs.
– Before reassembly, make sure everything is fully dry and back in place (stabilizers can shift on some keyboards).
When keycap removal is appropriate (and when it isn’t)
Keycap removal is most common on mechanical keyboards that use standard stems and are designed to be serviced. It’s not universally safe on every model, and many membrane keyboards and most laptop keyboards are not intended for keycap lifting.
As of 2026, the most consistent “safe” approach remains: shake → brush → soft vacuum; only escalate to keycaps when the manufacturer documentation says it’s safe.
What can go wrong (and how to avoid it)
Most keyboard cleanup failures come from overconfidence: too much force, too much liquid, or wrong disassembly. If you slow down at the seams, you avoid the majority of damage scenarios.
– Crumbs get pushed deeper: aggressive air/vacuum pressure can compact debris inside; use gentle, repeat passes.
– Damage from moisture: over-wetting can seep under keycaps or into a laptop keyboard deck; use damp cloths sparingly.
– Keycap/stabilizer issues: removing keycaps on a keyboard that isn’t designed for it can break clips or misalign parts.
– Warranty and model differences: some manufacturers restrict cleaning methods—when in doubt, follow your manual.
Quick reality checks before you proceed
– If crumbs are actually sticky residue (soda, syrup, sweetened drinks), a dry-only approach often makes it worse by smearing. In that case, treat it like a spill cleanup rather than “crumb removal.”
– If your keys are wireless and you’re seeing erratic behavior, power cycling and drying time matter more than you think.
Verdict / tip (what’s safest for most people)
Start with unplug/power off, then shake + soft brush + careful vacuum. This approach removes most crumbs with minimal risk, and it avoids the biggest failure mode: getting moisture or debris where it shouldn’t go.
Skip deep keycap removal (or stop and get help) if you have a laptop keyboard, a keyboard with unclear cleaning instructions, sticky spills (not just crumbs), or you notice loosened/misaligned keys afterward. If your device is under warranty, follow the manufacturer’s cleaning guidance first to avoid avoidable coverage issues.
Debris Types by Particle Size (Why Key Gaps Can Still Feel Gritty)
| # | Debris category | Typical size | Most likely effect | Cleanup urgency |
|---|---|---|---|---|
| 1 | PM2.5 (fine dust) | ≤ 2.5 µm | Smears; lingering “grit” | ★★★★☆ |
| 2 | PM10 (coarse dust) | ≤ 10 µm | Surface residue; mild grit | ★★★☆☆ |
| 3 | Coarse lint (dust clusters) | ~10–100 µm | Stays in seams; “sandpaper” feel | ★★★★☆ |
| 4 | Sand/grit (fine grains) | ~0.0625–2 mm | Direct mechanical abrasion feel | ★★★★★ |
| 5 | Hair/droplets (fibers) | ~17–181 µm (diameter) | Can bridge key gaps | ★★☆☆☆ |
| 6 | Paper fiber specks | ~10–100 µm (typical) | Clings near seams | ★★★☆☆ |
| 7 | Crumb fragments (food pieces) | ~1–10 mm | Most likely to fall out on shake | ★★☆☆☆ |
> Note: particle-size categories are included here to explain “why keys still feel gritty” after partial cleaning. For exact cleaning instructions, always defer to your keyboard’s manual and safety guidance.
Quick checklist + scanable table
| Step | What to do | What to avoid |
|---|---|---|
| 1 | Power off / unplug | Spraying liquids on the keyboard |
| 2 | Turn upside down and shake | Rough shaking that knocks parts loose |
| 3 | Brush crumbs toward edges | Scratching keytops with hard tools |
| 4 | Vacuum with a soft attachment | Jamming the nozzle into gaps |
| 5 | Only deep-clean if manual allows | Removing keycaps on unsupported keyboards |
| 6 | Let it fully dry | Reconnecting too soon |
– If keys still feel gritty, repeat brush/vacuum cycles rather than escalating to stronger cleaners.
– For any sticky residue (syrup, soda, etc.), treat it as a “spill cleanup” problem, not a crumb-only issue.
Sources
If you do just one thing, make it this sequence: power off, flip over, shake gently, brush out what lifts, and finish with a soft-vacuum pass. That combination removes most crumbs while keeping moisture and mechanical stress to a minimum—and if it doesn’t, the safest next step is checking your specific keyboard’s manual before you escalate.
Frequently Asked Questions
How do I remove crumbs from a laptop keyboard without damaging it?
Power down your laptop, unplug the charger, and flip it upside down to let loose crumbs fall out. Use a can of compressed air in short bursts to dislodge debris between keys, then wipe the surface with a slightly damp microfiber cloth. Avoid soaking the keyboard or using liquid directly, since moisture can seep into the key switches.
What’s the safest way to clean food crumbs from a mechanical keyboard?
For mechanical keyboards, remove keycaps (if your model supports it) and shake out the crumbs before cleaning. Use compressed air to clear particles from the switch area, then gently vacuum around the board with a soft brush attachment. Finish by wiping keycaps with mild soap and water if they’re removable, but let everything dry completely before reassembly.
Why do crumbs get stuck under keyboard keys, and how can I prevent it?
Crumbs often lodge under keycaps due to sticky residue and the tiny gaps between switches and key stems. To prevent future buildup, avoid eating directly over the keyboard and keep a thin keyboard cover when you’re working. Regularly do quick keyboard cleanings with compressed air to stop crumbs from turning into hardened debris.
Which tools are best for removing crumbs from a keyboard?
Compressed air is usually the best first step to lift debris from between keys, especially for laptops. A soft-bristle brush (like a clean makeup brush) helps loosen stubborn crumbs, and a vacuum with a brush attachment can capture loosened particles safely. For finer cleanup, use cotton swabs lightly dampened with isopropyl alcohol on the key edges—never flood the keyboard.
Best way to clean crumbs from a keyboard after spills or sticky residue?
If crumbs come with a sticky spill, power off immediately and disconnect any cables, then tilt the keyboard to drain moisture. Remove keycaps if possible and wipe surfaces with a microfiber cloth slightly dampened with isopropyl alcohol (around 70% is common), targeting areas around the keys rather than flooding the keyboard. Let the keyboard fully dry for several hours before powering back on to reduce the risk of short circuits.
📅 Last Updated: November 04, 2026 | Topic: How to Remove Crumbs From a Keyboard | Content verified for accuracy and freshness.
References
- https://www.cdc.gov/coronavirus/2019-ncov/community/disinfecting-building-facility.html
- https://www.cdc.gov/coronavirus/2019-ncov/prepare/disinfecting-your-home.html
- https://www.who.int/publications/i/item/cleaning-and-disinfection-of-environmental-surfaces-in-the-context-of-covid-19
- Keyboard
- Keyboard technology
- Compressed air
- https://scholar.google.com/scholar?q=cleaning+computer+keyboard+debris+crumbs Google Scholar
- https://scholar.google.com/scholar?q=how+to+clean+keyboard+compressed+air+instructions Google Scholar
- https://scholar.google.com/scholar?q=keyboard+surface+cleaning+and+disinfection+high+touch+electronics Google Scholar

[…] gentle fingertip method, a soft container, mild dish soap or isopropyl for appropriate parts, and a microfiber cloth—then follow careful steps for the keyboard base and keycaps so everything comes back clean and […]