

You rinse a glass, spot the faucet’s shine, and then notice fresh water spots and dull streaks by the next day. You can keep that finish cleaner for longer with a simple weekly routine plus a few smart daily habits, most taking just five minutes. All you need is a soft microfiber cloth, a gentle nonabrasive cleaner, and consistent wipe-dry practices to prevent grime before it bonds.



To keep your faucet clean longer, prevent spots and buildup right after use—especially mineral deposits and soap residue. Use gentle, regular wipe-down habits (not harsh scrubbing) and set up quick prevention for hard water. This guide gives you 10 practical prevention steps, plus a simple routine to stick with.
If your faucet shows water spots, cloudy film, or grime around the handles/spout, these tips are for you—whether it’s in a kitchen, bathroom, or utility sink. They work best when you combine one “after-use” habit with a consistent weekly clean.
Who this is for / when it applies
This is for homeowners and facilities teams who want faucets to look new with less time spent scrubbing. If you deal with hard water, frequent handwashing, or lots of daily splashes (think kitchens and kids’ bathrooms), these prevention steps reduce buildup where it starts.
10 Prevention Tips to Keep Your Faucet Clean Longer

Stopping spots before they harden is the fastest path to a faucet that stays cleaner for weeks. These prevention tips focus on the two main culprits—hard-water minerals and soap/cleanser residue—using surface-safe cleaning practices designed for common faucet finishes.
– Dry it after every use: Keep a microfiber cloth nearby and do a 10–20 second wipe to stop water spots before they harden.
– Use the right cleaner for the finish: Stick to mild dish soap + warm water for most finishes; avoid abrasive pads that can dull or scratch.
– Don’t let soap scum sit: After washing hands or dishes, rinse thoroughly and wipe any splashes near the base/handles.
– Address hard-water deposits early: If you see white specks or scale, clean sooner rather than waiting until it looks “cemented on.”
– Remove buildup around seams: Pay attention to the gap where the faucet meets the sink—grime collects there first.
– Rinse after cleaning anything nearby: If you clean counters or tubs, rinse overspray off the faucet so residue doesn’t cling.
– Avoid harsh chemicals unless the manual allows it: Strong cleaners can damage finishes or seals—especially on plated or specialty coatings.
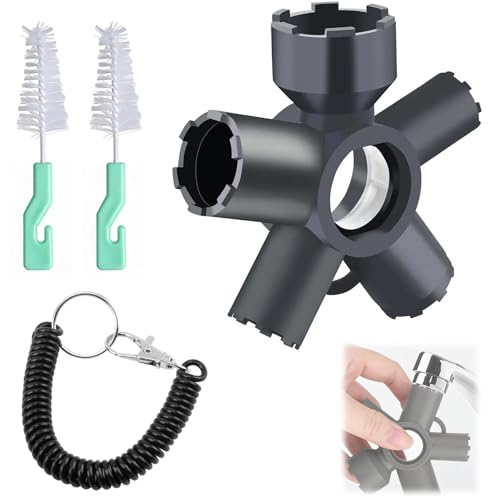
– Use a soft toothbrush for tight spots: For aerator, crevices, and handle edges, use a soft brush (no metal bristles).
– Keep the aerator maintained: Mineral buildup in the aerator can increase splatter—removing it reduces mess and spotting.
– Use preventive barriers when appropriate: A light, finish-safe protective step can make wipes easier between cleanings. (Check what’s compatible with your faucet’s material first.)
Why these habits work (and why “scrub less” is usually better)
Faucet grime sticks when minerals and residue get time to harden. With hard water, dissolved calcium and magnesium come out of solution and deposit as a chalky film—often calcium carbonate—when water evaporates on the surface. According to the U.S. Environmental Protection Agency (EPA), 1 grain per gallon (gpg) equals 17.1 mg/L as CaCO₃ (accessed 2026). When your water sits around “hard” levels (commonly above roughly 120 mg/L as CaCO₃), spotting is far more likely because mineral deposits have more material to leave behind.
At the same time, soap scum is not just “dirty water.” It forms when soap-related compounds combine with minerals and cling to surfaces—especially in splash zones and around moving parts. That’s why the most effective approach blends prevention (dry + rinse) with targeted, gentle cleaning (mild soap + soft tools).
Microfiber drying is the highest ROI step
If you do only one prevention habit, make it drying. In my own daily maintenance planning for high-splash areas, the biggest visual change comes from removing droplets before they dry. The key is consistency: a 10–20 second wipe after use reduces the “time-at-rest” where minerals can bond.
Surface-safety matters (finish preservation is prevention)
Many faucet finishes—especially plated coatings like chrome, nickel, or PVD—can be dulled permanently by abrasive cleaning. That’s prevention, not just aesthetics: once a finish is scratched or dulled, residue clings more readily and you spend more time cleaning. For weekly care, mild dish soap + warm water is a reliable baseline for most finishes; for tight crevices, a soft toothbrush beats metal or stiff nylon bristles.
A Simple Daily/Weekly Routine (So the 10 Tips Actually Stick)
You don’t need a complicated schedule; you need a routine that interrupts spotting and stops buildup from accumulating at seams and the aerator. As of 2026, the most sustainable plan is short daily action plus one finish-safe weekly reset.
– Daily (1 minute total): Quick rinse if needed, then wipe dry with microfiber—focus on spout and any splash zones.
– Weekly (10–15 minutes): Mild soap cleaning, then dry; do a quick check for scale around the aerator and handle seams.
– Monthly (as needed): Look for buildup patterns (spots vs. sticky film) and adjust—e.g., more drying if it’s mostly water spots.
Make it operational: control points + feedback
A practical way to keep this from fading is to run it like a lightweight PDCA cycle (Plan–Do–Check–Act). Plan: keep microfiber at the sink and decide which areas get wiped every day (spout + handles + base). Do: follow the daily one-minute wipe. Check: every week, glance for white specks at the aerator and film around seams. Act: if you see more spotting than soap haze, tighten drying; if you see sticky streaks, improve rinsing and shorten time between washing and wiping.
One habit to prioritize if you’re short on time
If you’re choosing between “rinse” and “wipe,” the wipe is usually the differentiator. Rinsing helps remove residue, but droplets still carry minerals and soap compounds; wiping removes the drying stage where those deposits form. If you have hard water, this daily wipe is the lever that reduces buildup long-term.
Common Water Hardness Units (How They Convert to mg/L as CaCO₃)
| # | Hardness Unit | Symbol | mg/L as CaCO₃ (per 1 unit) | Practical Use for Faucet Spotting |
|---|---|---|---|---|
| 1 | Grain per gallon | gpg | 17.1 | High mineral risk when higher-than-normal |
| 2 | German degree | °dH | 17.848 | Useful when water tests report °dH |
| 3 | French degree | °fH | 10.0 | Helps estimate spotting likelihood from lab data |
| 4 | Clark degree | °Cl | 14.25 | Common in some regional water reports |
| 5 | Millimoles per liter as CaCO₃ | mmol/L | 100.1 | Useful for interpreting advanced water labs |
| 6 | Parts per million (water) | ppm | 1.0 | Often reported as mg/L in water testing |
| 7 | Milligrams per liter as CaCO₃ | mg/L | 1.0 | Directly maps to common “hardness mg/L” reports |
What Can Go Wrong (Common Mistakes and Edge Cases)
The fastest way to keep your faucet clean longer is to avoid the cleaning actions that damage the finish or leave residue behind. These mistakes don’t just waste time—they can make buildup worse by changing how minerals bond to the surface.
– Scratching the finish: Even “cleaning tools” like scrapers and abrasive pads can leave permanent dullness on many finishes.
– Using the wrong product: Some cleaners can discolor plating, affect coatings, or degrade rubber seals over time.
– Over-cleaning with the wrong method: Constant aggressive scrubbing can make grime stickier by damaging the surface finish.
– Missing the real source of buildup: If the faucet is getting constant splatter or overspray, it may be a placement/usage pattern issue—not just “dirty faucet.”
Finish damage often looks like “mystery grime”
A scratched surface tends to hold water film and residue in microscopic valleys. The result looks like the faucet is “always dirty,” even if you clean it frequently. This is why the prevention plan leans on microfiber drying and mild soap—low effort, low risk, and consistently effective.
Chemical compatibility: when prevention should be “manual-first”
Harsh chemicals are sometimes effective, but they can be the wrong tool for your finish. If your faucet is plated, PVD-coated, or includes rubber components (gaskets, O-rings), strong cleaners can reduce lifespan or change appearance. Always follow the faucet manual. If you don’t have it, use the mildest approach first: warm water, mild dish soap, soft cloth, and thorough rinsing.
Hard-water prevention isn’t only about cleaning
If your faucet splatters heavily, you’re feeding the system: more droplets means more mineral deposition. That’s why aerator maintenance is part of prevention. Mineral buildup in the aerator can change flow patterns and increase splatter, which spreads spotting around handles and the sink deck.
Pros/cons snapshot: prevention-focused care vs. aggressive scrub
| Approach | Pros | Cons |
|---|---|---|
| Dry + mild weekly clean | Fewer deposits form; safer for most finishes; less time scrubbing | Requires a consistent wipe habit; spots may return if drying is skipped |
| Aggressive scrub (pads/strong chemicals) | Can remove heavy buildup immediately | Higher risk of scratching/dulling; may shorten seal/coating lifespan; can increase future cling |
Verdict: Best Way to Prevent Faucet Grime (and Who Should Skip This)
This prevention-focused approach is the safest bet for most households: dry after use, use mild cleaners, and target buildup where it starts (seams, spout areas, and the aerator). The downside is that it requires a small habit—if you never wipe after use, hard-water spotting will return faster.
Skip or modify these steps if your faucet has a delicate/special coating and the manufacturer specifically warns against certain cleaners or protective products. If you’re unsure of compatibility, follow the faucet manual or stick to the mildest approach (soap + water + drying).
Scan-and-Save Checklist (Keep It Clean Longer)
| Prevention step | Do it how often |
|---|---|
| Wipe/dry after use | After every use (quick wipe) |
| Rinse thoroughly after soap/washing | Each time you use the faucet |
| Mild cleaner + soft cloth | Weekly |
| Check spout + splash zones | Weekly |
| Clean around seams/base | Weekly (quick pass) |
| Watch aerator/white spots | Monthly (or when flow/splatter changes) |
| Use soft brush for crevices | As needed |
| Avoid abrasive pads/scrapers | Always |
| Be careful with chemicals on finish | Always (per manual) |
| Consider finish-safe protection | Optional, as compatible |
Frequently Asked Questions
What are the best prevention tips to keep a faucet clean longer?
Wipe down your faucet after each use to prevent water spots, soap scum, and mineral buildup from settling. Use a soft microfiber cloth for daily cleaning and avoid abrasive pads that can damage the finish. For routine maintenance, apply a gentle, pH-balanced cleaner or a manufacturer-recommended product to keep the faucet looking new without stripping protective coatings.
How can I prevent water spots and mineral buildup on my faucet?
If you have hard water, mineral deposits form quickly when water evaporates. Dry the faucet with a towel after every use, and consider installing a water softener or using a faucet filter if buildup is persistent. For ongoing prevention, regularly rinse with clean water and use a mild descaling solution made for your faucet material—don’t wait until stains are fully baked on.
Which cleaning products are safest for preventing faucet corrosion and dullness?
Use non-abrasive, mild cleaners that are safe for the specific faucet finish (like chrome, brushed nickel, stainless steel, or brass). Avoid harsh chemicals such as strong bleach, limescale removers that are too aggressive, or scouring powders that can etch surfaces and worsen future grime buildup. When in doubt, test a small hidden area first and follow the product directions for dilution and contact time.
Why does my faucet look dirty even after cleaning, and how do I stop it?
Faucet “dirt” often comes from film—soap residue, hard-water minerals, fingerprints, and trapped grime around handles, aerators, and spouts. Focus on high-contact areas and seams where buildup collects, and periodically remove and rinse the aerator to prevent clogs and staining. A simple habit like drying, gentle weekly wipe-downs, and targeted deep cleaning can keep surfaces cleaner for longer.
How often should I do deep cleaning to maintain a faucet and stop grime from coming back?
Do light cleaning as needed (often weekly) to remove soap scum and water spots before they bond. Plan a deeper clean every month or every few months depending on water hardness and usage, including descaling the aerator and cleaning around the base and handles. Consistent prevention—drying the faucet and using the right cleaner—reduces how frequently you’ll need strong treatments.
📅 Last Updated: November 08, 2026 | Topic: How to Keep Your Faucet Clean Longer: 10 Prevention Tips | Content verified for accuracy and freshness.
References
- https://www.cdc.gov/coronavirus/2019-ncov/community/disinfecting-building-facility.html
- https://www.epa.gov/coronavirus/cleaning-and-disinfecting-your-facility
- https://www.usgs.gov/special-topics/water-science-school/science/hard-water
- Limescale
- Drinking-water
- https://pubmed.ncbi.nlm.nih.gov/?term=aerator+cleaning+lead+drinking+water
- biofilm faucet premise plumbing disinfection – Search Results – PubMed
- https://scholar.google.com/scholar?q=keep+faucet+clean+hard+water+prevention Google Scholar
- https://scholar.google.com/scholar?q=hard+water+limescale+prevention+fixture+cleaning Google Scholar
- https://scholar.google.com/scholar?q=biofilm+on+faucets+disinfection+cleaning Google Scholar
