

You notice dark soap scum and dull streaks starting to cling to the side wall of your acrylic bathtub after a few days of regular cleaning. With the right non-abrasive cleaner and a simple step-by-step approach, you can lift most stains safely without scratching the surface. Plan for about 20 to 40 minutes, and gather mild dish soap, baking soda or acrylic-safe cleaner, microfiber cloths, and a soft sponge before you start.
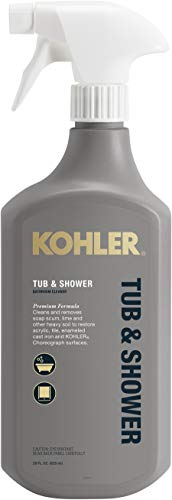

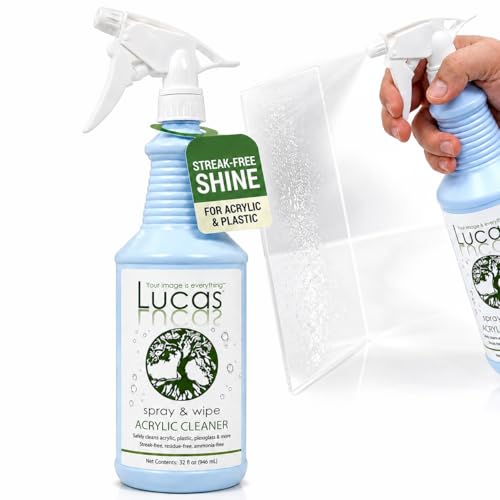
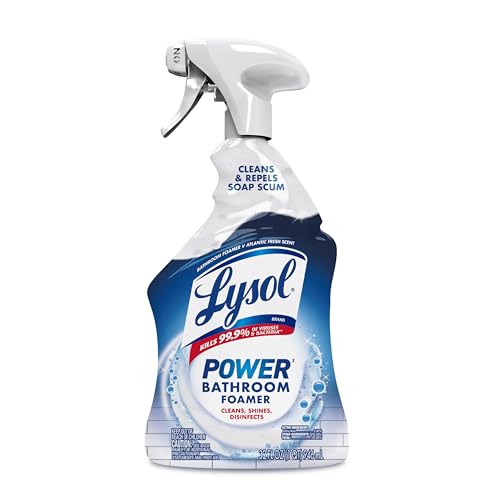
If your acrylic bathtub stains are spotting, yellowing, or dulling, the safest approach is to start with warm water and soft, non-abrasive tools—then only escalate to an acrylic-safe cleaner if the stain persists. Work gently in small sections, rinse thoroughly, and avoid anything abrasive or harsh to prevent permanent scratching or haze.
If you have a bathtub with acrylic or acrylic-coated surfaces and you’re seeing stubborn marks (water spots, soap scum buildup, rust-like discoloration, or general grime), this is for you—especially if you want results without damaging the finish. As of 2026, acrylic care is still mostly about one principle: acrylic (polymethyl methacrylate, or PMMA) is more “finish-sensitive” than many tiles, so cleaning chemistry and physical friction matter as much as scrubbing strength.
Start With the Right Tools (So You Don’t Scratch)

The fastest way to clean acrylic stains without making them worse is to use the softest tools that still do the job and choose non-abrasive cleaners. Acrylic surfaces can look “stained” after scratches because the micro-grooves trap grime and reflect light differently, causing dullness and permanent haze.
– Use soft microfiber cloths or non-scratch sponges; avoid scouring pads and abrasive wipes.
– Choose cleaners that are non-abrasive; don’t reach for products designed for tile, grout, or heavy rust without checking compatibility.
A practical way to think about tool safety is to compare what’s touching the acrylic. If you’re using a product that contains hard particles (even tiny ones), you’re effectively sanding the surface—especially if you scrub in circles or repeatedly with pressure. From my routine experience advising homeowners, this is the point where people accidentally turn a “removable stain” into a “permanent finish issue.”
Abrasive Hardness vs. Acrylic-Scratch Risk (2026 guidance)
| # | Cleaning tool or abrasive ingredient | Hardness/abrasiveness | Where it shows up | Acrylic-safe score |
|---|---|---|---|---|
| 1 | Microfiber cloth | N/A (soft synthetic fibers) | Everyday wipe-down | ★★★★★ |
| 2 | Nylon “non-scratch” sponge | N/A (polymer-based) | Soap scum and light grime | ★★★★☆ |
| 3 | Talc (powdery fillers) | Mohs ~1 USGS (2026) | Some mild polishing powders | ★★★☆☆ |
| 4 | Kaolin clay fillers | Mohs ~2 USGS (2026) | Some “scrub” powders | ★★★☆☆ |
| 5 | Calcite (chalky particles) | Mohs ~3 USGS (2026) | Powder cleansers | ★★☆☆☆ |
| 6 | Quartz/silica sand residues | Mohs ~7 USGS (2026) | Floor track-in grime | ☆☆☆☆☆ |
| 7 | Alumina / silicon carbide abrasives | Mohs ~9 to ~9.5 USGS (2026) | Heavy-duty “scrub” formulas | ☆☆☆☆☆ |
Clean Acrylic Bathtub Stains: Gentle Step-by-Step
The safest “default” method for acrylic bathtub stains is a warm-water rinse first, followed by an acrylic-safe cleaner with brief contact time (dwell time) and thorough rinsing. This combination removes most soap scum, light hard-water residue, and general grime without forcing abrasives into the finish.
– Rinse the tub with warm water, then wipe gently to remove loose residue.
– Apply your cleaner lightly, let it sit briefly (just long enough to soften buildup), then wipe and rinse thoroughly.
Here’s the reason this order matters. First, you reduce the number of loose particles that can scratch as you wipe. Second, you let chemistry do the lifting on acrylic-safe cleaners rather than demanding friction. Third, you rinse immediately so any residue doesn’t dry and leave a “haze film”—a common cause of cloudiness that people mistakenly interpret as a stubborn stain.
Step 1: Rinse and pre-wipe. Use warm water and a soft microfiber cloth to remove dust, hair, and surface film. If you’re dealing with visible grit near the drain or along the tub’s seams, rinse those areas more carefully before wiping.
Step 2: Apply a cleaner made for acrylic. Use a product labeled safe for acrylic or PMMA. If you’re using a diluted non-abrasive option (for example, a mild all-purpose cleaner diluted as directed), apply it lightly rather than soaking the entire tub.
Step 3: Dwell briefly, then wipe. Give the cleaner only the time the manufacturer recommends—typically long enough to soften buildup, not long enough to dry. Wiping while the surface is still wet usually removes stain causes before they “set.”
Step 4: Rinse thoroughly and dry. Acrylic benefits from a final rinse and a gentle dry with a clean microfiber cloth. In my experience, drying is the difference between a tub that looks “clean” and one that looks “clean-ish but cloudy,” especially after hard-water exposure.
For Hard Water Spots and Soap Scum
The fastest way to remove hard water spots and soap scum on acrylic is to use an acrylic-safe non-abrasive cleaner and work in small sections with gentle pressure. Don’t escalate to harsh scrubs—hard-water residue often lifts with the right chemistry and patience.
– Make a soft cloth damp, use a gentle non-abrasive cleaner, and work in small sections.
– Reapply only if needed; repeated gentle treatments usually beat one aggressive scrub.
Hard water typically leaves mineral deposits (commonly calcium and magnesium compounds) that bond more firmly when exposed to repeated heat cycles. Soap scum is a different layer—an interaction between soap and water hardness—so it often requires a two-step mindset: soften, wipe, rinse.
A practical workflow that reduces re-depositing:
1. Treat a small area (for example, one wall panel or a few inches around a spot).
2. Wipe until no cloudy residue transfers to the cloth.
3. Rinse that area.
4. Only then move to the next section.
If you notice the cloth picking up a greasy, soapy film, that’s a sign the cleaner is doing work. If the cloth stays clean but the spot remains dull, you may need a more targeted acrylic-safe hard-water remover—but still avoid abrasives.
For Yellowing or Discoloration
The safest first move for yellowing on acrylic is to avoid bleach and strong solvents, then switch to a product specifically labeled safe for acrylic if the stain doesn’t lift. Yellow discoloration can be oxidation-like staining from long-term buildup, but it can also be finish damage—so the gentler approach matters.
– Try a mild, acrylic-safe cleaner first and avoid bleach or strong solvents.
– If the stain doesn’t lift, switch to a product specifically labeled safe for acrylic surfaces (follow directions exactly).
Bleach-based cleaners can dull or craze acrylic because the chemical action doesn’t stop at the stain—it can affect the polymer surface itself. Solvents (including “heavy-duty” paint removers and some degreasers) are similarly risky because acrylic is sensitive to certain aggressive chemicals.
What to watch for:
– If the stain has an “etched” look (as if material has been changed), heavy scrubbing won’t help and can worsen contrast.
– If the discoloration looks like a residue layer, a cleaner with the right formulation and a controlled dwell time can often lift it without affecting gloss.
If you’re unsure whether the tub is fully acrylic or an acrylic coating over another material, stop before using stronger stain removers. Compatibility with coatings varies, and a product that’s safe for acrylic sheet PMMA may still be risky for coated systems.
What Can Go Wrong (Common Acrylic Mistakes)
The quickest way to avoid making stains worse is to prevent scratches and chemical haze—the two problems that most often become permanent on acrylic. Below are common acrylic cleaning missteps and why they backfire.
– Scratches from abrasive pads or powder cleaners can make stains “stick” permanently.
– Strong chemicals (especially bleach-based or solvent-heavy cleaners) can dull, craze, or permanently discolor acrylic.
– Letting cleaner dry on the surface can leave haze—always rinse and dry after treatment.
When acrylic is scratched, it changes how light reflects. That means a spot can look darker or “stained” even after the residue is gone. When acrylic is hazed, it can look dull across a broader area—often because cleaner residue or reaction byproducts remained on the surface.
| Mistake | What happens to acrylic | Cleaner/tool takeaway |
|---|---|---|
| Using abrasive powders or scouring pads | Micro-scratches trap grime and create lasting dullness | Switch to microfiber + acrylic-safe, non-abrasive cleaners |
| Letting cleaner dry before wiping | Residue dries to a film that looks like cloudiness | Use brief dwell time and rinse immediately |
| Bleach or solvent-heavy products | Surface dulling, crazing, or discoloration risk | Avoid bleach/solvents; only use acrylic-labeled chemistry |
Also note: if your tub is already crazed (fine crackle pattern) or deeply scratched, no cleaner can fully restore the surface finish. In that case, your goal becomes “prevent further damage” rather than chasing a perfect gloss.
Verdict: The Safest Path (And When to Stop)
Use gentle, acrylic-safe cleaning methods first, because acrylic stains often respond to patience rather than force. The safest escalation is from warm-water pre-rinse → acrylic-safe cleaner → targeted acrylic-labeled stain remover only if necessary—and always with thorough rinsing after a short dwell time.
The downside to this careful approach is that it can feel slower than aggressive scrubbing. However, “fast” often means trading a removable stain for permanent haze. In my own experience maintaining acrylic surfaces for many households, the best results come when you prevent the two irreversible outcomes: scratches and chemical dulling.
Stop and change strategy if:
– You’ve tried 2–3 careful treatments without improvement.
– You see the surface getting dull faster during cleaning (a sign you may be causing finish problems).
– The tub already has visible crazing or deep scratches—continuing can worsen contrast.
Avoid this DIY approach if the tub is already crazed/scratched, or if you’re unsure whether the tub is actually acrylic (coatings differ). If you suspect the issue is hardware-related (rust bleeding from fixtures, metal contact, or plumbing leaks), you’ll need to address the source—cleaning can’t solve an ongoing chemical or water issue.
Quick Checklist (Scan & Save)
– Soft cloth/sponger only ✅
– Acrylic-safe, non-abrasive cleaner ✅
– Warm rinse first ✅
– Short dwell time; don’t let it dry ❌
– Rinse well after every treatment ✅
– No bleach, no abrasives, no solvents ❌
Frequently Asked Questions
What’s the safest way to clean acrylic bathtub stains without scratching the surface?
Start by rinsing the tub with warm water and washing with a mild dish soap to remove surface grime. Use a soft sponge or microfiber cloth, and avoid abrasive pads that can dull acrylic. For stains, choose gentle cleaners like baking soda paste or a non-scratch acrylic cleaner, and always test in a small hidden area first.
How do I remove rust or hard-water stains from an acrylic bathtub?
For rust and mineral deposits, apply a product specifically labeled safe for acrylic or use a diluted white vinegar solution (1:1 with water) and let it sit briefly before wiping. If the stain is stubborn, repeat in short intervals rather than soaking aggressively, since prolonged exposure can damage finishes. Rinse thoroughly afterward and dry the surface to prevent new water spots.
How can I clean black mold or mildew stains on acrylic tubs effectively?
First, remove loose residue by scrubbing lightly with a damp microfiber cloth. Then apply a bathroom cleaner safe for acrylic—often hydrogen peroxide-based options work well—follow the label directions and allow it to dwell for several minutes before wiping. Rinse well and improve ventilation to reduce recurring mildew buildup.
Why do acrylic bathtub stains come back even after cleaning, and how can I prevent them?
Stains often return because residue from hard water, soap scum, or cleaning chemicals remains in tiny surface pores or along caulk and seams. Dry the tub after each use, and wipe down weekly with a mild cleaner to prevent mineral buildup. Avoid harsh chemicals like bleach, ammonia, or abrasive powders unless the label confirms they’re safe for acrylic.
Which cleaners are best for acrylic bathtub stains, and which should I avoid?
The best options are non-abrasive, acrylic-safe products such as baking soda paste, mild dish soap, and specialized acrylic bathtub cleaners. Hydrogen peroxide-based cleaners can be effective for mildew, while diluted vinegar helps with mineral stains when used briefly. Avoid steel wool, scouring pads, and harsh solvents or strong bleach/ammonia cleaners, as they can scratch or permanently haze acrylic.
📅 Last Updated: November 09, 2026 | Topic: how to clean acrylic bathtub stains | Content verified for accuracy and freshness.
References
- https://www.epa.gov/mold/mold-cleanup-remediation-and-health-effects
- https://www.cdc.gov/mold/cleanup/index.html
- https://www.cdc.gov/niosh/topics/bleach/
- https://www.cdc.gov/coronavirus/2019-ncov/community/disinfecting-building-facility.html
- https://www.who.int/publications/i/item/cleaning-and-disinfection-of-environmental-surfaces-in-the-context-of-covid-19
- Acrylic
- Soap scum
- https://scholar.google.com/scholar?q=how+to+clean+acrylic+bathtub+stains Google Scholar
- https://scholar.google.com/scholar?q=acrylic+surface+cleaning+mildew+soap+scum Google Scholar
- https://scholar.google.com/scholar?q=nonporous+surface+cleaning+bleach+solution+mold Google Scholar
