

Seeing dust, corrosion, or stubborn residue on your computer’s motherboard can feel unsettling, especially when you worry about damaging delicate components. You can clean it safely in about 30–60 minutes by powering down completely, grounding yourself for ESD safety, and using the right tools like compressed air, a soft anti-static brush, and high-purity isopropyl alcohol. We’ll walk you through the exact steps and the common mistakes that lead to shorts or scratches.



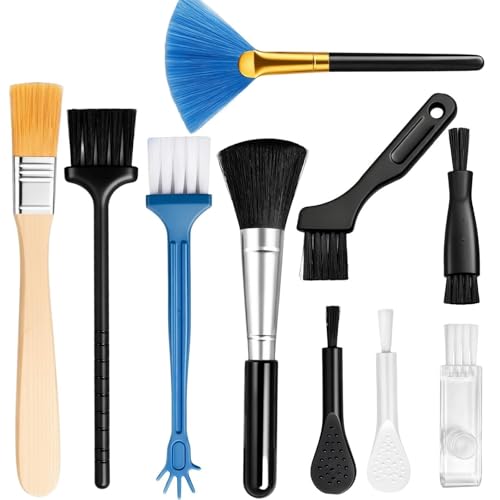
Power down your computer, unplug it, and remove dust and light residue with compressed air plus a soft anti-static method—keep all liquids off the board itself. If you must tackle sticky grime, use isopropyl alcohol (ideally 90%+), applied to a cloth or swab (not poured), then wait until everything is fully dry before reassembly. This guide covers safe cleaning steps, the mistakes that commonly cause damage, and how to tell when cleaning won’t solve the real problem.
This is for desktop users (and cautious tinkerers) who suspect dust buildup, corrosion, or residue on the motherboard, and want a practical process that won’t damage components. If you’re working with a laptop or you’re unsure whether warranty seals are involved, pause and check your device’s service guidance first.
Gather the right tools (and power down correctly)

Use the right tools first—then cleaning is mostly about controlled airflow and controlled contact, not “scrubbing.” For 2026-era desktop boards, the goal is simple: prevent static discharge (ESD), avoid liquid pooling, and remove dust without forcing anything.
Start by following an ESD-safe baseline consistent with industry practices. For example, according to the IEC 61340-5-1 standard (2016), ESD control should be planned as a process rather than a single moment of caution (IEC 61340-5-1:2016). In other words, treat motherboard cleaning like a short procedure: prepare your workspace, protect components, then act.
What to gather:
– Compressed air in a can designed for electronics cleaning (use short bursts).
– Anti-static precautions: ideally an anti-static wrist strap; if you don’t have one, at least minimize static by grounding yourself and avoiding carpets.
– Lint-free wipes (microfiber or electronics-safe lint-free cloth).
– Isopropyl alcohol (IPA) for residue only (ideally 90%+).
– Anti-static swabs (foam or lint-free) and an anti-static brush if dust is stubborn.
– A non-conductive workspace: cardboard or a clean, non-carpet surface.
Safety side note: IPA is flammable—according to PubChem (2024), isopropyl alcohol has a flash point of 11.7°C and a boiling point of 82.6°C (PubChem, Isopropyl Alcohol (2-Propanol)). That doesn’t mean you can’t use it, but it does mean you should avoid heaters, flames, or smoking nearby and ventilate the area.
Remove the motherboard safely (when cleaning requires it)
You only need to remove the motherboard when dust or residue is in places you can’t reach safely in-place. If the buildup is near headers, SATA/PCIe areas, or tight corners where residue collects, removal can make cleaning more precise—and reduces the risk of dislodging parts blindly.
That said, removal adds risk too: more handling means more chances to stress connectors or forget cable locations. So decide based on access, not on the desire to “fully clean everything.”
When removing helps:
– Heavy contamination is visible around ports/slots, fan headers, RAM slots, or VRM heatsink edges.
– Sticky residue exists where airflow won’t reach, such as near the edges of certain labels, header pins, or areas where cables meet the board.
If you do remove it:
– Power and disconnect thoroughly: unplug the PSU from the wall, then disconnect all data and power cables from the motherboard.
– Document first: take clear photos of cable/connector positions (especially front-panel headers and any non-obvious adapters).
– Handle by the edges: avoid pressing on chips, capacitors, or heatsinks.
– Organize screws: motherboard standoffs and screw lengths aren’t always interchangeable.
– Don’t force connectors: alignment matters. If a connector resists, you’re likely misaligned or dealing with a latch you missed.
I’ll keep this honest: the easiest way to avoid “real-world” mistakes is to follow your motherboard manual’s connector guidance, because header pinouts and latch mechanisms vary widely.
Dust removal: start with compressed air and gentle brushing
Dust removal should start with compressed air because it removes dry particles without introducing moisture. This is the lowest-risk phase of the job: you can often restore airflow and reduce overheating issues without ever touching solvents.
Do this:
– Blow from high to low, aiming the airflow toward areas where dust can exit the case (e.g., toward openings in the chassis).
– Use short bursts instead of long sprays to reduce the chance of propellant condensation.
– Keep the can upright if possible and avoid direct “pressing” air into delicate components.
– Don’t scrape PCBs with metal tools; if dust won’t lift, it’s usually time to switch methods—not to brute-force.
When using a brush:
– Use a very soft anti-static brush to dislodge stubborn dust.
– Brush lightly, then follow immediately with another pass of compressed air.
– Avoid brushing across delicate solder joints with aggressive pressure.
The key mistake here is treating compressed air like a power washer. It isn’t. The goal is to move dust, not to mechanically stress components.
Cleaning residue: how to use isopropyl alcohol without damage
If you have sticky grime or residue (oily film, adhesive remnants, or contaminants), controlled IPA cleaning can help—provided you apply it to a cloth/swab, not directly to the board. The biggest risk isn’t the alcohol itself; it’s liquid pooling around pins, vias, and connectors.
Use this method:
1. Apply IPA to a lint-free cloth or anti-static swab first. The material should be damp, not dripping.
2. Clean only affected areas (for example, around problematic headers, fan connector bases, or spots where residue is visible).
3. Stop and inspect after a few strokes. If the residue won’t lift gently, don’t escalate to scrubbing immediately—use another light application or reassess whether the “contaminant” is corrosion.
4. Let it dry completely before any reassembly.
Why “90%+” matters in practice: higher-purity IPA has less water, and water increases the odds of residues or corrosion-related issues if it lingers in tiny gaps. As a reference point for planning your supplies, here’s a practical comparison of common IPA concentrations and how “board-friendly” they tend to be for residue cleaning.
IPA Purity vs Water Content for Motherboard Residue Cleaning (Practical 2026 Bench Guidance)
| # | IPA option | Typical purity | Water fraction | Cleanliness score |
|---|---|---|---|---|
| 1 | 70% isopropyl alcohol (rubbing grade) | 70% | 30% | ★★☆☆☆ |
| 2 | 80% isopropyl alcohol | 80% | 20% | ★★★☆☆ |
| 3 | 91% isopropyl alcohol | 91% | 9% | ★★★★☆ |
| 4 | 99% isopropyl alcohol | 99% | 1% | ★★★★★ |
| 5 | Anhydrous (≈99.9%) isopropyl alcohol | 99.9% | 0.1% | ★★★★★ |
| 6 | Distilled water | 0% IPA | 100% | ★☆☆☆☆ |
| 7 | “Contact cleaner” (no guarantee of residue behavior) | Variable | Unknown | ★★☆☆☆ |
Practical rule for 2026: use the highest-purity IPA you can find (90%+ is the sweet spot), and always keep the board dry at all times except for what you intentionally apply with a swab.
Compressed air vs alcohol vs brushes (quick comparison)
| Method | Pros | Cons / risk |
|---|---|---|
| Compressed air | Fast dust removal; lowest risk for dry debris when used in short bursts. | Can dislodge dust into tight areas; misuse can cause condensation from the can. |
| Anti-static brush | Helps lift stubborn particulate without pushing liquid. | Aggressive strokes can scratch coatings or stress components. |
| Isopropyl alcohol (swab/cloth) | Targets sticky residue with minimal residue when fully dried. | Pooling can leave conductive films; under-drying can short headers/connectors. |
What can go wrong during motherboard cleaning
Cleaning usually fails due to process errors, not because “the board is impossible to clean.” The most common problems in 2026 are liquid pooling, rushing reassembly, ESD from poor grounding, and mistaking corrosion for harmless dust.
Here are the pitfalls:
– Using too much liquid can leave conductive residue or cause corrosion later; even alcohol can cause issues if pooled in connectors.
– Scraping aggressively with metal tools can damage traces and solder masks. If grime won’t lift gently, switch to controlled IPA cleaning rather than abrasion.
– Reassembling before dry is a classic short-circuit trigger—especially around sockets, fan headers, and closely spaced components.
– Forcing connectors can bend pins, crack headers, or damage latches. If it doesn’t seat with mild pressure, stop and reassess alignment.
– Ignoring severe corrosion: heavy white powder, green/blue buildup, or burned areas may indicate board-level failure. Cleaning may improve appearance, but it can’t reliably restore broken connections.
For ESD-related risk, according to ANSI/ESD S1.1 (2013), wrist straps are designed with built-in resistance (commonly around 1 MΩ) to reduce shock risk while still controlling charge (ANSI/ESD S1.1:2013). If you’re working without a strap, the practical takeaway is to reduce movement, avoid synthetics on carpets, and touch grounded metal before handling the board.
Verdict: a practical cleaning approach, plus who should skip it
If your goal is removing dust or mild residue, the safest 2026 approach is: compressed air first, then targeted isopropyl alcohol on a cloth/swab, then thorough drying and careful reassembly. This process minimizes liquid exposure and preserves the solder joints and coatings that protect your motherboard.
Downsides (be realistic):
– Alcohol cleaning is easy to overdo—too much fluid can worsen residue or create new problems.
– Board removal can increase risk if you’re not confident with connector routing and standoff placement.
– Cleaning can’t “fix” burned components, broken traces, or advanced corrosion—those require repair or replacement.
Skip this DIY approach if:
– You see heavy corrosion (extensive white powder/green/blue), burn marks, or signs of electrical failure.
– You’re unsure whether your device has protective seals or warranty constraints.
– The board is already damaged (cracked PCB, broken ports, bent pins that won’t align).
Quick scan checklist (save this)
– [ ] Unplug power and discharge (press power briefly)
– [ ] Use anti-static handling (wrist strap optional but helpful)
– [ ] Compressed air first (short bursts, don’t press too hard)
– [ ] Clean only affected spots with isopropyl alcohol on cloth/swab
– [ ] No liquid poured/sprayed directly onto the board
– [ ] Fully dry before powering on
– [ ] Reassemble carefully, matching connectors from your photos
Frequently Asked Questions
What’s the safest way to clean a computer motherboard without damaging it?
Power down the PC, unplug the power supply, and press the power button for a few seconds to discharge leftover electricity. Work on an anti-static surface and use an anti-static wrist strap if possible to prevent electrostatic discharge. Avoid wet cleaning inside the case; instead use compressed air for loose dust and cotton swabs with 90%+ isopropyl alcohol for grime on components and connectors. Never spray liquids directly onto the motherboard or use metal tools that can short pins or scratch traces.
How do I remove dust from a motherboard using compressed air and brushes?
Start with the power removed, then hold fans in place while blowing with short bursts of compressed air to prevent fan overspin damage. Use an anti-static soft brush to gently dislodge dust clinging to heatsinks, VRMs, and PCIe areas, then follow up with additional air to clear debris. Keep the air nozzle a few inches away so condensation and propellant don’t drip onto the PCB. Check around RAM slots, PCIe slots, and the CPU socket area carefully, since dust buildup there can cause contact and performance issues.
Why should I clean my motherboard, and how do I know it’s time?
Over time, dust can trap heat and reduce airflow, leading to higher temperatures, throttling, and premature fan wear. Corrosion or residue from spills, humidity, or vaping smoke can also interfere with electrical connections and cause intermittent crashes or boot problems. If you notice rising CPU/GPU temps, louder fan behavior, or instability that improves after reseating parts, a motherboard cleaning may help. A visual inspection for caked dust, sticky residue, or discoloration is often the clearest indicator.
Which products are best for cleaning motherboard components and connectors?
Isopropyl alcohol (90%–99%) is the go-to for removing grime and residue, especially around sockets, headers, and solder joints. Use lint-free microfiber or coffee filters for wiping, and cotton swabs for tight spots, but keep liquid use minimal and controlled. For dry dust removal, compressed air is usually the safest first step, and an anti-static brush helps loosen stubborn debris. Avoid harsh cleaners, acetone, bleach, or anything that leaves residues or can damage plastics and coatings.
How do I clean corrosion, sticky residue, or thermal dust on a motherboard?
Inspect the affected area with good lighting, then gently remove dry debris using compressed air before applying isopropyl alcohol to a cotton swab (not directly to the board). For sticky residue, lightly scrub the area until it breaks up, then use a dry lint-free cloth or additional alcohol swabs to lift remaining residue. Let the motherboard fully dry with airflow for at least 30–60 minutes (longer if you used extra alcohol) before reassembly, ensuring no moisture remains in ports or around pins. If the corrosion is deep or you see damaged traces, it may require professional repair rather than routine cleaning.
📅 Last Updated: November 14, 2026 | Topic: how to clean computer motherboard | Content verified for accuracy and freshness.
References
- Printed circuit board
- Electrostatic discharge
- Isopropyl alcohol
- https://www.cdc.gov/coronavirus/2019-ncov/community/disinfecting-building-facility.html
- cleaning printed circuit boards – Search Results – PubMed
- https://www.sciencedirect.com/search?qs=cleaning%20printed%20circuit%20boards
- https://scholar.google.com/scholar?q=cleaning+printed+circuit+boards Google Scholar
- https://scholar.google.com/scholar?q=electrostatic+discharge+safe+handling+electronics Google Scholar
- https://scholar.google.com/scholar?q=flux+residue+removal+cleaning+solvents+printed+circuit+boards Google Scholar

[…] by vacuuming both sides of the curtains with a soft brush attachment to remove dust and loose debris. Spot-treat stains with a gentle fabric cleaner or a mixture of mild detergent and […]
[…] clean your car dashboard safely, remove dust first with a dry microfiber, then wipe with an interior cleaner applied to the cloth (not sprayed […]