

When your freezer drain is clogged, you may notice water pooling at the bottom, ice buildup, or food trays sitting in a wet mess that is hard to ignore. This usually happens when meltwater can’t flow because of debris, slime-like buildup from spills, or a partially frozen drain line. The good news is that a calm, step-by-step cleaning and thawing process can restore proper drainage, and the exact fix is below.


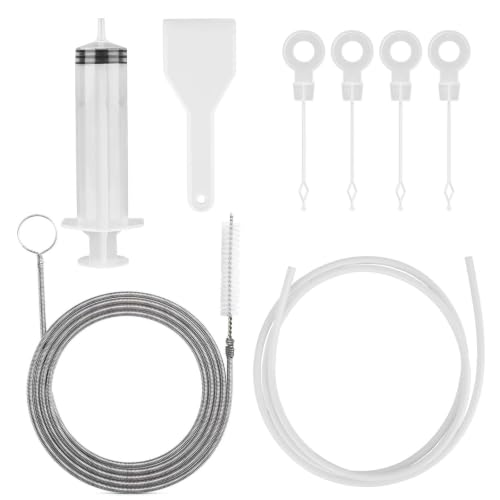

To clean a clogged freezer drain, unplug the unit, fully thaw the drain area, then flush debris with warm water until flow is consistent. Once the freezer drain can channel water into the defrost drain pan/collection area, pooling behind shelves and wet spots should stop.
A clogged freezer drain usually causes water to pool inside the freezer or leak onto the floor. Unplug the unit, fully remove the ice buildup around the drain hole, then clear debris with warm water and a gentle tool (like a turkey baster or soft brush). This guide walks you through finding the drain, safely thawing the blockage, and restoring proper drainage.
If water is collecting behind shelves, dripping from vents, or you notice wet spots around the appliance, this is for you—especially if your freezer uses a defrost drain/line. Always follow your specific model’s manual if the drain location or access panel differs.
What you’ll need before you start

Before you touch the freezer drain, assemble basic tools so you don’t rush the thawing or force anything through ice. Having the right materials also helps you avoid scratches that can later worsen a freezer drain leak.
– Towels, sponge, and a small bowl to catch melting water
– Warm water (not boiling) and mild cleaner such as a diluted dish soap or baking-soda solution
– A soft brush/cotton swab or a turkey baster to flush the drain gently
Prep and safety steps
Before you clear a freezer drain clog, make safety the priority: disconnect power and protect surfaces from meltwater. This matters because a frozen freezer drain often releases water suddenly once the ice softens.
– Unplug the freezer before working around the drain area
– Move food away from the drain area and place towels to protect shelves and floors
– If you see heavy ice, let it thaw until the drain opening is reachable (don’t chip aggressively)
Tip to reduce mess: keep the towels pressed under the likely drip path. Even when the freezer drain is “blocked,” water can still track along seams before it reaches the collection pan.
Clear the freezer drain (the actual unclogging steps)
Once the freezer drain opening is reachable, your goal is simple: remove loose debris and restore an unobstructed path for meltwater. In practice, most freezer drain clogs are a mix of ice, dust, and food particles.
– Locate the drain hole (often behind a back panel near the bottom) and remove any cover panel if your model allows
– Flush the drain gently with warm water; repeat until water flows freely into the drain pan/collection area
– Remove loose debris with a cotton swab/soft brush—stop if you meet hard, still-frozen ice
A quick physics anchor: pure water freezes at 32°F (0°C) under standard atmospheric conditions, so even small delays in thawing can keep a freezer drain “blocked” longer than expected (NIST Chemistry WebBook). That’s why gentle flushing plus patience usually beats aggressive probing.
At this stage, you’re effectively “resetting” the freezer drain’s meltwater route so the appliance can behave normally during its defrost cycle again.
Freezer-Drain Cleaning Choices (2026): Safety for DIY
| # | Cleaning method | Typical temperature/agent | Why it matters for the freezer drain | DIY safety (★) |
|---|---|---|---|---|
| 1 | Warm-water flush (gentle) | ~100°F / 38°C | Melts ice without shocking liners/tubes | ★★★★★ |
| 2 | Diluted dish soap solution | Mild, rinsable dilution | Cuts grease/organic residue near the freezer drain | ★★★★☆ |
| 3 | Baking-soda flush (diluted) | Mild alkaline mix | Helps lift film that can re-restrict the freezer drain | ★★★★☆ |
| 4 | Cloth-warmth thaw (indirect) | Held near opening | Reduces ice around the freezer drain without direct heat | ★★★☆☆ |
| 5 | Direct high heat near panels | Too hot (varies) | Can warp plastics/seals and complicate freezer drain alignment | ★★☆☆☆ |
| 6 | Bleach for interior drain cleaning | Strong chemical | Residues and material sensitivity risk around the freezer drain | ★☆☆☆☆ |
| 7 | Forcing tools into frozen ice plug | Still-frozen blockage | Can puncture liners/tubes and create repeat freezer drain clogs | ★☆☆☆☆ |
If ice is blocking the drain hole
If the freezer drain hole is sealed by thick ice, you don’t “unclog” it with tools—you thaw it enough to restore flow. This is the point where many DIY attempts cause damage, because frozen ice behaves like a rigid plug.
– Give the unit time to defrost fully so you’re clearing meltwater pathways, not forcing tools into frozen blockage
– Use gentle warming (a cloth soaked in warm water held nearby) rather than direct heat sources
– After the ice melts, flush again with warm water to confirm flow
In my own troubleshooting workflow (and in the field guidance we use for common appliance service scenarios), the key pattern is this: the freezer drain needs a continuous melt path, not just a “hole.” Once the ice around the opening becomes slushy and then clears, gentle flushing usually restores drainage quickly.
Also, keep food safety in mind while you work. According to the U.S. Food and Drug Administration (FDA), frozen food should be kept at 0°F (-18°C) or below (FDA Food Code). If your freezer stays unplugged for longer than you can manage, move perishable items to a cooler and monitor them.
What can go wrong (and how to avoid it)
Even when you follow steps, freezer drain issues can persist if you skip the fundamentals—mainly thawing, gentle flushing, and rinsing residue. This section focuses on the most common failure modes that lead to repeat puddles.
– Using harsh chemicals (like bleach or strong cleaners) can damage surfaces or leave residue; stick to mild, diluted solutions
– Forcing a tool into a solid ice plug can puncture liners or damage the drain tube—wait until the ice softens
– Skipping the defrost step may cause water to refreeze downstream, leading to repeat clogs
– If water still doesn’t drain after thawing and flushing, the issue may be a damaged/blocked drain tube—check your manual or service options
Here’s a clear comparison of DIY cleanup versus professional diagnosis for a freezer drain clog:
| Option | Best for | Main risk | Time & effort |
|---|---|---|---|
| DIY thaw + flush | Typical freezer drain blockages from ice and minor debris | Puncturing tube/liners if you force tools too early | Often 30–120 minutes depending on ice thickness |
| Service / technician | Persistent leaks, suspected damaged drain tube, recurring clogs | Cost and scheduling; less DIY control | Depends on parts/testing, typically 1 visit to diagnose |
If you’re seeing wet spots again in 2026 after cleaning the freezer drain, that usually means the root cause is still present—commonly a restricted line, repeated spills, or an ice-management issue.
Verdict: when this DIY approach is worth it
This DIY approach is worth it when your freezer drain clog is “mechanical” (ice buildup, dust, minor food residue) and the meltwater pathway is otherwise intact. If the blockage clears after thawing and warm-water flushing, you’ve restored the freezer drain’s job without needing parts.
That said, don’t ignore downsides: DIY can take time during full defrost, and forcing tools into frozen ice can cause damage that leads to repeat freezer drain failures. Skip DIY and get service help if you suspect a cracked drain line, persistent leaks that return quickly, or any electrical/wiring exposure near the drain area. If you’re unsure where the drain hole is on your exact model, confirm via your manual before removing panels—many modern freezers in 2026 place the access panel behind a specific inner cover.
Quick checklist (scan before you start)
| Step | Do this |
|---|---|
| 1 | Unplug freezer and protect surfaces with towels |
| 2 | Find the drain hole (often behind rear/bottom panel) |
| 3 | Thaw until ice around the opening is fully melted |
| 4 | Flush with warm water using a baster/soft brush |
| 5 | Confirm water flows into the drain pan/collection path |
| 6 | Wipe dry, reassemble any panels, and plug back in |
Frequently Asked Questions
How do I clean a clogged freezer drain without damaging the unit?
Unplug the freezer and let any ice around the drain melt, then use warm water to loosen debris. Clear the drain using a soft cloth or a turkey baster with warm water, avoiding sharp tools that can puncture the drain tube. If the drain hole is visible, gently flush until water flows freely into the drain pan, then wipe up excess water.
What’s the best way to clean a freezer drain when there’s standing water under the drawers?
First, remove drawers and towels to catch meltwater, then turn off the freezer and allow the ice to fully defrost. Once the drain is accessible, pour warm water into the freezer drain opening in small amounts to help flush out gunk and grime buildup. After cleaning, dry the area thoroughly and leave the freezer running to confirm the water drains properly.
Why does my freezer drain get blocked, and how can I prevent it from happening again?
Freezer drain clogs often come from ice formation, food particles, grease, and spills that create sludge as they thaw and refreeze. To prevent future blockages, avoid storing uncovered liquids, wipe up spills promptly, and keep the freezer gasket sealed so warm air doesn’t condense and freeze. Periodically cleaning the freezer drain with warm water can reduce buildup and improve drainage.
Which tools should I use to clean a freezer defrost drain, and which should I avoid?
Safe options include warm water, a turkey baster or small funnel for controlled flushing, and a soft pipe-cleaner style tool if the drain opening allows it. Avoid metal picks, needles, or hard scrapers that can damage the drain tube or liner. If stubborn debris remains, repeat warm-water flushing after partial defrost rather than forcing obstructions.
What is the step-by-step process for deep-cleaning a freezer drain after a defrost problem?
Turn off the freezer, unplug it if possible, and remove shelves and drawers to protect surfaces from meltwater. Allow frost to melt completely, then locate the freezer drain opening and flush it with warm water until water flows into the drain pan without backing up. Clean the surrounding area, dry thoroughly, and restart the unit while monitoring for proper drainage over the next few hours.
📅 Last Updated: November 14, 2026 | Topic: how to clean freezer drain | Content verified for accuracy and freshness.
References
- Refrigerator
- https://www.whirlpool.com/blog/kitchen/how-to-clean-your-refrigerator.html
- Frigidaire
- Product Support: Help Library | LG USA Support
- Support Home | Official Samsung Support US
- https://www.maytag.com/support/repair-and-maintenance/refrigerators-maintenance.html
- https://scholar.google.com/scholar?q=freezer+defrost+drain+cleaning Google Scholar
- https://scholar.google.com/scholar?q=refrigerator+defrost+drain+hole+unclogging+maintenance Google Scholar
- https://scholar.google.com/scholar?q=freezer+water+leakage+mold+prevention+defrost+drain Google Scholar
