
How to Clean Your Keyboard Safely
To clean your keyboard safely, first power it down and unplug it or remove batteries if wireless. Gently shake or use compressed air to clear loose debris between keys. Wipe the surface with a microfiber cloth lightly dampened with water or isopropyl alcohol for disinfection, avoiding excess moisture. For mechanical keyboards, remove keycaps carefully for deeper cleaning. Let it dry fully before reconnecting to avoid damage. Keep going, and you’ll discover even better ways to maintain your keyboard’s performance.
Gather the Necessary Cleaning Supplies

Before you start cleaning your keyboard, you’ll need to gather a few essential supplies. Having the right cleaning tools guarantees you maintain keyboard hygiene effectively without risking damage. You’ll want a soft microfiber cloth to wipe away dust and oils gently. A can of compressed air is perfect for blowing out dirt trapped between keys. Isopropyl alcohol (70% or higher) on a cotton swab helps disinfect surfaces without leaving moisture behind. Avoid harsh chemicals that could harm your keyboard’s finish. These cleaning tools give you freedom to keep your workspace fresh and healthy. Once you have everything ready, you’re set to approach cleaning with confidence and care, taking control of your keyboard hygiene while protecting your device.
Power Down and Unplug Your Keyboard
Before you start cleaning, make sure to turn off your device completely. If you’re using a wired keyboard, unplug the cable from your computer. For wireless keyboards, don’t forget to remove the batteries to avoid any accidental inputs or damage.
Turn Off Your Device
Although it might seem like a small step, turning off your device and unplugging your keyboard is essential for safe cleaning. This simple action guarantees keyboard safety by preventing accidental key presses and protecting your device from short circuits or electrical damage during cleaning. Before you start, shut down your computer or laptop completely, giving you full control over the process without interruptions. Unplugging your keyboard disconnects any power source, reducing risks and letting you work freely without worry. Prioritizing this step is smart device maintenance, keeping your technology in top shape and extending its lifespan. Taking these precautions empowers you to clean confidently, preserving both your keyboard’s functionality and your freedom to work or play without hassle.
Disconnect Keyboard Cable
When you’re ready to clean, start by disconnecting your keyboard cable from your computer or device. This simple step is essential for keyboard safety, preventing accidental key presses or electrical issues while you clean. Unplugging also gives you the freedom to move your keyboard freely without worrying about damaging the cable or port. Keep cable management in mind—gently untangle or coil the cord to avoid stress or sharp bends that could harm the wires inside. If your cable is detachable, remove it carefully, then clean both ends to maintain a good connection. By disconnecting your keyboard cable, you protect your device and guarantee a safer, more effective cleaning process, setting the stage for a fresh, worry-free workspace.
Remove Wireless Batteries
If you’re using a wireless keyboard, unplugging it means more than just disconnecting cables—you’ll also need to power it down and remove the batteries. This step guarantees safety and preserves your device’s longevity while embracing the wireless advantages freedom offers. Here’s how to handle the battery types and power down properly:
- Locate the battery compartment, usually on the back or underside.
- Identify the battery types (AA, AAA, or rechargeable) to handle them correctly.
- Power off the keyboard before removing batteries to avoid damage.
- Carefully remove batteries to prevent corrosion or leakage.
- Store batteries separately if you’re not cleaning immediately.
Taking these steps frees you from power concerns, letting you clean worry-free and keep your wireless keyboard in top shape.
Remove Loose Debris From Between Keys
Dust and crumbs can quickly accumulate between your keyboard keys, affecting both its appearance and functionality. To regain control, start by turning your keyboard upside down and gently shaking it to dislodge loose debris. If stubborn particles remain, consider keycap removal for a deeper clean. Carefully pop off keycaps using a keycap puller or your fingers, but only if you’re confident it won’t damage your keyboard. This lets you access hidden dirt trapped beneath. Use a soft brush or compressed air to sweep out the debris collection beneath the keys. Doing this regularly keeps your keyboard feeling fresh and responsive, freeing you from sticky keys or missed presses. Taking these small steps guarantees your keyboard stays in top shape without hassle.
Clean the Surface With a Soft Cloth
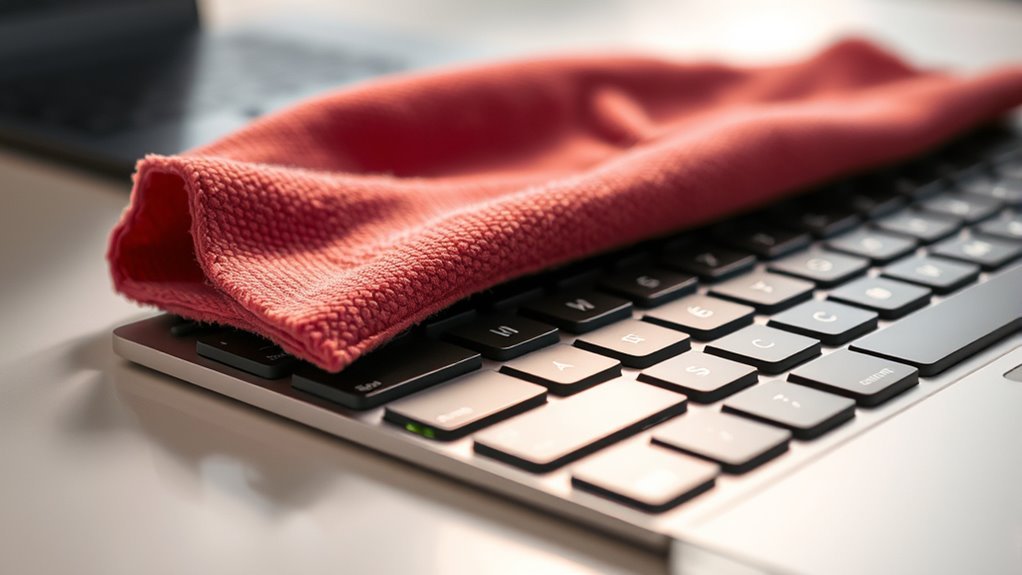
Once you’ve cleared out debris from between the keys, it’s time to focus on the keyboard’s surface. You want to keep it clean without risking damage. Grab a microfiber cloth—it’s gentle and won’t scratch. Avoid spraying any liquid directly on the keyboard; instead, lightly dampen the cloth with your preferred cleaning solution. Here’s how to proceed:
After removing debris, gently wipe the keyboard surface with a lightly dampened microfiber cloth to avoid damage.
- Use a soft microfiber cloth to wipe down the keys and surrounding areas.
- Lightly dampen the cloth with water or a mild cleaning solution.
- Wipe in gentle, circular motions to lift dirt and oils.
- Avoid excess moisture to prevent seepage into the keyboard.
- Let the keyboard dry completely before plugging it back in or using it.
This method keeps your keyboard fresh while preserving its freedom to perform.
Use Isopropyl Alcohol for Deep Cleaning
Anyone looking to give their keyboard a thorough clean can turn to isopropyl alcohol. This powerful yet safe solution offers isopropyl benefits like quick evaporation and effective germ elimination without damaging sensitive electronics. To make the most of these cleaning techniques, dampen a lint-free cloth or cotton swab with 70% isopropyl alcohol. Gently wipe the keys and keyboard surface, focusing on crevices where dirt and oils hide. Avoid pouring alcohol directly on your keyboard to prevent moisture damage. This method frees you from sticky residues and stubborn grime, restoring your keyboard’s appearance and hygiene effortlessly. By using isopropyl alcohol thoughtfully, you maintain your device’s longevity while enjoying a clean, responsive typing experience. This simple step gives you control over your tech’s upkeep with minimal hassle.
Clean Mechanical Keyboards Safely

While isopropyl alcohol works well for general cleaning, mechanical keyboards need a bit more care because of their complex design and individual key switches. To keep your keyboard in top shape and enjoy mechanical switch care, follow these steps:
- Unplug your keyboard before starting to avoid damage.
- Use a keycap puller to gently remove keycaps for thorough cleaning.
- Clean keycaps separately with mild soap and water; avoid harsh chemicals.
- Use compressed air or a soft brush to clear dust and debris from switches.
- After cleaning, replace keycaps carefully to maintain proper function.
This approach lets you maintain freedom over your keyboard’s feel and performance while ensuring your mechanical keyboard stays clean without risking damage during keycap replacement.
Allow the Keyboard to Dry Completely
You’ll want to let your keyboard dry completely before plugging it back in to avoid any moisture damage. Rushing this step can cause short circuits or corrosion inside your device. Giving it enough time to air dry guarantees your keyboard stays safe and functional.
Importance of Drying Time
Even if you’re enthusiastic to use your keyboard again, it’s essential to let it dry completely before plugging it back in. Skipping proper drying time risks internal damage and short circuits. To guarantee effective drying, consider these drying techniques for moisture prevention:
- Place the keyboard upside down on a towel to let excess liquid drain naturally.
- Use a fan or gentle airflow to speed evaporation without causing damage.
- Avoid using direct heat sources like hairdryers, which can warp components.
- Give it at least 24 hours in a warm, dry environment for thorough drying.
- Check for any residual dampness before reconnecting to prevent electrical risks.
Patience here means freedom from costly repairs and a longer-lasting keyboard you can rely on.
Preventing Moisture Damage
Since moisture can severely damage your keyboard’s internal components, it’s vital to let it dry completely before you reconnect it. Whether you’re dealing with routine cleaning or accidental liquid spills, moisture protection is important to keep your device functioning freely. After wiping down your keyboard, give it ample time—usually several hours or overnight—to air out in a dry, well-ventilated space. Avoid using heat sources like hairdryers, which might warp parts or push moisture deeper inside. By patiently allowing your keyboard to dry fully, you prevent corrosion and electrical shorts that can limit your freedom to work or play. Taking this simple step guarantees your keyboard stays reliable, so you can keep typing without worrying about hidden moisture damage.
Frequently Asked Questions
Can I Use Compressed Air Cans to Clean My Keyboard?
You can definitely use compressed air cans, or air canisters, for keyboard maintenance—they’re great for blasting out dust and crumbs without taking your keyboard apart. Just hold the can upright and spray in short bursts to avoid moisture buildup. It’s a quick, free way to keep your keyboard fresh and functioning smoothly. Just don’t shake the can or hold it upside down, and you’ll have your keyboard clean in no time!
How Often Should I Clean My Keyboard?
You should set a cleaning frequency based on how much you use your keyboard and your environment. If you’re typing daily, aim for a quick wipe-down once a week and a deeper clean every month for proper keyboard maintenance. This keeps grime and dust at bay, so your device stays responsive and pleasant to use. Staying consistent with cleaning frequency lets you enjoy freedom from sticky keys and unexpected malfunctions.
Are Keyboard Covers Effective for Keeping Keyboards Clean?
You might think keyboard covers get in the way, but they’re actually great for keyboard hygiene. They act as a barrier against dust, crumbs, and spills, making cleanup way easier. Plus, covers come in various materials like silicone or TPU, so you can pick one that feels just right without sacrificing your freedom to type naturally. Using a cover means you’re protecting your keyboard without limiting your comfort or style.
Can I Use Household Cleaners Like Bleach or Ammonia?
You shouldn’t use harsh cleaning products like bleach or ammonia on your keyboard because they can damage the keys and electronics. Instead, opt for gentle disinfecting methods like isopropyl alcohol wipes or sprays with at least 70% alcohol content. These will effectively kill germs without harming your device. Remember, using the right cleaning products lets you keep your keyboard fresh and functional, giving you the freedom to work comfortably and confidently.
Is It Safe to Clean a Wireless Keyboard the Same Way?
You might think cleaning a wireless keyboard is just like any other, but it’s not quite that simple. While freedom calls for easy cleaning techniques, wireless keyboards need extra care to avoid damaging sensitive electronics. Instead of soaking or harsh sprays, use a slightly damp cloth and gentle cleaning solutions. This way, you protect your device’s freedom to connect while keeping it fresh and functional without risking harm.


