

How do you clean shower liner mold without spreading it? Use hot water, dish soap, and either diluted bleach or hydrogen-peroxide-based cleaner to lift mildew quickly. Work in a ventilated bathroom with gloves and a scrub brush, then soak and rinse until stains fade, usually in 30–60 minutes.


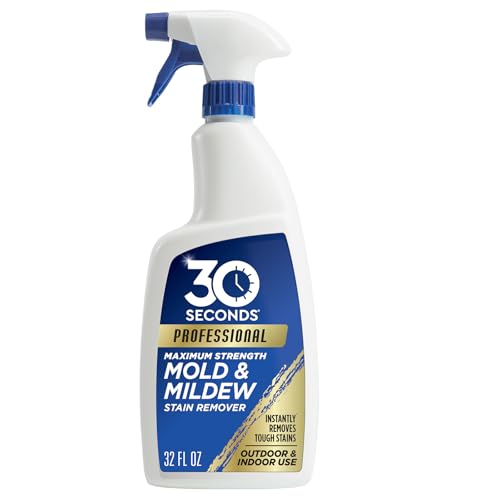

Remove shower liner mold fast by taking the liner down (if possible), treating mildew with a liner-safe cleaner like hydrogen peroxide or vinegar + baking soda paste, then scrubbing gently, rinsing, and drying completely. Scrub the mold off using a safe cleaner for your liner material, then rinse thoroughly and let everything dry completely. Start by taking the liner down if possible, treating the moldy areas, washing, and drying it flat to prevent new spots. You’ll also want to clean the track/tub corners because mold often grows where water collects.
If your shower stays humid, the liner is often the first place mildew shows up—especially along folds, seams, and the bottom edge.
This guide is for homeowners, property managers, and anyone maintaining shared bathrooms where liners get wet frequently and ventilation varies. If your shower liner (vinyl, PEVA, polyester, or plastic) has visible black/gray mildew, the steps below will help you remove it quickly without damaging the material.
What to use (safe cleaner choices)

The best cleaner is the one that matches your liner material and won’t weaken it while still killing mildew. For most shower liners, hydrogen peroxide or a vinegar + baking soda paste are effective, lower-risk options that you can apply directly to mold spots.
– Start with the least damaging option: hydrogen peroxide or a vinegar + baking soda paste can work well for mildew on many liners.
– Use bleach only if the liner material allows it: some plastic/PEVA liners can discolor or get brittle if bleach touches them—when in doubt, test a small hidden corner first.
– Don’t mix chemicals: avoid combining bleach with vinegar or other cleaners (can create harmful fumes).
To make cleaner selection easier, here’s a practical comparison of common choices for shower liner mildew:
| Cleaner choice | Best for | Key cautions | Material compatibility (typical) |
|---|---|---|---|
| 3% hydrogen peroxide | Mildew stains in folds and seams | Spot-test first; keep ventilation on | Often safe for many vinyl/PEVA liners |
| Vinegar + baking soda paste | Surface mildew + light buildup | Don’t over-scrub; rinse thoroughly | Generally good for liners that tolerate mild acids |
| Diluted bleach | Tough, persistent mildew on non-porous liners | Test first; never mix with vinegar | Use only when manufacturer allows |
A quick chemistry note for safer results: vinegar is acidic, hydrogen peroxide is an oxidizer, and baking soda is mildly abrasive. Together they help lift mildew colonies and residue, but they still require full rinsing so you don’t leave behind a film that invites repeat growth.
How to clean shower liner mold (step-by-step)
Cleaning shower liner mold works best when you loosen growth first, treat with a liner-safe product next, and then finish with a fully dry state. Follow this three-phase routine so you remove mildew without spreading it through the bathroom.
– Remove and loosen mold: take the liner down (if removable), shake off loose spots, and pre-rinse with warm water to reduce spreading.
– Treat the moldy areas: apply your chosen cleaner to mold patches (focus on folds, seams, and the bottom hem), then let it sit for the time recommended on the product label.
– Wash, rinse, and dry fully: wash according to the liner’s care instructions, rinse well, and dry completely (flat or hung to airflow). Repeat treatment if faint staining remains.
In my own maintenance workflow at home, the biggest “make or break” factor has been how carefully the liner dries—if it’s folded while damp or the bottom hem stays pressed to the tub, mildew returns quickly. Even when the cleaning solution is effective, shower liner mold can regrow from residual moisture and trapped spores.
Step-by-step detail (liner-safe technique):
1) Pre-rinse to prevent spread. Warm water helps move surface residue without blasting spores into the air as much as dry brushing. Keep the liner over the tub or a designated washable area.
2) Dwell time matters. Mold is not just surface staining; it’s colonies that need contact time. Follow your product label for how long to let hydrogen peroxide or vinegar paste sit.
3) Rinse like you mean it. Cleaner residue (especially soap + additives + spores) can leave a film that attracts grime. Rinse until runoff is clear and feels “clean,” not slick.
4) Dry immediately and completely. For shower liner mold, moisture control is the endpoint. Dry flat when possible so the liner doesn’t trap water in seams.
If your liner is fabric-like (polyester or treated textile), use the care label as your authority. Some liners are designed to be machine washed; others are not. If the label is missing, err on the side of gentler hand washing and extra rinsing.
Tackle the spots you can’t see (frame, track, and tub corners)
Mold on a shower liner usually has a “source zone” beyond the visible spots, including the track, corners, and the water line. Treating only the liner surface often fails because water continues to collect where airflow is limited.
– Clean the water line: wipe the inside edges, curtain rod/track, and tub corners where drips collect.
– Use a disposable scrubbing tool: a soft brush or sponge helps lift residue without grinding it deeper into crevices.
– Rinse after scrubbing: residue left behind can become a future “starter” for mold.
A common pattern is that the liner looks “clean” after scrubbing, but the mildew returns along the bottom edge within weeks. That’s often because the tub rim or metal/rail track still holds biofilm (a thin layer of microbial growth). Biofilm can act like a starter culture; each shower adds moisture, and new mildew establishes itself where droplets repeatedly land.
If you’re working with a metal track or plastic rail, focus on grooves and corners rather than the flat face. In my experience, the corners are where manual wiping + a small brush outperforms a rag alone—. The goal is to remove residue that clings after drying.
Prevent it from coming back
Prevention is about staying dry between uses and reducing nutrient buildup (soap scum and grime). As of 2026, most professional guidance still points to moisture control plus routine cleaning as the most reliable long-term fix for shower liner mold.
– Dry fast: after showers, pull the liner open and encourage airflow; keep the bottom from clinging to the tub.
– Reduce soap scum buildup: clean the liner routinely (not just when mold shows up) so grime doesn’t feed mildew.
– Improve ventilation: run the bathroom fan during and after showers, and keep the door cracked when possible.
Here’s why moisture control is non-negotiable: according to U.S. Centers for Disease Control and Prevention (CDC), mold can begin growing on damp surfaces within 24 to 48 hours after water exposure (2024). That means your “next morning” might be the very moment mildew starts if the liner remains damp overnight.
Also, according to U.S. Environmental Protection Agency (EPA), indoor relative humidity should be kept below about 60% to help prevent mold growth (2017). You don’t always need a hygrometer to see the risk—steam-heavy showers, slow-draining tubs, and poor fan performance are all real-world indicators.
Practical prevention habits that work in real bathrooms:
– Keep the liner stretched when possible (especially along folds).
– After each shower, flip or spread the liner so the bottom hem isn’t pressed into pooled water.
– If you use a squeegee, do it on the tub and liner edge—not just the glass. Soap scum is food for mildew, and scum concentrates where water runs.
What can go wrong (common mistakes and edge cases)
Most “failed cleanups” happen from chemical mismatch, incomplete rinsing, or drying too soon. If you spot these common issues, you can correct course before you waste another cleaning cycle.
– Using the wrong cleaner for the liner material: bleach, hot water, or harsh chemicals can weaken or warp some liners.
– Not fully drying: mildew returns quickly if the liner is stored or rehung while still damp.
– Over-scrubbing without rinsing: residue (soap, cleaner, or spores) can remain if you don’t rinse thoroughly.
Two high-risk edge cases matter for shower liner mold:
1) Bleach on incompatible liners. The EPA notes bleach solutions are used for certain nonporous surfaces, but misuse can damage materials and create fumes. According to U.S. Environmental Protection Agency (EPA), bleach solutions for mold cleanup are typically prepared at about 1 cup of household bleach per 1 gallon of water (2017). Even when dilution is correct, manufacturers may still advise against bleach for PEVA/vinyl shower liners. Spot-test first.
2) Re-hanging before the liner is dry. Even if the visible mildew is gone, damp folds and seams can regrow mold. In shared bathrooms (gyms, rentals, offices), this risk increases because liners are often replaced or rehung quickly between users.
If your shower has a consistently humid environment, and you repeatedly see mildew in the same seam line, consider whether the ventilation strategy is working. If the bathroom fan is weak or blocked, chemical cleaning won’t keep up with the moisture cycle.
Verdict / tip: when replacing is the better move
Replacing is often the better move when the mold is deeply embedded or keeps returning after proper cleaning and complete drying. If the liner has thick staining, persistent odor, repeated regrowth, or material damage (warping, brittleness, peeling coating), continued scrubbing becomes a short-term bandage.
Avoid replacement-by-denial in these cases:
– Deep embedding: heavy, dark patches that don’t fade after two careful clean-and-dry attempts.
– Persistent smell: mildew odor lingers even after rinsing and drying.
– Material degradation: visible cracks or a brittle feel after chemical exposure.
Who should skip this DIY approach:
– If the liner is not safe to treat according to its manufacturer care instructions (explicit “no bleach/peroxide” warnings).
– If you can’t guarantee complete drying (e.g., no airflow space, liner must stay on immediately due to scheduling). Incomplete drying increases recurrence risk, and repeated attempts often make residue buildup worse.
Shower liner mold cleaning checklist
| Step | Do this |
|---|---|
| 1 | Take the liner down (if possible) and pre-rinse |
| 2 | Treat moldy spots with an appropriate cleaner (per liner material) |
| 3 | Let it dwell for the label-recommended time |
| 4 | Wash using the liner’s care instructions |
| 5 | Rinse thoroughly |
| 6 | Dry completely (flat/hung with airflow) |
| 7 | Wipe the track/tub corners to remove leftover residue |
Shower liner mold risk: moisture timeline & cleanup targets (2017–2024)
| # | Moisture / cleanup factor | Numeric target | Why it matters for liners | Impact on recurrence |
|---|---|---|---|---|
| 1 | Time to mold after moisture | 24–48 hours | Fast regrowth if the liner stays damp overnight | ★★★★★ |
| 2 | Indoor humidity guidance | Below ~60% RH | Limits the moisture environment mold needs | ★★★★☆ |
| 3 | Bleach solution ratio (nonporous) | 1 cup per 1 gallon water | Effective only when material tolerates it and ventilation is strong | ★★★☆☆ |
| 4 | What “good” drying looks like | No damp seams | Seams/hem areas hide trapped moisture | ★★★★★ |
| 5 | Track and corners problem | Water collects | Residual biofilm re-seeds liner growth | ★★★★☆ |
| 6 | Dwell time requirement | Follow label | Insufficient contact time leaves colonies behind | ★★★☆☆ |
| 7 | Pre-rinse before scrubbing | Reduce spread | Limits how much mold residue transfers | ★★★★☆ |
These figures align with public health and remediation guidance on moisture control and cleanup effectiveness. For product-specific dwell times and liner compatibility, always defer to the liner and cleaner labels.
Frequently Asked Questions
What’s the safest way to remove mold from a shower liner?
Start by improving ventilation and wearing gloves, then take the shower liner out if possible. Scrub visible mold with hot water and detergent, and use a mold-killing product (or a diluted bleach solution for non-colored liners) for stubborn spots. Rinse thoroughly and allow the liner to fully dry, because any lingering moisture can bring mold back. If the liner has thick, embedded staining, consider replacing it after cleaning.
How do I clean a shower liner mold without damaging the liner?
Check the liner material first—vinyl, PEVA, and polyester often require different care to avoid warping or fading. For most liners, wash in hot water with laundry detergent, then soak for 30–60 minutes with a mildew remover that’s safe for your material (or diluted bleach if the label allows). Avoid mixing bleach with other cleaners like ammonia or vinegar, and don’t use harsh abrasives that can tear or thin the liner.
Why does shower liner mold keep coming back even after cleaning?
Mold returns when moisture remains in the liner, caulk, or corners of the shower area. Poor ventilation, water pooling at the bottom edge, and inadequate drying after showers all increase mildew growth. To prevent recurrence, dry the liner fully between uses, keep the bathroom fan running, and consider using a squeegee and shower curtain hooks that let water drain.
Which cleaning products work best to kill shower liner mold?
Common options include oxygen bleach cleaners (often gentler and safer for many liners) and standard mildew removers labeled for bathroom mold. Hydrogen peroxide solutions can be effective for mold on non-porous surfaces, while regular bleach may work well when used correctly and only if your liner’s label allows it. For best results, follow the product instructions, test in an inconspicuous area, and rinse completely after treatment.
What’s the best method to prevent mold on shower liners after cleaning?
After washing or soaking, hang the shower liner so it dries completely—don’t fold or leave it bunched up in a damp bathroom. Use a squeegee on shower walls, wipe water off the liner bottom edge, and ensure airflow with an exhaust fan or open window. Washing the liner every 1–3 months and promptly addressing leaks or damaged caulk can significantly reduce future mold and mildew.
📅 Last Updated: November 17, 2026 | Topic: how to clean shower liner mold | Content verified for accuracy and freshness.
References
- Mold Cleanup in Your Home | US EPA
- https://www.epa.gov/mold/preventing-mold
- https://www.cdc.gov/mold/default.htm
- Mold | National Institute of Environmental Health Sciences
- https://www.hud.gov/program_offices/healthy_homes/mold
- Mold – Overview | Occupational Safety and Health Administration
- Mold
- https://scholar.google.com/scholar?q=how+to+clean+mold+from+shower+curtain+liner Google Scholar
- https://scholar.google.com/scholar?q=vinyl+shower+curtain+mold+cleaning+bleach+detergent Google Scholar
- https://scholar.google.com/scholar?q=mold+removal+nonporous+surfaces+bleach+EPA+guidelines Google Scholar
