
Best Way to Sanitize Your Ceilings
To sanitize your ceilings effectively, first identify the ceiling material—drywall, textured, metal, or tile—since each needs different care. Use gentle, appropriate cleaners like mild detergent for painted drywall or vinegar solutions for tiles. Avoid soaking and harsh chemicals to prevent damage. Prepare your space by clearing furniture and ensuring good ventilation. Regular cleaning prevents mold and keeps your air quality healthy. Keep going to discover specific tips and step-by-step methods for various ceiling types.
Understanding Ceiling Surfaces and Materials
Before you start sanitizing, it’s important to know what kind of ceiling surface you’re dealing with. Different ceiling types respond uniquely based on their material characteristics. For example, drywall ceilings absorb moisture easily, so you’ll want to avoid soaking them. Textured ceilings might trap dust and require gentle care to maintain their look. Metal or tile ceilings have smoother surfaces, making them easier to wipe down but sometimes prone to rust or discoloration if you use harsh chemicals. Knowing these details gives you the freedom to choose the right approach, preventing damage while maximizing cleanliness. Once you grasp the material characteristics of your ceiling types, you’ll be empowered to sanitize effectively without compromising the integrity of your space.
Essential Tools and Cleaning Supplies
Knowing your ceiling’s material helps you pick the right tools and cleaning supplies to get the job done without causing damage. For smooth surfaces like drywall or plaster, a microfiber cloth and a gentle spray sanitizer work wonders. If you have textured or popcorn ceilings, a soft-bristled brush attached to an extendable pole can reach tricky spots without harming the texture. Don’t forget a sturdy ladder or step stool to safely access high areas. When choosing sanitizing supplies, opt for EPA-approved disinfectants that are safe for indoor use and won’t discolor your ceiling. Avoid harsh chemicals that might eat away paint or finish. With the proper cleaning tools and sanitizing supplies, you’ll enjoy a spotless ceiling while maintaining your freedom to control your space’s cleanliness efficiently and safely.
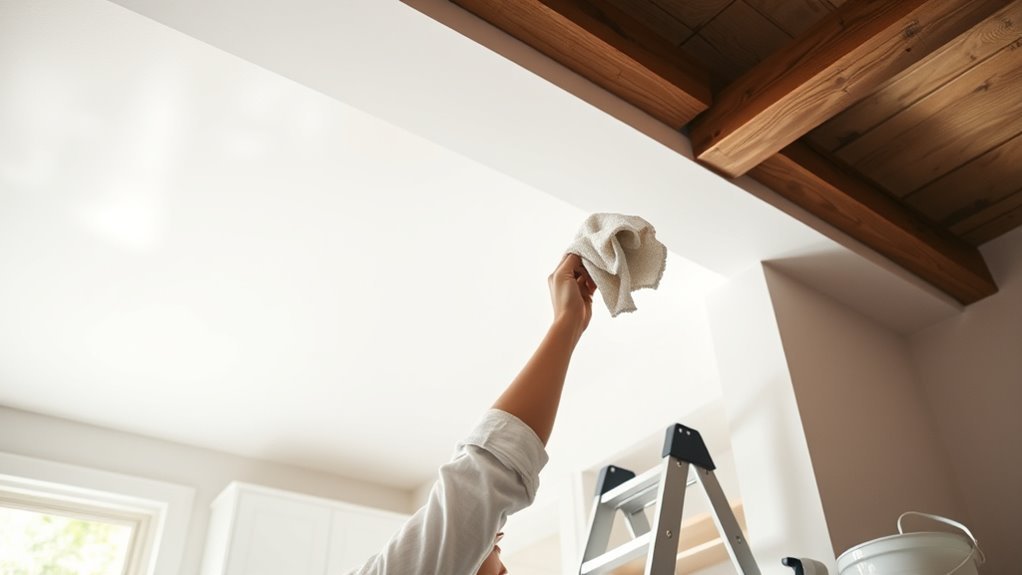
Preparing Your Space for Ceiling Sanitization

To prepare your space for ceiling sanitization, start by clearing the area beneath the ceiling to prevent any damage or contamination. Good ceiling preparation sets the stage for efficient and effective cleaning. Next, focus on space organization to make your work seamless and safe. Here’s what you should do:
- Move furniture and cover any items that can’t be relocated with drop cloths or plastic sheets.
- Confirm proper ventilation by opening windows or using fans to keep fresh air flowing.
- Set up a stable ladder or scaffolding to safely reach all ceiling areas without risking injury.
Safe Cleaning Solutions for Different Ceiling Types
You’ll want to choose cleaning solutions that match your ceiling’s material to avoid damage. Some surfaces need gentle, eco-friendly sanitizers, while others can handle stronger cleaners. Let’s look at the best options for different ceiling types and safe products you can use.
Cleaning Materials Overview
Choosing the right cleaning materials is essential when sanitizing ceilings, as different ceiling types react uniquely to various solutions. To maintain freedom in your cleaning routine, you need to focus on material compatibility and effective cleaning techniques. Here’s a quick rundown:
- Mild Detergents – Perfect for painted or drywall ceilings; they clean without damaging the finish.
- Vinegar Solutions – Great for tile or metal ceilings, offering natural disinfecting power without harsh chemicals.
- Disinfectant Sprays – Use these cautiously on porous or textured ceilings to avoid residue buildup.
Ceiling Type Considerations
Different ceiling materials demand specific care to keep them sanitized without causing damage. When you’re tackling ceiling types, you’ve got to evaluate material differences—what works for drywall might ruin wood or metal finishes. For instance, painted drywall ceilings need gentle, non-abrasive cleaners to avoid peeling, while wooden ceilings call for mild solutions that won’t strip natural oils. Metal ceilings can handle stronger disinfectants but watch for corrosive ingredients. Textured or acoustic ceilings require a more delicate touch; avoid soaking them to prevent sagging or mold. Knowing your ceiling type helps you pick the right cleaning method and solution, ensuring effective sanitation without sacrificing your ceiling’s integrity. Embracing these material differences grants you the freedom to keep your ceilings fresh and safe, no matter what they’re made of.
Eco-Friendly Sanitizing Options
Once you know what type of ceiling you’re working with, selecting eco-friendly sanitizing options becomes a smart move for both your health and the environment. You can keep your space fresh while embracing sustainable practices that reduce your carbon footprint. Here are three eco friendly cleaners suited for different ceiling types:
- Vinegar and Water Mix: Perfect for painted and drywall ceilings, this natural solution kills germs without harsh chemicals.
- Castile Soap Solution: Great for textured or wood ceilings, it gently cleans without damaging surfaces.
- Hydrogen Peroxide Spray: Ideal for mold-prone ceilings, it sanitizes effectively and breaks down safely.
Using these options not only protects your ceilings but also supports your freedom to choose safe, green cleaning methods.
Step-by-Step Guide to Sanitizing Painted Ceilings
Sanitizing painted ceilings requires a careful approach to protect the finish while effectively removing germs and dirt. Start by dusting off loose debris with a soft broom or microfiber cloth to avoid damaging the paint. Next, mix a gentle cleaning solution—like diluted dish soap or an eco-friendly sanitizer—in a bucket. Dip a sponge or soft cloth into the solution, wring out excess liquid, and gently wipe the ceiling in small sections. Avoid soaking the surface to maintain surface protection and prevent paint peeling. Rinse your cloth frequently and change the solution if it gets dirty. Finally, let the ceiling air dry completely. By following these steps, you’ll enjoy effective ceiling cleaning without compromising the freedom to keep your space fresh and vibrant.
Techniques for Cleaning Textured and Popcorn Ceilings
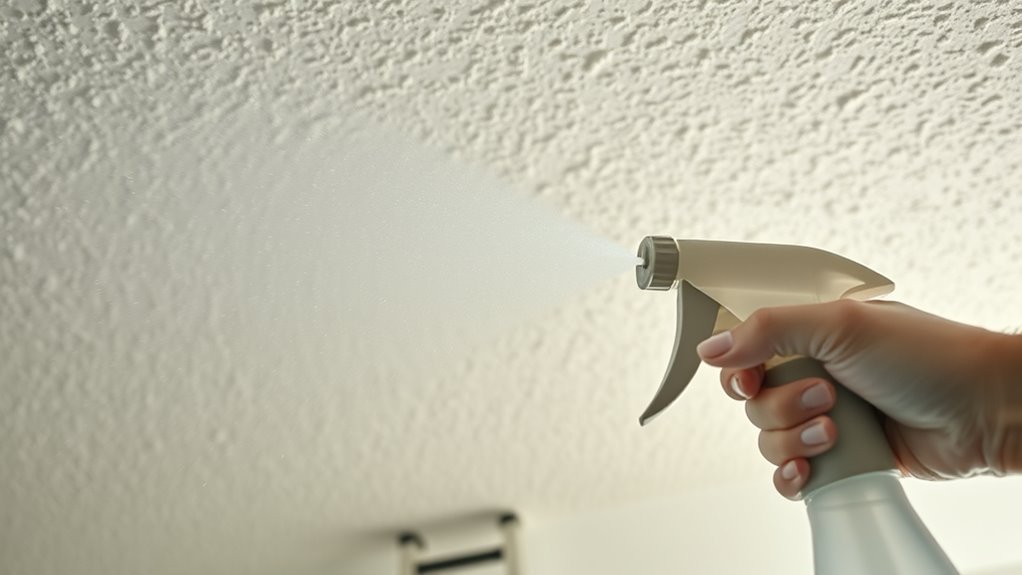
While painted ceilings can be gently wiped down, textured and popcorn ceilings require a more delicate touch to avoid damage. You want to preserve their unique look without causing crumbles or stains. Here are three effective textured ceiling techniques and popcorn ceiling methods to try:
- Use a soft-bristle brush or vacuum with a brush attachment to gently remove dust and cobwebs without scraping the surface.
- Lightly mist a microfiber cloth with a mixture of water and mild detergent, then dab (don’t rub) stubborn spots to prevent moisture from soaking in.
- Avoid harsh chemicals or high-pressure sprays—these can erode the texture and ruin your ceiling’s freedom from damage.
Stick to these steps, and your ceilings will stay fresh without losing their character.
Sanitizing Tiled and Drop Ceilings Effectively
Although tiled and drop ceilings might seem low-maintenance, they still need regular cleaning to prevent dust buildup and germs. For effective tile maintenance, start by gently dusting each tile with a soft cloth or vacuum using a brush attachment. Avoid soaking tiles, as excess moisture can weaken them. When sanitizing, use a mild disinfectant spray, wiping tiles softly to maintain their integrity. Drop ceiling care requires extra caution—remove tiles carefully if deep cleaning is needed, and clean the grid framework with a damp cloth. Always let tiles dry completely before reinstalling to avoid damage. By following these simple steps, you keep your ceilings fresh and sanitized without compromising their structure or your freedom to maintain a healthy space.
Preventing Mold and Mildew Growth on Ceilings
Because ceilings are often overlooked during routine cleaning, mold and mildew can easily take hold in damp or poorly ventilated areas. You can take control and guarantee mold prevention and mildew resistance by following these simple steps:
- Improve ventilation: Use exhaust fans or open windows to reduce moisture buildup.
- Fix leaks promptly: Address any roof or pipe leaks that contribute to dampness.
- Use mold-resistant paint: Apply specially formulated ceiling paint to create a barrier against mold spores.
Tips for Maintaining a Clean and Healthy Ceiling
If you want your ceilings to stay fresh and free from damage, regular cleaning and proper care are essential. Start by scheduling routine ceiling inspections to spot any early signs of dirt buildup, stains, or damage. This proactive approach lets you address issues before they escalate. For ceiling maintenance, use gentle cleaning solutions and soft cloths to avoid damaging surfaces. Avoid harsh chemicals that can strip paint or weaken materials. Also, keep your space well-ventilated to prevent moisture accumulation, which can lead to mold. Don’t forget to check vents and air filters, as clean airflow supports ceiling health. By staying consistent with these simple steps, you’ll enjoy a clean, healthy ceiling that boosts your freedom to live comfortably without worrying about hidden problems.
Frequently Asked Questions
Can Ceiling Sanitization Improve Indoor Air Quality?
Yes, ceiling sanitization can definitely improve your indoor air quality. When you tackle ceiling mold, you’re removing a major source of air pollutants that can cause allergies or respiratory issues. By keeping your ceilings clean and mold-free, you’re freeing your space from harmful contaminants, letting you breathe easier and live healthier. So, don’t underestimate how a simple ceiling cleaning can boost the freedom of fresh, clean air inside your home.
How Often Should Professional Ceiling Cleaning Be Scheduled?
You should base your cleaning frequency on your space’s use and environment, but generally, scheduling professional ceiling cleaning every 6 to 12 months works well. Sticking to this maintenance schedule helps keep dirt and allergens at bay, giving you freedom from constant worry about indoor air quality. If you’ve got pets or high traffic, you might want to clean more often. Adjusting your schedule guarantees your ceilings stay fresh without feeling tied down.
Are There Eco-Friendly Ceiling Sanitizing Products Available?
Did you know that 70% of consumers now prefer eco-friendly options when cleaning? If you’re looking for ceiling sanitizers, you’ll be happy to know there are plenty of sustainable practices built into green products. These eco-friendly options use natural ingredients that’re tough on germs but gentle on the planet. You can keep your space clean without feeling trapped by harsh chemicals—giving you freedom to protect both your health and the environment.
Does Ceiling Height Affect the Sanitization Process?
Yes, ceiling height definitely impacts how you approach sanitization. When you consider ceiling design and height considerations, taller ceilings may require specialized tools like extendable poles or spray systems to reach all areas effectively. You won’t want to miss spots just because it’s hard to reach. By adapting your method to your ceiling’s specifics, you maintain freedom in your cleaning routine without compromising thoroughness or safety.
Can Pets Impact Ceiling Cleanliness or Sanitization Needs?
When you’ve got pets, it’s like having a little tornado stirring up pet dander everywhere, including on your ceilings. Their fur and skin flakes can settle up high, leading to ceiling stains and extra dirt buildup. So, you’ll want to boost your sanitization routine to keep things fresh and clean. Don’t let the sneaky pet dander cramp your freedom—you deserve a spotless space, top to bottom!


