Cleaning Techniques for Printer Owners
To clean your printer effectively, first identify its type—inkjet or laser—as each needs specific care. Use lint-free microfiber cloths and isopropyl alcohol to wipe exterior surfaces gently. Always power off before removing ink cartridges or cleaning print heads to avoid damage. Use built-in cleaning cycles for minor nozzle clogs, and clean rollers carefully to prevent jams. Proper maintenance extends lifespan and print quality. Explore detailed methods to guarantee your printer stays in top condition.
Understanding Your Printer Type

Before you begin cleaning your printer, it is crucial to identify the type of printer you have—whether it’s inkjet, laser, or thermal—because each requires different maintenance techniques. Inkjet printers use liquid ink sprayed onto paper, making their print heads susceptible to clogging from dried ink. You’ll need to focus on cleaning the print heads carefully to avoid damage. Laser printers, on the other hand, use toner powder fused by heat, so dust and toner buildup inside the drum unit and fuser require targeted cleaning. Knowing your printer type lets you apply the appropriate cleaning method, preventing malfunctions and extending your device’s lifespan. This understanding grants you the freedom to maintain your equipment efficiently and avoid unnecessary replacements or service calls.
Tools Needed for Printer Cleaning
Effective printer cleaning demands a specific set of tools designed to tackle different printer components without causing damage. You’ll need specialized cleaning supplies such as lint-free microfiber cloths, isopropyl alcohol (preferably 99%), and compressed air cans to safely remove dust and ink residues. Maintenance tools like small, soft-bristled brushes help dislodge debris from delicate parts without scratching surfaces. Additionally, rubber gloves protect your hands from ink and cleaning agents, while cotton swabs assist in reaching tight spots. Avoid using harsh chemicals or abrasive materials, as these can degrade sensitive printer elements. Having these cleaning supplies and maintenance tools on hand guarantees you can perform precise, thorough cleaning routines that maintain ideal printer functionality and extend your device’s lifespan, granting you the freedom to print without interruptions. For best results, use compressed air cans carefully by holding the can upright and using short bursts to prevent moisture damage.
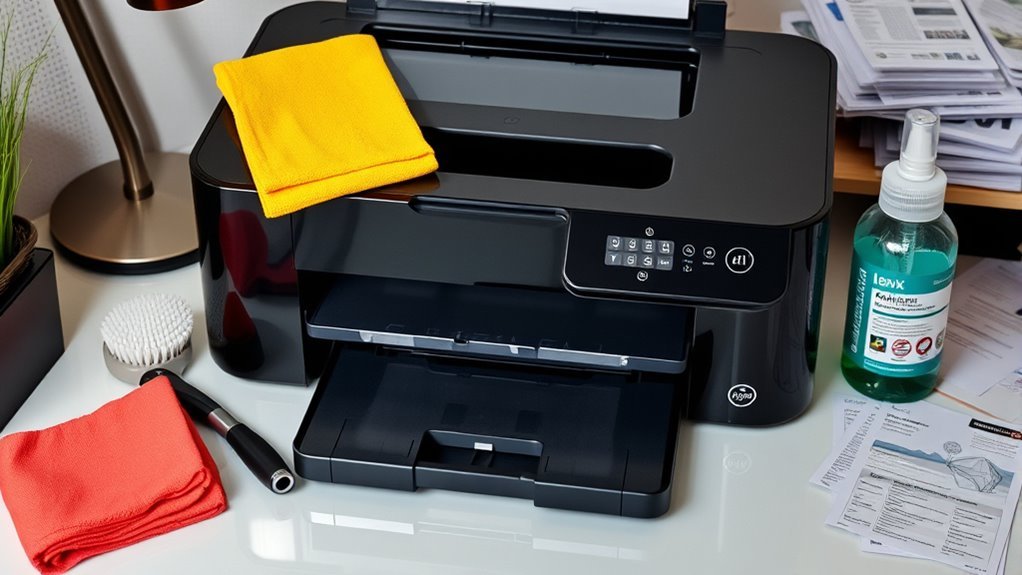
Cleaning the Printer Exterior
When cleaning your printer’s exterior, select lint-free microfiber cloths and isopropyl alcohol solutions to avoid residue and damage. Use gentle, circular wiping motions, paying close attention to crevices around buttons and the touchscreen to remove dirt without applying excess pressure. Always power off the device before cleaning sensitive areas to prevent accidental inputs or damage. Incorporating microfiber cloths ensures effective dust removal without scratching delicate surfaces.
Choosing Cleaning Materials
Although it might seem straightforward, selecting the right cleaning materials for your printer’s exterior is essential to prevent damage and secure ideal maintenance. You need to confirm material compatibility to avoid degrading plastic or electronic components. Focus on these essentials:
- Use lint-free, microfiber cloths to avoid scratching and trapping dust.
- Choose mild, non-abrasive cleaning solutions—preferably isopropyl alcohol diluted with water—to safely remove grime without harming surfaces.
- Avoid harsh chemicals like ammonia or bleach, as they can cause discoloration or corrosion.
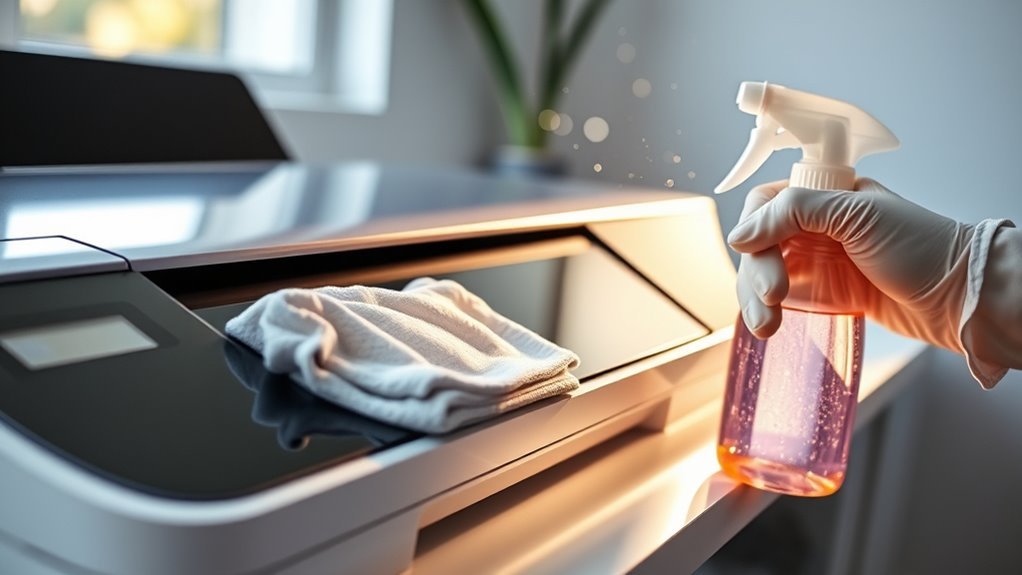
Wiping Methods and Tips
Since printer exteriors often have delicate surfaces and small crevices, you’ll want to use precise wiping techniques to guarantee thorough cleaning without causing damage. Start with a soft, lint-free microfiber cloth slightly dampened with distilled water or isopropyl alcohol diluted to 70%. Avoid harsh chemicals that can erode plastic. Use gentle, linear strokes along the surface to prevent abrasion, and employ cotton swabs for tight spaces. Maintain consistent pressure—too much can scratch, too little won’t remove dust effectively. Establish a cleaning frequency based on usage and environment; typically, wiping once every two weeks prevents buildup and maintains printer aesthetics. Regular wiping techniques not only preserve your printer’s appearance but reduce dust infiltration, ultimately extending its operational freedom and lifespan.
Handling Buttons and Screens
Because buttons and screens are more sensitive than other printer surfaces, you’ll need to use specialized cleaning methods to avoid damage. Their delicate nature demands careful attention to button sensitivity and screen protection to maintain functionality and appearance.
When cleaning these parts, follow these steps:
- Use a soft, lint-free microfiber cloth slightly dampened with distilled water or a mild, screen-safe cleaner.
- Avoid excessive moisture; never spray liquid directly on buttons or screens to prevent seepage and electrical issues.
- Gently wipe buttons without applying pressure to prevent impairing their responsiveness or causing mechanical wear.
Removing and Cleaning Ink Cartridges
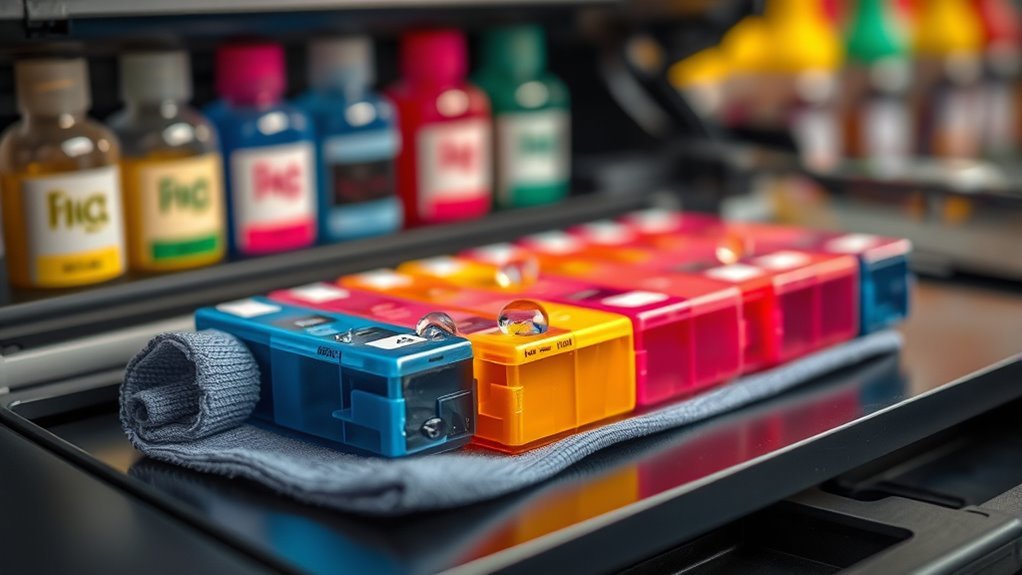
Before you start cleaning, make sure to power off the printer and open the access panel to carefully release each ink cartridge without forcing it. Use a lint-free cloth dampened with distilled water or isopropyl alcohol to gently wipe the cartridge contacts and nozzles, avoiding damage. Proper handling and cleaning will help maintain print quality and extend the cartridge’s lifespan.
Proper Ink Cartridge Removal
One essential step in maintaining your printer’s performance is removing ink cartridges properly to prevent damage and secure peak print quality. Start by powering off the printer and opening the cartridge access door carefully to avoid snapping delicate parts. Identify your ink cartridge types—whether thermal or piezoelectric—since removal techniques vary slightly. When removing the cartridges, follow these guidelines:
- Gently press the cartridge release tab and pull the cartridge straight out without twisting.
- Avoid touching the copper contacts or nozzles to prevent static damage.
- Immediately place cartridges in appropriate cartridge storage containers or seal them in airtight bags with a damp cloth to preserve ink moisture.
Proper handling guarantees your cartridges remain in prime condition, ready for reuse or storage, and helps maintain your printer’s freedom from malfunctions.
Cleaning Methods for Cartridges
Anyone looking to maintain ideal print quality should regularly clean their ink cartridges. Start by powering off your printer and carefully removing the cartridges, following the proper ink cartridge removal steps to avoid damage. Inspect the cartridges for ink residue, especially around the nozzles and contacts, which can cause clogs or poor cartridge alignment. Use a lint-free cloth slightly dampened with distilled water or isopropyl alcohol to gently wipe these areas. Avoid excessive moisture that could seep inside. After cleaning, let the cartridges air dry completely before reinserting them. Once reinstalled, run a cartridge alignment procedure via your printer’s software to guarantee optimal print precision. Regularly cleaning your cartridges not only preserves print quality but also grants you the freedom to print without interruption or degradation.
Cleaning the Printer Heads
Cleaning printer heads involves carefully removing dried ink and debris that can block nozzles and reduce print quality. To maintain peak function, you need to prioritize print head maintenance regularly. Start by running the printer’s built-in nozzle cleaning cycle to clear minor clogs. If that’s insufficient, gently wipe the heads with a lint-free cloth dampened with distilled water or a specialized cleaning solution. Always power off the printer before manual cleaning to avoid damage.
Key steps include:
- Performing automated nozzle cleaning through your printer’s software.
- Using appropriate cleaning fluids for stubborn ink residues.
- Avoiding excessive pressure to prevent misalignment or damage.
For best results, it is important to power off and unplug the printer before starting any cleaning procedure to ensure safety and prevent damage.
Clearing Paper Jams Safely
Maintaining print head cleanliness helps prevent print quality issues, but paper jams can still occur and disrupt your workflow. When clearing jams safely, first power off the printer to avoid damaging internal components. Open all accessible panels to locate the jammed paper; pull it out slowly and evenly to prevent tearing. Avoid using excessive force, which could harm delicate mechanisms. Use troubleshooting tips such as checking for small scraps left behind and confirming the paper tray is properly aligned. For effective paper jam prevention, guarantee you use the recommended paper type and keep sheets flat without folds or wrinkles. Regularly inspect your printer’s feed path to maintain smooth operation, giving you the freedom to print without interruptions or damage. Additionally, ensuring eco-friendly maintenance by using gentle cleaning methods can help prolong your printer’s lifespan.
Cleaning the Printer Rollers
To clean the printer rollers effectively, you’ll need specific tools like lint-free cloths and isopropyl alcohol. Begin by carefully accessing the rollers, then wipe them gently to remove dust and residue without damaging the surface. Following a precise step-by-step process guarantees smooth paper feeding and prevents future jams. Using distilled water to dampen the cloth ensures no mineral residue is left on the rollers, which helps maintain printer performance.
Roller Cleaning Tools
One essential tool you’ll need for roller cleaning is a lint-free cloth or specialized roller cleaning swab designed to remove dust, ink residue, and paper fibers without damaging the sensitive surfaces. To master effective roller cleaning techniques, you’ll also want:
- Isopropyl alcohol (70% or higher) for dissolving stubborn grime without leaving residue
- Compressed air canisters to blow away loose debris from hard-to-reach roller crevices
- Protective gloves to maintain grip and avoid transferring oils from your skin onto rollers
These effective cleaning tools help you maintain peak roller performance, preventing paper jams and ensuring smooth feeding. Using the right materials is critical; abrasive or damp cloths can harm rollers, compromising print quality. With these tools in hand, you have the freedom to perform precise maintenance, extending your printer’s lifespan and reliability.
Step-by-Step Cleaning Process
Cleaning the printer rollers involves a sequence of precise steps to guarantee thorough removal of dust, ink, and paper fibers. First, power off your printer and unplug it to confirm safety. Open the printer access panel to locate the rollers. Use a lint-free cloth lightly dampened with distilled water or isopropyl alcohol to gently wipe each roller, rotating them manually to clean the entire surface. Avoid excessive moisture to prevent damage. Allow the rollers to dry completely before closing the panel. Implementing this cleaning process regularly aligns with recommended printer maintenance, improving paper feed reliability and print quality. Adjust your cleaning frequency based on printer usage—high-volume printing demands more frequent roller care to maintain operational freedom and prevent jams.
Maintaining the Scanner Glass
Maintaining the scanner glass requires careful attention to prevent streaks and smudges that can degrade image quality. Proper scanner care hinges on precise glass maintenance, ensuring your scans remain crisp and clear. Start by turning off your device to avoid damage. Use a lint-free microfiber cloth dampened with a small amount of glass cleaner or isopropyl alcohol—never spray directly on the glass. Gently wipe in a circular motion, focusing on these key areas:
- Remove fingerprints and dust particles thoroughly.
- Avoid abrasive materials that could scratch the glass.
- Clean both sides if applicable, especially for duplex scanners.
Using a microfiber cloth is essential to avoid scratches and ensure safe cleaning of delicate surfaces.
Regular Maintenance Tips
A consistent maintenance schedule is crucial to keep your printer operating efficiently and to prevent common issues like paper jams and print quality degradation. Start by regularly cleaning the printhead to maintain peak ink quality; use manufacturer-recommended cleaning solutions to avoid damage. Check and replace ink cartridges promptly to guarantee consistent print reliability, as depleted or dried ink compromises output. Clean paper feed rollers with lint-free cloths to prevent misfeeds. Keep the printer’s interior free of dust and debris by gently vacuuming or using compressed air. Regularly update your printer’s firmware and drivers to enhance performance and fix bugs. Following these precise maintenance steps assures your printer remains free, functional, and reliable, giving you control over print quality without unexpected interruptions.
When to Seek Professional Help
How do you know when it’s time to call in a professional for your printer? Recognizing the signs of malfunction beyond basic cleaning is essential to maintaining your device’s freedom and functionality. You should seek expert assistance if you notice:
- Persistent error messages or hardware faults that don’t resolve after standard troubleshooting.
- Mechanical issues like paper jams occurring frequently despite proper loading and cleaning.
- Print quality degradation such as streaks or smudges that cleaning can’t fix.
Attempting complex repairs without the right tools or knowledge could worsen damage. Professionals have specialized diagnostic equipment and replacement parts, ensuring precise resolution. By identifying these significant signs of malfunction early, you preserve your printer’s lifespan and avoid costly downtime. Don’t hesitate to reach out for expert assistance when your maintenance efforts aren’t enough.
Frequently Asked Questions
Can I Use Household Cleaners on My Printer Parts?
You might think using household cleaners is a quick fix, but it’s actually risky for printer maintenance. While those cleaners are handy around the house, they often contain harsh chemicals that can damage delicate printer parts. Instead, you should use specialized cleaning supplies designed for printers. These guarantee effective cleaning without harming components, giving you the freedom to maintain your device safely and extend its lifespan without unintended damage.
How Often Should I Clean My Printer if Used Daily?
If you’re using your printer daily, you should establish a cleaning schedule that includes daily maintenance. This means wiping down accessible surfaces and checking for paper debris each day to prevent jams. Perform a more thorough cleaning weekly, focusing on the print heads and rollers. Sticking to this routine guarantees peak performance and prolongs your printer’s life, giving you the freedom to print without unexpected interruptions or costly repairs.
Does Printer Cleaning Affect Print Quality Immediately?
Think of your printer as a musical instrument—cleaning it is tuning the strings. When you clean your printer, you’ll often see an immediate boost in print quality, as dust or dried ink clogs no longer distort output. For best results, follow maintenance tips like using appropriate cleaning solutions and regularly inspecting internal components. This proactive care guarantees your printer performs freely and consistently, giving you crisp, vibrant prints without delay.
Are There Eco-Friendly Cleaning Solutions Safe for Printers?
You can definitely use natural cleaning alternatives that are eco-friendly and safe for your printer. Mix distilled water with a small amount of isopropyl alcohol—this combo effectively removes ink residue without damaging sensitive components. Remember, when following printer maintenance tips, avoid harsh chemicals or abrasive materials. Always power off and unplug your device before cleaning to maintain longevity and guarantee freedom from costly repairs. This keeps your printer running smoothly and responsibly.
Can Cleaning My Printer Void Its Warranty?
You want to keep your printer pristine, yet fear that cleaning it might void your warranty. Warranty policies often allow routine maintenance but strictly forbid unauthorized repairs or harsh chemicals. To stay safe, follow the manufacturer’s maintenance guidelines precisely—use recommended cleaning agents and techniques. This balance lets you maintain freedom over your device without risking coverage loss, ensuring your printer runs smoothly while your warranty remains intact.


