
Cleaning Tips Before and After Ceilings
Before cleaning your ceiling, check its material and condition to pick the right method and gather supplies like a microfiber mop, gentle cleaner, and ladder. Clear and cover furniture, then dust with a soft brush or extendable duster to avoid damage. Afterward, inspect for missed spots and gently touch up stains for a fresh finish. Maintaining regular dusting keeps it looking great longer. There’s more to learn about protecting fixtures and tackling stubborn stains effectively.
Assessing Ceiling Material and Condition

Before you begin cleaning, you’ll want to identify the type of ceiling you have and check its condition. Different ceiling types—like drywall, plaster, or textured surfaces—each demand specific care. Knowing your ceiling’s material durability helps you choose the right cleaning approach without causing damage. For example, a fragile plaster ceiling might need gentle dusting, while sturdier drywall can handle mild scrubbing. Assess any cracks, stains, or peeling paint to determine if repairs are necessary before cleaning. Taking this step gives you the freedom to clean effectively and confidently, ensuring your ceiling stays in great shape. By understanding what you’re working with, you avoid unnecessary risks and maintain the beauty of your space effortlessly.
Gathering Essential Cleaning Supplies
Since cleaning a ceiling can be tricky, having the right supplies on hand makes the job much easier and more effective. Before you start, create a supply checklist to guarantee you don’t forget anything essential. Basic cleaning tools include a sturdy ladder, microfiber cloths, a soft-bristle brush, a spray bottle with a gentle cleaner, and a bucket of warm water. Depending on your ceiling’s material, you might also need a vacuum with a brush attachment or specialized cleaning solutions. Gathering these items ahead of time lets you move freely and confidently, without interruptions. Stick to your supply checklist, and you’ll have all the tools necessary to tackle the job smoothly, freeing you to enjoy a refreshed, spotless ceiling without hassle.
Preparing the Room for Ceiling Cleaning
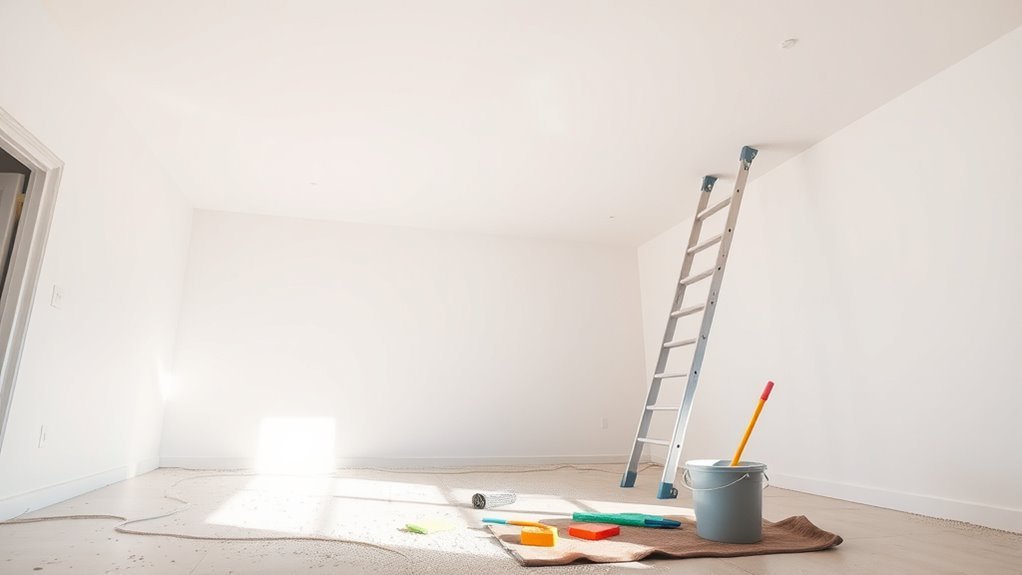
Three simple steps will help you prepare the room for ceiling cleaning efficiently. First, assess the room layout to understand how much space you have to work with. This helps you plan your movement without feeling confined. Next, adjust the furniture arrangement by moving pieces away from the walls and towards the center. Cover them with drop cloths or old sheets to protect against dust and drips. Finally, clear the floor area to prevent tripping hazards and make cleaning easier. By organizing the room this way, you create freedom to move safely and reach every ceiling corner without obstruction. Taking these steps guarantees a smooth, stress-free ceiling cleaning experience, giving you more control over your space and time.
Removing Dust and Cobwebs Safely
You’ll want to start by gently removing dust with a soft broom or microfiber duster to avoid damaging the ceiling. For cobwebs, use an extendable duster or vacuum with a brush attachment to reach high spots safely. Taking these steps carefully helps keep your ceiling clean without causing any harm.
Effective Dust Removal
Although dust and cobwebs on ceilings might seem harmless, they can accumulate quickly and affect your home’s air quality. To keep your space fresh, you’ll want to use effective dusting techniques that minimize mess and effort. Start by attaching a soft brush or microfiber dusting attachment to your vacuum. This lets you reach high spots without spreading dust around. Gently glide the vacuum over the ceiling to capture dust and cobwebs safely. If you don’t have vacuum attachments, a long-handled microfiber duster works well, too. Just avoid harsh scrubbing, which can damage the ceiling’s finish. By using these simple tools and methods, you’ll maintain a clean ceiling while preserving the freedom to breathe easy in your home.
Safe Cobweb Clearing
Keeping dust at bay is a great start, but dealing with cobwebs requires a bit more care to avoid damage or spreading debris. When it comes to cobweb removal, using the right ceiling tools can make all the difference. Here’s how you can clear cobwebs safely and freely:
- Choose a soft-bristled duster with an extendable handle to reach high corners without strain.
- Gently sweep cobwebs away, avoiding harsh scrubbing that might damage your ceiling’s finish.
- Work in one direction to prevent webs from scattering around the room.
- After clearing, vacuum or wipe nearby surfaces to catch any fallen dust or debris.
Tackling Stains and Discoloration
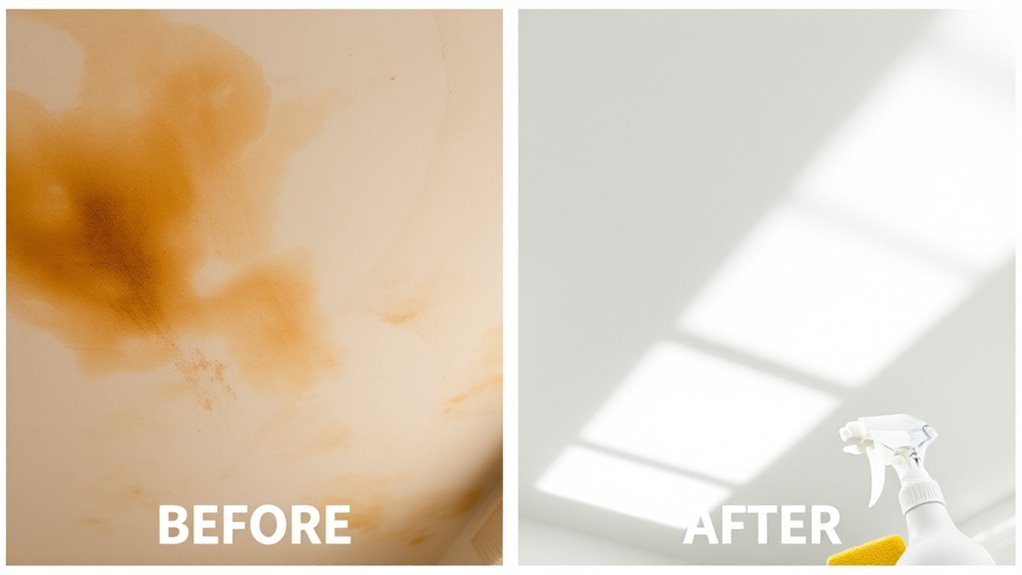
When stains and discoloration appear on your ceiling, addressing them promptly can prevent permanent damage. You don’t want those spots to set in and restrict your freedom to enjoy a clean, fresh space. Start by identifying the source—whether it’s water leaks, smoke, or dirt—to tackle stain removal effectively. Acting quickly helps you avoid stubborn marks that are tougher to erase. For discoloration prevention, keep your ceiling well-ventilated and reduce humidity, especially in kitchens and bathrooms. Regularly dusting and inspecting your ceiling allows you to catch issues early, so they don’t spiral out of control. Taking these steps gives you control over your environment, ensuring your ceiling stays bright and stain-free without complicated fixes or replacements.
Using Appropriate Cleaning Solutions
You’ll want to pick cleaning products that are safe for your ceiling’s material to avoid any damage. Harsh chemicals can cause discoloration or weaken the surface, so always check labels and test in a small area first. Using the right solution helps keep your ceiling clean without risking harm.
Choosing Safe Cleaning Products
How do you pick cleaning products that won’t damage your ceiling? It’s all about balancing eco friendly options with product effectiveness. You want something safe yet powerful enough to get the job done without restrictions on your cleaning freedom. Here’s how to choose:
- Check labels for non-toxic, biodegradable ingredients to protect both your ceiling and environment.
- Opt for products specifically designed for ceiling materials like drywall or plaster to guarantee compatibility.
- Avoid harsh chemicals like ammonia or bleach that might cause discoloration or damage over time.
- Test a small, hidden area first to confirm the product’s effectiveness and safety before full application.
Avoiding Surface Damage
Picking the right cleaning products is just the start; knowing how to use them without harming your ceiling surface is equally important. To guarantee proper surface protection, always test cleaning solutions on a small, hidden area first. This simple step helps you avoid unwanted discoloration or texture changes. When applying cleaners, use a soft cloth or sponge and avoid harsh scrubbing, which can cause damage. Opt for gentle, pH-balanced solutions designed for ceilings to enhance damage prevention. Avoid bleach or abrasive chemicals that might erode paint or finishes. By following these careful steps, you maintain your ceiling’s integrity while enjoying the freedom to clean effectively. Remember, protecting your ceiling surface today saves you time and effort in repairs tomorrow.
Protecting Fixtures and Furniture During Cleaning
Before you start cleaning your ceilings, it’s important to shield any fixtures and furniture nearby. Proper furniture protection and fixture covering prevent damage and save you from extra cleanup. Here’s how to do it efficiently:
- Move smaller furniture out of the room or to the center, then cover with plastic sheets or drop cloths.
- For larger, immovable pieces, wrap them tightly in plastic or use furniture covers designed for dust protection.
- Use painter’s tape to secure fixture coverings without leaving residue or damaging surfaces.
- Cover light fixtures with plastic bags or lightweight cloths, ensuring they’re securely fastened but easy to remove.
Taking these steps lets you clean freely without worrying about spills, dust, or drips ruining your belongings.
Post-Cleaning Inspection and Touch-Ups
Once you’ve finished cleaning, you’ll want to carefully inspect your ceilings to spot any missed spots or streaks. This final inspection is vital to guarantee your efforts truly shine. Take a step back and scan the surface from different angles under good lighting. If you notice any smudges or patches that didn’t come clean, don’t worry—you can easily fix them. Use gentle touch up techniques like a damp cloth or a soft brush with mild cleaner to carefully address these areas without damaging the ceiling. This step gives you freedom to perfect your work and enjoy a flawless finish. By dedicating time to post-cleaning inspection and touch-ups, you ensure your ceilings look fresh and pristine, reflecting your care and attention to detail.
Maintaining Ceiling Cleanliness Over Time
After you’ve perfected your ceiling’s appearance with careful inspection and touch-ups, keeping it clean over time will save you effort in the long run. To enjoy freedom from constant scrubbing, focus on smart ceiling maintenance habits that promote long term cleanliness:
Perfect your ceiling once, then maintain it wisely to save time and effort later.
- Dust regularly using a microfiber mop or soft broom to prevent dirt buildup.
- Address stains immediately with a gentle cleaner to avoid permanent marks.
- Guarantee proper ventilation to reduce moisture and mold growth on your ceiling.
- Schedule a thorough cleaning every 6-12 months to maintain its fresh look.
Frequently Asked Questions
Can I Use a Pressure Washer on My Ceiling?
You shouldn’t use a pressure washer on your ceiling because it can cause serious damage. When it comes to ceiling cleaning techniques, gentler methods are safer and more effective. Always prioritize pressure washer safety—these tools are powerful and meant for sturdy surfaces. Instead, consider using a soft cloth or sponge with mild detergent to clean your ceiling. This way, you keep your freedom to maintain your space without risking harm.
How Often Should I Deep Clean Popcorn Ceilings?
Think of your popcorn ceilings as the quiet guardians of your room, gathering dust like whispers over time. For popcorn maintenance, you’ll want to deep clean them about once every 1 to 3 years, depending on dust and humidity. This cleaning frequency keeps your ceiling fresh without feeling chained to constant upkeep. By treating them gently and regularly, you maintain freedom from grime and preserve that unique textured charm effortlessly.
Are There Eco-Friendly Ceiling Cleaning Products?
Yes, you can definitely find eco-friendly options for cleaning ceilings! Look for products made with natural ingredients like vinegar, baking soda, and plant-based surfactants. These choices let you clean effectively without harming the environment or your indoor air quality. Plus, using natural ingredients gives you the freedom to keep your space fresh while staying true to your values. You don’t have to sacrifice cleanliness for sustainability anymore!
Can Ceiling Cleaning Prevent Mold Growth?
Absolutely, ceiling cleaning plays a key role in mold prevention. When you keep your ceilings clean and dry, you reduce the chances of mold spores settling and growing. Regular ceiling maintenance helps control moisture and dust buildup, creating an environment where mold struggles to thrive. By staying on top of this, you’re not just protecting your home but also maintaining your freedom to enjoy a healthy, mold-free space without worries.
Is Professional Ceiling Cleaning Worth the Cost?
Did you know that 85% of homeowners who invest in professional ceiling cleaning report longer-lasting results? When deciding if it’s worth the cost, consider the cost benefits: professional services save you time and prevent costly repairs from mold or dirt buildup. You get to enjoy cleaner, healthier spaces without lifting a finger—giving you the freedom to focus on what truly matters in your life.


