Cleaning Tips Before and After Grout
You’ll want to start by clearing the area and using a stiff brush with a mild cleaner to remove dirt and stains from your grout. After cleaning, let it dry completely before sealing to lock in protection. Regularly wipe spills and use gentle cleaners to keep grout fresh without damage. Avoid harsh chemicals and reapply sealant every six to twelve months. Keep following along for easy strategies to maintain and protect your grout long-term.
Understanding the Importance of Grout Cleaning
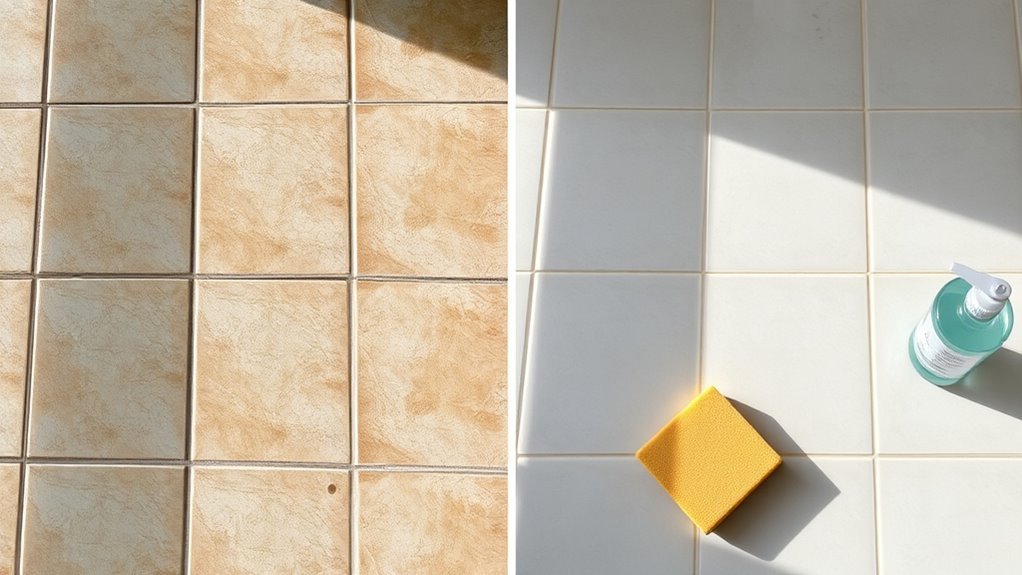
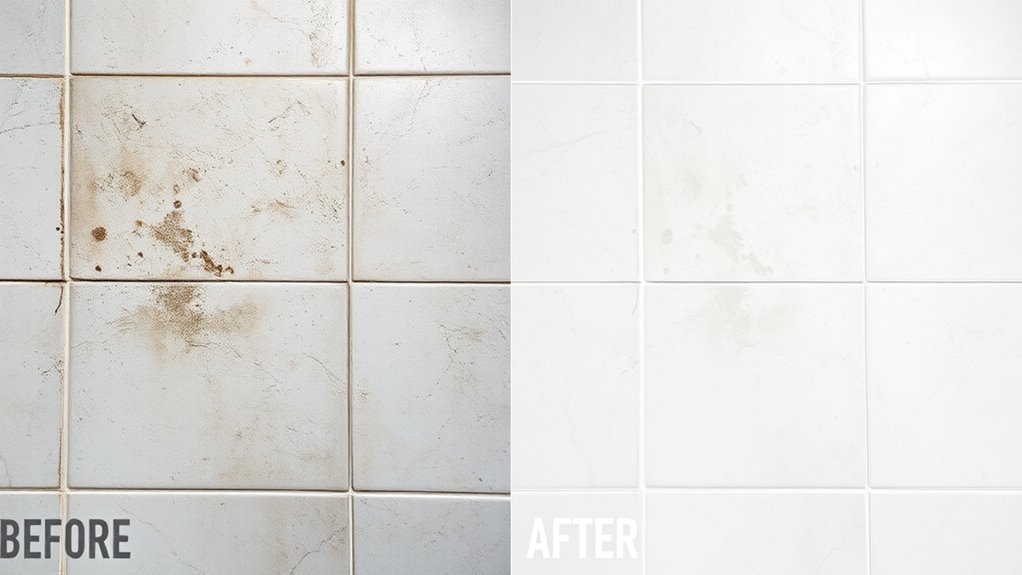
Grout might seem like just a small detail in your tiled surfaces, but keeping it clean is essential. If you want to enjoy the freedom of a fresh, inviting space, you need to understand how grout longevity depends heavily on your cleaning frequency. Neglecting grout allows dirt and grime to build up, which can lead to discoloration and even damage over time. By cleaning regularly, you not only preserve the appearance but also extend its lifespan, saving you from costly repairs or replacements. Staying on top of grout care means you’re in control of your environment, maintaining both beauty and durability effortlessly. So, prioritize your grout cleaning routine—it’s a simple step that grants you lasting freedom from worry.
Tools and Materials Needed for Grout Cleaning
To get your grout looking fresh, you’ll need the right tools and materials on hand. Basic essentials include a stiff brush and a reliable grout cleaner that suits your tile type. Having these ready will make the cleaning process much smoother and more effective.
Essential Cleaning Tools
A few key tools can make cleaning grout much easier and more effective. When you’re ready to tackle grout, having the right essentials is vital to maintain your freedom from tough scrubbing and endless effort. Start with grout brushes designed to reach deep into the narrow lines without damaging tiles. Pair those with effective cleaning solutions specific to grout, which break down dirt and stains quickly. Beyond that, these tools will empower you:
- A sturdy grout brush with firm bristles
- A spray bottle for applying cleaning solutions evenly
- A microfiber cloth for wiping and buffing grout after scrubbing
With these essentials, you’ll enjoy a cleaner space without sacrificing your time or energy—cleaning grout doesn’t have to be a chore anymore.
Recommended Cleaning Materials
Effective grout cleaning depends on choosing the right materials that work well together. To keep your grout spotless without sacrificing your values, start with eco friendly cleaners. These gentle options are perfect if you want to avoid harsh chemicals and still get great results. However, for tougher stains, industrial strength solutions can be a game-changer. Just be sure to use them sparingly and follow the instructions carefully to protect your tiles and grout. Alongside your cleaning solution, you’ll want a stiff-bristled brush to scrub away dirt effectively. Don’t forget microfiber cloths for wiping and drying. With these recommended cleaning materials, you gain the freedom to maintain your grout’s look without compromise, balancing power and care in every cleaning session.
Preparing the Area Before Cleaning Grout
Before you start cleaning grout, make sure to clear and declutter the area to give yourself enough room to work. Gather all the necessary supplies so you won’t have to stop midway. Being prepared helps the process go smoothly and efficiently.
Clear and Declutter Space
Since grout cleaning requires close attention to detail, you’ll want to clear and declutter the space around the tiled area first. Effective decluttering strategies help you enjoy a more efficient, stress-free cleaning session. Start by organizing your space to create freedom of movement and prevent accidents. Here’s how to get started:
- Remove any furniture or rugs that might block access to the grout.
- Clear countertops or shelves nearby to avoid splashing cleaning solutions on other items.
- Put away unnecessary items to create a clean, open workspace that keeps you focused.
Gather Necessary Supplies
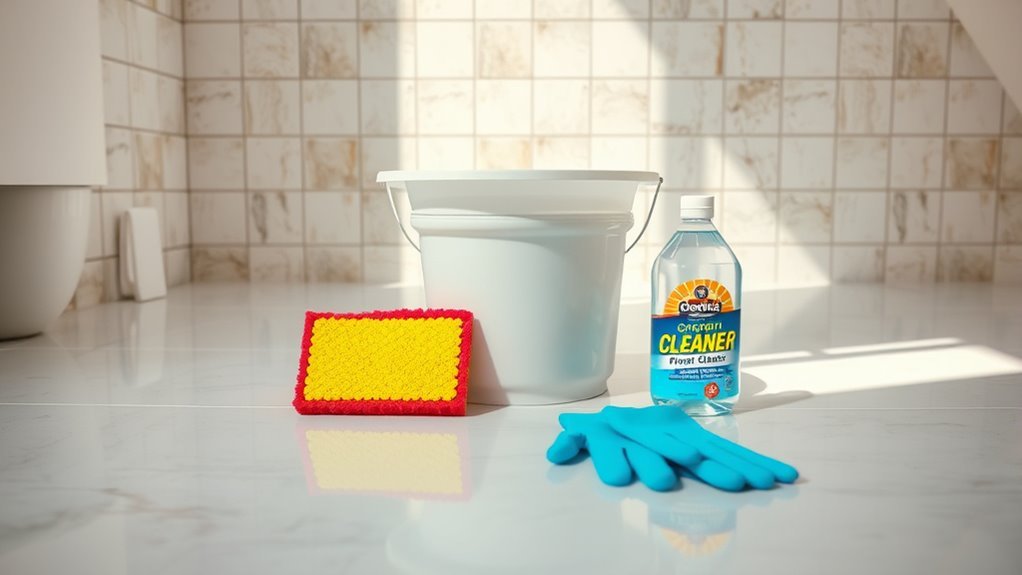
With your space cleared and ready, the next step is to gather all the supplies you’ll need for cleaning grout. Keep it simple: grab a stiff brush, a bucket, mild detergent or a grout cleaner, and some old towels or rags. Don’t forget gloves to protect your hands and a spray bottle if you plan to use a homemade solution. Having everything on hand lets you stick to your cleaning schedule without interruptions. After cleaning, consider applying grout sealing to protect your work and make future cleanings easier. Staying prepared with these essentials gives you the freedom to tackle grout cleaning efficiently and maintain the fresh look of your tiles with less hassle.
Effective Methods for Pre-Sealing Grout Cleaning
Although sealing grout is essential for long-term protection, you’ll need to clean it thoroughly first to make certain the sealer adheres properly. Pre seal techniques focus on removing dirt, oils, and residues that could block the sealer’s effectiveness. Proper grout maintenance starts here, freeing you from future hassles.
Cleaning grout thoroughly before sealing is crucial to ensure effective adhesion and long-lasting protection.
To clean grout effectively before sealing, try these methods:
- Use a mild detergent mixed with warm water to scrub grout lines gently.
- Apply a baking soda and water paste to lift stubborn dirt without harsh chemicals.
- Rinse thoroughly with clean water and let the grout dry completely before sealing.
These steps make certain your grout is clean and ready, giving the sealer a solid surface to lock in protection and keep your floors looking fresh longer.
How to Remove Stains and Mildew From Grout
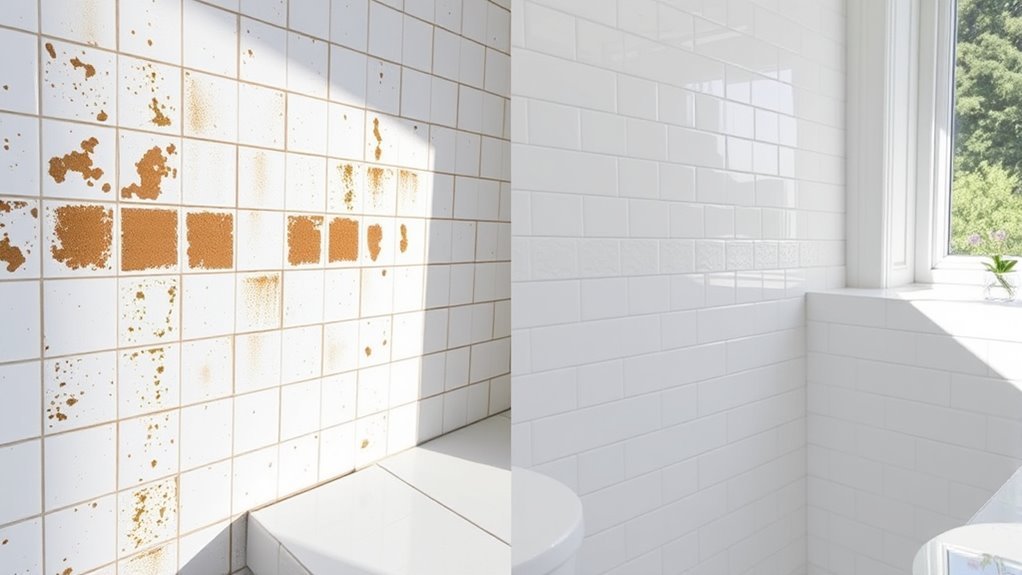
Tackling stains and mildew on grout can be tricky, but using the right techniques makes it much easier. For effective grout stain removal, start with a paste of baking soda and water applied to the grout lines. Let it sit, then scrub with a brush. For mildew treatment, use a mixture of equal parts white vinegar and water—spray, wait a few minutes, then scrub and rinse thoroughly.
| Step | Product Needed | Action |
|---|---|---|
| 1 | Baking soda paste | Apply and scrub |
| 2 | Vinegar-water mix | Spray and wait |
| 3 | Brush and water | Scrub and rinse |
Following this method frees you from stubborn stains and keeps grout looking fresh and clean.
Best Practices for Cleaning Grout After Sealing
Once you’ve sealed your grout, cleaning it properly becomes essential to maintain that protective barrier. Following the best sealing practices guarantees your grout stays resilient against dirt and moisture. To keep freedom from constant scrubbing, here are grout maintenance tips to simplify your routine:
Proper grout cleaning after sealing preserves its protective barrier, ensuring lasting resistance to dirt and moisture.
- Use a soft-bristle brush or microfiber cloth to gently clean grout lines without damaging the seal.
- Avoid harsh chemicals and acidic cleaners that can wear down the sealant over time.
- Wipe spills immediately to prevent stains from penetrating the sealed surface.
Homemade Solutions vs. Commercial Grout Cleaners
Keeping your sealed grout clean means choosing the right cleaning method, and you might wonder whether homemade solutions or commercial grout cleaners work better. Homemade cleaners often use simple ingredients like baking soda, vinegar, and lemon, giving you control over what touches your grout without harsh chemicals. They’re budget-friendly and eco-conscious, perfect if you value freedom from strong scents or synthetic additives. On the other hand, commercial products are formulated for tough stains and can save time with powerful ingredients, especially if your grout faces heavy wear. However, they may contain chemicals that require careful handling. Ultimately, your choice depends on convenience, grout condition, and personal preference. You can even alternate between homemade cleaners and commercial products to balance effectiveness with safety and sustainability.
Tips for Maintaining Grout Cleanliness Over Time
Although grout can quickly accumulate dirt and stains, maintaining its cleanliness over time is easier than you might think if you develop a regular care routine. With the right grout maintenance tips, you can enjoy long term cleanliness without feeling trapped by constant scrubbing. Here’s what you can do:
- Clean grout weekly using a gentle brush and mild cleaner to prevent buildup.
- Dry grout lines after every shower or spill to avoid moisture-related stains.
- Address stains immediately before they set in, keeping your grout looking fresh effortlessly.
How to Protect Grout From Future Dirt and Damage
Regular maintenance helps keep grout clean, but protecting it from future dirt and damage will extend its life even further. One of the best ways to do this is through grout sealant application. A good sealant creates a barrier, preventing dirt, moisture, and stains from settling deep into the grout lines. After cleaning and drying your grout thoroughly, apply the sealant according to the instructions, usually every six months to a year. Alongside sealant, stick to regular maintenance tips like wiping spills immediately, using gentle cleaners, and avoiding abrasive tools. These habits keep dirt at bay without wearing down the grout. By combining grout sealant application with consistent care, you’ll enjoy cleaner grout that lasts longer, giving you the freedom to focus on what really matters.
Signs That Indicate When Grout Needs Professional Cleaning
How do you know when it’s time to call in a professional for grout cleaning? Sometimes, tackling grout yourself just isn’t enough to reclaim that fresh, clean look. Here are clear signs you shouldn’t ignore:
- Persistent grout discoloration: If your grout remains stained despite regular scrubbing, it’s a sign deep cleaning is needed.
- Visible mold growth: Mold isn’t just unsightly; it can affect your health. Professionals can safely remove and treat it.
- Cracked or crumbling grout: Damaged grout compromises your floors or walls and requires expert repair.
Don’t let grout issues limit your freedom to enjoy your space. Recognizing these signs early means you can act fast and keep your home looking its best without hassle.
Frequently Asked Questions
Can Grout Color Be Changed After Cleaning?
Just like a butterfly emerging in new colors, your grout can transform after cleaning. You can absolutely change grout color using grout dyeing techniques, giving your space a fresh vibe. With so many grout color choices, you’re free to express your style boldly or subtly. Once cleaned, applying a grout dye not only revitalizes but also protects, letting you embrace freedom in design without the hassle of full regrouting.
How Long Does Grout Sealing Typically Last?
Grout sealing typically lasts anywhere from one to three years, depending on grout maintenance and the area’s usage. You’ll want to keep an eye on sealing frequency because high-traffic or wet zones might need resealing sooner. Staying on top of this helps keep your grout looking fresh and protected, giving you the freedom to enjoy your space without constant worry. Regular checks make grout care feel effortless and stress-free.
Are Steam Cleaners Safe for All Grout Types?
Oh sure, just release your steam cleaner on every grout type like it’s a magic wand—what could possibly go wrong? In reality, steam cleaner effectiveness varies; some grout, especially older or delicate types, might suffer damage. If you want grout maintenance tips that actually free you from worry, test a small spot first. Don’t let “all grout types” fool you; steam cleaning isn’t a one-size-fits-all freedom ride.
Does Grout Cleaning Affect Tile Adhesive?
You might wonder if grout cleaning affects tile adhesive. Generally, if you use proper cleaning methods, grout integrity stays intact without harming the adhesive beneath. Harsh chemicals or excessive water can weaken the bond, so you’ll want to avoid those. Stick to gentle, grout-safe products and controlled moisture levels. That way, you keep your tiles secure and enjoy the freedom of a clean, fresh look without risking damage.
Can Pets Damage Grout Surfaces?
Think of your grout as a delicate dance floor; pet behaviors like scratching or digging can wear it down over time. If you let your furry friends roam freely without grout maintenance, those tiny cracks might grow into bigger problems. But don’t worry—you can keep that dance floor pristine by regularly sealing grout and cleaning up any messes quickly. This way, your pets enjoy freedom, and your grout stays strong.


