
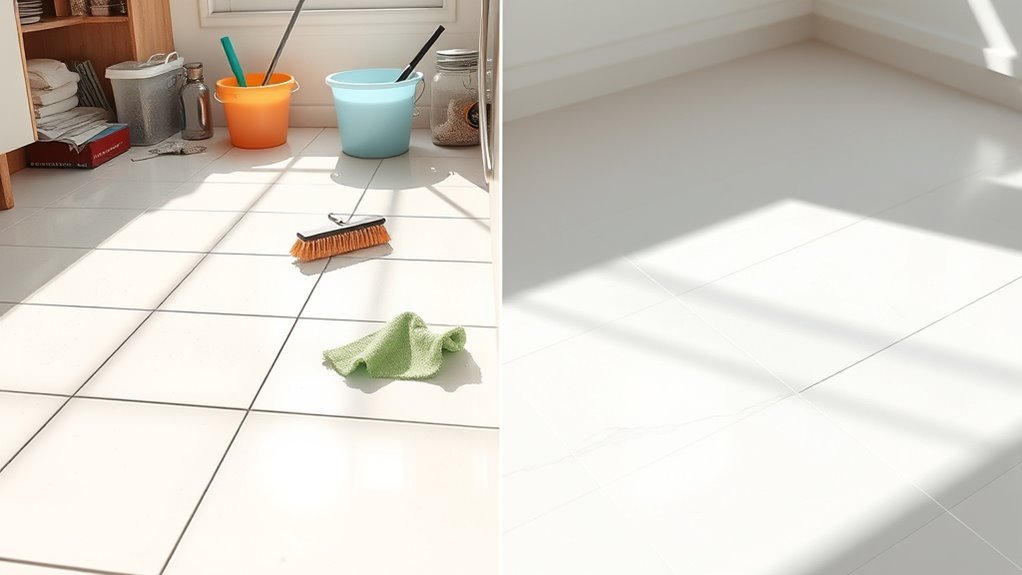
Cleaning Tips Before and After Tile
Before cleaning tile, clear debris and sweep to avoid scratches, then test a pH-neutral cleaner on a small area. Use a soft brush on grout lines and gentle mopping on tile surfaces. After cleaning, rinse thoroughly with warm water and dry to prevent streaks. Seal grout and porous tiles to protect against stains and moisture, and maintain regularly with mild cleaners to extend tile life. Following these steps guarantees lasting tile beauty and durability, with more detailed techniques to explore.
Preparing Your Tiles for Cleaning
Before you begin cleaning your tiles, you’ll want to prepare the area thoroughly to guarantee the best results. Start by identifying your tile types—ceramic, porcelain, natural stone, or glass—since each requires specific care. Next, clear the space of furniture and debris to avoid interference during cleaning. Surface preparation is essential: sweep or vacuum to remove loose dirt and grit that can scratch tiles. For natural stone, avoid acidic cleaners and make certain the surface is dry to prevent damage. Check grout lines for damage or mold, addressing these issues before cleaning. Finally, test a small, inconspicuous area with your chosen cleaning solution to verify compatibility. Proper preparation ensures your tiles stay intact and look fresh, giving you the freedom to clean effectively without worry. Using soft bristle brooms or vacuums helps prevent scratches during this initial cleaning phase.
Essential Tools and Materials Needed
Although having the right tools might seem straightforward, selecting the appropriate ones is essential for effective tile cleaning. You’ll want to gather tile cleaning essentials that give you control and efficiency without restricting your cleaning freedom. Here are the must have supplies to get started:
| Tool/Material | Purpose | Tip for Use |
|---|---|---|
| Soft-bristle brush | Scrubs grout & tough spots | Avoid harsh scrubbing to protect tiles |
| Microfiber mop | General surface cleaning | Use damp, not soaked |
| pH-neutral cleaner | Safe tile surface cleaner | Prevents damage from acids or alkalis |
| Bucket | Holds cleaning solution | Use separate buckets for rinse and wash |
| Gloves | Protects your hands | Choose comfortable, durable ones |
With these tools, you maintain freedom while ensuring thorough, damage-free tile care. Since grout is porous and easily traps dirt and stains, having proper tools is especially important for effective grout cleaning.
How to Remove Dust and Loose Dirt

Start by removing dust and loose dirt from your tile surfaces with a microfiber mop or a soft-bristle brush. These tools efficiently capture fine particles without scratching your tile. For effective dust removal, follow these steps:
- Begin at one corner of the room and methodically move across the tile surface, ensuring no spots are missed.
- Use gentle, sweeping motions to lift loose dirt, avoiding harsh scrubbing that could embed debris into grout lines.
- Periodically shake out or clean your mop or brush to maintain dust-trapping efficiency. Using microfiber cloths and mops helps wipe away residue without damaging the tile surface.
Choosing the Right Cleaning Solution
When selecting a cleaning solution for your tile, you’ll want to contemplate the type of tile you have and the nature of the dirt or stains you’re dealing with. Porcelain and ceramic tiles generally tolerate a wider range of cleaners, but natural stone like marble or travertine demands pH balanced cleaners to prevent etching or damage. Opting for eco friendly solutions not only protects the environment but also minimizes harsh chemical exposure in your space. Look for products labeled specifically for your tile type, ensuring they effectively remove grime without leaving residue. Avoid acidic or abrasive cleaners on delicate surfaces, and always test a small area before full application. Choosing the right cleaner empowers you to maintain your tile’s beauty while respecting both your health and the planet. Additionally, regular cleaning is essential to maintain the appearance of your grout and prevent odors caused by porous grout.
Techniques for Cleaning Grout Lines
To keep your grout lines spotless, you’ll want to use effective cleaning methods like a stiff brush paired with a baking soda and vinegar paste. Regularly sealing your grout prevents stains by creating a protective barrier against dirt and moisture. By consistently applying these techniques, you can maintain clean and durable grout for years. Additionally, using pH-neutral cleaners ensures you avoid damage while maintaining grout cleanliness.
Effective Grout Cleaning Methods
Cleaning grout lines effectively requires understanding the right techniques and products that target the porous nature of grout without damaging it. To maintain your grout color and extend its life, follow these methods:
- Use a pH-neutral cleaner with a soft brush to loosen dirt gently, preserving both grout and tile surfaces.
- Apply a grout-specific cleaner for stubborn stains, letting it sit briefly before scrubbing to avoid discoloration or damage.
- After cleaning, verify grout sealing is reapplied to protect against moisture and stains, maintaining the grout’s integrity and appearance.
Preventing Grout Stains
Although grout is durable, it’s highly susceptible to staining if not properly maintained. To prevent grout stains, start by selecting a grout color that complements your tile while minimizing visible dirt. Darker grout shades often conceal stains better, but regardless of color, applying a high-quality grout sealer is essential. Sealers create a protective barrier that repels moisture and dirt, reducing the risk of discoloration. Regularly clean grout lines with a pH-neutral cleaner to avoid breakdown of the sealant. Quickly address spills and avoid using harsh chemicals that can deteriorate grout, making it more prone to stains. By combining thoughtful grout color choices with consistent stain prevention techniques, you’ll maintain clean, vibrant grout lines and enjoy the freedom of a fresh, lasting tile appearance.
Dealing With Tough Stains and Buildup
When you encounter tough stains or buildup on your tile, the first step is to accurately identify the type of stain to choose the most effective cleaning solution. You’ll want to use specific products designed to break down stubborn residues without damaging the tile surface. Additionally, adopting preventive measures can help minimize future buildup and keep your tiles looking fresh longer. Understanding the different types of grout can help in selecting the most appropriate cleaning and sealing methods for your tiles.
Identifying Stubborn Stains
How can you tell if a stain on your tile is truly stubborn or just superficial dirt? Identifying common stains starts with recognizing stain types. Here’s how you can assess:
- Visual Inspection: Look closely at the stain’s color and texture. Grease stains often appear shiny, while mineral deposits are chalky and white.
- Surface Test: Gently rub the stain with a damp cloth. If it lifts easily, it’s likely dirt; if it persists, it’s more stubborn.
- Location and History: Consider where the stain is and what caused it. Oil from kitchens or rust near metal fixtures often signals tough buildup.
Effective Cleaning Solutions
Once you’ve identified a stubborn stain on your tile, choosing the right cleaning solution becomes key to effectively removing it without damaging the surface. For tough buildup, consider natural cleaning agents like white vinegar or baking soda, which safely break down grime without harsh chemicals. You can create homemade solutions by mixing equal parts vinegar and water or making a paste of baking soda and water for targeted scrubbing. Apply these gently with a soft brush to avoid scratching. For grease or oil stains, a few drops of mild dish soap diluted in warm water can be effective. Always test your solution on a small, hidden area first to verify compatibility. These natural cleaning and homemade solutions offer a freedom-friendly way to maintain your tile’s appearance while minimizing environmental impact.
Preventing Future Buildup
Although stubborn stains can be challenging to remove, establishing a consistent cleaning routine and adopting preventive measures will greatly reduce future buildup on your tile surfaces. To keep your tiles pristine, follow these key steps:
- Routine inspections: Regularly check grout lines and tile surfaces for early signs of dirt accumulation or discoloration. Catching issues early prevents stubborn buildup.
- Immediate spill cleanup: Don’t let spills sit. Wipe them up promptly to stop stains from setting, especially with substances like oils or dyes.
- Use appropriate sealants: Apply a high-quality sealant on grout and porous tiles to create a barrier against moisture and dirt, vastly reducing buildup.
Post-Cleaning Rinse and Drying Tips
After thoroughly cleaning your tile, rinsing it properly is essential to remove any leftover cleaning residue that can dull the surface or attract dirt. Use clean, warm water and a mop or cloth to rinse the tiles thoroughly, ensuring no detergent or cleaner remains. Next, perform a post cleaning inspection to spot any missed spots or streaks that might need a quick touch-up. For drying, apply effective drying techniques like using a microfiber cloth or a dry mop to absorb excess moisture quickly. Proper drying prevents water spots and reduces slip hazards, preserving your tile’s appearance and safety. By following these steps, you maintain your tiles’ freedom from buildup and enhance their longevity without extra effort. Additionally, understanding the differences in tile types can help you choose the best rinsing and drying methods to avoid damage.
Sealing Tiles and Grout for Protection
Rinsing and drying your tiles properly guarantees they look clean, but to keep them protected over time, sealing both the tiles and grout is a key step. Sealing methods vary, so choosing the right one for your tile type and usage is essential. Here’s how to approach it:
Proper rinsing and drying reveal clean tiles, but sealing protects tiles and grout for lasting durability.
- Clean tiles and grout thoroughly to remove dirt and moisture before sealing.
- Apply a penetrating sealer for grout protection; it soaks in and prevents stains without altering appearance.
- Use a surface sealer on tiles, especially porous ones, to create a durable barrier against spills and wear.
For a healthier, more sustainable home environment, consider using plant-based sealants that reduce exposure to harsh chemicals.
Regular Maintenance to Prevent Dirt Accumulation
Since sealed tiles and grout provide a strong defense against stains, regular maintenance is still crucial to prevent dirt buildup that can compromise their appearance and longevity. To keep your tiles looking fresh, commit to a consistent tile maintenance routine. Start by sweeping or vacuuming daily to remove loose dirt and debris, which can grind into surfaces and grout lines. Follow up with a damp mop using a pH-neutral cleaner designed for tiles to avoid damaging the sealant. Focus on grout lines where dirt tends to accumulate, using a soft brush when necessary. Address spills immediately to prevent grime from settling. By staying proactive with dirt prevention, you guarantee your tiles stay vibrant and durable, preserving both freedom in your cleaning routine and the beauty of your space over time. Using eco-friendly cleaning products can also protect your home environment while maintaining cleanliness effectively.
Avoiding Common Mistakes When Cleaning Tiles
Although cleaning tiles might seem straightforward, there are several common mistakes that can damage their surface or reduce their lifespan if you’re not careful. Avoiding these common cleaning pitfalls is essential for effective tile care. Here are three key tile care mistakes to watch out for:
Cleaning tiles seems easy, but common mistakes can damage surfaces and shorten their lifespan.
- Using harsh chemicals or abrasive tools that can scratch or discolor tiles. Stick to pH-neutral cleaners and soft cloths.
- Ignoring grout maintenance, which leads to staining and mold growth. Regularly clean and seal grout lines to preserve their integrity.
- Over-wetting tiles during cleaning, causing water to seep beneath and weaken adhesive bonds. Use minimal water and dry tiles promptly.
Sealing grout regularly is crucial because it simplifies maintenance and reduces the need for constant scrubbing by protecting against stains and moisture penetration, as explained in Sealing grout.
Frequently Asked Questions
Can Tile Cleaning Damage Underfloor Heating Systems?
You don’t have to worry much about tile cleaning damaging your underfloor heating system if you follow proper tile maintenance. Using gentle cleaning agents and avoiding excessive water keeps heating safety intact. Harsh chemicals or soaking can seep through grout and harm heating elements beneath. So, stick to recommended cleaners, avoid abrasive tools, and make sure floors dry quickly. That way, your freedom to enjoy warm tiles won’t be compromised by damage.
How Often Should Professional Tile Cleaning Be Scheduled?
You might think scheduling professional tile cleaning monthly is necessary, but that’s usually overkill. While monthly maintenance keeps your tiles looking fresh, deep cleaning by pros every 12 to 18 months is enough to tackle stubborn grime and preserve grout integrity. This balance frees you from constant worry, letting you enjoy your space without sacrificing cleanliness or risking damage. Trust regular upkeep paired with periodic deep cleaning for ideal tile care.
Are Natural Stone Tiles Cleaned Differently Than Ceramic Tiles?
Yes, you’ll need to approach stone tile care and ceramic tile maintenance differently. Natural stone tiles are porous and require pH-neutral cleaners to avoid damage, plus regular sealing to protect them. Ceramic tiles are more durable and can handle stronger cleaners and more frequent scrubbing. By tailoring your cleaning routine, you’ll keep both tile types looking great without risking wear or discoloration. Always test products on a small area first.
Can Essential Oils Be Used in Tile Cleaning Solutions?
Yes, you can use essential oils in tile cleaning solutions to add a natural fragrance and antibacterial properties. Just mix a few drops of oils like tea tree, lavender, or eucalyptus with water and a mild detergent. However, avoid using oils with strong acidity or that may damage grout or natural stone tiles. Always test a small area first to guarantee your essential oils won’t harm the tile surface or finish during your tile cleaning routine.
What Are the Best Storage Tips for Tile Cleaning Tools?
You’d think storing tile cleaning tools requires a secret vault, but really, tool organization is all about smart storage solutions. Use wall-mounted racks or pegboards to hang brushes and squeegees, freeing up floor space and keeping tools visible. Clear bins with labels help you quickly grab what you need without a scavenger hunt. Keeping everything orderly not only saves time but also gives you the freedom to clean efficiently without clutter chaos.


