DIY Cleaner for Garage Surfaces
You can make an effective DIY garage cleaner by mixing water, white vinegar, baking soda, and liquid castile soap—measure carefully to avoid surface damage. Use nitrile gloves and goggles for protection, and apply the solution with a microfiber mop or sturdy brush. Start by sweeping debris, then scrub floors, walls, and storage areas methodically. For tough grease, apply an absorbent like cat litter first. Following these steps guarantees thorough cleaning; additional details can improve your process.
Essential Ingredients for Your DIY Garage Cleaner
Creating an effective DIY garage cleaner starts with selecting the right ingredients. You’ll want to prioritize natural alternatives that maintain cleaning power without harsh chemicals, ensuring safety and environmental responsibility. Common components include white vinegar, baking soda, and liquid castile soap. These not only provide strong degreasing and stain removal capabilities but also maximize cost effectiveness, allowing you to maintain a clean garage without recurring expenses. Additionally, essential oils like tea tree or lemon can enhance antimicrobial properties and add a fresh scent. The precise measurements matter; too much vinegar can corrode surfaces, while insufficient soap reduces efficacy. By carefully balancing these natural alternatives, you gain control over the formula’s strength and environmental impact, granting you freedom from commercial cleaners’ limitations while achieving ideal, reliable results.
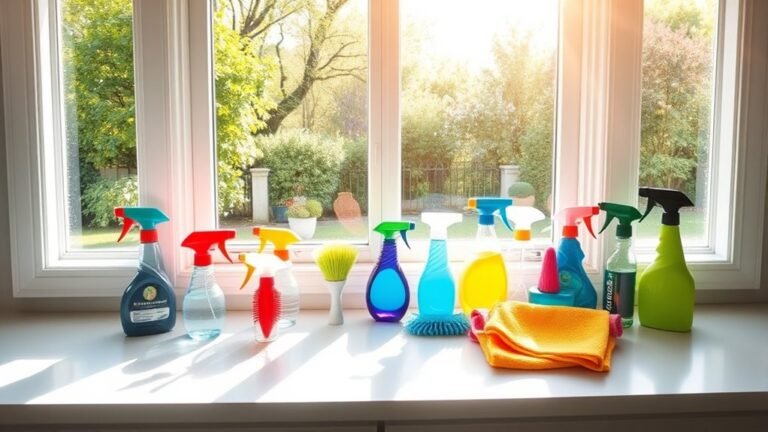
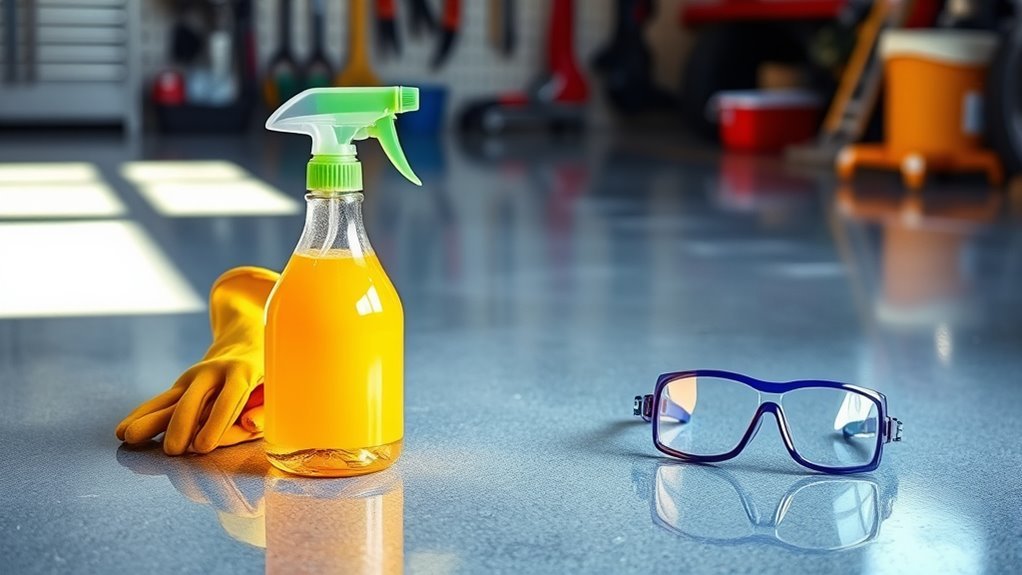
Tools Needed to Prepare and Apply the Cleaner
You’ll need specific tools to prepare and apply your DIY garage cleaner effectively, including measuring devices and mixing containers. Don’t forget protective gear like gloves and goggles to guarantee safety during preparation and application. Choosing the right application tools, such as scrub brushes or spray bottles, will optimize cleaning efficiency on various garage surfaces.
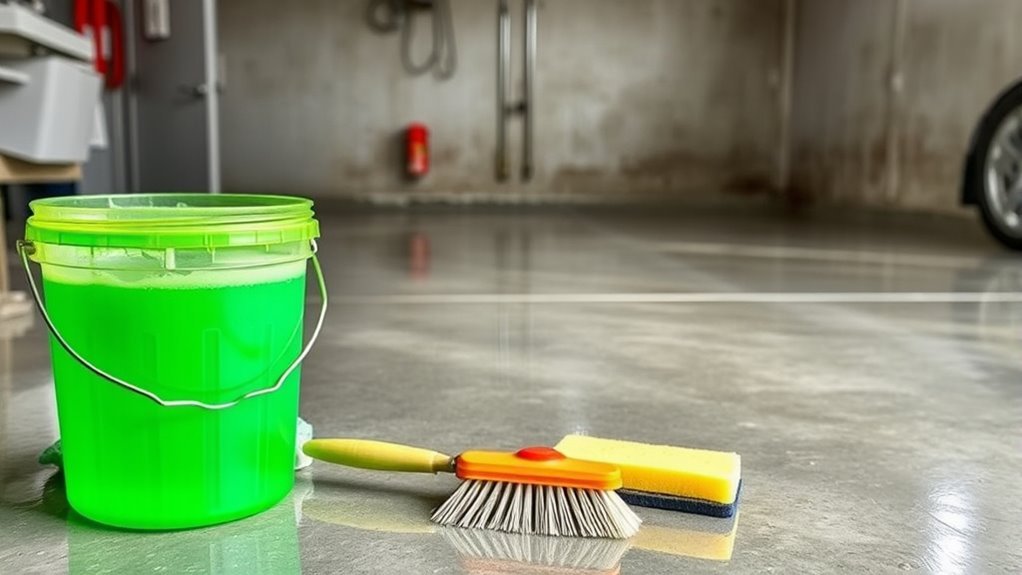
Essential Cleaning Tools
A few key tools are essential to prepare and apply your DIY garage cleaner effectively. First, select durable cleaning brushes; stiff-bristled variants excel at scrubbing stubborn grime from concrete or painted surfaces. Second, choose appropriate mop types—microfiber mops work best for smooth floors, while sponge mops handle uneven textures. Third, use a sturdy bucket with measurement markers to mix your cleaner accurately. Fourth, a spray bottle with adjustable nozzles allows precise application on targeted spots. Each tool contributes to efficient cleaning, reducing effort and maximizing coverage. By assembling these specific instruments, you maintain control over the process and tailor your approach to your garage’s unique surface, empowering you with the freedom to achieve professional-level results without relying on commercial products or services.
Protective Gear Required
Although preparing your DIY cleaner is essential, guaranteeing your safety through proper protective gear is equally important when handling and applying the solution. Prioritize gloves usage to shield your skin from potentially irritating or corrosive ingredients. Choose chemically resistant gloves made of nitrile or neoprene for ideal protection. Additionally, always wear eye protection—safety goggles or glasses with side shields—to prevent splashes or fumes from causing injury. Avoid contact lenses during preparation, as they can trap chemicals against your eyes. Confirm your protective gear fits well and remains undamaged throughout the process. By adhering to these precautions, you maintain control and freedom to work confidently while minimizing health risks. Proper gloves usage and eye protection empower you to handle your DIY cleaner safely and effectively.
Application Equipment Choices
Selecting the right tools is critical for preparing and applying your DIY garage cleaner efficiently and safely. You want equipment that maximizes coverage and control without restricting movement.
- Spray Bottles: Choose adjustable nozzles for precise application and even distribution of the cleaner on vertical and horizontal surfaces.
- Mop Heads: Opt for microfiber mop heads; they retain liquid well and scrub effectively without damaging concrete or epoxy finishes.
- Buckets: Use sturdy buckets with measurement markings to mix your cleaner accurately, ensuring consistent concentration.
- Scrub Brushes: Select brushes with ergonomic handles and firm bristles to manually tackle stubborn stains without excessive fatigue.
Each tool should support your freedom to move swiftly and adapt to different garage surface textures while maintaining safety and cleanliness standards.
Step-by-Step Instructions for Mixing the Solution
You’ll need specific ingredients measured accurately to guarantee the cleaner’s effectiveness. Follow a precise mixing sequence to combine these components safely and thoroughly. Remember to wear protective gear and work in a well-ventilated area to minimize exposure risks.
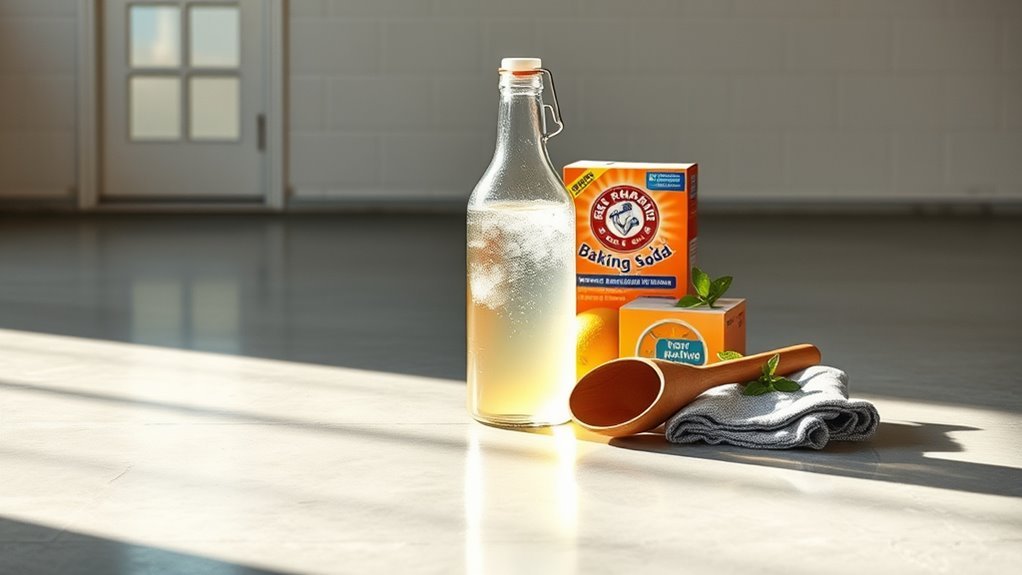
Required Ingredients Overview
Gathering the required ingredients is the essential first step for preparing an effective garage surface cleaner. Choosing natural ingredients and eco friendly options guarantees safety and sustainability. You’ll need the following components:
- White vinegar – a natural degreaser and disinfectant.
- Baking soda – for abrasion and odor neutralization.
- Liquid castile soap – an eco friendly surfactant for breaking down grime.
- Water – preferably distilled to avoid mineral deposits.
Each ingredient plays a distinct role in the cleaning process, contributing to a powerful yet environmentally responsible solution. By selecting these components, you maintain control over the chemical makeup, avoiding harmful additives. This methodical approach empowers you to create a garage cleaner that’s both effective and aligned with your values of freedom and ecological mindfulness.
Mixing Process Explained
Once you have all the ingredients ready, the mixing process can begin by combining specific proportions to ascertain the solution’s effectiveness. Start by measuring your base liquid—usually water—according to the recommended mixing ratios. Add the concentrated cleaning agents slowly, making sure each component is fully incorporated before proceeding. Stir the mixture steadily using a non-reactive utensil to maintain solution consistency. Avoid vigorous shaking to prevent unwanted foaming or separation. Monitor the texture; the solution should be homogenous without any visible particulates or layering. If the mixture appears too thick, adjust by adding small increments of water, adhering strictly to the predefined ratios. Precision during this stage guarantees your DIY cleaner performs efficiently on garage surfaces while giving you the freedom to customize strength within safe parameters.
Safety Precautions Noted
A critical step in mixing your DIY garage cleaner is adhering strictly to safety precautions to prevent accidents and guarantee effective handling of ingredients. You must respect chemical hazards by maintaining control over the environment and your actions. Follow these steps for ideal cleaning safety:
- Wear appropriate personal protective equipment (PPE), including gloves and goggles, to avoid skin and eye contact with chemicals.
- Mix ingredients in a well-ventilated area to minimize inhalation risks from fumes.
- Measure and combine chemicals precisely, preventing dangerous reactions caused by incorrect ratios.
- Store unused chemicals securely, away from children and pets, to avoid accidental exposure.
Best Techniques for Cleaning Garage Floors
Three essential steps guarantee effective cleaning of garage floors: debris removal, stain treatment, and surface scrubbing. Begin by clearing loose debris with a broom or vacuum to expose the floor type, as concrete and epoxy require different approaches. For stain removal, apply a suitable cleaner promptly to prevent absorption. Finally, scrub the surface methodically using a stiff-bristle brush or a mechanical scrubber to restore cleanliness without damaging the floor.
| Schritt | Recommended Tool | Note |
|---|---|---|
| Debris Removal | Broom or Vacuum | Adapt based on floor type |
| Stain Treatment | pH-neutral Cleaner | Target stains immediately |
| Surface Scrubbing | Stiff-bristle Brush | Use mechanical scrubber if needed |
Following these techniques guarantees your garage floor remains durable and visually free.
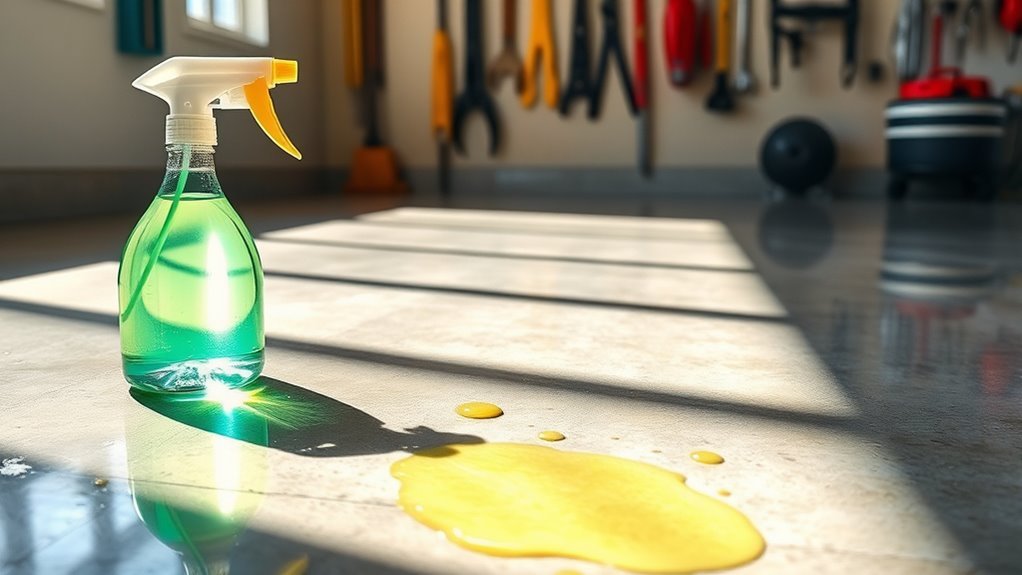
How to Remove Tough Grease and Oil Stains
Removing tough grease and oil stains from your garage floor requires targeted methods that penetrate and break down the residues effectively. Start by applying an oil absorption material like cat litter or sawdust to soak up excess oil. Next, follow these steps for ideal grease removal:
- Sprinkle a degreasing agent directly onto the stain.
- Let it sit for 10–15 minutes to allow chemical action.
- Scrub the area with a stiff brush to agitate and lift the grease.
- Rinse thoroughly with hot water, repeating if necessary.
This method guarantees that oil absorption is maximized and grease removal is complete, freeing your garage floor from stubborn stains without harsh chemicals. By applying this precise technique, you’ll maintain a clean surface ready for any project or freedom you seek.
Cleaning Garage Walls and Storage Areas
Effective cleaning of garage walls and storage areas demands a systematic approach tailored to the surfaces and materials involved. Begin by removing all items from shelves to access the full wall surface and assess dirt accumulation. Use a mild detergent mixed with warm water to scrub painted drywall or concrete walls, employing a soft brush to avoid damage. For storage organization, clean shelves and bins thoroughly with the same solution, guaranteeing no residue remains that could attract dirt. Rinse walls and storage units with clean water, then dry completely to prevent mold growth. Regular wall maintenance includes inspecting for cracks or peeling paint, addressing these promptly to maintain structural integrity. This methodical process guarantees a clean, organized space that supports your freedom to utilize the garage efficiently.
Safety Tips When Using Homemade Cleaners
When handling homemade cleaners, you must prioritize safety to prevent chemical reactions and health hazards. Using these solutions freely requires methodical precautions to protect yourself and your space. Follow these steps:
- Always wear personal protective equipment such as gloves and goggles to avoid skin and eye irritation.
- Never mix ingredients unless you’re certain of their compatibility; unpredictable chemical reactions can release toxic gases.
- Work in a well-ventilated area to disperse fumes and minimize inhalation risks.
- Store homemade cleaners clearly labeled and out of reach of children or pets to prevent accidental exposure.
Maintaining a Clean Garage With Regular DIY Cleaning
Although a deep clean is vital occasionally, maintaining a clean garage requires consistent, methodical attention using DIY cleaning techniques tailored to your space. Establish a cleaning schedule that fits your usage patterns—weekly sweeping and monthly surface scrubbing prevent dirt buildup. Incorporate garage organization strategies such as labeled storage bins and wall-mounted racks to minimize clutter, making cleaning more efficient. Use homemade cleaners appropriate for specific surfaces, following precise dilution ratios to protect finishes. Regularly inspect and address spills or stains promptly to avoid permanent damage. By adhering to this structured routine, you maintain a functional, orderly garage environment without sacrificing your freedom to customize cleaning methods. Consistency in your DIY cleaning and organization efforts guarantees your garage remains a reliable, accessible space.
Häufig gestellte Fragen
Can This Cleaner Be Used on Outdoor Driveway Surfaces?
Sure, when considering driveway cleaning, you’ll want a solution that’s safe for outdoor surfaces. This cleaner’s composition is carefully calibrated to tackle tough stains without damaging concrete or asphalt. You can confidently apply it to your driveway, but always conduct a small patch test first. Its balanced formula guarantees effective grime removal while preserving surface integrity, giving you the freedom to maintain your outdoor areas with precision and care.
Is the DIY Cleaner Safe for Pets Around the Garage?
You’ll want to prioritize pet safety when using any cleaner around your garage. This DIY cleaner balances cleaning effectiveness with non-toxic ingredients, reducing risks to your pets. However, make certain the area dries completely before allowing animals near, preventing ingestion or skin contact with residues. Always test a small area first and ventilate the space well. By following these steps, you maintain a safe environment without compromising on cleaning power.
How Long Does the Cleaning Solution Stay Effective Once Mixed?
You’ll find the shelf life of the cleaning solution is typically around 7 to 10 days once mixed. Its effectiveness duration depends on storage conditions—keep it in a sealed container away from sunlight and extreme temperatures to maintain potency. After this period, the solution may lose strength, reducing cleaning power. For best results and to preserve freedom in your cleaning routine, prepare only what you’ll use within that timeframe.
Can the Cleaner Remove Rust Stains From Metal Tools?
Imagine rust stains as stubborn shadows clinging to your metal tools. With effective rust removal, you’re not just erasing these marks but also fortifying the metal’s surface against further decay. This cleaner methodically breaks down rust molecules while leaving a protective barrier that slows future corrosion. By applying it precisely, you maintain your tools’ freedom to function without compromise, ensuring longevity and reliable performance in your projects ahead.
What Is the Best Storage Method for the Homemade Cleaner?
You should store your homemade cleaner in airtight glass spray bottles to maintain its effectiveness and prevent chemical reactions. Glass spray containers are non-reactive, preserving the cleaner’s composition longer than plastic. Label each container clearly with the contents and date made. Keep them in a cool, dark place away from direct sunlight and heat sources to guarantee stability. This method guarantees your cleaner stays potent and ready whenever you need it.