Best Living Room for Cleaning Refrigerator
To keep your refrigerator easy to clean, make sure you leave enough space around it for airflow and easy access. Bright, neutral lighting will help spot dirt without glare, while durable, water-resistant flooring like tile makes cleanup simple. Organize your cleaning supplies nearby for quick reach, and choose a living room layout with minimal clutter and clear pathways to avoid obstacles. Plus, good ventilation supports your appliance’s efficiency. Keep these tips in mind to create a hassle-free cleaning routine.
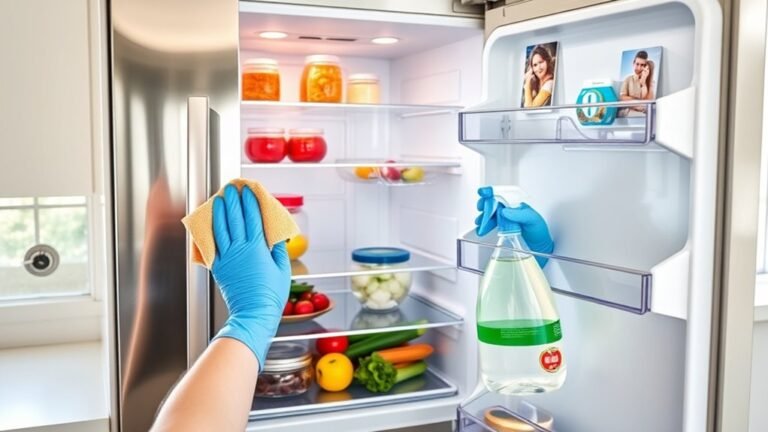
Importance of Adequate Space Around the Refrigerator

Although you might not think about it often, having enough space around your refrigerator is essential for easy cleaning and maintenance. When you focus on refrigerator placement, you give yourself the freedom to access every nook and cranny without hassle. Proper space management means you won’t be stuck wrestling with tight spots or awkward angles, making your chores quicker and less frustrating. By planning for clearance on all sides, you allow air circulation, which keeps your appliance running efficiently and reduces energy use. Plus, having that extra room lets you easily pull the fridge out when deep cleaning or maintenance calls for it. So, prioritize smart refrigerator placement and space management to enjoy a cleaner kitchen and a smoother living experience.
Optimal Lighting for Efficient Cleaning
You’ll want bright lighting to spot every nook and cranny when cleaning your refrigerator. Balancing natural and artificial light helps reduce shadows that can hide dirt. Let’s explore how to set up the best lighting for efficient cleaning.
Brightness Levels Impact
One key factor that can make cleaning your refrigerator easier is the brightness level in your living room. Adjusting your brightness settings and color temperature can transform this chore into a quicker, more effective task. Here’s how you can optimize it:
- Set brightness to a medium-high level to reveal hidden dirt without causing glare.
- Choose a neutral color temperature (around 4000K) for natural, clear visibility.
- Avoid overly warm or cool tones that can distort the appearance of stains.
- Use adjustable lighting so you can customize brightness based on time of day or cleaning needs.
Natural Vs Artificial
Adjusting brightness levels is just part of the equation when it comes to lighting for cleaning your refrigerator. You’ll want to evaluate whether natural or artificial light suits your cleaning style best. Natural lighting offers a crisp, clear view that helps you spot grime and spills easily, supporting a more natural cleaning routine without relying on artificial fragrances to mask odors. It also feels freeing, bringing a fresh vibe to the task. On the other hand, artificial lighting provides consistent brightness anytime, which is handy if you clean during evenings or darker days. Just keep it bright enough to avoid missing spots but avoid harsh, cold lights that can strain your eyes. Choosing the right light lets you clean efficiently and enjoy the process more.
Shadow Minimization Techniques
Although good lighting is essential, minimizing shadows is just as important when cleaning your refrigerator. Shadows can hide grime and make thorough cleaning tough. To achieve effective shadow reduction, consider these tips:
- Position multiple light sources at varying light angles to evenly illuminate all surfaces.
- Use adjustable lamps or portable LED lights so you can change angles as needed.
- Avoid overhead lighting alone; side lighting helps fill in shadows for better visibility.
- Opt for bright, white bulbs that mimic daylight, making it easier to spot dirt.
Choosing Easy-to-Clean Flooring Materials
When you’re choosing flooring for a living room that’s easy to clean after refrigerator maintenance, durability and stain resistance should be your top priorities. Tile options are excellent because they offer a smooth surface that wipes down effortlessly, resisting spills and stains. Plus, tile’s water resistance means you won’t worry about moisture from cleaning tasks. If you prefer a warmer look, laminate durability has improved remarkably, providing a tough, scratch-resistant surface that handles spills well and cleans up quickly. Both choices free you from constant scrubbing, giving you more time to enjoy your space. By selecting flooring that’s both practical and stylish, you create a living room that supports your freedom to maintain cleanliness without hassle.
Organizing Storage for Cleaning Supplies

To keep your cleaning routine efficient, you’ll want to organize your supplies where they’re easy to reach. Think about using baskets, caddies, or shelves that keep everything visible and accessible. This way, you won’t waste time searching for what you need when cleaning your refrigerator.
Cleaning Supply Storage Ideas
A well-organized cleaning supply storage can make tackling refrigerator cleaning quicker and less stressful. When you’ve got cleaning product organization nailed, supply accessibility becomes effortless, letting you move freely without hunting for essentials. Here are four ideas to optimize your cleaning supply storage:
- Use clear, labeled bins to group products by type—sprays, cloths, and gloves—for quick identification.
- Install adjustable shelves or pull-out drawers to customize space based on your cleaning arsenal.
- Hang small caddies or baskets on cabinet doors to keep frequently used items within arm’s reach.
- Dedicate a portable caddy for refrigerator cleaning supplies so you can carry everything easily to wherever you clean.
With these strategies, you’ll free yourself from clutter and waste less time, making refrigerator cleaning a breeze.
Easy Access Organization
Although organizing cleaning supplies might seem straightforward, creating easy access storage can considerably speed up your refrigerator cleaning routine. You want to set up a system where every spray bottle, cloth, and brush is within arm’s reach, so you’re not wasting time searching. Start by grouping similar items together and using clear bins or labeled containers to keep things neat. Consider a rolling cart or a small caddy that you can grab and move freely to wherever you’re cleaning. These organization tips help you maintain freedom of movement and efficiency, making the process less of a chore. When your supplies are easy to access, you can tackle spills or messes immediately, keeping your refrigerator fresh without stress or delay.
Designing a Clutter-Free Living Room Layout
When you design a clutter-free living room layout, you create a space that not only feels open but also makes tasks like cleaning the refrigerator easier. Embrace minimalist decor to reduce visual noise and free up movement paths. Opt for multifunctional furniture to maximize utility without overcrowding. Here’s how to achieve this:
- Prioritize open floor space to allow easy access to adjacent areas like the kitchen.
- Choose sleek, compact furniture with hidden storage to keep essentials out of sight.
- Arrange seating and tables to create clear walkways, preventing obstacles during chores.
- Limit decorative items to a few meaningful pieces, keeping surfaces clear for quick cleaning.
This approach gives you freedom to move around, making refrigerator maintenance less of a hassle.
Incorporating Ventilation and Airflow Considerations

Since proper ventilation directly impacts how efficiently your refrigerator runs, you’ll want to guarantee your living room layout supports good airflow. Prioritize airflow management by positioning your fridge away from walls or bulky furniture that block air circulation. Make sure ventilation systems, like vents or fans, aren’t obstructed so heat can escape easily. This freedom in your living space prevents your fridge from overheating and cuts down on energy use. You don’t want your cleaning efforts wasted by a poorly ventilated spot that wears your appliance down faster. Keep pathways clear and consider adding adjustable vents or portable fans if natural airflow is limited. By doing this, you create a living room that’s not only easy to clean around but also helps your refrigerator perform at its best.
Häufig gestellte Fragen
How Often Should I Deep Clean My Refrigerator?
You don’t want your fridge turning into a science experiment, right? For ultimate freedom from funky smells and spoiled food, stick to a refrigerator maintenance routine where you deep clean every three to four months. This cleaning schedule keeps your appliance humming smoothly and your food fresh. Regular deep cleans save you from unexpected messes and wasted groceries, letting you enjoy life without being chained to constant fridge disasters.
What Cleaning Products Are Safe for Refrigerator Surfaces?
When cleaning your fridge, you’ll want to stick with safe disinfectants that won’t damage surfaces or leave harmful residues. Natural cleaners like diluted vinegar, baking soda paste, or gentle dish soap work wonders without harsh chemicals. These options give you freedom from worrying about toxins while keeping your fridge fresh and spotless. Avoid bleach or abrasive scrubbers—they can harm seals and finishes. You’ve got plenty of safe, effective choices to keep your fridge clean and healthy!
Can I Clean the Refrigerator While It Is Plugged In?
You can clean your refrigerator while it’s plugged in, but you should take safety precautions to avoid electric shocks. It’s best to unplug it if you’re doing a deep clean or working near electrical components. For light cleaning, use gentle cleaning techniques like a damp cloth and mild detergent, avoiding excessive water. This way, you keep things safe and enjoy the freedom of maintaining your fridge without hassle.
How Do I Prevent Mold Buildup Inside the Fridge?
If you don’t want your fridge to turn into a mold jungle, you’ve got to stay on top of mold prevention! You can’t just let spills and leftovers run wild. Regular refrigerator maintenance is your ticket to freedom from funky smells and slimy surprises. Keep it dry, clean spills immediately, and don’t overload it so air circulates. Trust me, a little effort lets you enjoy fresh food without the creepy crawlies!
What Is the Best Way to Defrost a Freezer?
When it comes to defrosting your freezer, the best defrost techniques start with unplugging it and removing all food. Let the ice melt naturally by leaving the door open, or speed things up with bowls of hot water placed inside. Avoid sharp tools that could damage your freezer. Regular freezer maintenance like this keeps it running efficiently and gives you the freedom to store your favorite foods without worry.