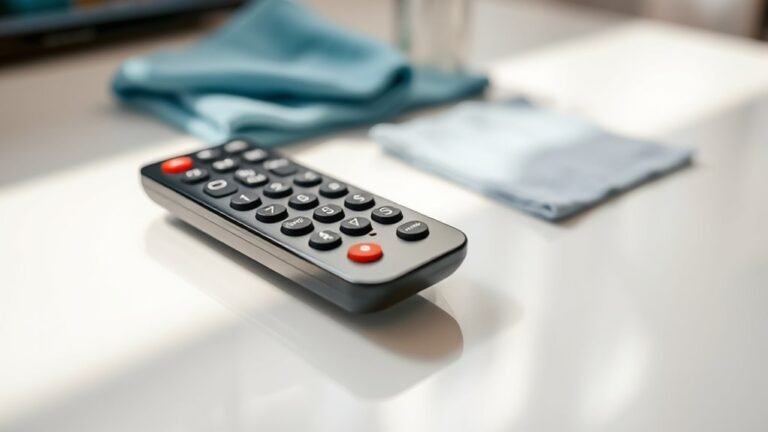
How to Clean Your Remote in 10 Minutes
To clean your remote in 10 minutes, first remove the batteries and any covers. Use compressed air to blow out dust from crevices, then wipe the surface with a lightly damp microfiber cloth. Clean between buttons using a toothpick or cotton swab dipped in water. Disinfect by applying isopropyl alcohol to a cloth—not directly on the remote—to avoid damage. Let it dry fully before reassembling and replacing batteries. Following these quick steps keeps your remote fresh, and you can explore more tips to maintain it longer.
Gather Your Cleaning Supplies
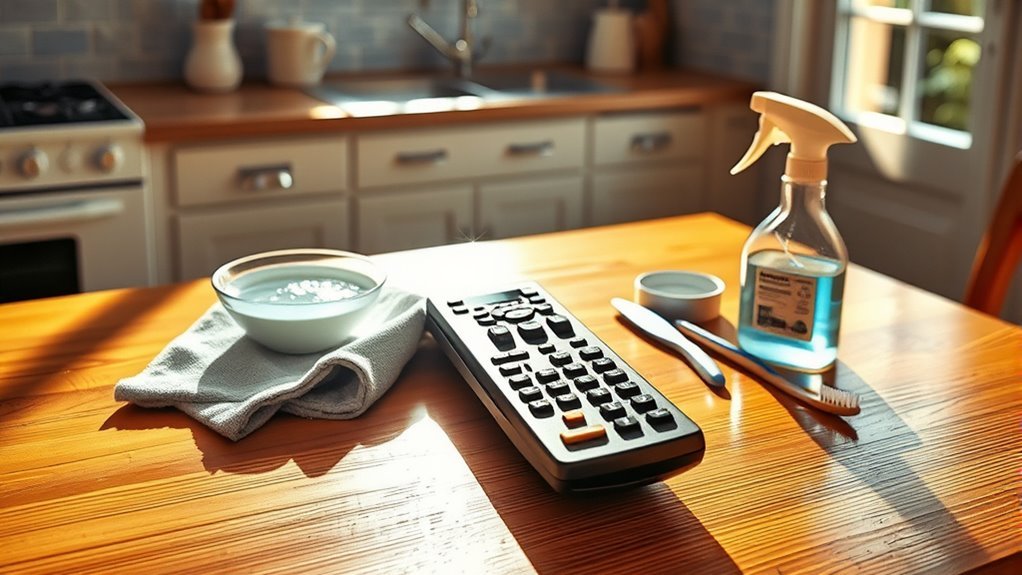
Before you begin cleaning your remote, gather a few essential supplies to make the process efficient and effective. Start with basic cleaning tools: a microfiber cloth to wipe surfaces without scratching, cotton swabs for tight spaces, and a soft-bristle brush to dislodge dirt from buttons. You’ll also need isopropyl alcohol (70% or higher) as a reliable disinfectant that evaporates quickly, preventing moisture damage. Avoid harsh chemicals that can harm plastic components. Have a toothpick or a soft wooden stick handy to gently remove grime from crevices. Collecting these items beforehand streamlines your remote care routine, letting you maintain cleanliness without hassle. With the right cleaning tools ready, you’re set to preserve your remote’s function and extend its lifespan while enjoying the freedom of a hygienic, comfortable device.
Remove Batteries and Detach Covers
Start by removing the batteries from your remote to prevent any electrical issues or accidental button presses during cleaning. Locate the battery compartment, usually on the back, and slide or lift the cover off carefully. This cover removal is vital to access the remote battery and avoid damage. Gently take out the batteries and set them aside in a safe spot. If your remote has additional detachable parts, like a front cover, remove those as well to reach hidden dirt. Handling the remote battery and covers with care guarantees your device stays intact and ready for reassembly. Taking these simple steps frees you to clean thoroughly without worrying about short circuits or stuck buttons, giving you complete control over your remote’s maintenance.
Use Compressed Air to Remove Dust

You’ll find compressed air effective for blowing out dust and debris from tight spaces without damaging delicate components. Hold the can upright and use short bursts to avoid moisture buildup, keeping a safe distance from buttons and circuits. Always work in a well-ventilated area and avoid shaking the can to guarantee safe, efficient cleaning.
Benefits of Compressed Air
Although it might seem minor, using compressed air to clean your remote is one of the most effective ways to remove dust from hard-to-reach crevices. The compressed air benefits go beyond simple surface cleaning, improving cleaning efficiency considerably. You’ll notice how it blasts away particles without disassembly or moisture. Here’s why it’s a game-changer:
- Reaches tight spots without damage
- Prevents buildup that affects button function
- Quick and mess-free method
- Extends the remote’s lifespan
- No need for harsh chemicals
How to Use Properly
Before using compressed air on your remote, make certain to hold the can upright and keep a safe distance of about two to three inches from the surface to avoid moisture buildup. Aim the nozzle at the crevices around the buttons, where dust and debris accumulate. Use short, controlled bursts to dislodge particles without forcing them deeper. This respects remote etiquette by preserving sensitive components and preventing damage. Focus on areas with frequent button usage since grime tends to collect there, affecting responsiveness. Avoid pressing buttons while spraying to guarantee no moisture seeps inside. Afterward, wipe the surface gently with a dry cloth to remove loosened dust. By following these steps, you maintain your remote’s functionality and longevity, giving you the freedom to enjoy seamless control without interruptions.
Safety Precautions
Using compressed air effectively means paying close attention to safety precautions to protect both yourself and your remote. Compressed air is a powerful cleaning tool, but improper use can damage the device or cause injury. To maintain remote hygiene safely, follow these tips:
- Hold the can upright to prevent liquid propellant from spraying.
- Use short bursts to avoid moisture buildup inside the remote.
- Keep the nozzle at least a few inches away from buttons and crevices.
- Work in a well-ventilated area to avoid inhaling fumes.
- Avoid shaking the can before or during use to prevent liquid discharge.
Wipe Down the Surface With a Damp Cloth

A damp cloth is crucial for effectively removing dirt and grime from your remote’s surface without damaging its sensitive components. Choose a soft cloth slightly moistened with water or a mild cleaning solution suited for your remote’s surface materials, such as plastic or rubber. Avoid soaking the cloth; excess moisture can seep into the device and cause damage. Wipe the remote gently, covering all visible areas to lift fingerprints, oils, and dust. Pay attention to corners and edges where dirt tends to accumulate. Maintaining a regular cleaning frequency—once a week or biweekly—prevents buildup and keeps your remote looking fresh and functioning well. This simple step guarantees your device stays clean without compromising its durability or performance.
Clean Between Buttons With a Toothpick or Cotton Swab
Once you’ve wiped down the surface, you’ll notice dirt often hides in the narrow spaces between buttons. To free your remote from grime, use the toothpick technique carefully to avoid scratching. Follow these steps:
- Gently slide a toothpick along button edges to loosen debris.
- Use a cotton swab dipped in a small amount of water to wipe loosened dirt.
- Rotate the cotton swab to a clean side frequently.
- Avoid pressing too hard to prevent damage.
- Focus on corners and crevices where dirt accumulates.
This method lets you reach tight spots without disassembling your remote. It’s quick, effective, and keeps your device responsive. With the toothpick technique and cotton swab, you regain control over cleanliness, ensuring your remote feels fresh and works smoothly every time you use it.
Disinfect the Remote With Isopropyl Alcohol
To disinfect your remote effectively, use isopropyl alcohol with at least 70% concentration for best results. Apply it sparingly to a microfiber cloth or cotton swab—never pour directly onto the remote—to avoid damaging the electronics. Always work in a well-ventilated area and keep the remote powered off while cleaning to stay safe.
Choosing the Right Alcohol
Why should you choose isopropyl alcohol for cleaning your remote? Among the various types of alcohol, isopropyl alcohol stands out for its balance of effectiveness and safety. Its ideal alcohol concentration—usually around 70%—ensures it kills germs without damaging sensitive electronics. Here’s why it’s your best bet:
- Evaporates quickly, leaving no residue
- Kills bacteria and viruses efficiently
- Safe on plastic and rubber buttons
- Readily available and affordable
- Less harsh than other alcohol types like ethanol or methanol
Choosing the right alcohol means you avoid damaging your remote while achieving thorough disinfection. Stick with isopropyl alcohol at 70%, and you’ll enjoy a clean, germ-free remote without compromising its functionality or your peace of mind.
Proper Application Techniques
When you’re ready to disinfect your remote, start by lightly dampening a microfiber cloth with 70% isopropyl alcohol—never apply the alcohol directly to the device. This application method prevents excess moisture from seeping into the remote’s internal components. Use controlled, gentle wiping motions to cover the entire surface, paying special attention to buttons and crevices where germs linger. Avoid saturating the cloth; it should be just damp enough to clean effectively without dripping. Employ cleaning techniques that include frequent cloth folds to expose a fresh side, ensuring you don’t just spread dirt around. Let the remote air dry completely before use to maintain peak function. Following these precise application methods guarantees a thorough, damage-free clean every time.
Safety Precautions to Follow
Although isopropyl alcohol is effective for disinfecting your remote, you should handle it carefully to avoid damage or health risks. Prioritizing remote safety means respecting the power of cleaning chemicals and using them wisely. Here’s what you need to keep in mind:
- Use 70% isopropyl alcohol; higher concentrations can harm plastic surfaces.
- Apply alcohol to a soft cloth, not directly on the remote, to prevent liquid seeping inside.
- Work in a well-ventilated area to avoid inhaling fumes that can irritate your respiratory system.
- Avoid prolonged skin contact to prevent dryness or irritation.
- Keep the remote unplugged or remove batteries before cleaning to guarantee electrical safety.
Following these precautions assures a clean remote without risking damage or your well-being.
Dry the Remote Thoroughly
Before you use the remote again, make certain it’s completely dry to prevent any damage or malfunction. Start by wiping it down with a dry microfiber cloth, focusing on seams and buttons where moisture hides. Avoid using heat sources like hairdryers, which can warp components. Instead, let the remote air dry in a warm, well-ventilated area for at least 30 minutes. For stubborn moisture inside, gently shake the remote or place it near a desiccant packet to absorb residual dampness. Proper drying techniques guarantee your remote stays functional and extends its lifespan. Once dry, store your remote in a clean, dry spot away from direct sunlight and humidity to maintain its condition. Taking these steps empowers you to keep your remote reliable and ready whenever freedom calls.
Reassemble and Replace Batteries
Two essential steps remain: reassembling your remote and replacing the batteries. First, align the remote’s casing carefully to avoid damaging internal components. Then, snap or screw it back together securely. Once reassembled, it’s time to replace batteries to guarantee smooth operation.
Here’s how to do it right:
- Insert new batteries matching the polarity (+/-) indicators.
- Use fresh batteries to avoid leakage or corrosion.
- Clean battery contacts with a dry cloth before inserting.
- Close the battery compartment firmly to prevent loosening.
- Test all buttons to confirm functionality before final use.
Tips for Regular Remote Maintenance
To keep your remote working smoothly, you’ll want to perform regular maintenance that goes beyond occasional cleaning. Establish a remote care maintenance schedule—wipe down your remote with a microfiber cloth weekly to prevent grime buildup. Remove batteries every few months to check for corrosion and clean the battery contacts gently with a cotton swab dipped in isopropyl alcohol. Avoid eating or drinking near your remote to reduce dirt and spills. Store your remote in a designated spot to prevent drops or damage. If you notice sluggish button responses, open the remote and clean the internal contacts carefully. By sticking to this maintenance schedule, you’ll extend your remote’s lifespan and maintain seamless control over your devices, giving you the freedom to enjoy your entertainment without interruptions.
Häufig gestellte Fragen
Can I Use Water Instead of Isopropyl Alcohol to Disinfect the Remote?
You can use water alternatives for disinfecting, but plain water alone isn’t very effective at killing germs on your remote. For better results, you might try diluted vinegar or a mild soap solution. Just avoid soaking the remote—moisture can damage it. Isopropyl alcohol is preferred because it evaporates quickly and disinfects well. When disinfecting, use a slightly damp cloth, not dripping wet, to keep your remote safe and clean.
How Often Should I Deep Clean My Remote Control?
You should aim for daily cleaning of your remote to keep germs at bay, especially if multiple people use it. However, deep cleaning can be done less often, about once a month, depending on your cleaning frequency needs. If you want more freedom from worry, adjust based on how often it’s handled or if it gets visibly dirty. Staying consistent prevents buildup and keeps your remote fresh and hygienic.
Will Cleaning Damage the Remote’S Electronic Components?
You might worry that cleaning could damage your remote’s electronic components, but if you follow proper remote care and use safe cleaning methods, you’re in the clear. Avoid soaking or using excessive liquid; instead, opt for a slightly damp cloth or alcohol wipes. This way, you protect the internal circuits while removing grime efficiently. Being detailed and cautious guarantees your remote stays functional without sacrificing cleanliness or your freedom to use it worry-free.
What Should I Do if Buttons Stop Working After Cleaning?
If your buttons stop working after cleaning, start with some troubleshooting tips: check for moisture inside the remote, and let it dry completely. Press each button repeatedly to see if it loosens stuck contacts. If that doesn’t help, you might consider button replacement—either by purchasing a replacement keypad or contacting a professional. Don’t worry; with a bit of patience, you’ll regain full control without sacrificing your freedom to enjoy your device.
Can I Use a Dishwasher to Clean My Remote Control?
You shouldn’t use a dishwasher to clean your remote control because dishwasher safety isn’t designed for electronics. The heat, water, and detergent can damage remote materials like plastic and circuit boards, causing permanent harm. Instead, stick to gentle cleaning methods like using rubbing alcohol and a soft cloth. This way, you keep your remote functional and avoid frying its internal parts, giving you freedom from costly replacements.