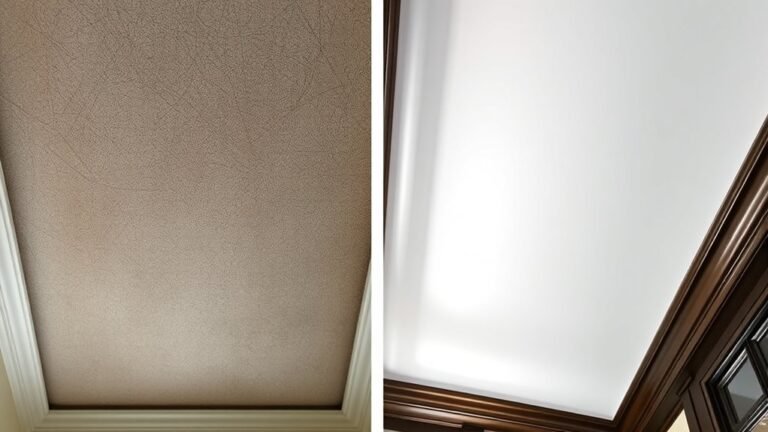
Step-By-Step Guide to Cleaning Walls
First, identify your wall’s surface and paint type to avoid damage. Gather soft sponges, microfiber cloths, and gentle cleaners, then clear furniture and protect your floors. Dust walls using smooth strokes, test cleaning solutions on a small spot, and wipe with a mild detergent. For stubborn stains, try baking soda paste or a magic eraser. Afterward, dry thoroughly with good ventilation to prevent mold. Keep these steps in mind, and you’ll be ready to explore more tips for long-lasting clean walls.
Assessing Wall Surfaces and Paint Types

Before you begin cleaning, it’s important to evaluate your wall surfaces and paint types carefully. Knowing your wall material types—whether drywall, plaster, wood, or brick—helps you choose the right cleaning approach without causing damage. Each surface reacts differently to moisture and scrubbing, so understanding this gives you freedom to clean confidently.
Next, take a close look at your paint finish options. Flat, eggshell, satin, semi-gloss, and gloss finishes all handle cleaning differently. For example, flat finishes are more delicate, while semi-gloss can endure more rigorous scrubbing. Identifying your paint type guarantees you avoid stripping or dulling the finish. By evaluating both wall materials and paint finishes upfront, you set yourself up for a smooth, damage-free cleaning experience that keeps your walls looking great.
Gathering Necessary Cleaning Supplies
Before you start cleaning, make sure you have the right tools like soft sponges, microfiber cloths, and a gentle brush. Picking safe cleaning agents is key to protecting your walls and paint. Let’s explore which supplies will make the job easier and keep your walls looking fresh.
Essential Cleaning Tools
To clean your walls effectively, you’ll need the right tools on hand. Start with quality cleaning brushes; their bristles help you reach corners and textured surfaces, freeing your walls from dust and grime. Pair these with microfiber cloths, which are excellent for wiping down walls gently without leaving streaks or scratches. These cloths trap dirt and dust, making your cleaning more efficient. You’ll also want a sturdy bucket for water, a spray bottle for misting, and a ladder if your walls are tall. Having these essentials lets you work swiftly and thoroughly, giving you the freedom to tackle any wall surface confidently. Keep your tools organized and within reach, so you stay in control throughout the cleaning process.
Choosing Safe Cleaning Agents
Once you’ve gathered the right tools, picking safe cleaning agents will make all the difference in protecting your walls and your health. You want to choose eco friendly cleaners that effectively remove dirt without harsh chemicals. These products respect your freedom by minimizing toxins in your space, letting you breathe easy. When shopping, check labels for natural ingredients and avoid anything with strong fragrances or ammonia. Chemical safety isn’t just about your walls—it’s about your well-being and the environment. Using gentle, plant-based solutions reduces risks of irritation and damage. If you prefer DIY, a mix of vinegar and water can work wonders on many surfaces. By choosing wisely, you keep your home fresh and safe while embracing a cleaner, freer lifestyle.
Preparing the Room for Wall Cleaning

Getting your room ready for wall cleaning is key to making the process smooth and effective. Before you get started, consider your room layout and furniture arrangement to maximize your freedom of movement. Here’s how to prepare:
- Clear the Space: Move furniture away from walls to prevent damage and give yourself full access. Use lightweight covers to protect pieces you can’t relocate.
- Protect the Floor: Lay down drop cloths or old sheets to catch drips and debris, keeping your floors safe and clean.
- Ensure Good Lighting: Open curtains or turn on bright lights so you can clearly see the walls and any spots that need extra attention.
With these steps, you’ll create a workspace that lets you clean efficiently and enjoy the freedom of a fresh, spotless room.
Dusting and Removing Loose Dirt
Before you start scrubbing, grab the right tools like a microfiber cloth or a soft-bristle brush to dust your walls gently. Using smooth, downward strokes helps remove loose dirt without damaging the paint. This step guarantees your walls are clean and ready for deeper cleaning.
Tools for Dusting
A good set of tools can make dusting your walls quicker and more effective. Choosing the right duster types is key to enjoying the freedom of a clean space without hassle. You want tools that reach high corners and trap dust rather than just scatter it around. Here are three essentials to take into account:
- Microfiber Dusters – Lightweight and gentle, perfect for delicate surfaces.
- Extendable Dusting Poles – Give you the freedom to reach tall walls and ceilings easily.
- Electrostatic Dusters – Attract dust with static electricity, making your job faster and cleaner.
These tools combined with smart dusting techniques allow you to take control of your cleaning routine and keep walls fresh effortlessly.
Techniques to Remove Dirt
Start by gently sweeping your chosen duster across the wall’s surface to lift dust and loose dirt without spreading it around. This simple step is essential for effective dirt removal and sets the foundation for thorough wall maintenance. Use long, smooth strokes to avoid scratching or damaging the paint. For stubborn spots, lightly dampen a microfiber cloth and wipe the area, but test a small patch first to verify no damage. Remember, consistent dusting prevents buildup, making future cleaning easier and preserving your walls’ appearance. By adopting these techniques, you’re not just cleaning—you’re embracing freedom from dirt and grime, keeping your space fresh and inviting with minimal effort. Clean walls reflect a clear mind and open spaces, so keep your routine simple and effective.
Testing Cleaning Solutions on a Small Area

Although cleaning solutions can be effective, you’ll want to test them on a small, inconspicuous area of your wall first to guarantee they won’t cause damage or discoloration. Different cleaning solution types interact uniquely with various surfaces, so ensuring surface compatibility is key.
Here’s how to do it right:
- Choose a hidden spot on your wall, like behind a piece of furniture or near a corner.
- Apply a small amount of the cleaning solution using a soft cloth or sponge.
- Wait a few minutes, then check for any changes in color, texture, or finish.
Cleaning Walls With Mild Detergent
When you want to clean your walls without risking damage, a mild detergent is often your best bet. It offers gentle yet effective cleaning that preserves paint and finishes. Mix a few drops of mild detergent with warm water, then use a soft sponge or cloth to wipe your walls. This method balances mild detergent effectiveness with safety, preventing harsh wear over time. Be sure to rinse with clean water to avoid residue. How often you clean walls depends on your lifestyle and environment, but a wall cleaning frequency of every six months to a year usually keeps surfaces fresh without overdoing it. Stick to this routine, and you’ll enjoy clean, vibrant walls while maintaining their integrity.
Tackling Tough Stains and Marks
If you’ve tried mild detergent but stubborn stains still linger, you’ll need stronger tactics to tackle tough marks on your walls. Effective stain removal requires a bit more effort but rewards your space with a fresh look and lasting mark prevention. Here’s how you can take control:
When mild detergent fails, stronger stain removal tactics refresh your walls and prevent future marks.
- Use a baking soda paste: Mix baking soda with water, apply to the stain, and gently scrub with a soft cloth.
- Try a magic eraser: These sponges break down marks without harsh chemicals, perfect for scuffs and crayon.
- Apply vinegar solution: Dilute white vinegar with water and dab on stains, then wipe clean to neutralize odors and prevent future marks.
With these methods, you reclaim your freedom from stubborn stains and keep your walls pristine.
Drying and Ventilating the Walls
Properly drying and ventilating your walls is essential to prevent moisture buildup and potential damage after cleaning. To keep your space fresh and free, open windows or doors to encourage natural air circulation. If natural airflow is limited, use fans or dehumidifiers to speed up drying and maintain moisture control. Avoid closing off the room immediately, as trapped moisture can lead to mold or paint peeling. Pay special attention to corners and behind furniture, where air circulation tends to be weaker. By managing moisture control effectively, you protect your walls and guarantee they remain in great shape. Taking these simple steps gives you the freedom to enjoy a cleaner, healthier home without worrying about hidden dampness or damage.
Preventative Tips to Keep Walls Clean Longer
After drying and ventilating your walls, you’ll want to keep them looking fresh for as long as possible. Effective wall maintenance is key to preserving your space’s freedom and cleanliness. Here are three preventative tips to help you:
- Apply Protective Coatings: Use washable paints or sealants to create a barrier against dirt and stains, making future cleanings easier.
- Control Humidity: Maintain proper ventilation and use dehumidifiers if needed to prevent mold and mildew buildup that can damage walls.
- Regular Dusting: Frequently dust walls with a microfiber cloth to stop grime from settling and becoming tougher to remove.
Häufig gestellte Fragen
Can I Use a Pressure Washer to Clean Exterior Walls?
Using a pressure washer to clean exterior walls can be like wielding a double-edged sword—powerful but risky. You’ll want to pick the right pressure washer types, like electric for lighter jobs or gas-powered for tougher grime. Mastering wall cleaning techniques is key to avoid damage; keep the nozzle at an angle and maintain distance. With care, you’ll enjoy the freedom to blast away dirt without harming your walls.
How Often Should I Repaint Walls to Maintain Cleanliness?
You’ll want to follow frequency recommendations based on your paint’s longevity and your environment. Typically, repainting every 5-7 years keeps walls looking fresh and clean. If you live somewhere with harsh weather or high humidity, you might need to do it sooner. Staying on top of it gives you freedom from constant touch-ups and helps maintain that crisp, clean vibe you want in your space without feeling stuck in endless maintenance.
Are There Eco-Friendly Cleaning Products Safe for All Wall Types?
You’d think cleaning your walls would require a chemistry degree, but luckily, natural cleaners make it a breeze! These eco-friendly options are so gentle, they respect every wall material you’ve got—whether it’s delicate wallpaper or sturdy drywall. You don’t have to sacrifice your freedom to harsh chemicals anymore. With natural cleaners, you can keep your walls spotless and your conscience clear, letting you enjoy a truly fresh, healthy home environment.
Can Cleaning Walls Remove Mold or Mildew Effectively?
You can tackle mold removal by cleaning your walls, but it’s important to use the right products to be truly effective. Regular cleaning helps with mildew prevention, keeping your space fresh and healthy. Just remember, stubborn mold might need specialized treatments or professional help. By staying proactive and consistent, you’re freeing yourself from mold’s grip and creating a safer, cleaner environment without hassle.
What Should I Do if the Paint Starts Peeling During Cleaning?
If you notice peeling paint while cleaning, don’t panic. You’ll want to stop immediately to avoid making it worse. Carefully scrape off the loose paint and sand the area smooth. Then, patch any damaged spots with spackle or wall repair compound. Once dry, prime and repaint the wall to restore its look. Taking these steps lets you fix peeling paint while maintaining your freedom to keep walls fresh and clean.