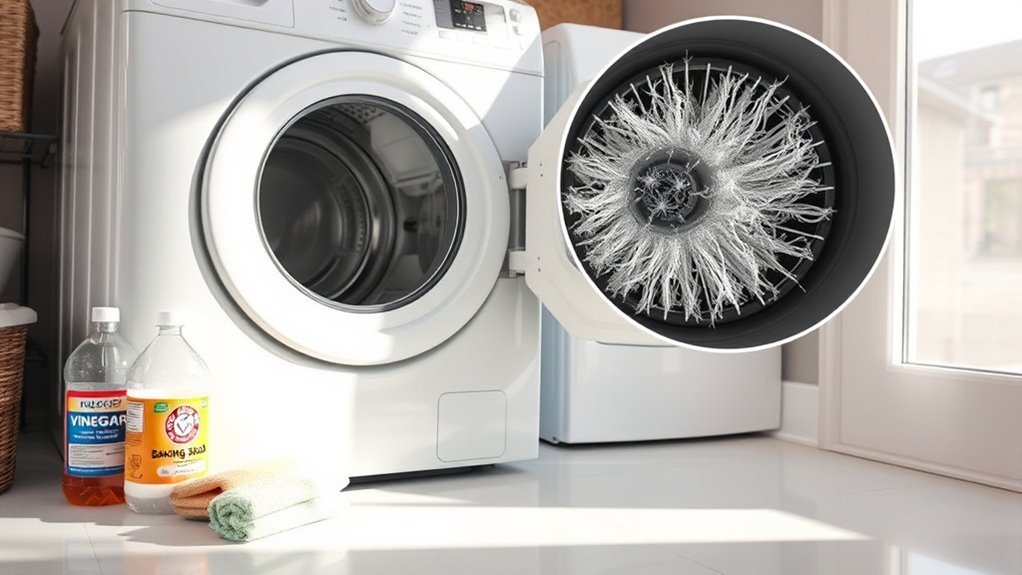
Deep Cleaning Checklist for Dryer
To deep clean your dryer, start by inspecting and cleaning the lint trap to prevent buildup and fire hazards. Next, remove and wash the drum using mild detergent, then vacuum out the vent and exhaust hose for better airflow. Don’t forget to clean the moisture sensor with rubbing alcohol and wipe down the exterior and control panel gently. Setting a regular maintenance schedule helps keep things safe and efficient. Keep going to discover more helpful tips for thorough care.
Inspecting and Cleaning the Lint Trap
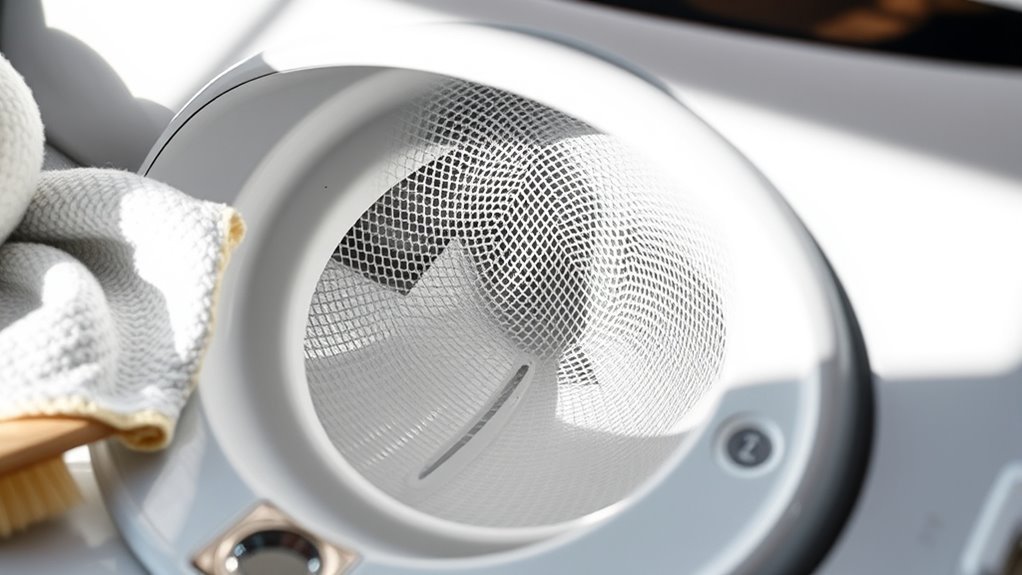
Before you begin any deep cleaning, it’s important to inspect and clean the lint trap thoroughly. You want to eliminate every bit of lint buildup to keep your dryer running smoothly and efficiently. Neglecting trap maintenance can lead to reduced airflow, longer drying times, and even fire hazards. Start by removing the lint screen and clearing away visible lint. Then, use a soft brush or vacuum attachment to clean inside the trap housing. This simple step frees your dryer from hidden blockages and boosts performance, giving you the freedom to enjoy quick, hassle-free drying. By staying on top of trap maintenance, you’re not just protecting your appliance—you’re ensuring safety and saving energy, so your laundry routine stays effortless and reliable.
Removing and Washing the Dryer Drum
Now’s the time to carefully detach the dryer drum so you can clean its interior thoroughly. You’ll want to remove any buildup or residue inside the drum to keep your dryer running efficiently. After that, follow proper washing and drying methods to guarantee the drum is spotless and ready to reassemble.
Detaching the Dryer Drum
Although detaching the dryer drum might seem intimidating, it’s an essential step for a thorough deep clean. To regain control over your appliance’s performance, mastering drum removal techniques is key. First, unplug your dryer to verify safety precautions are met. Removing any screws or clips holding the drum in place requires patience and a few basic tools. Carefully lift the drum out, avoiding damage to belts or wiring. Taking your time here frees you from future maintenance hassles. Once detached, you can access areas usually unreachable, allowing you to clean more effectively. Remember, prioritizing safety means you won’t trade freedom for risk. With the drum safely removed, you’re ready to move on to the next cleaning stage with confidence.
Cleaning Drum Interior
With the drum safely removed, you can focus on cleaning its interior thoroughly. Start by inspecting for any drum stains that might have built up over time. These stains not only look unpleasant but can cause unwanted drum odor that lingers in your clothes. Use a soft cloth and a mild detergent to gently scrub away any grime or residue. Avoid harsh chemicals that could damage the drum’s finish. Pay special attention to crevices where lint or detergent can accumulate. Cleaning the drum interior regularly helps keep your dryer running smoothly and prevents stubborn smells from taking hold. Taking this step gives you the freedom to enjoy fresh, odor-free laundry every time you dry.
Washing and Drying Methods
Removing and washing the dryer drum may seem intimidating, but it’s an important step for a deep clean. You’ll want to carefully detach the drum following your dryer’s manual to avoid damage. Once removed, use gentle washing techniques—like a mixture of warm water and mild detergent—to scrub away lint, grime, and residue. Avoid harsh chemicals that might degrade the drum’s surface.
After washing, drying tips are significant: let the drum air dry completely before reinstalling to prevent moisture buildup and mold growth. Position it in a well-ventilated area or use a fan to speed drying. Taking these steps not only extends your dryer’s lifespan but also gives you the freedom to enjoy fresh, clean laundry without worrying about hidden dirt or odors.
Vacuuming the Dryer Vent and Exhaust Hose
Before you start vacuuming the dryer vent and exhaust hose, make certain the dryer is unplugged to keep things safe. This step is essential for vent cleaning and exhaust maintenance, preventing lint buildup that restricts airflow and poses fire risks. Detach the exhaust hose carefully, then use a vacuum with a hose attachment to remove lint and debris from both the hose and the vent opening. You’ll want to reach deep inside to clear any hidden blockages. Regularly maintaining these parts not only boosts your dryer’s efficiency but also gives you the freedom to avoid costly repairs or hazards. Taking control of your vent cleaning guarantees your dryer runs smoothly and safely, freeing you up to enjoy life without unnecessary interruptions.
Checking and Cleaning the Moisture Sensor
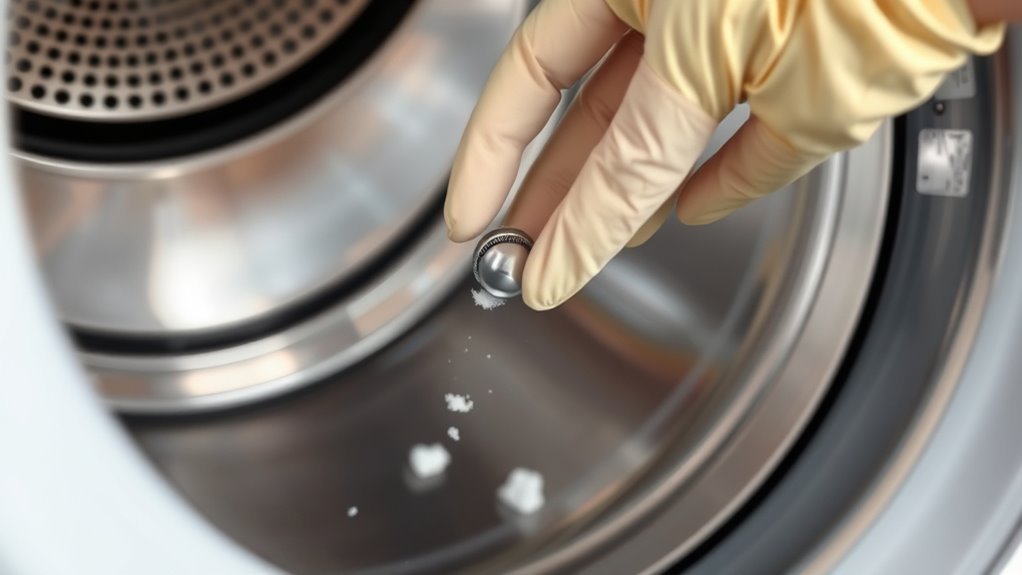
You’ll find the moisture sensor inside the dryer drum, usually near the lint filter. Grab a soft cloth and some rubbing alcohol to clean it gently without causing damage. Regularly wiping the sensor helps your dryer detect moisture accurately and prevents over-drying.
Location of Moisture Sensor
Finding the moisture sensor is the first step to ensuring your dryer runs efficiently. You’ll usually find the moisture sensor location inside the drum, near the lint filter or on the dryer’s front edge. It’s a small metal strip or two that detects moisture levels in your clothes. Understanding where it’s located helps you maintain sensor functionality and avoid longer drying times or wasted energy. If the sensor gets covered with residue, it can’t accurately read moisture, so knowing exactly where it is means you can easily check and clean it. Keeping the sensor clear lets your dryer work freely and effectively, saving you time and energy while giving you the convenience you deserve.
Cleaning Materials Needed
Knowing where your dryer’s moisture sensor is located makes it easier to gather the right tools to clean it properly. You’ll want to use specific cleaning supplies that won’t damage the sensor while following safety precautions to protect yourself and your appliance.
| Cleaning Supplies | Purpose |
|---|---|
| Soft cloth or sponge | Gentle cleaning without scratches |
| Isopropyl alcohol | Removes residue and buildup |
| Mild dish soap | Cleans dirt and lint |
| Gloves | Protects your hands |
Confirm the dryer is unplugged before you start. Use a soft cloth dampened with isopropyl alcohol or mild soap to wipe the sensor gently. Avoid harsh chemicals or abrasive tools to prevent damage. Following these steps guarantees your sensor stays efficient, giving you the freedom to keep your dryer working smoothly.
Sensor Maintenance Tips
Although the moisture sensor is a small component, it plays an important role in drying efficiency, so checking and cleaning it regularly is crucial. You want your dryer to work smoothly, and a dirty moisture sensor can throw off sensor calibration, causing longer drying times or damp clothes. To maintain it, simply wipe the sensor bars inside the drum with a soft cloth and mild detergent. Avoid abrasive cleaners that can damage the sensor. After cleaning, run a test cycle to verify the sensor calibration is accurate. Keeping this sensor clean frees you from unnecessary energy use and frustration. Regular sensor maintenance helps your dryer dry efficiently, giving you more freedom to focus on what matters.
Wiping Down the Exterior and Control Panel

One essential step in maintaining your dryer is wiping down the exterior and control panel regularly. This simple task helps keep your appliance looking fresh and prevents dust or grime from interfering with buttons or displays. Use a soft, damp cloth with a mild cleaner to gently wipe the exterior surfaces, avoiding harsh chemicals that could damage the finish. Pay special attention to the control panel—removing smudges and buildup guarantees the buttons stay responsive and the display remains clear. Keeping these areas clean not only maintains your dryer’s appearance but also supports smooth operation, giving you more freedom from unnecessary repairs. Make this quick wipe-down part of your routine to enjoy a dryer that looks great and works reliably every day.
Scheduling Regular Maintenance and Safety Checks
To keep your dryer running safely and efficiently, you should schedule regular maintenance and safety checks. Sticking to a clear maintenance schedule not only boosts dryer safety but also prevents unexpected breakdowns that could limit your freedom. Set reminders every six months to inspect lint traps, vents, and electrical connections. If you’re not comfortable doing this yourself, hire a professional to guarantee everything’s in top shape. Regular checks help catch issues early, avoiding fire hazards and costly repairs. By prioritizing these routine tasks, you free yourself from the stress of emergency fixes and keep your dryer performing smoothly. Remember, a well-maintained dryer saves you time and energy, letting you focus on what truly matters—living life on your terms without unnecessary interruptions.
Frequently Asked Questions
How Often Should I Replace My Dryer’s Vent Hose?
You should replace your dryer’s vent hose about every 3 to 5 years to keep things running smoothly. Vent hose maintenance is key to preventing lint buildup and fire hazards. Depending on your dryer vent types—like flexible foil or rigid metal—the lifespan can vary. Staying on top of this frees you from worries about efficiency or safety, giving you peace of mind and more time to enjoy life without dryer drama.
Can a Clogged Dryer Vent Cause My Clothes to Overheat?
Clothes overheating, clothes shrinking, clothes catching fire—you don’t want any of these risks. Yes, a clogged dryer vent can cause your clothes to overheat, creating a serious dryer safety hazard. When airflow is blocked, heat builds up, making your dryer less efficient and more dangerous. To keep your freedom from worrying about accidents, regularly clean your vent and guarantee proper airflow. It’s a simple step to protect your clothes and your home.
What Is the Safest Way to Dispose of Dryer Lint?
When it comes to lint disposal, you want to choose safe methods that prevent fire risks. Never just toss lint in the trash near flammable materials. Instead, you can compost it if it’s from natural fibers — it’s great for your garden! Another safe way is to use lint for fire starters when camping. By handling lint disposal carefully, you’re keeping your home safe and enjoying the freedom of worry-free laundry days.
Are There Eco-Friendly Products for Cleaning My Dryer?
Did you know that using eco friendly cleaners can reduce household chemical exposure by up to 90%? You can totally embrace natural solutions like vinegar, baking soda, and lemon juice to keep your dryer fresh without harsh toxins. These options not only protect the environment but also give you the freedom to clean confidently, knowing you’re making safer choices for your home and the planet. It’s a win-win for you and nature!
How Do I Troubleshoot a Dryer That Won’T Start?
If your dryer won’t start, first check the dryer power by ensuring it’s plugged in and the circuit breaker hasn’t tripped. Then, try these troubleshooting tips: open and close the door firmly, as some models won’t start if it’s not fully closed. Also, test the start button and inspect the thermal fuse for faults. By following these steps, you’ll regain control and freedom from laundry hassles quickly.