Deep Cleaning Checklist for Window
Start your deep window cleaning by gathering supplies like a squeegee, microfiber cloths, and eco-friendly cleaner. Prep the area by moving furniture and laying protective cloths. Gently dust frames and screens, then clean frames with a soft brush. Remove and wash screens carefully. Apply your glass cleaner, scrub panes, and dry thoroughly for a streak-free shine. Finally, inspect for damage or wear to plan maintenance. Stick around to discover tips that help keep your windows pristine and energy-efficient.
Gather Essential Cleaning Supplies
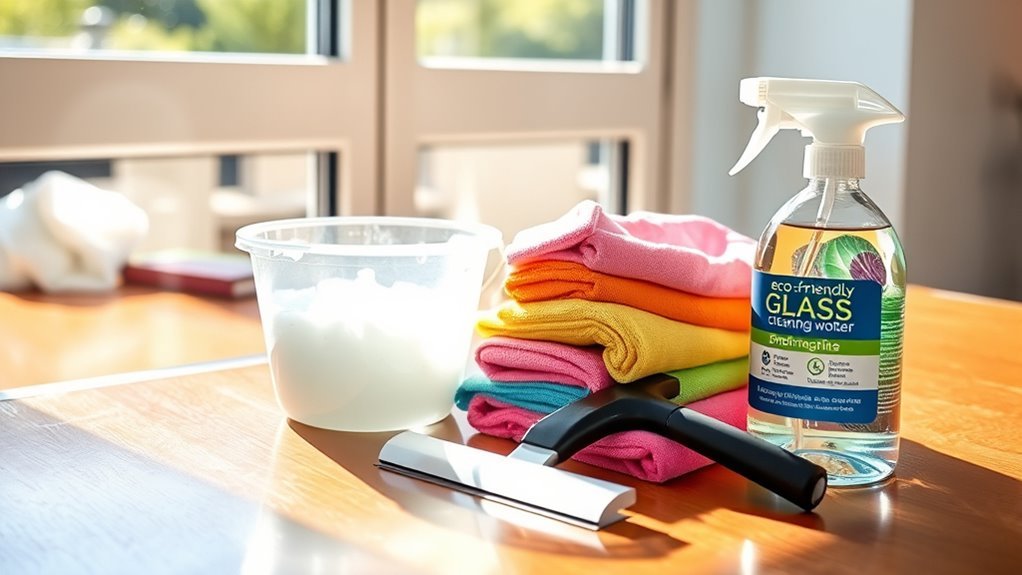
Before you begin cleaning your windows, it’s important to gather all the essential supplies you’ll need. Having the right cleaning tools on hand frees you from interruptions and lets you focus on the task. Start with a sturdy squeegee, microfiber cloths, and a bucket for your cleaning solution. If you want to keep things eco-friendly, opt for natural sprays or make your own mix with vinegar and water. Using eco friendly supplies not only protects the environment but also guarantees your home stays chemical-free. Don’t forget gloves to protect your hands and a soft-bristled brush to reach corners. By preparing your cleaning tools thoughtfully, you’re embracing freedom from harsh chemicals and wasted time, making your window cleaning both efficient and environmentally conscious.
Prepare the Surrounding Area
Once you have your cleaning supplies ready, the next step is to prepare the area around your windows. Clear the surrounding furniture to prevent damage and create ample space to move freely. Don’t forget to adjust or remove window treatments like curtains or blinds to avoid getting them wet or dirty during cleaning. This preparation helps maintain the freedom to work efficiently without interruptions.
| Task | Reason |
|---|---|
| Move surrounding furniture | Protect from water and cleaning agents |
| Adjust window treatments | Prevent damage and ease cleaning access |
| Lay down protective cloth | Catch drips and debris |
Remove Dust and Loose Dirt

Although it might seem simple, removing dust and loose dirt is an essential step that sets the stage for a thorough window cleaning. You want to free your windows from all the particles that can scratch the glass or reduce cleaning effectiveness. Start by using gentle dust removal techniques like a soft brush or a microfiber cloth to sweep away surface dust. Avoid harsh tools that can damage your windows. Once the dust is gone, you’ll find it easier to apply dirt prevention strategies, such as regular dusting and keeping nearby areas clean, to maintain that freedom from grime. Taking these steps guarantees your windows stay clear longer and makes your deep cleaning quicker and more efficient every time.
Clean Window Frames and Sills
Two key areas that often get overlooked during window cleaning are the frames and sills, but they play an essential role in the overall appearance and function of your windows. Start by identifying the frame materials—whether wood, vinyl, or aluminum—since each needs a specific cleaning approach to avoid damage. Use a gentle cleaner and a soft cloth or brush to remove built-up grime and prevent deterioration. For sill maintenance, clear away debris, dirt, and any standing water to stop mold and rot from taking hold. Regularly wiping down these spots guarantees your windows not only look sharp but also operate smoothly, giving you the freedom to enjoy clear views and fresh air without hassle. Keep these areas clean, and your windows will thank you in the long run.
Wash Window Screens

When washing your window screens, start by removing them carefully to avoid damage. Use a gentle cleaning solution to get rid of dirt without harming the mesh. Make sure to dry the screens thoroughly before putting them back in place.
Remove Screens Carefully
Start by gently removing your window screens to avoid bending or damaging them. Screen removal is a vital step in your window maintenance routine, giving you the freedom to clean thoroughly without risking tears or warping. Take your time to press the release tabs or lift the screen frame carefully, ensuring it comes out smoothly. Once removed, inspect each screen for any holes or loose edges—this is key for effective screen maintenance and long-lasting protection. Handling your screens with care not only preserves their shape but also makes cleaning easier and more efficient. By mastering careful screen removal, you’re embracing a straightforward way to maintain clear views and fresh airflow, all while extending the life of your window screens.
Use Gentle Cleaning Solution
A mild cleaning solution is crucial for washing your window screens without causing damage. You want to preserve their integrity while freeing them from dirt and grime. Opting for gentle ingredients guarantees your screens stay intact and your environment stays safe. Here’s how you can create and use an eco friendly solution effectively:
- Mix a few drops of mild dish soap with warm water, avoiding harsh chemicals.
- Use a soft brush or sponge dipped in this solution to gently scrub the screens.
- Rinse thoroughly with clean water to remove all soap residue.
Dry Screens Thoroughly
After rinsing your window screens with the gentle cleaning solution, make certain to dry them thoroughly to prevent mold and mildew buildup. Proper screen maintenance relies heavily on moisture control, so taking the time to dry your screens right after washing guarantees they stay in top shape. You can either air-dry them in a sunny spot or use a clean, dry cloth to speed things up. Avoid stacking wet screens or setting them against damp surfaces, as trapped moisture will invite damage. Staying disciplined with drying not only extends your screens’ lifespan but also keeps your windows feeling fresh and free from unwanted allergens. Taking control of moisture means you’re safeguarding your home’s freedom from mold and maintaining clear views without hassle.
Apply Glass Cleaner or Homemade Solution
Spray your chosen glass cleaner or homemade solution evenly across the window surface to break down dirt and grime. When selecting your cleaner, consider these glass cleaner options:
- Commercial glass cleaners for quick, streak-free results.
- Homemade solution benefits include control over ingredients and eco-friendliness.
- Vinegar and water or lemon juice mixtures offer a natural, effective alternative.
Using a homemade solution lets you cut chemicals and save money, giving you freedom from harsh toxins. Apply the cleaner liberally but avoid oversaturation to prevent drips. This step preps your windows for the next stage, ensuring dirt loosens up for easy removal. Whether you choose a store-bought product or a DIY mixture, your windows will soon be ready to shine without limits.
Scrub and Wipe Window Panes
Grab a soft cloth or sponge and gently scrub the window panes to lift away loosened dirt and grime. Using effective tools like microfiber cloths or non-abrasive sponges makes this process smoother, preventing scratches while tackling stubborn spots. Focus on scrubbing techniques that involve circular motions for better dirt removal without damaging the glass. Don’t rush; take your time to guarantee every corner gets attention, especially edges where grime tends to build up. If you encounter tough stains, dampen your cloth with a bit more cleaner and apply gentle pressure. By mastering these scrubbing techniques and choosing the right tools, you’ll free your windows from buildup and prepare them perfectly for the next step, leaving you with crystal-clear views and a sense of accomplishment.
Dry and Polish for a Streak-Free Finish
Once you’ve thoroughly scrubbed and wiped your window panes, the next step is to dry and polish them to achieve a streak-free finish. To reveal that crystal-clear view, you’ll want to embrace these streak free techniques using the right polishing tools. Here’s how to do it:
- Use a clean, dry microfiber cloth or a lint-free towel to gently dry the glass, preventing water spots.
- Employ circular motions with a polishing tool like a glass polishing pad or a soft cotton cloth to buff out any remaining streaks.
- Finish with a vertical wipe using a fresh, dry cloth to guarantee no residue remains.
Inspect for Damage and Maintenance Needs
Before you finish, take a close look at your windows to spot any damage or maintenance needs. Checking for cracks, broken seals, or warped frames now can save you from bigger issues later. If you notice any problems, plan necessary window repairs promptly to keep your space secure and energy-efficient. Setting up a maintenance schedule is key—it guarantees you stay ahead of wear and tear without feeling overwhelmed. Regular inspections help you catch small issues before they become costly headaches, giving you more freedom and peace of mind. Keeping your windows in top shape not only boosts your home’s appearance but also its comfort and value. Don’t skip this step; it’s an essential part of your deep cleaning routine.
Frequently Asked Questions
How Often Should I Deep Clean My Windows?
How often do you want your windows to sparkle and let in the most light? For ideal window maintenance, deep cleaning every three to six months is best, depending on your environment. If you live in a dusty or rainy area, you might need to increase the cleaning frequency. Keeping up with this schedule not only boosts your home’s appearance but also gives you the freedom to enjoy clearer views without constant worry.
Can Deep Cleaning Windows Help Improve Indoor Air Quality?
Absolutely, deep cleaning your windows can boost indoor air quality. When you remove dust, pollen, and other indoor allergens from your window surfaces, you’re cutting down on irritants trapped inside. Plus, clean windows let in more sunlight exposure, which naturally helps reduce mold and bacteria growth. So, by keeping your windows spotless, you’re creating a fresher, freer space where you can breathe easy and enjoy the natural light.
What Are the Best Times of Day for Window Cleaning?
Cleaning your windows is like catching the perfect breeze—timing matters. You’ll find morning sunlight is ideal because it provides gentle, natural light without the harsh glare that midday sun brings. Plus, optimal conditions in the early hours help your cleaning solution dry evenly, preventing streaks. So, grab your supplies when the day’s cool and bright; this way, you’ll enjoy clearer views and the freedom of a fresh, sunlit space.
Are There Eco-Friendly Products Safe for All Window Types?
You’ll be glad to know there are plenty of eco-friendly cleaners that work well on all window materials without harming the environment. These products avoid harsh chemicals, letting you clean freely without worrying about damage or toxins. Whether your windows are glass, vinyl, or wood-framed, you can find natural solutions like vinegar-based sprays or plant-derived detergents that keep your space sparkling and safe. It’s all about choosing freedom for you and the planet.
How Do I Prevent Windows From Fogging After Cleaning?
Oh sure, let your windows fog up like a mysterious ghost story every time you breathe near them! But if you want freedom from that annoying blur, try using anti fog solutions—they’re like tiny superheroes fighting moisture. Also, controlling humidity in your space is key; think of it as creating a fog-free zone where you call the shots. Trust me, you’ll enjoy crystal-clear views without the foggy drama cramping your style.