DIY Cleaner for Glass
You can make an effective DIY glass cleaner using just vinegar, rubbing alcohol, and distilled water. Mix two parts distilled water with one part vinegar and one part rubbing alcohol in a spray bottle, shake well, and label it. Use a microfiber cloth to apply evenly, avoiding direct sunlight to prevent streaks. Store it in a cool, dark place and use within a month. Proper mixing and application techniques guarantee ideal results, and there’s more to learn about maintenance and safety.
Benefits of Making Your Own Glass Cleaner

One key advantage of making your own glass cleaner is the ability to control the ingredients, ensuring a non-toxic and environmentally friendly solution. By customizing your formula, you avoid harmful chemicals found in commercial products, aligning with your commitment to sustainability and health. This approach also delivers significant cost savings; common household items like vinegar and rubbing alcohol are inexpensive and readily available. You can tailor the cleaner to your personal preferences, adjusting scent, strength, and effectiveness to suit specific needs, whether for delicate surfaces or heavy-duty grime. This freedom allows you to optimize performance without compromising safety or budget. Ultimately, making your own glass cleaner grants you precise control over quality and environmental impact, empowering you with a responsible, economical, and customizable cleaning option.
Essential Ingredients for DIY Glass Cleaner
Creating an effective DIY glass cleaner requires a careful selection of essential ingredients that work together to dissolve grease, remove smudges, and leave surfaces streak-free. Vinegar benefits you by providing acetic acid, which breaks down mineral deposits and grime without harsh chemicals. Its natural acidity enhances cleaning power while being safe for most glass surfaces. Alcohol effectiveness lies in its rapid evaporation and ability to dissolve oils and fingerprints efficiently. Using isopropyl or ethyl alcohol guarantees quick drying and prevents streaks. Distilled water serves as a pure solvent base, reducing mineral residue compared to tap water. Combining these ingredients in appropriate ratios maximizes cleaning performance while maintaining environmental friendliness and user control. This precise blend empowers you to create a potent, customizable glass cleaner suited to your needs.
Step-by-Step Guide to Mixing Your Cleaner
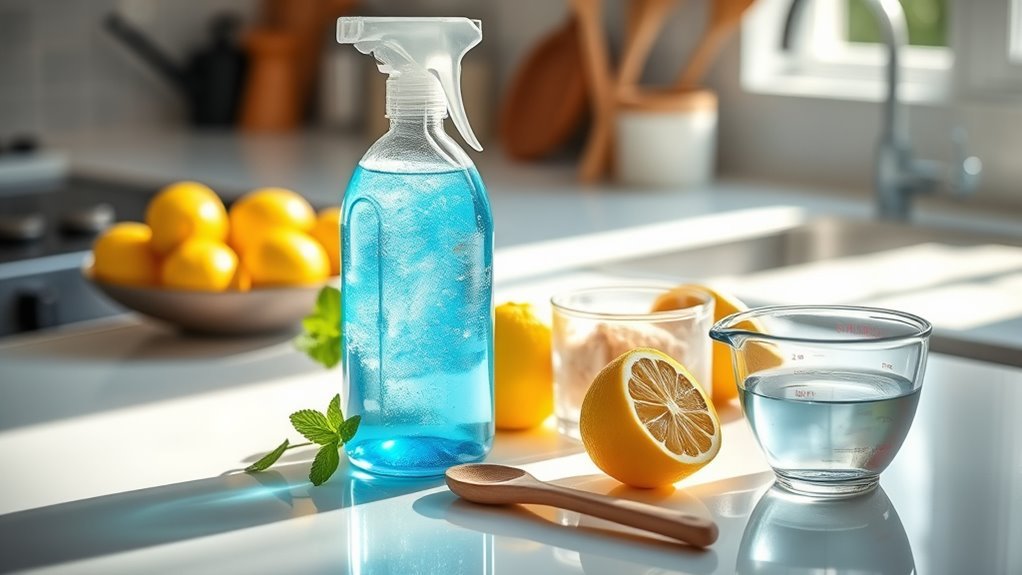
Three key steps will guide you through mixing your DIY glass cleaner efficiently and safely. First, gather all cleaning supplies: distilled water, white vinegar, rubbing alcohol, and a spray bottle. Confirm the spray bottle is clean to avoid contamination. Second, measure your ingredients precisely according to recommended mixing ratios—commonly, two parts distilled water, one part white vinegar, and one part rubbing alcohol. Use a measuring cup or graduated cylinder for accuracy. Third, combine the liquids in the spray bottle, securing the cap tightly, and shake vigorously to blend. Label your bottle with contents and date for safety. Adhering to these steps guarantees an effective cleaner that leverages the power of each ingredient, giving you the freedom to maintain spotless glass surfaces without relying on commercial products.
Tips for Applying the Cleaner Effectively
Before applying your DIY cleaner, make certain to remove any loose dirt or dust to prevent scratching the glass surface. Use a microfiber cloth for wiping, as it reduces streaks and enhances clarity. Apply the cleaner evenly in a circular motion to guarantee full coverage without over-saturating the glass.
Preparation Before Cleaning
Although it might seem straightforward, proper preparation is essential to guarantee your DIY glass cleaner works effectively. Start by gathering the right cleaning tools—microfiber cloths, spray bottles, and squeegees are ideal for best application and removal. Before applying the cleaner, remove loose dirt and dust with a dry cloth to prevent abrasion on the glass surface. Make sure the area is well-ventilated, and wear gloves to adhere to safety precautions, especially if your DIY solution contains vinegar or rubbing alcohol. Avoid applying the cleaner under direct sunlight, as rapid drying can cause streaks. By meticulously preparing both the workspace and tools, you’ll maximize your cleaner’s efficiency and achieve a clear, streak-free finish with minimal effort.
Streak-Free Wiping Techniques
When you apply your DIY glass cleaner, using the right wiping technique is essential to avoid streaks and residue. Start by using a clean, lint-free microfiber cloth, which enhances streak prevention by absorbing moisture without leaving fibers behind. Wipe in a consistent pattern—either vertical strokes followed by horizontal ones or circular motions—to guarantee full coverage and eliminate missed spots. Avoid excessive pressure; a gentle touch prevents smearing. For larger surfaces, work in sections to maintain effective streak prevention, reapplying the cleaner as needed. Finally, always finish with a dry cloth to remove any remaining moisture. Mastering these wiping techniques will give your glass a crystal-clear finish, freeing you from streaks and maximizing the effectiveness of your DIY cleaner.
Common Mistakes to Avoid When Cleaning Glass

When cleaning glass, you shouldn’t use abrasive or lint-producing cloths, as they can scratch surfaces or leave fibers behind. It’s also essential to address streak prevention by using the right technique and materials; otherwise, you’ll end up with unsightly marks. Avoiding these common mistakes guarantees a clear, spotless finish every time.
Using the Wrong Cloth
One of the most critical factors affecting glass cleaning efficiency is the choice of cloth. Using the wrong cloth can lead to streaks, scratches, or residue. For best results, a microfiber cloth is preferred due to its fine fibers that lift dirt without scratching. In contrast, a cotton cloth may leave lint or fibers behind, reducing clarity. Avoid abrasive or rough materials that compromise the glass surface. Below is a comparison of cloth types to guide your selection:
| Cloth Type | Advantages | Disadvantages |
|---|---|---|
| Microfiber | Non-abrasive, lint-free | Requires proper washing |
| Cotton Cloth | Readily available, absorbent | Leaves lint, less effective |
| Paper Towels | Disposable | Can scratch, leave residue |
| Terry Cloth | Highly absorbent | Coarse fibers, potential scratching |
| Synthetic Blend | Durable, quick drying | May leave streaks |
Choose carefully to maintain clear, pristine glass surfaces.
Ignoring Streak Prevention
Although it might seem trivial, ignoring streak prevention can greatly undermine your glass cleaning efforts. Streak formation commonly occurs when residue from cleaning solutions or water droplets dries unevenly on the surface. To avoid this, you need to adopt effective drying techniques that promote uniform evaporation. Using a clean, lint-free microfiber cloth and drying the glass in a consistent, circular motion helps minimize streaks. Additionally, avoid cleaning glass under direct sunlight, as rapid drying intensifies streak formation. You should also control the amount of cleaner applied; excess liquid increases the likelihood of streaks. By mastering these drying techniques and understanding the causes of streak formation, you gain the freedom to achieve crystal-clear, streak-free glass effortlessly every time you clean.
Eco-Friendly Alternatives for Tough Stains
Since tough stains often resist conventional cleaning methods, turning to eco-friendly alternatives can provide effective solutions without harmful chemicals. You can use vinegar solutions, which are acidic enough to break down mineral deposits and grime on glass surfaces. Combine equal parts white vinegar and water for a potent yet safe cleaner. Additionally, citrus extracts, rich in natural solvents like limonene, excel at dissolving oily residues and stubborn dirt. You can create a mixture by infusing citrus peels in water or adding a few drops of essential oil to your cleaning spray. These alternatives not only maintain your freedom from toxic substances but also guarantee your glass surfaces regain clarity efficiently. Experiment with concentrations carefully to avoid damage, and always test on a small area first.
Storage and Shelf Life of Homemade Glass Cleaner
After preparing your eco-friendly glass cleaner, proper storage is key to maintaining its effectiveness and safety over time. Use airtight storage containers made of glass or durable plastic to prevent contamination and evaporation. Guarantee containers are clean and dry before filling to prolong the shelf life. Store the cleaner in a cool, dark place away from direct sunlight and temperature fluctuations, which can degrade active ingredients. Typically, homemade glass cleaners have a shelf life of up to one month due to the absence of preservatives. Label your containers with the preparation date to monitor freshness and avoid using expired solutions that may lose efficacy or harbor bacteria. By adhering to these storage guidelines, you maintain the cleaner’s performance and enjoy the freedom of a reliable, chemical-free product whenever you need it.
Frequently Asked Questions
Can DIY Glass Cleaner Damage Tinted or Coated Windows?
When caring for tinted windows, you need to be cautious about the ingredients in any glass cleaner you use. Harsh chemicals like ammonia or bleach can damage the tint or coatings, causing discoloration or peeling. For proper tinted window care, choose cleaners with gentle, non-abrasive ingredients. If you want freedom in cleaning, opt for solutions specifically designed to protect coatings, ensuring your windows stay clear without compromising their finish.
How Does Homemade Glass Cleaner Compare to Commercial Products?
Imagine your windows as clear canvases, reflecting your world. When you compare homemade glass cleaners to commercial products, cost comparison shows DIY solutions often save money by using common ingredients. Effectiveness analysis reveals commercial cleaners may have specialized chemicals for streak-free shine, but DIY options can be just as capable if mixed right. You get freedom to customize formulas, balancing budget and performance while maintaining crystal clarity tailored to your needs.
Is Vinegar-Based Glass Cleaner Safe for Car Windshields?
You can safely use vinegar-based cleaner on your car windshield, as vinegar benefits include removing grime and enhancing windshield clarity effectively. However, avoid prolonged exposure, since its acidity might degrade rubber seals or tint films. For best results, dilute vinegar with water (usually 1:1) and apply with a soft cloth. This approach provides clear visibility without compromising materials, letting you maintain your vehicle’s glass with freedom and confidence.
Can Essential Oils in Glass Cleaner Cause Allergies?
Isn’t it ironic that something as natural as essential oils might turn your glass cleaning ritual into an allergy battlefield? Yes, essential oils can indeed trigger allergy symptoms like sneezing, watery eyes, or skin irritation for sensitive individuals. If you want to enjoy a clear view without compromise, it’s essential to choose oils wisely and test small amounts first. Freedom means knowing how to avoid hidden irritants while embracing nature’s scents safely.
What Surfaces Should DIY Glass Cleaner Never Be Used On?
You shouldn’t use DIY glass cleaner on non-glass surfaces like wood, painted finishes, or natural stone, as the acidity or alcohol can damage them. Proper cleaning techniques require selecting products suited for each material to avoid etching, discoloration, or deterioration. Always test a small, inconspicuous area first and avoid abrasive ingredients or excessive scrubbing. This approach guarantees you maintain freedom in your cleaning routine without risking harm to delicate surfaces.