DIY Cleaner for Pet Mess Surfaces
You can easily make a safe, effective DIY cleaner for pet messes using natural ingredients like vinegar and baking soda. Vinegar neutralizes odors and breaks down stains, while baking soda deodorizes and gently lifts dirt. For tougher spots, sprinkle baking soda first, then add vinegar to fizz and loosen grime. Mixing lemon juice or yogurt adds enzymes to tackle odors further. Keep your home fresh and pet-safe while avoiding harsh chemicals. There’s more on making and using these cleaners properly to follow.
Understanding the Challenges of Cleaning Pet Messes

Although pets bring joy to your home, cleaning up after them can be tricky because their messes often involve stubborn stains and lingering odors. Understanding pet behavior helps you anticipate where accidents might happen—like a nervous pup marking territory or a curious cat knocking things over. Knowing this lets you tackle messes promptly with the right cleaning techniques, preventing stains from setting in and odors from sticking around. You’ll want to act quickly and choose methods that neutralize smells without harsh chemicals, preserving your freedom to enjoy your space. By grasping these challenges, you can create effective DIY solutions that fit your lifestyle, keeping your home fresh and welcoming without feeling restricted by constant cleanup.
Essential Ingredients for Homemade Pet Mess Cleaners
When making your own pet mess cleaner, you’ll want to choose natural cleaning agents that are effective yet gentle. It’s important to pick ingredients that are safe for your furry friends to avoid any harm. Also, don’t forget to include odor neutralizers to keep your home smelling fresh without harsh chemicals.
Natural Cleaning Agents
Three natural cleaning agents you’ll find essential for tackling pet messes are vinegar, baking soda, and lemon juice. These eco friendly alternatives offer impressive cleaning effectiveness without harsh chemicals, giving you the freedom to maintain a safe, fresh home. Vinegar’s acidity breaks down stains and neutralizes odors, while baking soda acts as a gentle abrasive and deodorizer. Lemon juice adds a natural antibacterial boost and leaves a pleasant scent behind. Together, they create powerful homemade solutions that handle everything from urine spots to food spills. By choosing these natural agents, you’re not only protecting your pets and family but also reducing your environmental impact. Embrace these ingredients to clean confidently, knowing you’re using safe, effective, and sustainable options every time.
Pet-Safe Ingredients
Using natural cleaning agents like vinegar, baking soda, and lemon juice is a great start, but you also need to make sure the other ingredients you choose won’t harm your pets. When crafting your DIY cleaner, stick to pet safe essentials that prioritize your furry friend’s health. Non toxic alternatives like castile soap, hydrogen peroxide, and essential oils (in very small amounts) can enhance cleaning power without introducing dangers. Avoid harsh chemicals, artificial fragrances, or anything labeled hazardous. You want a formula that cleans effectively yet respects your pet’s sensitivity. By choosing wisely, you maintain freedom to clean confidently, knowing your environment stays safe and fresh for everyone at home. Remember, the key is simplicity and safety—your pets will thank you for it.
Odor Neutralizers Choices
Although eliminating stains is important, tackling the odors they leave behind is just as crucial for a truly fresh home. When choosing odor neutralizers for your DIY pet mess cleaner, focus on effective odor elimination methods rather than just scent masking techniques. Ingredients like baking soda naturally absorb unpleasant smells, while white vinegar breaks down odor-causing molecules at their source. Essential oils, such as lavender or eucalyptus, can complement these by adding a pleasant aroma without overpowering your space. You want a cleaner that frees you from pet smells, not one that simply covers them up. By combining these elements thoughtfully, you create a powerful, homemade solution that restores your freedom to enjoy a fresh, odor-free home every day.
How to Make a Natural Enzyme Cleaner for Stains and Odors
When dealing with pet stains and odors, a natural enzyme cleaner can be your best ally because it breaks down organic matter at the source, rather than just masking the smell. To make your own, combine equal parts water and lemon juice with a cup of plain yogurt or a tablespoon of live-culture apple cider vinegar. The enzymes produced by the yogurt or vinegar deliver powerful stain removal and odor-fighting benefits that commercial cleaners often lack. Simply mix, pour into a spray bottle, and apply directly to affected areas. Let it sit for 15-30 minutes before blotting with a clean cloth. This DIY approach not only harnesses enzyme benefits but also gives you the freedom to clean safely and effectively without harsh chemicals.
DIY Vinegar and Baking Soda Solution for Tough Stains

Natural enzyme cleaners do a great job breaking down organic stains, but for those tougher messes, you’ll want a solution with a bit more muscle. Mixing vinegar and baking soda taps into vinegar effectiveness as a natural disinfectant and deodorizer, while baking soda properties help lift and neutralize stubborn residues. To make this DIY cleaner, sprinkle baking soda directly on the stained area, then slowly pour vinegar over it. The fizzing reaction breaks down grime and loosens dirt, making it easier to wipe away. Let it sit for 10-15 minutes before scrubbing gently and rinsing with warm water. This combo gives you a powerful, chemical-free way to tackle pet messes without restricting your freedom to use simple, accessible ingredients.
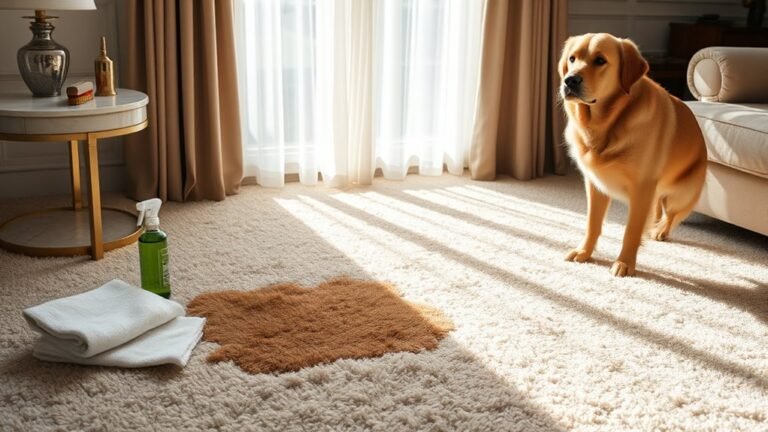
Preparing a Safe Upholstery and Carpet Cleaner
Since pet messes can deeply penetrate upholstery and carpets, preparing a safe cleaner tailored for these materials is crucial to avoid damage. You’ll want a solution gentle enough for various upholstery types—like microfiber, leather, or cotton—while still effective on different carpet fibers. Start by mixing equal parts water and white vinegar, adding a few drops of mild dish soap. This combo breaks down stains without harsh chemicals that could ruin your fabrics. Always test your cleaner on a hidden spot first to verify it won’t discolor or weaken the material. With this DIY approach, you maintain control over what touches your surfaces, keeping your home fresh and your freedom intact.
Tips for Cleaning Hard Floors After Pet Accidents

Although hard floors are generally easier to clean than carpets, pet accidents still require prompt attention to prevent stains and odors. You’ll want to act fast with hard surface techniques to avoid any lasting damage. Start by blotting up the mess with paper towels—don’t rub, or you’ll spread it. Next, use a homemade cleaner like a mix of vinegar and water to neutralize odors and break down residues. Be sure to rinse with plain water afterward to avoid sticky buildup. For quick cleanup tips, always keep your DIY spray handy, so you’re ready when accidents happen. Finally, dry the area thoroughly to prevent slips and discourage pets from returning to the same spot. Staying on top of this keeps your floors fresh and your freedom intact.
Best Practices for Disinfecting Pet Toys and Accessories
When your pet’s toys and accessories aren’t cleaned regularly, germs and bacteria can quickly build up, leading to potential health issues. To keep your pet safe, adjust your cleaning frequency based on toy materials. For example, rubber toys need more frequent disinfecting than fabric ones. Use mild DIY cleaners that won’t harm your pet or the toy.
| Toy Material | Cleaning Frequency | Recommended Method |
|---|---|---|
| Rubber | Weekly | Soak in vinegar solution |
| Fabric | Biweekly | Wash with mild soap |
| Plastic | Weekly | Wipe with diluted bleach |
| Rope | Monthly | Hand wash and air dry |
Storing and Using Your DIY Cleaners Safely Around Pets
To keep your pets safe, you’ll want to store DIY cleaners out of their reach and label all containers clearly. Proper safe storage and cleaning precautions are key to enjoying a pet-friendly home without worry. Here’s how to handle your DIY cleaners freely but responsibly:
- Store all cleaners in high cabinets or locked areas to prevent accidental access.
- Use airtight, clearly labeled containers to avoid confusion and spills.
- Always prepare and use cleaners in well-ventilated spaces to protect both you and your pets.
- Rinse surfaces thoroughly after cleaning to remove any residue that might harm your furry friends.
Frequently Asked Questions
Can DIY Cleaners Be Used on Pet Bedding Materials?
You can definitely use DIY cleaning solutions on pet bedding materials, but you’ll want to be careful about the ingredients. Since pet bedding is often delicate, avoid harsh chemicals or anything that might irritate your furry friend’s skin. Stick to natural, pet-safe ingredients like vinegar, baking soda, or mild soap. This way, you keep your pet comfortable and free while maintaining a fresh, clean environment without relying on commercial cleaners.
How Often Should I Clean Areas Where Pets Frequently Mess?
You might feel like you’re battling a never-ending mess tornado when it comes to pet areas! To keep chaos at bay, your cleaning frequency should be at least once a week, but daily spot cleaning is golden for mess prevention. This routine keeps odors and stains from settling in, giving you more freedom to enjoy your space without constant worry. Stay consistent, and you’ll conquer the mess with ease and keep your home fresh!
Are Homemade Cleaners Effective Against Flea and Tick Residues?
You might wonder about homemade effectiveness against stubborn flea and tick residues. While DIY solutions can help clean surfaces and even act as mild flea repellents, they often lack the power of commercial treatments. If you want freedom from harsh chemicals, homemade cleaners can be a good start, but for serious infestations, combining them with vet-recommended products is smarter. That way, you keep your space safe and your pets comfortable.
Can These DIY Solutions Be Used on Outdoor Pet Areas?
You can definitely use these DIY solutions on outdoor surfaces where your pet hangs out. Just keep in mind that outdoor areas get dirty faster due to weather and dirt, so you’ll want to adjust your cleaning frequency accordingly—maybe more often than indoors. These natural cleaners give you the freedom to keep things fresh without harsh chemicals, letting your pet enjoy a cleaner space safely while you stay in control of what’s used around them.
What Should I Do if My Pet Ingests a DIY Cleaner?
What would you do if your pet suddenly licked something harmful? When it comes to pet health, quick emergency response is key. Don’t wait—call your vet immediately or a poison control center. Keep calm and provide details about the cleaner ingested. You want your furry friend free and safe, not trapped in a health crisis. Always store cleaners out of reach to prevent accidents and keep your pet’s adventurous spirit alive.