DIY Cleaner for Remote Surfaces
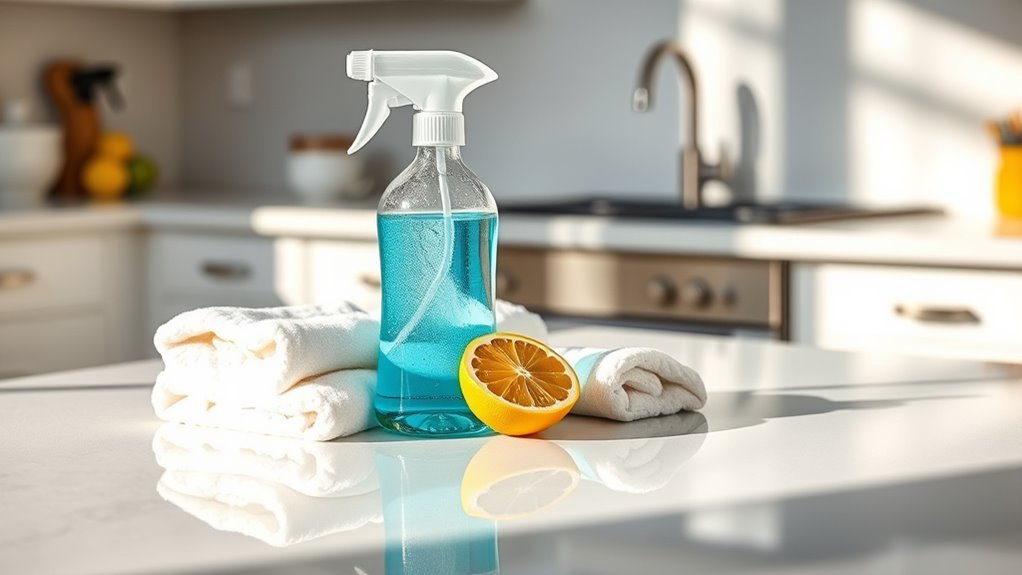
You can make an effective DIY cleaner for your remote using 70% isopropyl alcohol mixed with distilled water, which disinfects without damaging the plastic surface. Add a few drops of essential oils like tea tree for extra antimicrobial power. Use a microfiber cloth dampened with the solution—never soak the remote—to gently wipe it down. Regular cleaning keeps germs like E. coli and flu viruses at bay while protecting your health. For more handy tips on maintaining and safely cleaning your remote, keep exploring.
Why Clean Your Remote Controls Regularly
Although you might not think about it often, your remote control can harbor a surprising amount of dirt and germs. Understanding the significant factors behind cleaning your remote regularly helps you maintain a healthier and more enjoyable environment. You want the freedom to relax without worrying about unseen grime spreading illness or discomfort. Cleaning frequency plays an essential role here—it’s not just about doing it once in a while but establishing a routine that fits your lifestyle. Depending on how often you use your remote and who else handles it, you might need to clean it weekly or more frequently. By staying mindful of these factors and sticking to a consistent cleaning schedule, you guarantee your remote stays as fresh and safe as the freedom you cherish.
Common Germs Found on Remote Surfaces
Remote controls can be breeding grounds for various germs that you might not expect. Since you handle them often, these devices become germ hotspots, harboring bacteria like Staphylococcus and E. coli, which can lead to infections if left unchecked. Viruses, including the common cold and flu, also linger on these surfaces longer than you might think. Understanding this makes you realize why cleaning frequency matters—regular wiping reduces the chance of transferring these microbes to your hands and face. By staying aware of the germs common to your remote controls, you’re choosing to protect your health and maintain your freedom from unnecessary illness. So, don’t underestimate these small gadgets; a little care goes a long way in keeping your space safe and germ-free.
Essential Ingredients for a DIY Remote Cleaner

Creating your own cleaner for remote surfaces is simpler than you might think. To achieve both safety and cleaning efficiency, you’ll want to focus on natural alternatives that are gentle yet effective. Start with isopropyl alcohol—typically 70% concentration—which disinfects without damaging electronics. Mix it with distilled water to avoid residue. Adding a few drops of essential oils like tea tree or lavender not only boosts antimicrobial power but also leaves a pleasant scent, keeping your cleaning routine fresh and free from harsh chemicals. Avoid ingredients that can harm sensitive remote surfaces, like bleach or abrasive substances. With just these essentials, you can craft a powerful, eco-friendly cleaner that gives you freedom from commercial chemicals while keeping your remotes spotless and germ-free.
Tools Needed for Cleaning Remote Controls
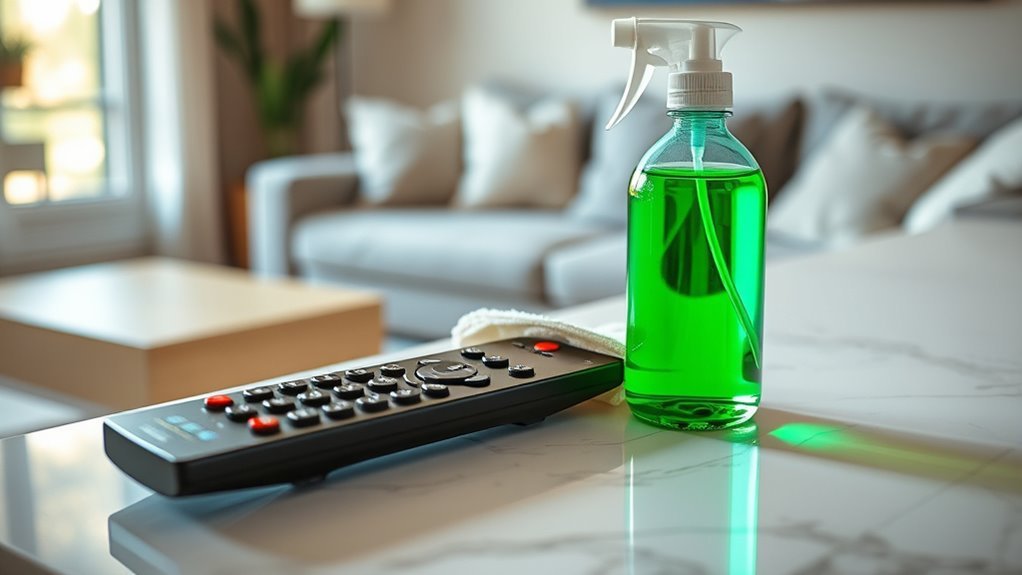
Once you’ve mixed your DIY cleaner, you’ll need the right tools to apply it effectively without damaging your device. Start with a soft microfiber cloth—it’s gentle and perfect for wiping away grime without scratching your remote. Cotton swabs are essential for reaching tight spaces between buttons where dust loves to hide. For stubborn dirt, a soft-bristled toothbrush works wonders without risking damage. Avoid soaking your remote; instead, lightly dampen your cleaning supplies to maintain control and protect internal components. Having a small bowl or spray bottle for your cleaner helps you manage application precisely. These simple tools empower you to take full control of remote maintenance, keeping your device fresh and functional without relying on harsh chemicals or expensive gadgets.
Step-by-Step Guide to Making Your Own Cleaner

You’ll need just a few essential ingredients to make your own cleaner safely and effectively. I’ll walk you through simple mixing instructions that anyone can follow. Plus, I’ll share tips to apply your cleaner without damaging your remote surfaces.
Essential Ingredients Needed
A few key ingredients will make your DIY cleaner both effective and safe for remote surfaces. You’ll need distilled water as a pure base, white vinegar for its natural disinfecting power, and a mild liquid soap to break down grime without harsh chemicals. Adding a few drops of essential oils like tea tree or lavender not only enhances cleaning but also leaves a fresh scent, supporting your remote hygiene routine.
Mixing Instructions Simplified
Mixing your DIY cleaner is simpler than you might think, requiring just a few straightforward steps. Start by measuring your ingredients carefully, sticking to the recommended solution ratios—usually one part vinegar to two parts water for effective cleaning without harshness. Add a few drops of essential oil if you want a pleasant scent. Stir gently to combine everything well.
Keep in mind your cleaning frequency; for high-touch surfaces, prepare fresh solution weekly to maintain potency. Store your cleaner in a labeled spray bottle for easy access. This method saves you from relying on commercial products, giving you control over what touches your remote surfaces. With just these simple steps, you’re free to clean safely and effectively whenever you need.
Safe Application Tips
Before applying your DIY cleaner, make certain you test it on a small, hidden area of the surface to check for any adverse reactions. This step guarantees safe application and protects your belongings. When cleaning, wear gloves to avoid skin irritation and work in a well-ventilated space to minimize inhaling fumes. Avoid mixing your cleaner with other chemicals—this could cause dangerous reactions. Use a soft cloth or sponge to gently apply the solution, preventing damage to delicate materials. Always follow cleaning precautions by not soaking surfaces excessively, especially porous ones, to prevent warping or discoloration. By taking these mindful steps, you maintain control over your environment, enjoy the freedom of DIY solutions, and keep your remote surfaces looking fresh and cared for without hassle.
How to Safely Clean Remote Buttons and Screens
When cleaning remote buttons and screens, you’ll want to use gentle methods to avoid damage. Maintaining remote surface hygiene is key to keeping your devices functional and fresh without restricting your freedom to use them comfortably. Consider your cleaning frequency based on usage to prevent buildup without overdoing it.
Here’s how to safely clean remote surfaces:
- Use a soft microfiber cloth slightly dampened with a DIY cleaner.
- Avoid spraying liquids directly onto the remote to prevent moisture seeping inside.
- Gently wipe buttons and screens without pressing hard to protect sensitive parts.
- Allow the remote to air dry completely before use to avoid electrical issues.
With these simple steps, you can keep your remotes clean and fully operational without hassle.
Tips for Maintaining a Germ-Free Remote
To keep your remote germ-free, you’ll want to use effective cleaning tools and safe solutions that won’t damage it. Setting up a regular disinfection routine makes a big difference in preventing buildup. Let’s explore the best ways to maintain a clean and sanitary remote.
Effective Cleaning Tools
Although your remote might seem harmless, it can harbor more germs than you realize, so using the right cleaning tools is essential. To maintain remote hygiene and boost cleaning efficiency, you need tools that reach every nook without damaging delicate buttons. Here are some essentials to keep handy:
- Microfiber cloths: Gentle yet effective for wiping away dirt and oils.
- Soft-bristle toothbrushes: Perfect for scrubbing between buttons.
- Cotton swabs: Reach tight spots and crevices with precision.
- Compressed air cans: Blow out dust without moisture.
With these tools, you can freely tackle germs and maintain your remote’s cleanliness without hassle. Choosing the right tools means you’re not just cleaning—you’re taking control of your space and health.
Safe Cleaning Solutions
Using the right tools is only part of keeping your remote germ-free—you also need safe cleaning solutions that won’t damage its sensitive components. You don’t have to rely on harsh chemicals; natural alternatives like diluted white vinegar or a mix of water and a few drops of mild dish soap work wonders. Homemade mixtures give you control over what touches your remote, keeping it safe and your environment toxin-free. Just dampen a microfiber cloth with your chosen solution—never soak it—and gently wipe the surface. Avoid sprays directly on the remote to prevent moisture buildup inside. By opting for these gentle, effective options, you maintain your freedom from harmful substances while still keeping your remote clean and functional.
Regular Disinfection Routine
While it might be tempting to clean your remote only when it looks dirty, establishing a regular disinfection routine guarantees germs don’t have a chance to build up. Keeping your cleaning habits consistent helps you enjoy your devices without worry, giving you freedom from germs. Focus on a disinfection frequency that fits your lifestyle—whether it’s weekly or biweekly—to keep things fresh and safe.
Here are essential tips to maintain your remote’s cleanliness:
- Disinfect after anyone sick has used it
- Wipe down surfaces with a DIY cleaner every 7-10 days
- Avoid eating while using the remote to reduce grime buildup
- Store your remote in a clean, dry spot when not in use
Stick to these habits, and you’ll keep your remote germ-free effortlessly.
Avoiding Damage While Cleaning Electronics
Before you start cleaning your remote or other electronics, you’ll want to guarantee you don’t cause any damage. Each electronic material reacts differently to cleaning agents, so understanding surface compatibility is key. Avoid harsh chemicals like ammonia or bleach that can erode plastic or seep into internal components. Instead, opt for gentle solutions like diluted isopropyl alcohol or a mild soap mix. Always apply liquids to a soft cloth, never directly onto the device, preventing moisture from entering crevices. Use microfiber cloths to avoid scratching delicate surfaces. Taking these steps lets you clean freely without risking harm, keeping your electronics safe and functional. Remember, respecting surface compatibility means your devices stay protected while you enjoy the freedom of DIY cleaning.
Eco-Friendly Alternatives for Cleaning Remotes
If you want to keep your remote clean without harming the environment, there are plenty of eco-friendly alternatives you can try. Choosing eco friendly materials and embracing sustainable practices lets you maintain your gadgets while respecting the planet. You don’t have to rely on harsh chemicals that harm both your health and the earth.
Consider these options for a greener clean:
- Use a microfiber cloth dampened with a mix of water and white vinegar.
- Opt for reusable cotton pads instead of disposable wipes.
- Make a gentle solution with castile soap and water for stubborn dirt.
- Use bamboo cotton swabs to reach tight spots without plastic waste.
These choices give you freedom from waste and toxins while keeping your remote spotless.
When to Replace Your Remote Control Instead of Cleaning
If your remote isn’t responding or buttons stick despite cleaning, it might be time to contemplate replacing it. You’ll want to weigh the cost of repair versus buying a new one, especially if your remote is outdated. Sometimes upgrading to a newer model with better features makes more sense than trying to fix an old device.
Signs of Malfunction
Though cleaning can fix many issues, there are times when your remote control shows signs of malfunction that can’t be resolved with a simple wipe-down. If you’ve increased your cleaning frequency and still face persistent remote issues, it might be time to contemplate a replacement. Don’t let a faulty remote limit your freedom to control your devices effortlessly.
Watch out for these signs:
- Buttons that don’t respond or stick despite thorough cleaning
- Cracks or physical damage affecting function
- Battery compartment corrosion or poor contact
- Frequent random inputs or unresponsive behavior
Recognizing these symptoms early helps you avoid frustration and keeps your entertainment experience smooth. When your remote crosses these lines, cleaning won’t cut it anymore—it’s time for a fresh start.
Cost vs. Repair
When deciding whether to repair or replace your remote control, you’ll want to weigh the costs carefully. Repair costs can sometimes exceed the price of a new remote, especially if internal components are damaged. If your remote has minor issues, cleaning or simple fixes might save you money and hassle. However, if buttons remain unresponsive or the device frequently malfunctions despite your efforts, replacement decisions become clearer. Opting for a new remote can offer reliable performance and freedom from repeated repairs. Ultimately, consider how much time and money you’re willing to invest. Prioritize solutions that restore your control without limiting your convenience. Balancing repair costs against the value of a fresh device guarantees your remote keeps working seamlessly with minimal fuss.
Technological Obsolescence
As technology advances, you might find that cleaning your remote control won’t solve all issues. Sometimes, planned obsolescence means your device is designed to last only so long before it becomes outdated or malfunctioning beyond simple fixes. Knowing when to replace rather than clean can save you time and frustration, giving you the freedom to enjoy seamless control.
Consider replacing your remote if:
- Buttons become unresponsive despite cleaning
- Compatibility with new devices or software is lost
- Physical wear affects device longevity
- Frequent malfunctions interrupt your experience
Recognizing these signs helps you decide when a new remote is a better investment, ensuring your tech keeps pace with your lifestyle rather than holding you back.
Frequently Asked Questions
Can DIY Cleaners Be Used on All Types of Remote Control Materials?
Cleaning remote materials is like walking a tightrope—you need balance. You can’t just use any DIY cleaner on all types of remote controls because some materials, like silicone or leather, react differently to certain ingredients. It’s smart to tailor your cleaning methods to the material, avoiding harsh chemicals that can damage surfaces. By choosing the right approach, you keep your remote looking fresh without losing the freedom to clean it yourself.
How Often Should I Deep Clean My Remote Control Beyond Regular Wipes?
You should aim for a deep clean of your remote control about once a month, even if you do weekly cleaning with quick wipes. While regular wipe-downs keep surface dirt away, a thorough clean helps remove grime and germs lurking in crevices. Adjust your cleaning frequency based on how often you use it and who shares it. Staying on top of this gives you freedom from sticky buttons and unwanted bacteria.
Are There Any Health Risks Associated With Homemade Remote Cleaners?
You might worry about health concerns when mixing your own cleaners, but as long as you stick to safe, non-toxic ingredients, you’re good to go. Avoid harsh chemicals like bleach or ammonia, which can irritate skin or eyes. Using mild options like diluted vinegar or rubbing alcohol keeps ingredient safety in check, letting you clean freely without health risks. Just test on a small area first to be sure it’s gentle enough.
Can Essential Oils Be Added to DIY Cleaners for Fragrance?
You can definitely add essential oils to your DIY cleaners for fragrance, giving you natural fragrance options that are both invigorating and calming. Essential oil benefits include antimicrobial properties and mood enhancement, so you’re not just masking smells but improving your space’s vibe. Just be sure to test for any allergies and use them sparingly to avoid overpowering scents. This way, you maintain your freedom to create a cleaner that truly suits your style.
How Do I Clean Remote Controls With Built-In Microphones or Sensors?
You might think cleaning remote controls with built-in microphones or sensors is tricky, but you’ve got this! Use gentle cleaning techniques—dampen a microfiber cloth with a bit of rubbing alcohol, never soaking it. Carefully wipe around buttons and sensors to avoid moisture getting inside. For microphone protection, avoid spraying directly; instead, lightly clean the surface. This way, you keep your remote free and clear without risking damage, letting you enjoy every command.


