DIY Cleaner for Sink
You can make an effective DIY sink cleaner using baking soda and vinegar—baking soda gently scrubs grime, while vinegar cuts through grease and mineral buildup. Mix baking soda into a paste, apply it to your sink, let it sit for 15 minutes, then scrub gently with a sponge. Rinse thoroughly with warm water and dry to prevent spots. Add lemon juice or essential oils for fresh scent and extra cleaning power. Keep following for more tips on maintaining a spotless sink naturally.
Benefits of Using Homemade Sink Cleaners

Although commercial cleaners are convenient, using homemade sink cleaners offers several practical benefits you’ll appreciate. First, they serve as eco friendly alternatives that reduce your exposure to harsh chemicals, protecting both your health and the environment. By making your own cleaner, you control exactly what goes into it, avoiding unnecessary toxins. Additionally, these DIY solutions are incredibly cost effective solutions, often using common household ingredients like baking soda and vinegar. This means you’ll save money while maintaining a clean sink. Plus, homemade cleaners give you freedom to customize formulas to suit your specific needs, whether you want extra scrubbing power or a fresh scent. Embracing these alternatives empowers you to clean safely, efficiently, and sustainably without relying on commercial products. This simple shift leads to powerful benefits for both your health and the planet.
Essential Ingredients for DIY Sink Cleaner
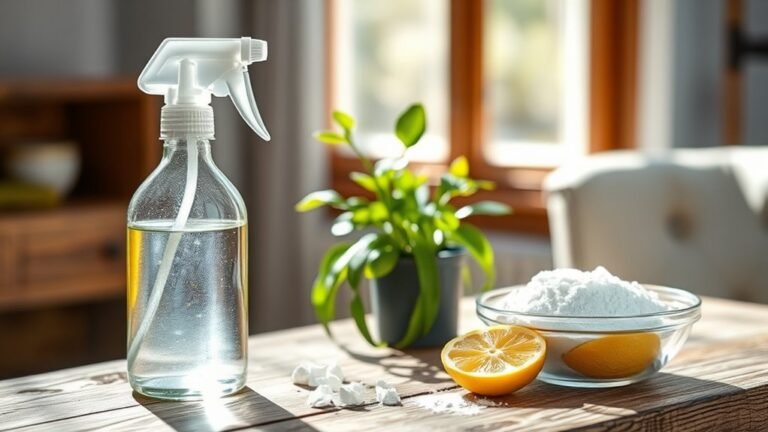
You’ll find most DIY sink cleaners use common household ingredients like baking soda, vinegar, and lemon juice because they each have natural cleaning properties. Baking soda acts as a gentle abrasive to scrub away grime, while vinegar cuts through grease and mineral deposits. Lemon juice adds a fresh scent and helps break down stains, making these ingredients both effective and easy to source. It’s important to choose cleaning solutions that are compatible with your sink material to preserve sink finish and avoid damage.
Common Household Ingredients
Keeping your sink spotless doesn’t require expensive products; instead, you can rely on common household ingredients that are effective and safe. Start with baking soda—it’s a gentle abrasive that scrubs away grime without scratching surfaces. Pair it with a vinegar solution to fizz away tough stains and deodorize. Lemon juice works wonders too, cutting through grease and leaving a fresh scent behind. For stubborn spots or disinfecting, hydrogen peroxide is your go-to—it’s a natural bleach and sanitizer. You can mix these ingredients in simple combinations: sprinkle baking soda, spray vinegar solution, then rinse; or apply lemon juice followed by hydrogen peroxide for a deeper clean. Using what you already have gives you freedom from harsh chemicals and costly cleaners, making your sink sparkle with ease.
Natural Cleaning Properties
When you want a cleaner that’s both effective and safe, understanding the natural properties of each ingredient helps you make smarter choices. For your DIY sink cleaner, focus on natural enzymes—they break down grease and grime without harsh chemicals, making your cleaning process efficient and eco-friendly. Ingredients like lemon juice and vinegar offer antibacterial properties, which help eliminate harmful bacteria while leaving your sink fresh. Baking soda adds gentle abrasion to remove stuck-on debris without scratching surfaces. Combining these elements guarantees your cleaner tackles dirt, kills germs, and respects your health and the environment. By choosing ingredients with natural enzymes and antibacterial properties, you maintain freedom from toxins and control exactly what’s going into your cleaner. This knowledge empowers you to create a safe, powerful sink cleaner that works every time.
How to Prepare Your DIY Sink Cleaner

Before mixing your DIY sink cleaner, gather all necessary ingredients and tools to secure a smooth preparation process. You’ll typically need baking soda, white vinegar, lemon juice, and essential oils depending on the DIY cleaner recipes you prefer. Have measuring spoons, a mixing bowl, and a spray bottle ready for easy application. Choose ingredients based on the sink cleaning methods you want to use—powder for scrubbing or liquid for spraying. Measure each component precisely to maintain the right balance for effectiveness and safety. Mix dry ingredients first, then slowly add liquids while stirring to avoid clumps. Once combined, pour your homemade cleaner into the spray bottle. Label it clearly to prevent confusion. Preparing your cleaner this way allows you to control what goes into your sink care routine, giving you freedom from harsh chemicals. Regular cleaning and maintenance also play a crucial role in ensuring a healthy indoor environment by reducing common contaminants that can affect air quality and health.
Step-by-Step Guide to Cleaning Your Sink
To get started, gather essential supplies like your DIY cleaner, a soft sponge, and a brush for tough spots. Next, use effective techniques such as scrubbing in circular motions and rinsing thoroughly to remove all residue. Following these steps guarantees your sink will be spotless and fresh every time. Additionally, incorporating the regular use of natural deodorizers can help maintain a clean and odor-free sink environment.
Essential Cleaning Supplies
Although cleaning your sink might seem straightforward, having the right supplies on hand will make the process faster and more effective. Choosing efficient tools improves cleaning effectiveness and lets you work smarter, not harder. Consider the cost comparison between store-bought and DIY supplies to save money without sacrificing quality.
| Supply | Purpose | Cost Comparison |
|---|---|---|
| Baking Soda | Removes stains, deodorizes | Low-cost, DIY favorite |
| White Vinegar | Disinfects, dissolves mineral deposits | Affordable, versatile |
| Scrub Brush | Scrubs grime, reaches corners | One-time purchase, reusable |
Gather these essentials before you start—they’re your ticket to a cleaner sink with less effort.
Effective Cleaning Techniques
When you’re ready to tackle your sink, start by clearing out any dishes or debris to give yourself a clean workspace. Next, sprinkle baking soda generously over the sink surface—this budget friendly solution acts as a gentle abrasive. Then, spray a mixture of white vinegar and water, an eco friendly alternative to harsh chemicals, onto the baking soda. Let it fizz for a few minutes. Use a soft sponge or cloth to scrub thoroughly, focusing on stains and corners. Rinse with warm water to wash away residue. For stubborn spots, create a paste with lemon juice and baking soda, apply, let sit, then scrub. Finally, wipe down the faucet and drain areas. These effective cleaning techniques keep your sink fresh without breaking the bank or harming the environment.
Tips for Removing Tough Stains and Build-Up

Even if regular cleaning keeps your sink looking fresh, tough stains and build-up can still sneak in over time. To tackle them effectively and maintain stain removal and build up prevention, try these steps:
Regular cleaning helps, but tough stains require extra care to keep your sink spotless and build-up free.
- Apply baking soda paste: Mix baking soda with water, spread it on stains, and let it sit for 15 minutes.
- Scrub gently: Use a soft brush or sponge to avoid scratching while lifting grime.
- Use vinegar rinse: Pour white vinegar over the paste, creating a fizz that breaks down deposits.
- Rinse and dry: Wash thoroughly with warm water and dry the sink to prevent new build-up.
Following these tips regularly helps you reclaim your sink’s shine and keep tough stains at bay without harsh chemicals. For best results, remember that using natural ingredients like baking soda and vinegar supports safer and eco-friendly cleaning.
Natural Solutions for Eliminating Sink Odors
If your sink starts to emit unpleasant odors, you can tackle the problem using simple, natural ingredients found right in your kitchen. First, pour a half cup of baking soda down the drain, followed by a cup of white vinegar. Let the mixture fizz and work for about 15 minutes to break down grime causing the sink odor. Then, flush the drain with boiling water to clear loosened debris. For ongoing freshness, grind citrus peels like lemon or orange in your garbage disposal or drop them in the drain if you don’t have one. These natural remedies neutralize odors without harsh chemicals, giving you control and freedom from store-bought cleaners. Repeat weekly or as needed to keep your sink smelling clean and fresh naturally. Using baking soda as a mild abrasive also helps keep the sink surfaces clean while tackling odors.
Safe Practices When Using Homemade Cleaners
Using natural ingredients to freshen your sink is effective, but handling homemade cleaners safely guarantees you avoid accidents and protect your plumbing. To maintain safety precautions and optimize your cleaning techniques, follow these steps:
Natural sink freshening works well; safe handling prevents accidents and protects your plumbing.
- Always label your homemade cleaners clearly to prevent misuse or accidental ingestion.
- Use gloves and make certain good ventilation to protect your skin and lungs from irritants.
- Avoid mixing ingredients like vinegar and baking soda until you’re ready to clean, as their reaction can cause splattering.
- Test your cleaner on a small sink area first to prevent damage to finishes or pipes. Additionally, storing your cleaner in a sturdy, airtight container helps maintain its potency and prevents spills.
How Often to Clean Your Sink With DIY Solutions
You’ll want to wipe down your sink daily with a mild DIY cleaner to prevent buildup and keep it fresh. Once a week, give it a deeper clean using a stronger homemade solution to tackle grime and sanitize surfaces. Sticking to this routine will help maintain a sparkling sink without much effort. Incorporating natural ingredients like baking soda and vinegar ensures an effective and eco-friendly cleaning process.
Daily Maintenance Tips
Although you might not need to deep clean your sink every day, maintaining it with a quick DIY solution regularly prevents buildup and keeps it fresh. Consistent sink maintenance hinges on smart cleaning frequency, so here’s a simple daily routine you can follow:
- Rinse your sink thoroughly after each use to remove food particles and soap residue.
- Wipe down the surface with a mixture of equal parts water and white vinegar to disinfect and shine.
- Use a soft cloth or sponge to scrub gently, avoiding harsh abrasives that can damage finishes.
- Dry the sink with a clean towel to prevent water spots and mineral deposits.
Weekly Deep Cleaning
Twice a week is an ideal frequency to give your sink a thorough deep clean using DIY solutions to tackle buildup that daily maintenance might miss. Sticking to a weekly schedule guarantees grime and odors don’t settle in, keeping your sink fresh and hygienic. Incorporate this deep clean into your cleaning routine by targeting stains, mineral deposits, and drain clogs with natural ingredients like baking soda and vinegar.
| Task | DIY Solution | Time Required |
|---|---|---|
| Scrubbing basin | Baking soda paste | 5 minutes |
| Cleaning faucet | Vinegar soak | 10 minutes |
| Clearing drains | Boiling water + salt | 5 minutes |
| Wiping surfaces | Lemon juice spray | 3 minutes |
Follow this plan twice weekly and enjoy a sink that feels spotless and under your control.
Comparing DIY Sink Cleaner With Commercial Products
When deciding between DIY sink cleaners and commercial products, you should consider factors like ingredients, cost, and effectiveness. Here’s a straightforward comparison to help you choose:
- Ingredients: DIY cleaners use simple, natural components, reducing harsh chemicals and lowering environmental impact. Commercial products often contain synthetic chemicals that can be harmful.
- Cost Comparison: Making your cleaner at home usually costs less, giving you control over quantity and frequency.
- Effectiveness: Both can clean well, but DIY mixtures may need more elbow grease or time.
- Convenience: Commercial cleaners are ready-to-use, while DIY requires preparation but offers customization.
Additionally, choosing DIY options can help minimize chemical runoff that negatively impacts aquatic ecosystems.
Enhancing Your DIY Cleaner With Essential Oils
Adding essential oils to your DIY sink cleaner can boost its cleaning power and leave a pleasant scent behind. You can customize your cleaner by experimenting with essential oil blends to enhance both effectiveness and aroma. Here’s a quick guide to scent combinations that work well for sinks:
| Essential Oil | Benefits |
|---|---|
| Lemon + Tea Tree | Antibacterial, fresh citrus |
| Eucalyptus + Peppermint | Deodorizing, invigorating |
| Lavender + Orange | Calming, uplifting scent |
| Rosemary + Grapefruit | Antimicrobial, rejuvenating |
Start with about 10-15 drops of your chosen blend per cup of cleaner. Mix well and test the scent strength, adjusting as needed. This way, you gain freedom to tailor your cleaner’s power and fragrance exactly to your liking. For best results, always use a clean container with a lid to store your DIY cleaner safely.
Frequently Asked Questions
Can DIY Sink Cleaners Be Used on All Sink Materials?
You’ll want to take into account sink material compatibility before using any cleaner. Not all cleaners work equally well on every surface, so cleaner effectiveness comparison is key. For example, acidic solutions can damage natural stone, while gentle abrasives might not clean stainless steel thoroughly. To guarantee freedom in your cleaning choices, test a small area first and tailor your cleaner to your sink’s material. This keeps your sink safe and sparkling.
How Should I Store Homemade Sink Cleaner Safely?
You should store your homemade cleaner in airtight storage containers to keep it fresh and prevent spills. Make sure these containers are sturdy and made from materials that won’t react with the ingredients. Always attach safety labels clearly stating what’s inside and any hazards, so you and others stay informed. Keep the containers in a cool, dry place away from kids and pets. This way, you stay safe and in control of your cleaning supplies.
Are DIY Sink Cleaners Safe for Septic Systems?
You might worry that cleaning agents could harm your septic systems, but many DIY options are actually gentler than commercial products. To keep your system healthy, avoid harsh chemicals like bleach or ammonia. Instead, use natural ingredients like baking soda and vinegar, which break down safely. Always rinse thoroughly and use these cleaners sparingly. This way, you maintain effective cleaning without risking damage, giving you freedom from costly repairs.
Can I Use DIY Cleaner for Kitchen and Bathroom Sinks Interchangeably?
You can usually use the same homemade cleaner for both kitchen sinks and bathroom sinks, but keep in mind their different needs. Kitchen sinks deal with grease and food residue, so a cleaner with degreasing ingredients works best. Bathroom sinks often need more focus on soap scum and mineral buildup. Adjust your DIY mix accordingly—adding baking soda for scrubbing or vinegar for dissolving deposits—to keep both sinks fresh and clean without harsh chemicals.
What Should I Do if DIY Cleaner Causes Skin Irritation?
Imagine your skin feeling tight, red, like it’s burning after contact. If your skin irritation flares up or you notice allergic reactions, immediately rinse the area with cool water to soothe the sting. Avoid scratching to prevent worsening. Apply a gentle moisturizer or aloe vera. If symptoms persist or worsen, seek medical advice. Next time, wear gloves and test a small patch before full use to protect your freedom from discomfort.