How to Keep a Home Music Room Dust-Free
To keep your home music room dust-free, use microfiber cloths and soft brushes to clean instruments gently and regularly. Organize cables with ties to avoid dust traps and store accessories in closed containers. Maintain good air quality by using an air filtration system and controlling humidity between 40-50%. Protect instruments with fitted covers or cases when not in use. Following these steps helps preserve your gear and keeps the space fresh. There’s more you can do to make your music room pristine and inviting.
Essential Cleaning Tools for a Dust-Free Music Room

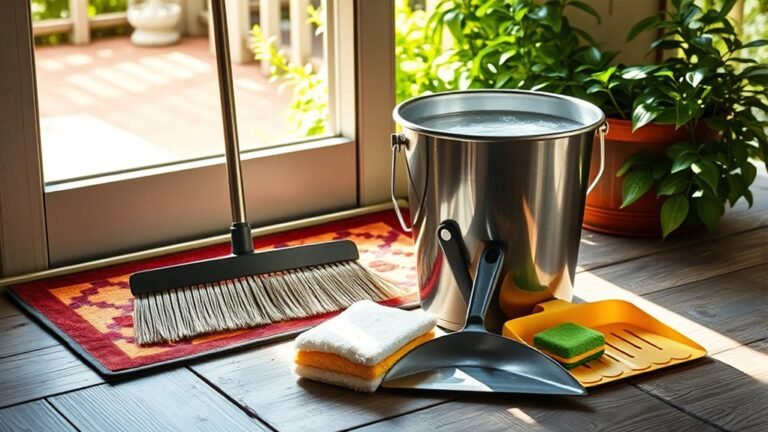
Before you start cleaning, make sure you have the right tools on hand. Your freedom to enjoy a dust-free music room depends on using effective cleaning tools designed for delicate surfaces. Grab a microfiber cloth to gently wipe down instruments without scratching. A small, soft-bristled brush is essential for reaching tight spots on music accessories like tuners and pedals. Don’t forget a handheld vacuum with a brush attachment—it’s perfect for removing dust from carpets and corners without disturbing your setup. Using the right cleaning tools means you won’t waste time or risk damage, letting you focus on what you love: playing freely in a clean, inspiring space. Keep your gear spotless, and your music room will stay a sanctuary for creativity.
Effective Dusting Techniques for Instruments and Equipment
You’ll want to use safe cleaning materials that won’t damage your instruments or gear. Gentle dust removal methods, like microfiber cloths and soft brushes, work best to avoid scratches or buildup. Let’s explore how to keep your equipment spotless without risking harm.
Safe Cleaning Materials
Although cleaning a music room can feel challenging, choosing safe materials makes dusting your instruments and equipment much easier. You want to protect your gear without harsh chemicals, so opting for eco friendly cleaners is a smart move. These products are gentle yet effective, keeping your instruments safe and the environment happy. When dusting, use soft microfiber cloths paired with these cleaners to avoid scratches or damage. To maintain a dust-free vibe longer, consider applying dust repellent sprays designed specifically for musical equipment. They help prevent dust buildup without leaving residue, giving you more freedom to focus on your music. By sticking to these safe cleaning materials, you guarantee your instruments stay pristine and ready to play, all while embracing a cleaner, healthier space.
Dust Removal Methods
Choosing the right cleaning materials sets the stage for effective dust removal from your instruments and equipment. Your dusting frequency depends on how often you use the room and the type of instruments you own. Use gentle cleaning techniques like microfiber cloths or soft brushes to avoid damage while freeing your gear from dust buildup. Here’s a quick guide to keep your music room pristine without restricting your creativity:
| Instrument/Equipment | Recommended Dusting Frequency | Best Cleaning Technique |
|---|---|---|
| Guitars | Weekly | Soft microfiber cloth |
| Keyboards | Twice a week | Compressed air, soft brush |
| Amplifiers | Weekly | Dry cloth, gentle brush |
| Wind Instruments | After each use | Swabs, soft cloth |
| Speakers | Weekly | Electrostatic duster |
Stick to these methods and enjoy a dust-free, liberating music space!
Optimizing Air Quality to Reduce Dust Accumulation

Since dust often settles from the air, improving your home music room’s air quality can greatly cut down on how much dust accumulates. Start by investing in a quality air filtration system—it captures airborne particles before they settle on your instruments and equipment. Keeping windows closed during high pollen or dust days also helps maintain cleaner air inside. Humidity control plays an essential role too; aim for a balanced level around 40-50%. Too dry, and dust particles float freely; too humid, and moisture attracts dust and promotes mold. Using a humidifier or dehumidifier lets you keep this balance effortlessly. By focusing on air filtration and humidity control, you’re not just reducing dust—you’re creating a freer, cleaner environment where your music can truly thrive.
Organizing Cables and Accessories to Minimize Dust Traps
Controlling air quality is a great start, but dust can still gather in overlooked spots like tangled cables and scattered accessories. To keep your music room truly dust-free, focus on effective cable management. Use clips, ties, or sleeves to bundle cables neatly, preventing dust from settling in those hard-to-reach tangles. This not only reduces dust traps but also frees up floor space, giving you more room to move. For accessory storage, opt for dedicated containers or drawers that keep items like picks, tuners, and cables out of sight and dust-free. Keeping everything organized lets you enjoy your music room without the hassle of constant cleaning. With simple cable management and smart accessory storage, you’ll maintain a cleaner, freer space that’s ready for creativity.
Protective Covers and Storage Solutions for Instruments

Although managing dust in the air and on surfaces helps, your instruments need extra protection to stay in top shape. Using quality protective covers shields them from dust settling on delicate parts, keeping your gear ready to play whenever inspiration strikes. When not in use, store your instruments in sturdy instrument cases designed to block out dust and prevent damage. These cases also make it easier to transport your instruments without worrying about dirt or scratches. Choose covers and cases that fit snugly and allow proper airflow to avoid moisture buildup. By investing in the right protective covers and storage solutions, you’re giving your instruments freedom to thrive in a clean, dust-free environment. This simple step preserves their sound and extends their life so you can enjoy your music without limits.
Establishing a Regular Cleaning Schedule
Even if you’ve taken steps to protect your instruments, dust will still find its way into your music room over time. That’s why establishing a regular cleaning schedule is essential. Decide on a cleaning frequency that fits your lifestyle—whether it’s weekly, biweekly, or monthly—and stick to it. Setting specific days helps turn cleaning into a habit rather than a chore. To keep your motivation strategies effective, try pairing cleaning sessions with your favorite playlist or rewarding yourself afterward. Remember, maintaining a consistent routine not only preserves your instruments but also frees you from the stress of unexpected messes. By committing to this rhythm, you gain control over your space, allowing your creativity to flow unhindered in a dust-free environment.
Tips for Preventing Dust During Renovations or Room Changes
When you’re renovating or rearranging your music room, sealing off the work area can keep dust from spreading. You’ll also want to use air scrubbers to capture airborne particles effectively. These steps help protect your instruments and keep the space clean throughout the process.
Seal Off Work Area
Since dust can easily spread during renovations or room changes, it is crucial to seal off your work area completely. You want to protect your music room’s freedom and freshness by creating a solid barrier that traps dust before it escapes. Using soundproof barriers or sturdy room partitions can help contain debris and noise simultaneously, maintaining your creative sanctuary’s vibe.
Here’s how to effectively seal off your workspace:
- Install temporary plastic sheeting attached with painter’s tape around openings
- Use soundproof barriers or room partitions to block dust and sound
- Seal gaps under doors with draft stoppers or rolled towels
- Keep the door closed and limit foot traffic during work
This way, your music room stays dust-free and ready for inspiration.
Use Air Scrubbers
Once you’ve sealed off your work area to block dust, the next step is to actively remove airborne particles before they settle. Using air scrubbers is a smart move—they continuously pull in contaminated air, trap dust, and release clean air back into the room. The air scrubber benefits include reducing allergens and preventing dust from settling on your instruments, preserving their quality. These devices act as powerful air filtration systems, working quietly and efficiently to keep your music room fresh and dust-free during renovations or rearrangements. Investing in a reliable air scrubber gives you freedom from constant cleaning and worry, allowing you to focus on your music without compromise. Don’t underestimate how much cleaner air can transform your creative space.
Frequently Asked Questions
Can Certain Plants Help Reduce Dust in a Music Room?
Oh sure, you can totally trust dust absorbing plants to do all the cleaning while you just sit back. In reality, certain plants do help improve indoor air quality by trapping dust particles, giving your music room a fresher vibe. But don’t rely on them alone—they’re just part of the solution. You’ve got to strike a balance, combining nature’s touch with good cleaning habits to keep your space truly free and clear.
How Does Humidity Affect Dust Levels in a Music Room?
Humidity control plays a big role in managing dust accumulation in your music room. When the air’s too dry, dust particles float freely, settling on your instruments and surfaces. But if it’s too humid, moisture can cause dust to clump and stick, potentially damaging your gear. By keeping humidity balanced—ideally around 40-50%—you’ll minimize dust buildup and protect your space, letting you enjoy your music room without constant cleaning hassles.
Are There Specific Flooring Types Better for Dust Control?
Imagine walking barefoot on a stage, free and clear—hardwood flooring gives you that open, airy feel while making dust easy to spot and sweep away. Carpet tiles, though cozy, can trap dust like an old vinyl record collecting scratches. If you want freedom from constant dust battles, hardwood’s your best bet. It’s smooth, stylish, and keeps particles from hiding, letting your music room breathe as freely as your soul.
Can Air Purifiers Damage Sensitive Musical Instruments?
You might wonder if air purifiers can harm your sensitive musical instruments. Generally, they won’t if you choose the right model. Maintaining good air quality is key for instrument care, helping prevent dust and moisture buildup that can cause damage. Just avoid purifiers with ozone generators or harsh chemicals, as they might affect finishes or wood. So, with careful selection, you can enjoy cleaner air without sacrificing your instruments’ freedom to resonate beautifully.
What Is the Best Way to Clean Digital Music Equipment?
Cleaning digital music equipment can feel like trying to tame a wild storm, but with the right techniques, you’ll have it spotless in no time. You’ll want to contemplate your equipment materials—use a soft microfiber cloth for screens and knobs, and avoid harsh chemicals that could damage sensitive parts. Lightly dampen the cloth with water or a gentle cleaner designed for electronics. Remember, gentle and steady wins the freedom to keep your gear pristine without risk.


