Cleaning Mistakes That Damage Your Bike
You’re likely harming your bike if you use high-pressure water jets, which push water into bearings and seals, causing wear. Skipping lubrication after cleaning removes essential oils, leading to rust and friction. Harsh chemicals can degrade your chain, while abrasive brushes damage finishes. Neglecting brake cleaning risks poor stopping power, and leaving moisture on parts promotes corrosion. Missing suspension care reduces ride quality and longevity. Understanding these pitfalls helps you protect your bike’s performance and lifespan.
Using High-Pressure Water Jets

Although it might seem efficient, using high-pressure water jets to clean your bike can cause more harm than good. Water jetting at high pressure forces water into sensitive areas like bearings, suspension seals, and bottom brackets, leading to premature wear and corrosion. The high pressure effects strip away grease and protective coatings essential for smooth operation and longevity. Instead of blasting your bike with powerful jets, opt for a gentler approach using a low-pressure hose or a spray bottle, combined with a soft brush. This method removes dirt without compromising your bike’s integrity, preserving your freedom to ride without unexpected mechanical failures. Remember, protecting your bike’s precision components means choosing cleaning techniques that maintain performance and durability, not jeopardize them through aggressive water jetting.
Neglecting to Lubricate After Cleaning
After cleaning your bike, you can’t skip lubricating the chain and moving parts, as water and detergents remove essential oils. Failing to apply the right lubricant leads to increased friction, accelerated wear, and potential rust formation. Using a high-quality bike-specific lubricant guarantees smooth operation and prolongs component life.
Importance of Post-Clean Lubrication
Even if you’ve thoroughly cleaned your bike, failing to lubricate its moving parts immediately afterward can lead to increased friction, accelerated wear, and potential component damage. Post clean maintenance isn’t just about wiping down surfaces; it requires applying the right lubricant to chains, derailleurs, and pivot points to restore smooth function. Skipping this step leaves metal exposed, increasing resistance and reducing efficiency during rides. To protect your freedom on the road, integrate lubrication into your routine right after every wash. Combine this with regular inspections to spot early signs of wear or rust, ensuring your bike remains reliable and responsive. By prioritizing post clean maintenance, you maintain performance, extend component lifespan, and safeguard your cycling experience from avoidable mechanical failures.
Consequences of Skipping Lubrication
If you neglect to lubricate your bike immediately after cleaning, you risk accelerating wear on critical components like the chain, derailleurs, and pivot points. Water and cleaning agents strip away existing lubrication, leaving metal surfaces vulnerable to corrosion and friction. This increases mechanical resistance, reducing efficiency and freedom of movement. Maintaining proper lubrication frequency is essential; skipping sessions compromises performance and shortens component lifespan. Employing correct lubrication techniques—applying lubricant precisely to contact points and wiping off excess—ensures ideal protection without attracting dirt. Ignoring these steps leads to premature chain stretch, noisy shifting, and potential part failure, restricting your ride’s reliability and enjoyment. To preserve your bike’s freedom and function, always follow recommended lubrication frequency and techniques immediately after each cleaning.
Best Lubricants for Bikes
Skipping lubrication after cleaning exposes your bike’s components to increased wear, making the choice of lubricant all the more important. For ideal chain maintenance techniques, select lubricants designed specifically for your riding conditions—wet lubes for rainy environments, dry lubes for dusty trails. These lubricants reduce friction and prevent corrosion, extending drivetrain life. Follow lubrication frequency recommendations closely: apply lubricant after every cleaning or every 100-150 miles, whichever comes first. Avoid heavy greases that attract dirt or penetrating oils that evaporate quickly. Apply lubricant sparingly to the chain’s rollers, wiping away excess to prevent grime buildup. Proper lubrication guarantees smooth shifting and preserves your bike’s freedom on the road or trail, protecting your investment while enhancing performance and reliability.
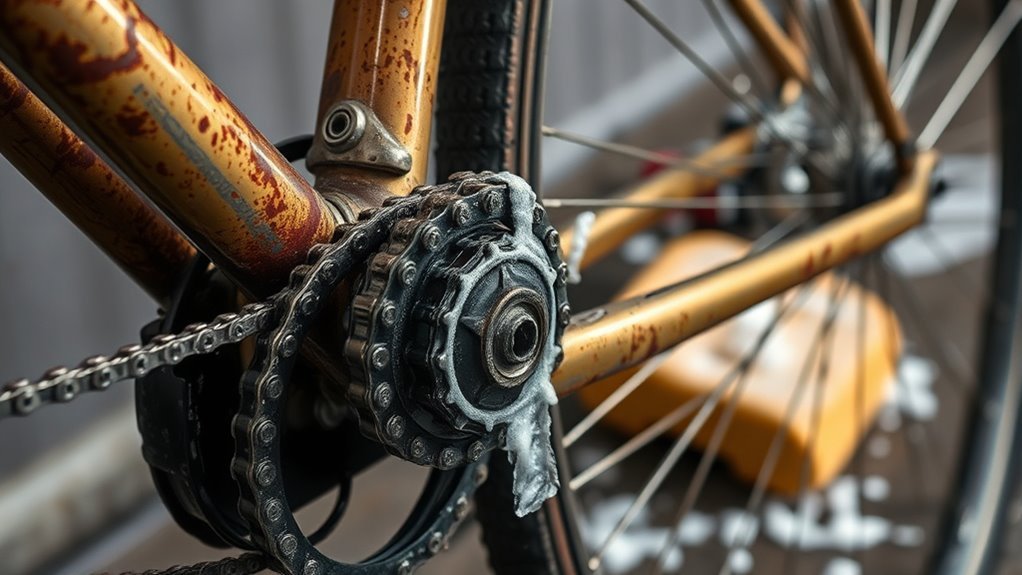
Cleaning the Chain With Harsh Chemicals
Although harsh chemicals might seem effective for cleaning your bike chain, they can actually degrade the metal and remove essential lubrication. Using solvents like brake cleaner or industrial degreasers risks chemical damage that weakens chain links and accelerates wear. Instead, opt for biodegradable, bike-specific degreasers designed to break down grime without compromising metal integrity. During chain cleaning, apply the degreaser sparingly, allowing it to penetrate before scrubbing gently with a stiff brush. Rinse thoroughly with water to remove residues, then dry completely to prevent rust. Avoid prolonged exposure to aggressive chemicals, as they strip protective oils, leading to increased friction and reduced drivetrain performance. By choosing the right products and techniques, you preserve chain durability and maintain the freedom to ride smoothly and reliably.
Ignoring the Brake Components

You shouldn’t overlook your brake components when cleaning your bike, as contaminating brake pads with grease or solvents can severely reduce stopping power. Be careful not to spray harsh cleaners directly onto brake calipers, as this can damage seals and compromise performance. Properly maintaining these parts guarantees reliable braking and extends their lifespan.
Brake Pad Contamination
One common mistake that leads to brake pad contamination is neglecting to protect brake components during cleaning. When you spray degreasers or solvents near the brakes without shielding them, you risk introducing oils or chemicals that degrade the pad’s friction material. For effective brake pad maintenance, always cover the calipers and pads with clean rags or plastic wrap before applying cleaning agents to the drivetrain or frame. Avoid using lubricants or grease near the brake area, as even minimal contamination can drastically reduce braking efficiency and increase stopping distances. Contamination prevention isn’t just about cleaning methods—it’s about precision and foresight. By maintaining strict separation between cleaning solvents and brake parts, you preserve your bike’s performance and your freedom on the road or trail.
Damaging Brake Calipers
Protecting brake pads from contamination is only part of the care required for your bike’s braking system. You must also avoid damaging the brake calipers during cleaning. Neglecting caliper alignment can reduce brake performance drastically, compromising your control and freedom on the road or trail. When cleaning, steer clear of high-pressure water jets aimed directly at the calipers—they can force dirt and water into seals, causing corrosion or sticking pistons. Use a soft brush and appropriate brake cleaner to gently remove grime without disturbing the caliper’s positioning. After cleaning, always check caliper alignment; misaligned calipers cause uneven pad wear and diminished braking power. Maintaining precise caliper alignment guarantees consistent brake performance, keeping you safe and in control, so you can enjoy your ride without interruption.
Skipping the Drying Step
Although it might seem convenient to skip drying your bike after washing, leaving moisture on its components can lead to corrosion and degraded performance. Moisture retention, especially in crevices like the drivetrain and bearings, accelerates rust formation and compromises smooth operation. To prevent this, adopt effective drying techniques such as using a clean, absorbent microfiber cloth to wipe down exposed surfaces immediately after rinsing. Follow up with compressed air or a gentle blow dryer to dislodge trapped water in hard-to-reach areas. Avoid letting your bike air dry, as this prolongs moisture exposure. Prioritizing thorough drying preserves your bike’s mechanical integrity and extends its lifespan, ensuring your freedom to ride without unexpected mechanical failures. Skipping this step risks costly repairs and limits your bike’s reliability on every ride.
Using Abrasive Brushes or Cloths

Choosing the right cleaning tools is essential to maintaining your bike’s finish and components. Using abrasive materials like harsh brushes or rough cloths can scratch paint, damage seals, and wear down delicate parts. To protect your bike, avoid abrasive brush types and opt for tools designed specifically for bike maintenance.
Select gentle, bike-specific cleaning tools to avoid scratches and protect delicate components during maintenance.
Consider these practical tips:
- Use soft-bristle brushes to clean frames without scratching.
- Choose microfiber cloths that trap dirt without abrasion.
- Avoid stiff wire brushes on painted or carbon surfaces.
- Select brushes designed for drivetrain cleaning to prevent damage.
Overlooking the Suspension Parts
Three critical suspension components often get overlooked during cleaning: the stanchions, seals, and pivots. Neglecting these parts compromises suspension performance and durability. During suspension cleaning, you must carefully wipe the stanchions with a soft, lint-free cloth to remove dirt without scratching the surface. Pay close attention to the seals; dirt buildup here can cause leaks and accelerate wear. Use a gentle cleaner compatible with suspension components to avoid damage. Pivots require proper lubrication after cleaning to maintain smooth movement and prevent corrosion. Skipping these steps undermines your suspension maintenance routine, restricting your bike’s freedom to absorb terrain impacts efficiently. By regularly addressing these components, you preserve ideal suspension function, enhance ride quality, and extend the lifespan of your bike’s suspension system.
Frequently Asked Questions
How Often Should I Clean My Bike for Optimal Maintenance?
You should set your cleaning frequency based on how often and where you ride. For regular road use, cleaning your bike every 1-2 weeks fits a solid maintenance schedule. If you hit muddy trails or ride in wet conditions, clean it after each ride to prevent damage. This approach keeps your bike in top shape, ensuring smooth performance and extending its lifespan, giving you the freedom to ride confidently whenever you want.
Can I Use Household Detergents to Clean My Bike?
You shouldn’t use household detergent for bike cleaning because they often contain harsh chemicals that can strip lubricants and damage paint or components. Instead, opt for bike-specific cleaners designed to be gentle yet effective. These maintain your bike’s performance and appearance without causing harm. Using the right products helps you keep your bike running smoothly, giving you the freedom to ride confidently without worrying about unintended damage.
What Is the Best Time of Day to Clean My Bike?
The best time to clean your bike is during your morning routine or evening cleanup when temperatures are moderate. Cleaning early prevents grime from baking onto components, while evening cleanup helps remove daily dirt before it hardens overnight. Avoid peak sunlight to prevent rapid drying, which can leave residues. Consistent timing fits your freedom to ride anytime, ensuring your bike stays in prime condition without compromising your schedule.
Should I Remove the Wheels Before Cleaning the Bike?
Imagine your bike laid out like a puzzle, each piece needing care. Wheel removal lets you access hard-to-reach spots, making cleaning techniques more effective. By detaching the wheels, you can thoroughly clean the rims, hubs, and brake surfaces without obstruction. It also helps prevent water from seeping into sensitive areas. So, yes, removing the wheels enhances your cleaning precision and keeps your bike in top shape, giving you the freedom to ride worry-free.
How Do I Protect My Bike Frame From Rust After Cleaning?
To protect your bike frame from rust after cleaning, start by thoroughly drying it to prevent moisture buildup. Apply a quality frame protection spray or a light coat of bike-specific lubricant to all metal surfaces, focusing on joints and welds where rust often forms. Regularly inspect for chips or scratches and touch them up with paint or rust inhibitor. This rust prevention routine helps maintain your bike’s freedom to perform without corrosion holding you back.