Daily Maintenance Tips for Keyboard
You should regularly remove dust and debris from your keyboard to keep it responsive. Use gentle cleaning solutions for keycaps and compressed air for tight spaces. Avoid eating or drinking near your keyboard to prevent spills and crumbs. Keep your hands clean before typing and check loose keys to maintain stability. Store your keyboard properly when not in use, and update its firmware and software if it’s wireless. There are more simple steps you can follow for even better care.
Regularly Remove Dust and Debris
One simple step you can take to keep your keyboard in top shape is to regularly remove dust and debris. This vital part of keyboard maintenance guarantees your device stays responsive and comfortable to use. Dust can accumulate quickly, clogging keys and interfering with your typing flow, which limits your freedom to work or play without interruption. By making dust prevention a habit, you’re protecting your keyboard’s lifespan and performance. Simply turn your keyboard upside down, gently shake it, or use compressed air to clear out particles trapped beneath the keys. This quick routine keeps your keyboard clean and functional, giving you the freedom to focus on what matters without worrying about sticky or unresponsive keys. Consistent care is the key to lasting reliability.
Clean Keycaps With Gentle Solutions
When cleaning your keycaps, make sure to pick gentle, safe cleaning agents to avoid damage. Carefully remove each keycap to prevent breaks or scratches. Once cleaned, dry them thoroughly before putting everything back together to keep your keyboard in top shape.
Choosing Safe Cleaning Agents
Although it might be tempting to reach for strong chemicals, you should opt for gentle solutions to clean your keycaps safely. Harsh cleaners often contain harmful substances that could damage the plastic or fade the legends on your keys. Instead, choose eco friendly cleaners that are free from abrasive agents and toxins. These solutions protect your keyboard’s materials and the environment, giving you freedom from worry about long-term damage. A simple mixture of mild dish soap and water usually does the trick without risking harm. Avoid bleach, ammonia, or alcohol-based products, as they can degrade your keycaps over time. By selecting safe, gentle cleaning agents, you maintain your keyboard’s look and function while staying true to a clean, responsible routine.
Removing Keycaps Carefully
Choosing the right cleaning agents is only part of keeping your keyboard in top shape; handling your keycaps with care is just as important. When it comes to keycap removal, you want to avoid damaging the switches or the caps themselves. Use a keycap puller to guarantee safe handling—this tool helps you lift keys evenly without bending or snapping them. Gently wiggle each keycap free rather than pulling forcefully. Once removed, clean your keycaps with gentle solutions like mild soap and warm water to keep them fresh without harsh chemicals. This careful approach preserves your keyboard’s functionality and lets you maintain the freedom to customize and clean without worry. Remember, patience and proper tools make all the difference in keycap removal.
Drying and Reassembling Tips
After cleaning your keycaps with gentle solutions, you’ll want to dry them thoroughly before reassembling your keyboard to prevent any moisture damage. Use drying techniques like air drying on a clean towel or using a soft cloth to pat them dry gently. Avoid direct heat or sunlight, as that can warp the plastic. Once completely dry, you’re free to start reassembling. When putting the keycaps back, align each one carefully with its switch stem to avoid bending or breaking. Use steady pressure and check that every key snaps into place securely. These reassembly tips help keep your keyboard functioning smoothly and extend its lifespan, giving you the freedom to type confidently and maintain your gear without hassle.
Use Compressed Air for Hard-to-Reach Areas
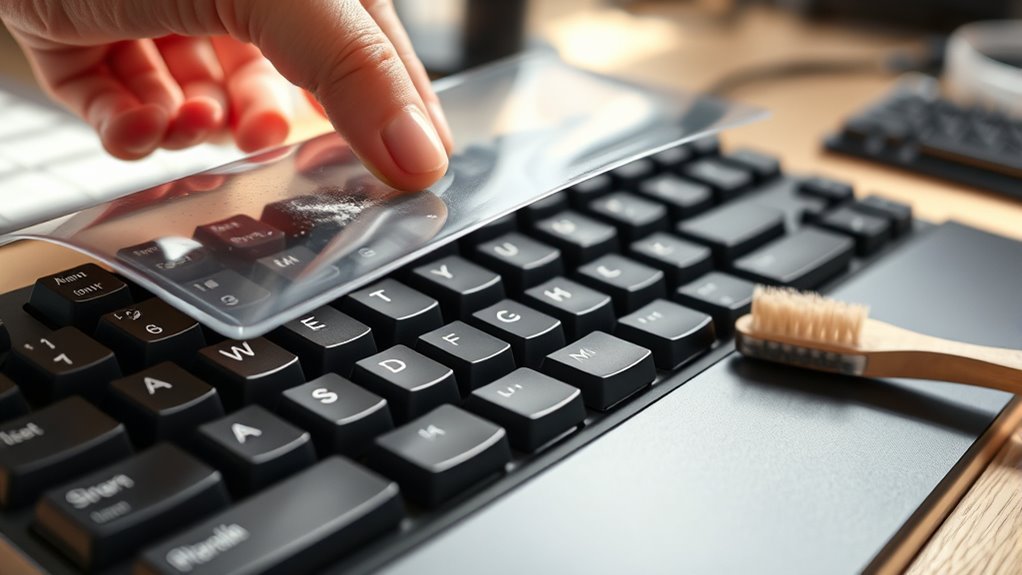
One of the easiest ways to keep your keyboard clean is by using compressed air to blast away dust and debris from hard-to-reach areas. Compressed air is a powerful cleaning tool that lets you free your keyboard from grime without disassembling it. Just aim the nozzle between the keys and let the air do the work, pushing out particles that vacuuming or wiping can’t reach.
| Cleaning Tool | Purpose | Frequency |
|---|---|---|
| Compressed Air | Removes dust in tight spots | Weekly or as needed |
| Microfiber Cloth | Wipes surface dirt | Daily |
| Keyboard Brush | Dislodges stubborn debris | Weekly |
Using compressed air gives you freedom from sticky keys and keeps your keyboard smooth and responsive.
Avoid Eating or Drinking Near Your Keyboard

Although it might be tempting to snack or sip while you work, eating or drinking near your keyboard can lead to sticky keys, crumbs, and spills that damage your device. To keep your keyboard functioning smoothly and maintain your freedom from frustrating repairs, consider these tips:
- Choose snack alternatives like whole fruits or pre-portioned nuts that minimize crumbs and mess.
- Always place drinks away from your keyboard—use a stable coaster on a separate surface to prevent accidental spills.
- Take regular breaks to enjoy your snacks and drinks away from your workspace, giving your keyboard a chance to stay clean and safe.
Maintain Proper Hand Hygiene Before Use
Keeping your keyboard clean goes beyond avoiding food and drinks nearby. To truly protect your device and enjoy smooth typing, start with proper hand hygiene before use. Regular hand washing helps remove dirt, oils, and germs that can quickly accumulate on your keyboard. If you’re on the go or don’t have immediate access to soap and water, keep a pack of sanitizing wipes handy. A quick wipe of your hands before typing prevents grime buildup and keeps your keyboard feeling fresh longer. By taking these simple steps, you maintain both your health and your keyboard’s performance, giving you the freedom to work or play without worry. Clean hands mean a cleaner, more responsive keyboard every time you sit down to type.
Check and Tighten Loose Keys

If you notice a key wobbling or not responding well, it’s likely loose and needs attention. You’ll want to carefully identify which keys are affected before tightening them properly. Using the right technique guarantees your keyboard stays functional without causing damage.
Identifying Loose Keys
Loose keys can disrupt your typing flow and cause frustration, so it’s important to spot them early. You want your keyboard to offer smooth, reliable key stability that lets you work or play freely. Here’s how to identify loose keys before they become a bigger issue:
- Gently press each key to feel if it wobbles or sinks lower than the others.
- Listen for unusual rattling sounds when you tap keys—this might signal looseness.
- Test the responsiveness; keys that stick or fail to register a press might need key replacement.
Proper Tightening Techniques
Once you’ve noticed keys that wobble or don’t respond properly, it’s time to check their tightness and secure them. Start by gently removing the keycap to access the underlying screws or clips. Use a screwdriver to perform precise screw adjustments, ensuring you don’t overtighten and risk damaging the mechanism. Pay close attention to key torque—the amount of force applied to tighten screws—because too much can strip threads or hinder key movement. Aim for a snug fit that eliminates wobble but still allows smooth keypresses. After adjustments, test each key by pressing it several times to confirm responsiveness. Taking control of these small tweaks frees you from annoying keyboard issues and keeps your device performing at its best.
Store Keyboard Properly When Not in Use
Although it might seem simple, storing your keyboard properly when you’re not using it can greatly extend its lifespan. You want to make sure your keyboard stays clean, damage-free, and ready for action whenever you need it. Here are some keyboard storage solutions and ideal placement tips to keep that freedom of use:
- Choose a dust-free environment: Store your keyboard in a dry, clean area to prevent dust buildup and moisture damage.
- Use a protective cover or case: A slim dust cover or padded case shields your keyboard from spills and scratches while not in use.
- Keep it flat or slightly elevated: Avoid placing heavy objects on it and make sure it’s on a stable surface to prevent key damage.
Following these steps helps your keyboard stay in top shape, letting you enjoy uninterrupted freedom whenever you type.
Update Firmware and Software for Wireless Keyboards
Storing your keyboard properly helps protect its physical condition, but keeping it updated guarantees it works smoothly. For wireless keyboards, regularly checking for firmware updates is key. These updates not only fix bugs but also enhance performance and security, giving you the freedom to type without interruptions. Equally important is ensuring software compatibility with your device’s operating system. Outdated software can cause lag or disconnects, limiting your productivity. Most manufacturers provide easy-to-use apps or websites where you can download the latest firmware and drivers. Make it a habit to connect your keyboard to these tools and install updates as soon as they’re available. By staying on top of firmware and software updates, you maintain a seamless, reliable connection—keeping your wireless keyboard running effortlessly.
Frequently Asked Questions
How Often Should I Replace My Keyboard Switches?
You might not know this, but some mechanical keyboard switches can last up to 50 million keystrokes! Your switch lifespan really depends on the switch types you choose—linear, tactile, or clicky. If you love freedom in your typing experience, swapping out switches only when you notice performance drop or feel changes in feedback keeps things fresh. Don’t replace them just for the sake of it; trust your own typing vibe instead.
Can I Use a Mechanical Keyboard Under Water?
You probably shouldn’t use a mechanical keyboard underwater since most aren’t designed with water resistance in mind. Mechanical durability means they can handle heavy typing and some knocks, but water can easily damage the switches and electronics. If you want freedom to use a keyboard near water, look for one specifically labeled as water-resistant or waterproof. Otherwise, keeping it dry is your best bet to avoid costly damage and keep your keyboard working smoothly.
What Is the Best Keyboard for Gaming?
Picking the best gaming keyboard feels like choosing your first bike—you want something that fits perfectly and performs well. When hunting for gaming features, brands like Corsair, Razer, and Logitech often lead the pack with customizable keys, RGB lighting, and fast response times. You’ll want a keyboard that gives you freedom to play your way, with durable switches and anti-ghosting. Find one that feels like an extension of you, and you’re set to win.
How Do I Fix a Keyboard That Types Wrong Characters?
If your keyboard types wrong characters, first check your keyboard layout settings—sometimes it switches unintentionally. Go to your software settings and verify the correct language or layout is selected. You might also want to update or reinstall your keyboard drivers. Don’t let these glitches limit your freedom; fixing them lets you type exactly how you want, without restrictions or surprises interrupting your flow.
Are Ergonomic Keyboards Effective for Preventing Wrist Pain?
Imagine breaking free from the chains of wrist pain—that’s what an ergonomic keyboard offers you. With its thoughtful ergonomic design and built-in wrist support, it’s crafted to keep discomfort at bay while you work. You’ll feel more liberated, typing with ease and less strain. Though it’s not a cure-all, choosing one can definitely help you reclaim comfort and keep your wrists healthier, empowering your freedom to create without limits.