DIY Cleaner for Garage
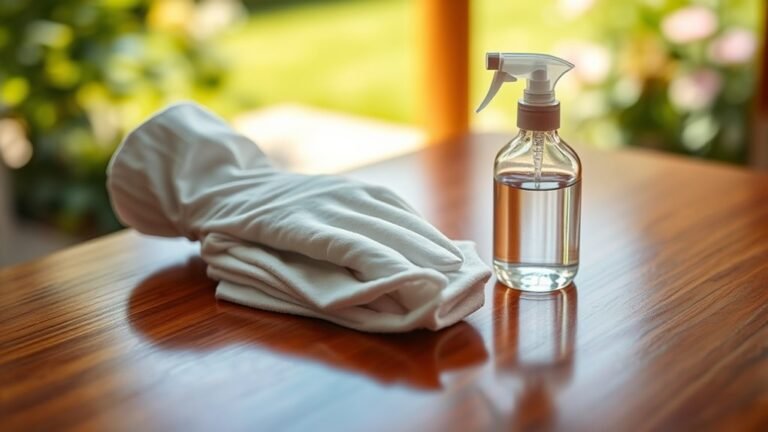
You can make an effective, eco-friendly DIY garage cleaner using white vinegar, baking soda, liquid dish soap, and warm water. This mix tackles grease, dirt, and mildew safely without harsh chemicals, saving you money and reducing chemical exposure. Absorb fresh oil stains first, then scrub with your cleaner for best results. Store your solution in labeled, airtight containers away from kids. To learn how to optimize its use and handle tough garage messes, keep exploring these guidelines.
Benefits of Using a DIY Garage Cleaner

Although you might be tempted to buy commercial cleaners, using a DIY garage cleaner offers several distinct advantages. You gain control over the ingredients, ensuring environmental benefits by avoiding harsh chemicals that harm ecosystems. This choice reduces your ecological footprint and promotes sustainability. Additionally, making your own cleaner leads to significant cost savings. Commercial products often come with premium prices due to branding and packaging, whereas DIY solutions use common, inexpensive ingredients. This approach empowers you to clean effectively without recurring expenses. By crafting your own cleaner, you also enhance your independence, no longer relying on store-bought options that may contain unnecessary additives. Overall, choosing a DIY garage cleaner aligns with your desire for freedom, financial prudence, and environmental responsibility.
Essential Ingredients for Your Homemade Cleaner
Creating an effective homemade garage cleaner starts with selecting a few key ingredients that target common stains and grime without damaging surfaces. To maximize your cleaning efficiency while embracing natural alternatives, focus on these essentials:
Start your homemade garage cleaner with key ingredients that tackle stains and grime safely and effectively.
- White Vinegar – Its acidity breaks down grease and grime effortlessly, making it a powerful, natural degreaser.
- Baking Soda – This mild abrasive lifts tough stains and neutralizes odors without scratching surfaces.
- Liquid Castile Soap – A plant-based cleanser that cuts through dirt while being gentle on the environment.
How to Mix Your DIY Garage Cleaner

You’ll start by gathering the essential ingredients outlined earlier, ensuring accurate measurements for effectiveness. Follow a step-by-step process to combine each component safely and thoroughly. This methodical approach guarantees a powerful, consistent DIY garage cleaner every time.
Essential Ingredients
Before mixing your DIY garage cleaner, gather the essential ingredients: white vinegar, baking soda, liquid dish soap, and warm water. These components form a powerful, natural cleaning solution that lets you take control of your garage maintenance.
- White Vinegar: Known for its vinegar benefits, it cuts through grease and grime while neutralizing odors.
- Baking Soda: Acts as a gentle abrasive and deodorizer, lifting stains without harsh chemicals.
- Liquid Dish Soap: Enhances the mixture’s ability to break down tough dirt and oil residues.
Using these ingredients guarantees an effective, eco-friendly cleaner that’s safe to use and easy to prepare. With this setup, you’re ready to reclaim your garage space on your terms, avoiding toxic substances and expensive commercial products.
Step-by-Step Mixing
Now that you have your ingredients ready, it’s time to combine them properly to maximize their cleaning power. Begin by wearing gloves and eye protection—safety precautions are essential. In a large bucket, pour 1 gallon of warm water. Slowly add half a cup of white vinegar, followed by a tablespoon of liquid dish soap. Stir gently with a wooden spoon to avoid excessive suds. Next, add a quarter cup of baking soda carefully; expect some fizzing—that’s normal. Mix until fully dissolved. Avoid mixing vinegar and baking soda in a sealed container to prevent pressure buildup. This methodical approach guarantees your cleaner is balanced and effective. Remember, mastering these cleaning techniques not only boosts performance but also gives you freedom to tackle garage grime confidently and safely.
Cleaning Grease and Oil Stains Effectively
Although grease and oil stains can seem stubborn, tackling them with the right approach makes removal straightforward. You’ll want to focus on efficient grease removal and oil absorption techniques to restore your garage floor’s cleanliness quickly. Follow these steps:
- Absorb excess oil: Immediately sprinkle an absorbent like cat litter or baking soda to soak up fresh spills. Let it sit for 15-30 minutes.
- Apply a degreaser: Use a strong, eco-friendly degreasing solution or your DIY cleaner to break down the stain’s oils.
- Scrub thoroughly: Employ a stiff brush and hot water to agitate and lift the grease from the surface. Rinse well and repeat if necessary.
Removing Dirt and Dust From Garage Floors

To remove dirt effectively from your garage floor, start by sweeping thoroughly with a stiff-bristled broom to loosen debris. Control dust by dampening the floor slightly before sweeping or using a high-quality vacuum designed for hard surfaces. These steps guarantee a clean surface that’s ready for deeper cleaning or sealing.
Effective Dirt Removal
When you want to maintain a clean garage floor, tackling dirt and dust effectively is essential. Proper dirt removal is the foundation for thorough surface preparation, ensuring your garage stays spotless and ready for any project. Here’s how you can achieve this efficiently:
- Dry Sweep First: Use a stiff-bristled broom or a dust mop to remove loose dirt and debris. This step prevents grime from embedding deeper during wet cleaning.
- Spot Treat Stains: Apply a degreaser or homemade cleaner to stubborn stains for targeted removal without damaging the floor.
- Wet Clean Thoroughly: Use a mop with warm water and a mild detergent, scrubbing gently to lift remaining dirt.
Dust Control Techniques
Since dust can quickly accumulate and compromise both cleanliness and air quality, controlling it effectively on your garage floor is essential. Start by using a vacuum system with strong dust collection capabilities to remove fine particles without dispersing them into the air. Follow this with a damp mop or microfiber cloth to capture residual dust, ensuring you don’t just push it around. To maintain surface protection, consider applying a sealant or floor coating that minimizes dust adherence and simplifies future cleanings. Regularly inspect and clean entry points to prevent external dirt from entering. By adopting these dust control techniques, you’ll preserve your garage’s cleanliness and air quality, granting you the freedom to work or store items without concern for dust buildup. This approach is both efficient and sustainable.
Tackling Mold and Mildew in the Garage
How do you effectively eliminate mold and mildew from your garage? Start by implementing a clear strategy focused on mold prevention and mildew treatments to regain control over your space.
- Identify moisture sources: Check for leaks, condensation, or poor ventilation. Mold thrives in damp environments, so fixing these issues is essential.
- Apply targeted mildew treatments: Use a DIY cleaner with vinegar or hydrogen peroxide to kill mold spores directly on affected surfaces.
- Improve airflow and humidity control: Install a dehumidifier or use fans to keep humidity below 50%, preventing mold regrowth.
Deodorizing Your Garage Space Naturally
After eliminating mold and mildew, addressing lingering odors is the next step to restoring your garage’s freshness. Start with natural deodorizing agents like baking soda, which absorbs unwanted smells effectively. Sprinkle it on floors or inside open containers, then vacuum after several hours. Next, place bowls of white vinegar strategically; its volatile compounds neutralize odor-causing molecules without harsh chemicals. For inviting garage scents, consider essential oils—peppermint or eucalyptus work well. Add a few drops to cotton balls and position them around the space. Guarantee proper ventilation by opening windows and doors to allow fresh air circulation. By using these precise, natural deodorizing methods, you control your environment confidently and sustainably, keeping your garage smelling clean without sacrificing your freedom from synthetic fragrances.
Safe Storage Tips for Your DIY Cleaner
When storing your DIY cleaner, you need to prioritize safety to prevent accidents and maintain its effectiveness. Use the right storage containers—opt for airtight, durable materials resistant to corrosion or leaks. Next, label each container clearly with safety labels that detail the contents and any hazards to avoid confusion. Finally, store your cleaner in a cool, dry place away from direct sunlight and out of reach of children and pets. Follow these steps:
- Select appropriate storage containers designed for chemical solutions.
- Apply clear, durable safety labels with ingredient and hazard information.
- Keep the containers in a secure, temperature-controlled area away from heat sources.
Additional Uses for Your Homemade Cleaner
Although your homemade cleaner is designed primarily for garage use, it can tackle a variety of other cleaning tasks effectively. Embracing alternative uses not only maximizes your investment but also aligns with eco friendly options, reducing reliance on harsh chemicals. You can confidently clean surfaces beyond the garage, from kitchen counters to outdoor furniture, with this versatile solution.
| Surface Type | Recommended Use | Benefits |
|---|---|---|
| Kitchen | Countertops, sinks | Removes grease, non-toxic |
| Outdoor Furniture | Plastic, metal frames | Eco friendly, gentle yet strong |
| Bathroom | Tiles, fixtures | Effective on grime, safe for seals |
Frequently Asked Questions
Can I Use This Cleaner on Painted Garage Walls?
Did you know that 85% of paint failures result from poor adhesion? When using this cleaner on painted garage walls, you need to be cautious. It’s formulated to maintain paint adhesion and preserve wall durability, but always test a small area first. If the paint softens or peels, avoid using it broadly. Protecting the paint guarantees your walls stay strong and look great while you enjoy the freedom to maintain your space confidently.
Is This DIY Cleaner Safe for Pets and Children?
You’ll want to prioritize pet safety and child safety when choosing any cleaner. This DIY cleaner uses natural ingredients, reducing harsh chemicals that can harm loved ones. Still, always store it out of reach and guarantee treated areas dry fully before letting pets or children back. By following these steps, you maintain a safe environment without sacrificing effectiveness, giving you freedom to clean confidently without worrying about health risks.
How Long Does the Homemade Cleaner Stay Effective?
You might wonder how long your cleaner stays effective, how long its power holds. Cleaner longevity usually depends on storage and ingredients. Typically, you can expect an effectiveness duration of about one to two weeks when kept in a sealed container away from heat and sunlight. Beyond this, its potency diminishes. So, for reliable results, mix fresh batches regularly—this way, you maintain the freedom to clean efficiently without compromise.
Can I Use This Cleaner for Outdoor Furniture?
Yes, you can use this cleaner on outdoor surfaces, but you should consider your furniture materials first. It works well on metal, plastic, and resin, effectively removing dirt and grime without damage. However, be cautious with wood or delicate fabrics; test a small area to avoid discoloration or deterioration. Always rinse thoroughly and let the furniture dry in the sun. This method keeps your outdoor space fresh while preserving your freedom to maintain your belongings.
What Should I Do if the Cleaner Causes Skin Irritation?
Think of your skin as a fortress; when it signals distress, you’ve got to act quickly. If you experience skin irritation, immediately rinse the area with cool water to wash away any residues. Apply gentle skin irritation remedies like aloe vera or a fragrance-free moisturizer to soothe the area. Always follow safety precautions: wear gloves, avoid prolonged contact, and test products in a small patch before full use to protect your skin’s freedom and health.