How to Clean Your Window in 10 Minutes
You can easily clean your windows in 10 minutes by first gathering eco-friendly supplies like vinegar, water, and a microfiber cloth. Start by dusting off dirt, then spray your homemade solution evenly on the glass. Use a squeegee with firm, sweeping strokes to avoid streaks, and dry edges with a cloth. Don’t forget to clean screens separately for a full refresh. Follow these steps, and you’ll discover even quicker tricks to keep windows sparkling.
Gather Your Cleaning Supplies
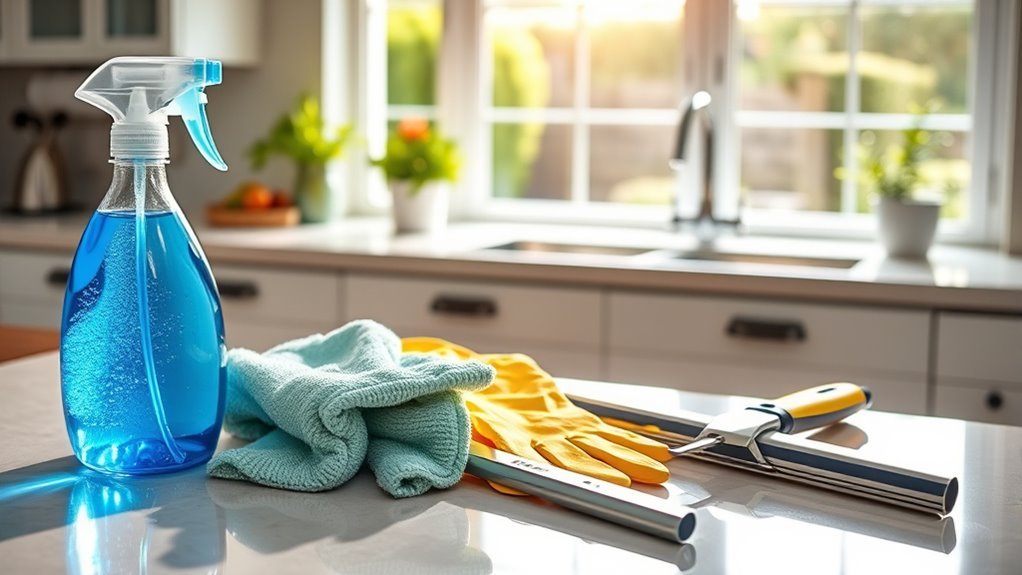
Before you start cleaning, make sure you’ve gathered all the necessary supplies. Choosing eco friendly options like vinegar, lemon juice, or baking soda helps you keep your space fresh without harsh chemicals, giving you freedom from toxins. You’ll need a spray bottle, microfiber cloths, and a squeegee—simple tools that make your job quicker and more effective. Use cleaning hacks such as mixing a small amount of dish soap with water for tough grime or adding a few drops of essential oil to your solution for a pleasant scent. Having everything at hand prevents interruptions, letting you clean your window efficiently in just 10 minutes. When you’re ready, you’ll enjoy the clear view without sacrificing your values or time.
Remove Dust and Loose Dirt
With your cleaning supplies ready, the next step is to tackle the dust and loose dirt on your window. Start by using a soft brush or a dry microfiber cloth to gently sweep away the surface dust. This dust removal step is essential because it prevents scratches during the wet cleaning phase and keeps the window clear from debris. Don’t rush—make sure to reach all corners and edges where loose dirt tends to collect. If you spot stubborn dirt, a quick wipe with a slightly damp cloth will loosen it without smearing. By removing dust and loose dirt first, you set the stage for a streak-free finish and save yourself time in the long run. You’re one step closer to windows that let you enjoy your freedom with a crystal-clear view.
Prepare a Cleaning Solution

One simple cleaning solution you can prepare quickly involves just three common ingredients: water, white vinegar, and a few drops of dish soap. This vinegar solution is a powerful, natural way to cut through grime and leave your windows sparkling without harsh chemicals. To make your homemade cleaner, mix one part white vinegar with two parts water in a spray bottle. Add a few drops of dish soap to boost its grease-fighting ability. Shake gently to combine. This mixture not only saves you money but also gives you control over what’s touching your home, letting you embrace a cleaner, freer lifestyle. Keep your solution handy—it’s ready whenever you need to refresh your windows and enjoy the clear view outside.
Wipe Down the Window Frame
Before cleaning the glass, you’ll want to remove dust and dirt from the window frame using a soft brush or cloth. Picking the right cleaning solution is key—mild soap mixed with water usually works well without damaging the frame. This step guarantees your window looks fresh and prevents grime from spreading back onto the glass.
Dust Removal Techniques
Dust and grime tend to settle along the edges of your window frame, making it essential to give this area a thorough wipe-down. Controlling dust accumulation here not only keeps your windows looking fresh but also extends their lifespan. Adjust your cleaning frequency depending on your environment—more often if you’re near busy streets or trees.
| Technique | Tip |
|---|---|
| Dry Dusting | Use a microfiber cloth |
| Vacuuming | Attach a brush head |
| Damp Wiping | Lightly moisten cloth |
| Compressed Air | Blow out hard-to-reach spots |
Choosing Cleaning Solutions
Selecting the right cleaning solution is key to effectively wiping down your window frame without causing damage. You want a product that cleans well, leaves no streaks, and aligns with your lifestyle. Vinegar solution is a popular homemade recipe—simple, affordable, and eco friendly. If you prefer commercial cleaners, look for streak free formulas designed specifically for window frames to avoid residue buildup. For those who love a fresh scent, scented additives can be mixed into homemade solutions or found in store-bought options, giving your cleaning a pleasant boost. Ultimately, choosing between commercial cleaners and eco friendly options depends on your priorities. Whichever you pick, make sure it’s safe for your frame material and easy for you to use, so cleaning stays a quick, freeing task.
Apply the Cleaning Solution to the Glass

Start by spraying a generous amount of your chosen cleaning solution evenly across the glass surface. Whether you’re dealing with single-pane, double-pane, or tempered glass, using the right application techniques will make your job easier and more effective. Hold the spray bottle about 6 to 8 inches from the window to guarantee even coverage without wasting solution. For larger windows, work in sections to avoid the cleaner drying too quickly. Avoid soaking the window frame, especially if it’s wood, to prevent damage. Remember, a light, consistent mist works better than heavy drips. This approach helps break down dirt and grime while giving you the freedom to move swiftly, keeping your window cleaning quick and efficient.
Use a Squeegee for Streak-Free Results
To get streak-free windows, you’ll want to pick the right squeegee that fits your window size. Using the proper technique—like starting at the top and wiping in straight, overlapping strokes—makes all the difference. Also, keep the squeegee blade clean to avoid spreading dirt or streaks as you work.
Choose the Right Squeegee
One essential tool you shouldn’t overlook is the squeegee, which makes all the difference in achieving streak-free windows. When choosing the right squeegee, consider the various squeegee types available—handheld models offer control and ease, while those with extendable handles provide freedom to reach high spots without ladders. Next, focus on squeegee materials: rubber blades are flexible and effective for smooth finishes, while silicone blades last longer and resist cracking. The handle material matters too; lightweight aluminum or plastic handles make the process less tiring. Picking a squeegee that fits your cleaning style and window size lets you work quickly and freely, without frustration. With the right squeegee in hand, you’re one step closer to sparkling, streak-free windows every time.
Master the Squeegee Technique
Now that you’ve picked the right squeegee, it’s time to use it properly for streak-free results. Start at the top corner of your window and pull the squeegee down in a smooth, continuous stroke. Different squeegee styles, like straight or curved blades, can affect your grip and efficiency, so find what feels natural to you. Remember to overlap each stroke slightly to avoid leaving streaks behind. When choosing squeegee brands, opt for those with ergonomic handles to reduce hand fatigue and give you better control. Keep your wrist steady and apply consistent pressure as you glide across the glass. Mastering this technique means you’ll enjoy spotless windows with minimal effort—giving you more freedom to relax and appreciate the view.
Maintain Squeegee Blade Cleanliness
Keeping your squeegee blade clean is essential for streak-free windows every time. Regular squeegee maintenance lets you glide freely across glass without dragging dirt or grime. After each use, rinse the blade with water and wipe gently. Check for nicks or cracks—they’ll cause streaks and need blade replacement to maintain that crystal-clear view.
| Maintenance Step | Why It Matters |
|---|---|
| Rinse blade after use | Removes debris |
| Wipe blade dry | Prevents water spots |
| Inspect for damage | Avoids streaks |
| Replace blade timely | Keeps cleaning smooth |
| Store properly | Extends blade life |
Stay on top of these simple habits, and your windows will shine with freedom and clarity every time.
Dry the Edges and Corners
To finish your window cleaning efficiently, focus on drying the edges and corners thoroughly. These areas often trap moisture, so mastering edge drying techniques is key to a spotless finish. Use a clean, dry cloth or a small sponge to reach into those tight corners. Here are some corner cleaning tips to help you:
- Gently press the cloth into corners to absorb lingering water.
- Use a corner of the cloth for precision, avoiding streaks.
- Rotate the cloth frequently to keep it dry and effective.
- Work quickly but carefully to prevent drips that could ruin your hard work.
Polish With a Microfiber Cloth
One essential step to achieve a streak-free shine is polishing your window with a microfiber cloth. These cloths are designed to trap dust and dirt without scratching the glass, making them perfect for the job. Use gentle, circular polishing techniques to buff away any remaining smudges or streaks. Don’t rush—let the cloth do the work as you glide it smoothly over the surface. If you notice stubborn spots, fold the microfiber cloth to a clean section and apply a little extra pressure. Remember, the key is consistent, light movements rather than harsh scrubbing. With just a few minutes of careful polishing using microfiber cloths, your windows will look crystal clear, giving you that fresh, open feeling you crave in your space.
Clean Window Screens Separately
After polishing your windows, don’t forget that the screens need attention too—they can collect dirt and grime just like the glass. Taking a few extra minutes for screen cleaning techniques frees you from the frustration of clogged screens blocking fresh air and sunlight. Here’s how to keep your screens in top shape:
Don’t overlook your screens—they trap dirt like glass and need regular cleaning to keep air and light flowing freely.
- Gently remove screens and rinse with a hose or in a bathtub.
- Use a soft brush and mild soap to scrub away built-up dust and debris.
- Rinse thoroughly and let them dry completely before reinstalling.
- Regular screen maintenance tips include checking for tears or loose edges to guarantee lasting freedom from bugs.
Inspect for Missed Spots
Once you finish cleaning, take a moment to spot any streaks or smudges you might’ve missed. Pay close attention to the edges of the frame, where dirt tends to hide. Catching these early will leave your window sparkling clear.
Spotting Streaks Quickly
Anyone can miss a spot when cleaning windows, so it’s important to inspect your work carefully to spot streaks quickly. Use streak identification tips like viewing the glass from different angles in natural light to catch any leftover marks. To maintain your freedom from constant re-cleaning, apply streak prevention methods such as using a microfiber cloth and not over-wetting the surface. Here’s how to stay one step ahead:
- Scan the window slowly, moving your head side to side.
- Use a dry, lint-free cloth for a final wipe.
- Check right after cleaning to fix streaks while they’re fresh.
- Avoid harsh chemicals that cause residue build-up.
Taking these steps lets you enjoy clear, streak-free windows and the freedom to move on with your day.
Checking Frame Edges
Though it’s easy to focus on the glass itself, don’t forget to check the window frame edges for missed spots. Dirt and grime often gather where the glass meets the frame, especially if your frame materials are textured or have grooves. Take a moment to run your fingers along the edges or use a soft cloth to spot any stubborn buildup. Proper edge maintenance not only keeps your windows looking spotless but also prolongs the life of the frame by preventing mold and decay. Whether your frames are wood, vinyl, or aluminum, a quick edge inspection guarantees no dirt escapes your cleaning efforts. Embrace this small step to enjoy crystal-clear views and the freedom of a truly clean window.
Frequently Asked Questions
Can I Use Vinegar Instead of Commercial Window Cleaner?
You absolutely can use vinegar instead of commercial window cleaner. Vinegar benefits include being natural, inexpensive, and free from harsh chemicals, giving you more freedom from synthetic products. Its cleaning effectiveness is impressive—vinegar cuts through grime and streaks, leaving your windows sparkling clear. Plus, it’s eco-friendly, so you’re making a smart choice for both your health and the planet. Just mix it with water, and you’re good to go!
How Often Should I Clean My Windows for Best Results?
They say, “A stitch in time saves nine,” and that’s true for your windows too. To keep them sparkling and clear, you’ll want to make window cleaning part of your weekly routine. This helps prevent buildup and keeps your view fresh. Then, add a thorough seasonal cleaning to tackle deeper grime. By sticking to this rhythm, you’ll enjoy freedom from dirt and streaks all year long without much hassle.
What’S the Best Time of Day to Clean Windows?
You’ll want to clean your windows when the morning sunlight isn’t too harsh, ideally mid-morning, so the glass doesn’t dry too quickly and leave streaks. Avoid cleaning in the middle of the day when the sun’s strongest; it can make the cleaning solution evaporate fast. Evening shadows are great too, as cooler temps help you work comfortably without glare. Choosing those times gives you freedom to clean efficiently and enjoy spotless windows.
Are There Any Safety Tips for Cleaning High or Hard-To-Reach Windows?
When tackling high or hard-to-reach windows, ladder safety is key. Always make sure your ladder is on stable ground and never overreach—move the ladder instead. Use cleaning tools with extendable handles to keep your balance and avoid risky positions. Wear non-slip shoes and keep your phone handy in case you need help. Staying safe lets you enjoy the freedom of sparkling windows without any mishaps!
Can Window Cleaning Damage Tinted or Treated Glass?
Imagine your tinted glass as a delicate butterfly wing—beautiful but fragile. You don’t want to trap it under harsh cleaning products that could strip away its vibrant hues. To keep your tinted or treated glass free and radiant, choose gentle, non-abrasive cleaners specifically designed for these surfaces. This way, you protect your window’s freedom to tint the world without damage, letting light dance through unhindered and safe from harm.