Removing Bedroom Stains From Grout
To remove bedroom stains from grout, start by identifying the stain type—sweat, dirt, or makeup—and gather essentials like a stiff brush, baking soda, and vinegar. Clean the grout surface, ensuring it’s dry, then sprinkle baking soda on stains and spray vinegar to fizz and lift grime. Scrub gently, rinse with warm water, and repeat if needed. For tougher stains, use a specialized grout cleaner safely. Taking these steps thoroughly restores your grout; next, you’ll discover how to maintain stain-free grout longer.
Identifying Common Bedroom Stains on Grout
Although grout is designed to withstand regular wear, it can still absorb various stains common in bedrooms, making it crucial for you to recognize these marks early. Common stain types include sweat and body oils, which often leave yellowish or brownish discolorations. Dust and dirt tracked in from outside tend to cause grayish grime buildup. You might also encounter makeup or hair product spills, which typically appear as darker, sticky patches. To accurately identify these stains, examine the grout closely under natural light, noting color variations and texture changes. Use stain identification tips like rubbing a damp white cloth to see if the stain transfers or fades slightly. Recognizing these specifics guarantees you choose the right cleaning approach, giving you freedom from persistent, unsightly grout stains.
Essential Tools and Materials for Grout Cleaning
Before you start scrubbing, gather must-have cleaning supplies like a stiff-bristled brush, grout cleaner, and a sponge to tackle stains effectively. Don’t forget protective gear such as gloves and a mask to safeguard your skin and lungs from harsh chemicals. Having these tools ready guarantees a thorough and safe grout cleaning process.
Must-Have Cleaning Supplies
Since grout can be porous and easily stained, having the right cleaning supplies is vital to effectively remove bedroom stains without damaging the surrounding tiles. To master grout cleaning techniques, you’ll need a stiff-bristled brush to scrub deeply into the grout lines and a spray bottle for applying solutions evenly. Natural remedies like a mixture of baking soda and vinegar or hydrogen peroxide are powerful yet gentle options you should keep on hand. Additionally, a microfiber cloth helps wipe away loosened dirt without scratching tiles. For stubborn stains, a grout cleaner formulated specifically for your tile type guarantees effectiveness. By assembling these must-have supplies, you gain control over the cleaning process, allowing you to restore grout’s original brightness while preserving your freedom from harsh chemicals.
Protective Gear Essentials
When tackling grout cleaning, you’ll want to protect yourself with the right gear to prevent skin irritation and respiratory issues caused by cleaning agents and loosened grime. Prioritize gloves selection carefully: choose durable, chemical-resistant gloves that fit snugly to maintain dexterity while shielding your skin from harsh substances. Nitrile gloves are often a reliable choice, offering excellent protection without latex allergies. Equally critical is mask importance; a well-fitted respirator or a high-quality dust mask will guard your lungs against airborne particles and fumes. Avoid disposable surgical masks, which often fail to filter fine dust adequately. By equipping yourself with appropriate gloves and a proper mask, you guarantee safety and freedom to clean aggressively without compromising your health, enabling efficient, confident grout stain removal.
Preparing the Grout Surface for Treatment

Although grout may appear sturdy, it’s actually quite porous and prone to trapping dirt and stains deep within its surface. For effective grout surface preparation, start by thoroughly vacuuming or sweeping the area to remove loose debris. Next, use a pH-neutral cleaner to gently wash the grout, avoiding harsh chemicals that can damage it. Allow the surface to dry completely before moving forward; moisture can hinder stain treatment techniques. Inspect the grout for cracks or damage, as these may require repair to guarantee even treatment. Taking these precise steps will optimize your grout’s readiness, enabling stain removal solutions to penetrate deeply and work efficiently. Proper preparation gives you the freedom to restore your grout’s clean appearance confidently and effectively.
Using Baking Soda and Vinegar to Remove Stains
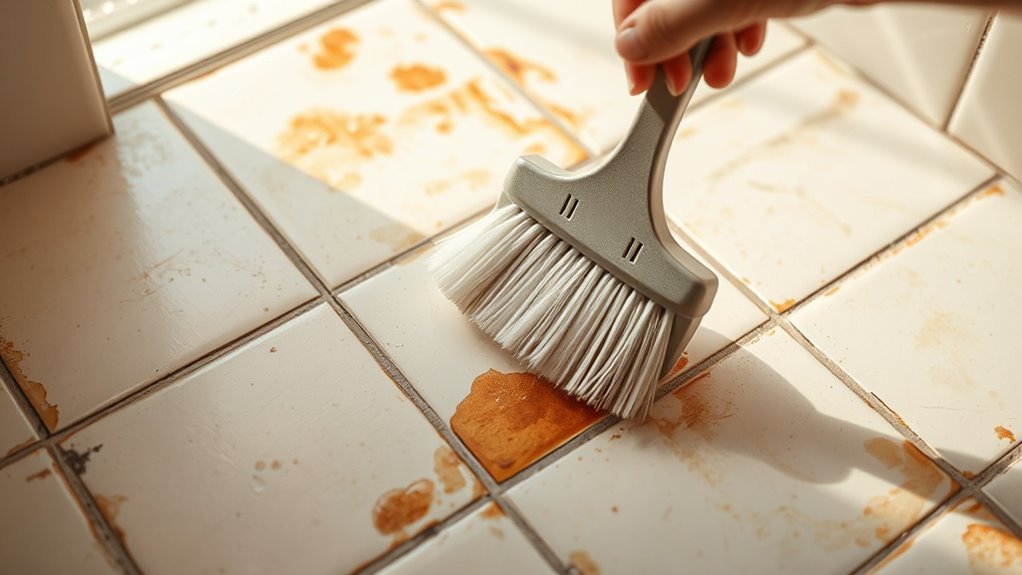
After ensuring your grout is clean and dry, you’re ready to tackle stains using a natural and effective method involving baking soda and vinegar. Start by sprinkling baking soda over the stained grout. The baking soda benefits include its gentle abrasive action, which loosens grime without damaging grout. Next, spray vinegar onto the baking soda; its natural acidity reacts to lift and dissolve stains. Let the mixture fizz for 5–10 minutes before scrubbing with a stiff brush. Rinse with warm water to reveal brighter grout.
| Baking Soda Benefits | Vinegar Properties |
|---|---|
| Non-toxic, safe to use | Natural disinfectant |
| Removes odors and stains | Breaks down mineral deposits |
| Mild abrasive action | Eco-friendly cleaning agent |
This method grants you freedom from harsh chemicals while effectively restoring your grout.
Applying Commercial Grout Cleaners Safely

Before applying commercial grout cleaners, you’ll want to carefully read the product label to understand its specific usage instructions and safety precautions. Prioritizing commercial cleaner safety guarantees you protect yourself and your home during grout cleaner application. Follow these essential steps:
- Wear gloves and guarantee proper ventilation to avoid inhaling fumes.
- Test the cleaner on a small, inconspicuous grout area to check for discoloration or damage.
- Apply the cleaner evenly, using a brush designed for grout to target stains without spreading chemicals unnecessarily.
- Rinse thoroughly with water after the recommended dwell time to remove residue and prevent grout deterioration.
Preventative Measures to Keep Grout Stain-Free
To keep your grout looking clean and fresh, you’ll need to adopt consistent preventative measures that minimize stain buildup over time. Grout sealing is essential; it creates a barrier against moisture and stains, greatly enhancing stain prevention. Regularly wiping spills and dirt also reduces the chance of permanent marks. Here’s a clear plan to keep your grout stain-free:
| Measure | Frequency | Benefit |
|---|---|---|
| Grout Sealing | Every 6-12 months | Protects against moisture and stains |
| Immediate Cleaning | After spills | Prevents stain absorption |
| Use Mats/Rugs | Always | Limits dirt tracked onto grout |
| Avoid Harsh Cleaners | Ongoing | Preserves grout integrity |
Tips for Maintaining Clean and Bright Grout Over Time
While grout can easily become dull and discolored over time, maintaining its brightness requires a consistent and targeted approach. You’ll want to prioritize regular maintenance combined with effective grout sealing to protect against stains and wear. Here’s how to keep your grout clean and vibrant:
- Seal your grout thoroughly after installation or cleaning to create a protective barrier against dirt and moisture.
- Clean grout weekly with a gentle brush and pH-neutral cleaner to prevent buildup.
- Address spills immediately to stop stains from setting and becoming permanent.
- Inspect grout periodically for cracks or wear, resealing as needed to maintain its integrity.
Frequently Asked Questions
Can Grout Stains Cause Health Issues in the Bedroom?
Yes, grout stains can cause health issues in the bedroom, especially if mold exposure is involved. When grout becomes stained or damp, it can harbor mold, which releases spores into the air. You might not realize it, but breathing in these spores can lead to respiratory issues like coughing, wheezing, or even asthma flare-ups. It’s essential that you address grout stains promptly to maintain a healthy, breathable space where you feel free and safe.
How Long Should Grout Cleaners Be Left on Stains?
When you’re tackling grout stains, the cleaning duration really depends on the cleaner’s instructions and the stain’s severity. Typically, you’ll want to let the grout cleaner sit for about 5 to 10 minutes to allow deep stain removal without damaging the grout. Don’t rush—this time lets the solution break down grime effectively. Always follow the product guidelines carefully to protect your surfaces and achieve the best results with minimal effort.
Are Natural Grout Cleaning Methods Safe for Pets?
You’ll find natural cleaners generally safer for pet safety since they avoid harsh chemicals that can harm your furry friends. Ingredients like baking soda, vinegar, and lemon juice are effective yet gentle. However, you should still guarantee proper ventilation and keep pets away while cleaning and drying. Always test a small area first and rinse thoroughly. This way, you maintain a clean home without compromising your pets’ well-being or your freedom to use safe products.
Can Grout Be Recolored if Stains Are Permanent?
Think of recoloring grout like giving a faded wall a fresh coat of paint—it’s definitely doable. If stains are permanent, you can apply a grout colorant to restore uniformity and protect it. After recoloring, grout sealing is essential; it locks in the new color and acts as a barrier against future stains. This method not only revives your grout’s appearance but also enhances stain prevention, giving you long-lasting freedom from discoloration.
How Does Humidity Affect Grout Stain Formation?
You’ll find that high humidity levels can accelerate grout stain formation by promoting mold, mildew, and moisture absorption. When grout stays damp, stains set more quickly, making stain prevention essential. Managing humidity with proper ventilation and dehumidifiers helps keep grout dry and less prone to discoloration. By controlling moisture in the air, you maintain grout’s integrity and appearance, giving you freedom from constant cleaning worries and preserving your space’s fresh look.