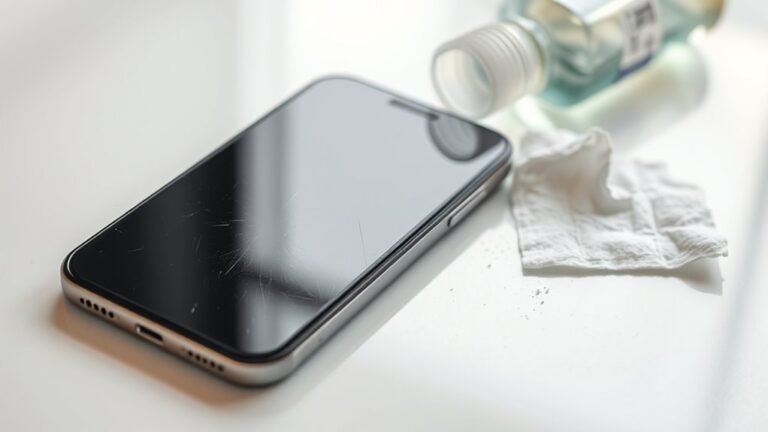
Why You Should Use Keyboard When Cleaning
You should use your keyboard during cleaning to identify stuck or unresponsive keys and detect hidden dust or debris affecting performance. Testing key functions helps prevent damage and confirms all inputs register correctly. This tactile feedback guides precise cleaning, targeting germ hotspots and worn areas early. Regular use during cleaning also streamlines maintenance, ensuring peak functionality and extending your keyboard’s lifespan. Keeping these practices in mind sets the foundation for more effective care strategies.
Identifying Stuck or Unresponsive Keys

How can you tell if a key is stuck or unresponsive? Start with key testing by pressing each key individually to observe its reaction. During your responsiveness assessment, focus on whether the key registers input consistently and returns promptly after being pressed. A stuck key will physically remain depressed or cause repeated inputs without additional presses, while an unresponsive key fails to register any input despite normal pressure. Use diagnostic software or built-in keyboard testing tools to verify electrical signals and confirm mechanical faults. Identifying these issues early grants you the freedom to address them before they hinder your workflow. Precise key testing and responsiveness assessments guarantee your keyboard maintains peak performance, allowing uninterrupted productivity and a seamless user experience.
Detecting Dust and Debris Accumulation
Although dust and debris often accumulate invisibly, they can greatly impair your keyboard’s functionality. Effective dust detection requires close visual inspection under strong lighting, focusing on gaps between keys and beneath keycaps where particles collect. You should also perform debris assessment by gently tilting and tapping the keyboard to dislodge hidden contaminants. Using compressed air can reveal stubborn dust that’s not immediately visible. Regularly monitoring your keyboard for these signs prevents long-term damage and guarantees consistent key response. By mastering dust detection and debris assessment, you maintain peak performance and extend your device’s lifespan without unnecessary replacements. Taking control of this process empowers you to keep your keyboard clean, reliable, and free from the constraints that accumulated particles can impose on your typing experience.
Enhancing Cleaning Precision With Key Feedback

You’ll gain improved tactile control by paying attention to key feedback during cleaning, allowing you to identify stuck or sticky keys more effectively. This sensory input enhances cleaning accuracy, ensuring debris is thoroughly removed without damaging components. Relying on key feedback helps you maintain the keyboard’s responsiveness and longevity.
Improved Tactile Control
A significant advantage of using a keyboard during cleaning is the enhanced tactile control it provides, allowing you to precisely target specific areas without relying solely on visual cues. The keyboard’s tactile feedback lets you feel each key’s resistance and contour, making it easier to identify dirt or debris trapped around keys. This sensory input is critical for maintaining ideal keyboard ergonomics, as it reduces the need for excessive force or awkward hand positions that can cause strain. By leveraging tactile feedback, you can navigate the keyboard’s surface more intuitively, ensuring thorough cleaning without missing spots. This precise control empowers you to maintain your device’s functionality and longevity, granting you freedom from frequent repairs caused by overlooked contaminants.
Enhanced Cleaning Accuracy
When you rely on key feedback during cleaning, your accuracy improves markedly, allowing you to detect even minor particles lodged beneath or between keys. This enhanced cleaning accuracy is essential for effective keyboard maintenance. Using precise cleaning techniques with tactile input lets you:
- Identify stubborn debris without guesswork.
- Adjust pressure to avoid damaging sensitive key mechanisms.
- Target specific keys that require deeper attention.
- Verify cleanliness through real-time feedback, ensuring no residue remains.
Preventing Damage by Testing Key Functions
Before and after cleaning, you should test each key’s responsiveness to catch sticky or unregistered inputs early. This helps you identify issues that could worsen if dirt remains trapped. Regularly verifying key function prevents damage and guarantees your keyboard operates smoothly.
Check Key Responsiveness
Someone cleaning a keyboard should always check key responsiveness to verify no damage occurs during the process. Testing key functions verifies your key layout remains intact and your typing technique isn’t compromised. Follow these steps:
- Power on your device and open a text editor.
- Press each key individually, verifying it registers correctly.
- Note any delayed or unregistered keystrokes to identify potential issues.
- Confirm modifier keys (Shift, Ctrl, Alt) work in combination with other keys.
Identify Sticky Keys
After verifying key responsiveness, the next step is to identify any sticky keys that may hinder performance or cause damage. Pay close attention to keys that feel sluggish or fail to return quickly after pressing. Sticky residue buildup is often the culprit, impairing smooth key movement and risking long-term mechanical wear. Test each key individually, ensuring it registers input cleanly and resets without delay. If you detect stickiness, avoid forcing the key, as this can worsen damage. Instead, apply proper key lubrication to restore smooth action and prevent further residue accumulation. Maintaining free, responsive keys not only preserves your keyboard’s functionality but also grants you the freedom to type efficiently without interruption or degradation. Identifying and addressing sticky keys early protects your device’s longevity and your workflow’s fluidity.
Detect Unregistered Inputs
While cleaning your keyboard, you’ll want to detect unregistered inputs to prevent potential damage. Detecting input anomalies early helps maintain peak key performance and avoids costly repairs. Here’s how you can effectively monitor key performance:
- Connect your keyboard to a diagnostic tool or software that tracks key presses.
- Press each key individually, observing if any fail to register or produce inconsistent signals.
- Repeat the test multiple times to verify accuracy and rule out temporary glitches.
- Document any unregistered inputs and address them promptly, whether by cleaning or professional servicing.
Recognizing Signs of Wear and Tear Early
Although keyboards are designed for durability, early signs of wear and tear can greatly affect performance and hygiene if overlooked. You need to monitor wear indicators like fading key legends and surface discoloration, which signal material degradation. Surface discoloration not only compromises aesthetics but may also indicate grime buildup interfering with key functionality. Pay attention to keys that feel sticky or unresponsive, as these symptoms often precede mechanical failure. Recognizing these signs early lets you intervene before inputs become erratic or the keyboard becomes unhygienic. Regular inspection combined with proper cleaning habits guarantees your keyboard remains reliable and extends its lifespan, giving you the freedom to focus on your tasks without interruption or replacement worries. Act promptly when wear indicators appear to maintain peak performance.
Improving Hygiene by Targeting Germ Hotspots

Since keyboards are a frequent touchpoint, they harbor concentrated germ hotspots that can compromise hygiene. To improve hygiene practices effectively, focus on these critical areas:
- Between keys – debris and bacteria accumulate in tight spaces.
- Spacebar and Enter key – high-contact keys often overlooked.
- Wrist rest – skin oils and sweat foster microbial growth.
- Keyboard frame edges – dust and germs collect along crevices.
Targeting these germ hotspots guarantees you reduce microbial load and maintain a healthier workspace. Consistent attention to these zones within your hygiene routine enables you to limit contamination risks. Remember, precision in cleaning these specific areas maximizes the efficacy of your hygiene practices, helping you maintain a cleaner, safer environment without unnecessary effort or disruption.
Streamlining the Cleaning Process
To maintain a consistently clean keyboard without disrupting your workflow, you’ll need an efficient cleaning routine that targets germ hotspots quickly and thoroughly. Employing precise cleaning techniques guarantees effective keyboard maintenance while preserving your freedom to work without interruptions.
| Step | Technique | Benefit |
|---|---|---|
| 1 | Use compressed air | Removes dust efficiently |
| 2 | Microfiber wipe | Eliminates surface grime |
| 3 | Isopropyl alcohol | Disinfects key surfaces |
| 4 | Keycap removal | Deep cleans hard-to-reach areas |
| 5 | Scheduled routine | Prevents buildup, prolongs lifespan |
Adopt this streamlined process to maintain hygiene and operational integrity. This approach balances thoroughness with speed, letting you focus on productivity without sacrificing cleanliness.
Maintaining Optimal Keyboard Performance
Maintaining ideal keyboard performance requires regular attention to both hardware functionality and cleanliness. You need to optimize your setup to guarantee smooth operation and avoid interruptions.
- Use specialized cleaning tools like compressed air and microfiber cloths to remove debris without damaging sensitive components.
- Regularly inspect keys for responsiveness; sticky keys often signal underlying dirt buildup affecting hardware performance.
- Incorporate keyboard shortcuts to reduce wear on frequently used keys and improve efficiency.
- Periodically update firmware or drivers to maintain compatibility and functionality, preventing lag or misregistrations.
Extending the Lifespan of Your Keyboard
Although regular cleaning is essential, extending your keyboard’s lifespan also depends on proper usage and storage practices. Avoid eating or drinking near your keyboard to prevent debris and liquid damage. Establishing a consistent cleaning schedule helps you catch dust and grime before they affect performance. Use compressed air and gentle wipes during maintenance to preserve key functionality. Store your keyboard in a dry, dust-free environment when not in use to minimize exposure to harmful particles. Additionally, avoid excessive force while typing to reduce mechanical wear. By integrating these keyboard maintenance strategies, you guarantee reliable operation and delay costly replacements. Taking control of your keyboard care empowers you to maintain freedom from interruptions and maximize device longevity.
Frequently Asked Questions
Can I Use a Vacuum Cleaner to Clean My Keyboard?
You can use a vacuum cleaner to clean your keyboard, but it’s best to use a vacuum attachment designed for delicate electronics. This method helps remove dust and debris effectively without damaging keys or internal components. For ideal keyboard maintenance, make sure the vacuum’s suction is gentle to avoid dislodging keycaps or harming circuitry. Regular, careful cleaning with the right tools keeps your keyboard functional and extends its lifespan, giving you more freedom to work efficiently.
Is It Safe to Use Water or Liquid Cleaners on Keyboards?
Think of your keyboard as a delicate ship maneuvering stormy seas—water or liquid cleaners can cause water damage, sinking its functionality. You shouldn’t pour liquids directly on it; instead, use dampened microfiber cloths or approved cleaning wipes. These methods avoid moisture seeping inside, preserving your keyboard’s freedom to perform. Always power off before cleaning, and steer clear of harsh chemicals to keep your device sailing smoothly without risking costly repairs.
How Often Should I Deep Clean My Keyboard?
For ideal keyboard maintenance, deep clean your keyboard every 3 to 6 months, depending on usage intensity. Cleaning frequency recommendations suggest more frequent attention if you eat near it or share it with others. Regularly removing debris and disinfecting key surfaces enhances functionality and hygiene. Following these keyboard maintenance tips guarantees longevity and prevents buildup that can impair performance, giving you the freedom to work or game without interruption.
Are Mechanical Keyboards Easier to Clean Than Membrane Ones?
When comparing mechanical vs membrane keyboards, mechanical ones are generally easier to clean due to their removable keycaps. You can use more thorough cleaning techniques, like keycap removal and compressed air, without damaging the switches. Membrane keyboards, with their sealed layers, require gentler cleaning to avoid moisture damage. So, if you value freedom in maintenance and want efficient cleaning techniques, mechanical keyboards give you more control and ease.
Can Keyboard Cleaning Improve Typing Speed or Accuracy?
Yes, regular keyboard cleaning can enhance your typing performance by ensuring keys respond consistently and accurately. Dirt and debris can cause sticky or unresponsive keys, leading to errors and slower typing. By prioritizing keyboard maintenance, you reduce friction and key malfunctions, allowing your fingers to glide smoothly. This upkeep not only improves accuracy but also extends your keyboard’s lifespan, giving you more freedom to type efficiently without interruption or frustration.