DIY Cleaner for Keyboard
You can make an effective DIY keyboard cleaner using distilled water, isopropyl alcohol, and a few drops of mild dish soap mixed in a spray bottle. Use cotton swabs and a microfiber cloth to gently clean your keyboard without causing damage. Always unplug your device before cleaning, and avoid harsh chemicals to protect its electronics. This homemade solution is safe, eco-friendly, and customizable for scent or strength. Keep going to discover helpful tips for safe, thorough cleaning and maintenance.
Essential Supplies for Making Your Own Keyboard Cleaner

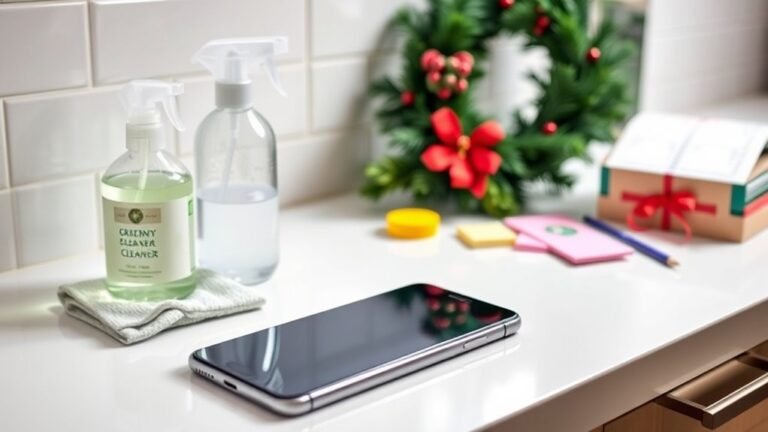
To make your own keyboard cleaner, you’ll need just a few essential supplies that are easy to find. Start with basic cleaning tools like cotton swabs, microfiber cloths, and a small brush to reach between keys. Isopropyl alcohol is a must-have for effective disinfecting without damaging your keyboard. You might also want a spray bottle to mix your solution, combining water and alcohol for peak cleaning power. These supplies empower you to take control of your keyboard maintenance, freeing you from reliance on expensive commercial products. Having these tools on hand means you can keep your workspace fresh and functional whenever you choose, embracing the freedom of DIY care. With this setup, keyboard maintenance becomes straightforward and within your grasp.
Step-by-Step Guide to Preparing the DIY Keyboard Cleaner
Now that you’ve gathered your supplies, let’s walk through the ingredients you’ll need and how to mix them properly. I’ll also share some tips on storing your DIY keyboard cleaner to keep it fresh and effective. This simple process will have your keyboard spotless in no time.
Ingredients Needed
You’ll need just a few simple ingredients to prepare an effective DIY keyboard cleaner. Opt for natural alternatives that are gentle yet powerful enough to lift dirt and grime. Start with distilled water to avoid mineral deposits. Add a splash of white vinegar—an eco friendly solution known for its disinfecting properties. A few drops of essential oils, like tea tree or lemon, can boost cleaning power and leave a fresh scent. Use isopropyl alcohol at around 70% concentration; it evaporates quickly and kills bacteria without damaging electronics. Finally, grab a small spray bottle to mix and apply your cleaner with ease. These ingredients keep your keyboard spotless without harsh chemicals, giving you freedom from commercial cleaners and their environmental impact.
Mixing Instructions
Start by pouring half a cup of distilled water into your spray bottle as the base for your cleaner. Next, carefully add one tablespoon of isopropyl alcohol and a few drops of mild dish soap. These precise mixing ratios guarantee your cleaner is effective yet gentle on your keyboard. Use simple blending techniques—gently swirl the bottle instead of shaking vigorously—to maintain a balanced mixture and avoid excess bubbles. Remember, your goal is a solution that cleans without damaging electronics. Here’s a quick checklist to keep you on track:
- Measure ingredients accurately for consistency
- Use distilled water to prevent mineral buildup
- Blend gently to preserve the solution’s integrity
Following these steps lets you create a powerful, homemade cleaner that respects your keyboard’s delicate parts and your freedom to maintain your gear.
Storage Tips
Proper storage is key to keeping your DIY keyboard cleaner effective and safe to use. After mixing your solution, store it in a cool, dark place away from direct sunlight to preserve its potency. Use a tightly sealed container to prevent evaporation and contamination. Label your bottle clearly with the date you made it, so you can track its freshness. When considering keyboard storage, keep your cleaning supplies separate from your workspace to avoid accidental spills. Also, pay attention to your cleaning frequency; regular, gentle cleanings prevent buildup and reduce the need for harsher treatments. By managing both keyboard storage and cleaning frequency wisely, you maintain a clean keyboard and extend the life of your DIY cleaner without hassle or waste.
How to Safely Clean Your Keyboard Using the Homemade Solution
Although cleaning your keyboard might seem challenging, using a homemade solution can make the process both safe and effective. To maintain your freedom from dirt and grime, focus on these simple steps that respect your keyboard’s delicate nature and support regular keyboard maintenance:
- Power down and unplug your keyboard to avoid damage or short circuits.
- Lightly dampen a microfiber cloth with your homemade cleaner—never soak it—to prevent moisture seeping inside.
- Gently wipe all surfaces, including between keys, ensuring you don’t press too hard or use abrasive materials.
Tips for Maintaining Keyboard Hygiene Between Cleanings

Keeping your keyboard clean with a homemade solution is a great step, but maintaining hygiene between deep cleanings can make a big difference in how often you need to do it. To enjoy that freedom, adopt simple keyboard maintenance tips like wiping your keyboard with a microfiber cloth daily. This prevents dust buildup and keeps germs at bay. Avoid eating over your keyboard to minimize crumbs and sticky keys. Wash your hands before typing to reduce transferring oils and dirt. Establishing these hygiene habits not only extends your keyboard’s life but also keeps your workspace healthier. By staying consistent, you’ll reduce the need for frequent deep cleans and enjoy a cleaner, more efficient typing experience without hassle.
Precautions to Take When Cleaning Electronic Devices
Before you start cleaning your keyboard or any electronic device, it’s important to take certain precautions to avoid damage. Following safety measures guarantees your devices stay functional and you maintain your freedom to use them without hassle. Remember these key points:
- Power down and unplug: Always disconnect electronic devices before cleaning to prevent electrical shocks or short circuits.
- Use appropriate cleaning tools: Avoid harsh chemicals; opt for gentle solutions and soft cloths designed for electronics.
- Avoid excess moisture: Never spray liquids directly onto devices—apply cleaners to cloths instead to protect internal components.
Benefits of Using a DIY Cleaner Over Commercial Products

You’ll find that making your own keyboard cleaner saves you money compared to buying commercial products. Plus, you can skip harsh chemicals and use natural ingredients that are safer for you and your device. Best of all, you get to customize the solution to fit your specific cleaning needs.
Cost-Effectiveness
Although commercial keyboard cleaners promise convenience, making your own DIY cleaner can save you a significant amount of money without sacrificing effectiveness. When you do a cost analysis, you’ll see that DIY options are far more budget friendly, letting you clean your keyboard without constantly reaching for your wallet. Plus, you gain control over what goes into your cleaner, avoiding unnecessary expenses. Here’s why DIY wins on cost-effectiveness:
- Ingredients like vinegar, rubbing alcohol, and water are inexpensive and often already in your home.
- You can make larger batches at a fraction of the price of commercial products.
- Reusing spray bottles or containers reduces waste and keeps costs down.
Chemical-Free Ingredients
Three simple ingredients—vinegar, rubbing alcohol, and water—make a DIY keyboard cleaner not only effective but also gentle and chemical-free. When you choose these natural alternatives, you’re embracing eco friendly options that protect both your health and the planet. Unlike commercial products packed with harsh chemicals, your homemade solution avoids toxins that can irritate your skin or damage surfaces. You get the freedom to clean confidently without worrying about harmful residues or environmental impact. Plus, these ingredients are easy to find and safe to use repeatedly. By opting for a DIY cleaner, you’re taking control, reducing waste, and supporting a cleaner, greener lifestyle—simple steps that empower you to maintain your keyboard safely and sustainably.
Customizable Cleaning Solutions
One major advantage of a DIY keyboard cleaner is how easily you can tailor the solution to your specific needs. Unlike commercial products, you’re free to choose ingredients that suit your preferences and values. You can add custom fragrances to make cleaning enjoyable or stick with unscented blends if you prefer. Plus, you get to pick eco friendly options that minimize your environmental impact.
With DIY solutions, you control:
- The strength and ingredients, ensuring safety for your keyboard
- The scent, from invigorating citrus to calming lavender
- The environmental footprint, opting for biodegradable components
This freedom means your cleaner fits your lifestyle perfectly, giving you a personalized, responsible way to keep your keyboard spotless without compromise.
Frequently Asked Questions
Can DIY Cleaners Damage Mechanical Keyboard Switches?
They say, “Don’t put all your eggs in one basket,” and when it comes to cleaning mechanical keyboard switches, that’s true. If your cleaner ingredients are too harsh—like alcohol or ammonia—they can damage switch protection, causing stickiness or corrosion. You want to enjoy your keyboard’s freedom, so choose gentle, safe solutions. Always test on a small area first to keep those switches clicking smoothly and reliably for years to come.
How Often Should I Deep Clean My Keyboard?
You should deep clean your keyboard every 3 to 6 months to keep it in top shape. Regular keyboard maintenance tips suggest adjusting cleaning frequency based on your environment and usage. If you eat near your keyboard or have pets, consider cleaning more often. Staying consistent with cleaning frequency recommendations lets you enjoy a smooth typing experience without feeling tied down—giving you the freedom to focus on what matters.
Are DIY Cleaners Safe for Wireless Keyboards?
You might wonder if homemade solutions are safe for your wireless keyboard. Generally, they are, as long as you avoid excess moisture that can damage internal components. When doing keyboard maintenance, use gentle ingredients like diluted isopropyl alcohol or mild soap with water on a soft cloth. This way, you maintain freedom to clean your device without risking harm. Just be careful not to let liquids seep inside, and your wireless keyboard should stay in great shape.
Can I Use Essential Oils in My Keyboard Cleaner?
You might think essential oils can boost your cleaning routine, and they do have benefits like natural antibacterial properties. But when it comes to keyboard cleaning, you’ve got to be careful—they’re often oily and can leave residue or damage delicate parts. Instead, stick to gentle, alcohol-based solutions for keyboard cleaning tips. If you want that fresh scent, add just a tiny drop to a cloth, never directly on your keyboard.
What Should I Do if Liquid Seeps Under the Keys?
If liquid seeps under your keys, act fast to prevent liquid damage. Immediately unplug your keyboard and turn it upside down to let the liquid drain out. Use a soft cloth to blot excess moisture, but don’t press keys hard. Let it dry completely—ideally 24 hours—in a warm, airy spot. Regular keyboard maintenance, like gentle cleaning and avoiding spills, helps keep you in control and your device working freely.


