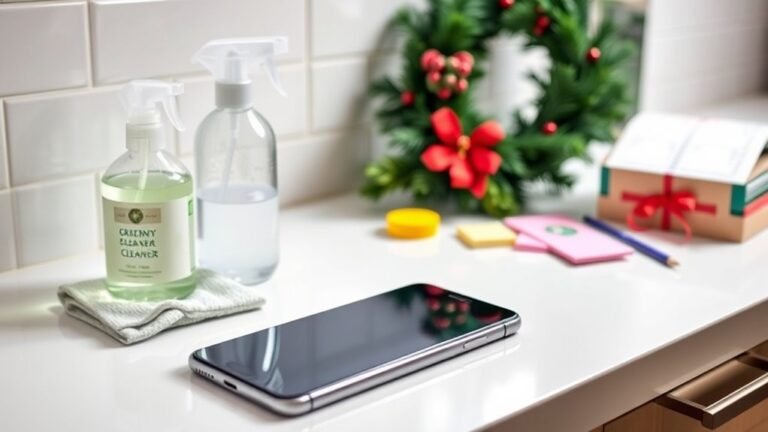
Cleaning With Keyboard: What Works and What Doesn’T
When cleaning your keyboard, avoid spraying liquids directly or using harsh chemicals, which can damage keys. Use a lightly dampened microfiber cloth with safe solutions like a 70% isopropyl alcohol mix or eco-friendly cleaners. For mechanical keyboards, carefully remove keycaps for deep cleaning; for laptops, power off before wiping. Regular cleaning prevents germs and key malfunctions. Using proper tools like brushes and compressed air makes a big difference. Learn practical tips and detailed methods to keep your keyboard spotless and fully functional.
Why Regular Keyboard Cleaning Is Important

Although you might not notice it daily, your keyboard accumulates dust, oils, and bacteria from constant use. Regular cleaning is crucial to maintain your health and workspace efficiency. Removing these contaminants reduces the risk of illness by minimizing bacteria and allergens, offering clear health benefits. Furthermore, a clean keyboard improves tactile response and key function, which can lead to a noticeable productivity boost. When keys stick or become unresponsive due to grime, your workflow suffers. By committing to routine cleaning, you guarantee a hygienic environment and maintain peak device performance. This disciplined approach supports your desire for freedom—freedom from distractions, sickness, and inefficient tools—allowing you to focus on what truly matters without unnecessary interruptions.
Tools You Need for Effective Keyboard Cleaning
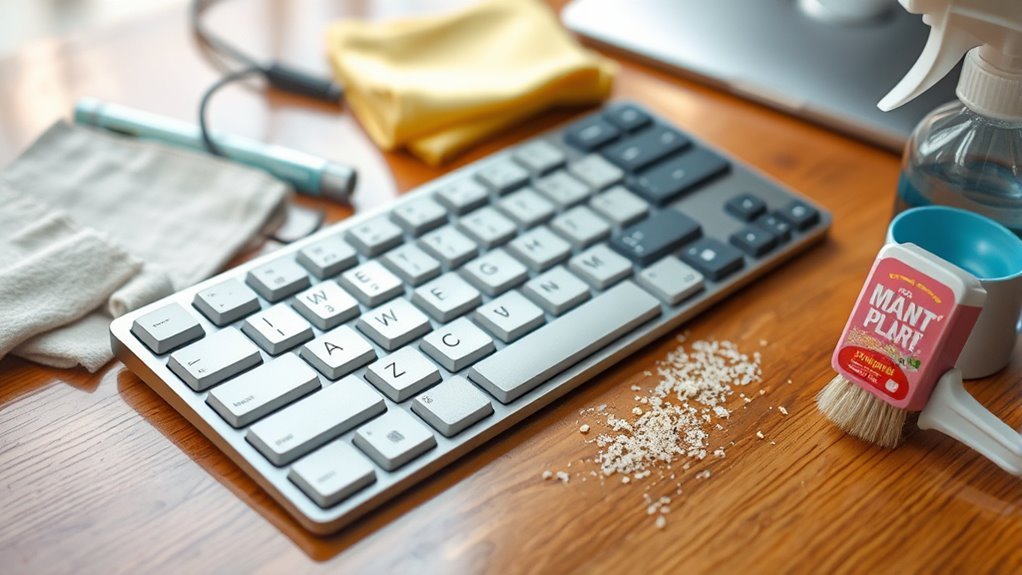
Three essential tools will make your keyboard cleaning both efficient and thorough. You’ll need specialized brushes to reach between keys, microfiber cloths for gentle wiping, and compressed air to dislodge dust without damage. Each tool serves a distinct role, ensuring your keyboard stays pristine without risking harm.
| Tool | Purpose | Benefit |
|---|---|---|
| Specialized Brushes | Remove debris between keys | Precision cleaning |
| Microfiber Cloths | Wipe surface dirt and smudges | Gentle on surfaces |
| Compressed Air | Blow out dust and particles | Avoids liquid damage |
With these tools, you’ll maintain freedom from grime while preserving your keyboard’s function and appearance.
Safe Cleaning Solutions for Your Keyboard

Anyone looking to clean their keyboard safely should choose solutions that effectively remove dirt without causing damage. You want to avoid harsh chemicals that could strip key labels or corrode internal components. Eco friendly cleaners are excellent choices; they’re gentle, biodegradable, and reduce environmental impact. Simple DIY solutions, like a mix of distilled water and isopropyl alcohol (70% concentration), work well for disinfecting without leaving residue. Use a microfiber cloth dampened—not soaked—to prevent liquid seeping beneath keys. Avoid bleach, ammonia, or abrasive cleaners, as they can degrade your keyboard’s materials. By selecting safe, proven cleaning agents, you maintain both your device’s functionality and your freedom to clean confidently, knowing you’re not risking damage or toxic exposure.
Step-by-Step Guide to Cleaning a Mechanical Keyboard
You’ll start by carefully removing the keycaps using the right tools to avoid damage. Next, focus on cleaning the switches thoroughly without causing moisture issues. Finally, reassemble your keyboard properly and test each key to guarantee everything works smoothly.
Keycap Removal Techniques
Removing keycaps is a crucial first step in thoroughly cleaning your mechanical keyboard. To do this effectively, you need to understand keycap types and use the right removal tools. Some keycaps are standard, while others are larger or shaped differently, requiring care. Use a keycap puller—wire or plastic—for safe removal without damage. Gently pull straight up to avoid bending stems. Avoid prying with fingers or metal tools, which can cause harm. Below is a quick reference table for keycap removal techniques:
| Keycap Type | Recommended Tool | Removal Tips |
|---|---|---|
| Standard | Wire keycap puller | Pull straight up gently |
| OEM Profile | Plastic puller | Avoid tilting or twisting |
| Larger Keys | Wire puller + fingers | Support stabilizers carefully |
| Sculpted Caps | Plastic puller | Remove slowly, layer by layer |
| Specialty Keys | Wire puller | Check for unique stabilizers |
Following this method guarantees a clean, intact keyboard.
Switch Cleaning Methods
Before diving into switch cleaning, it’s important to gather the right tools and work in a well-lit, static-free environment. Start by using compressed air to blow out dust and debris from each switch. Next, apply a small amount of isopropyl alcohol on a cotton swab to gently clean around the switch housing and slider. Avoid excess moisture to prevent damage. For deeper cleaning, consider removing the switch tops if your keyboard supports hot-swappable switches. This allows you to clean internal components carefully using switch cleaning techniques like lubricating sliders and springs. Remember, switch maintenance tips include being gentle and patient, ensuring no parts are lost or damaged. These methods help restore smooth keystroke action and prolong switch lifespan, giving you the freedom to enjoy a responsive typing experience.
Reassembly and Testing
Once all components are thoroughly cleaned and dried, you can begin reassembling your mechanical keyboard with care. Start by aligning the switches correctly on the PCB, ensuring each fits securely into its slot. Use precise reassembly techniques to avoid damaging delicate pins or components. Next, reinstall the stabilizers and keycaps, pressing firmly but gently to secure them in place. After reassembly, it’s essential to test functionality before fully securing the keyboard casing. Connect the keyboard to your device and verify that every key registers correctly, checking for any missed connections or sticky keys. Address any issues by carefully disassembling and inspecting problem areas. Following these steps guarantees your keyboard performs reliably, providing the freedom to enjoy smooth, responsive typing once again.
How to Clean a Laptop Keyboard Without Damage
When cleaning your laptop keyboard, you need to use safe methods that prevent moisture from seeping inside and causing damage. Avoid harsh chemicals and excessive liquid, as these can harm the delicate components beneath the keys. Following careful techniques guarantees your laptop stays functional and clean without risking any hardware issues.
Safe Cleaning Methods
Although it might be tempting to use household cleaners or excessive moisture, these can easily damage your laptop keyboard. Instead, choose safe cleaning methods that protect your device while offering freedom from harsh chemicals. Start by powering off your laptop and unplugging it. Use a dry microfiber cloth to gently wipe away dust and debris. For stubborn grime, lightly dampen the cloth with an eco friendly cleaner—avoid sprays directly on the keyboard. Eco friendly cleaners minimize chemical exposure and reduce environmental impact, aligning with a responsible cleaning routine. Use gentle, controlled motions to prevent liquid seeping under keys. Avoid abrasive tools that could scratch surfaces. By following these steps, you maintain cleanliness without risking damage, preserving your laptop’s functionality and your freedom to work comfortably.
Avoiding Keyboard Damage
To prevent damage while cleaning your laptop keyboard, you should avoid applying excessive moisture or harsh chemicals that can seep beneath the keys and cause malfunction. For effective keyboard protection, use a lightly dampened microfiber cloth with water or a 70% isopropyl alcohol solution. Never spray liquids directly onto the keyboard. Instead, apply them to the cloth first. When cleaning, press gently to prevent key loosening or breakage. Damage prevention also means turning off and unplugging your laptop before cleaning to avoid electrical issues. Avoid abrasive tools or excessive force that can scratch or dislodge keys. By following these careful steps, you protect your keyboard’s functionality and extend its lifespan, giving you freedom to clean confidently without risking costly repairs.
Common Mistakes to Avoid When Cleaning Your Keyboard

Since keyboards are delicate electronic devices, improper cleaning methods can cause damage or reduce their lifespan. To maintain effective keyboard care, avoid common maintenance mistakes like using harsh chemicals or excessive moisture, which can seep into the circuitry and cause malfunctions. Don’t spray cleaners directly onto the keyboard; instead, apply them to a cloth first. Avoid removing keys unless you know the specific model’s design, as forceful removal may break clips or damage switches. Skipping regular cleaning allows debris buildup, making your keyboard less responsive and unhygienic. Also, don’t ignore power-off procedures before cleaning to prevent electrical issues. By steering clear of these mistakes, you’ll preserve your keyboard’s functionality and enjoy a cleaner, more reliable device without risking damage.
How Often Should You Clean Your Keyboard?
How often should you clean your keyboard to keep it functioning at its best? Establishing a proper keyboard cleaning frequency is essential for maintaining hygiene and peak performance. Here’s a guideline to help you maintain keyboard hygiene tips effectively:
- Wipe down your keyboard weekly with a microfiber cloth to remove dust and surface grime.
- Use compressed air monthly to clear debris lodged between keys.
- Deep clean your keyboard every 3-6 months, depending on usage and environment.
- Sanitize your keyboard regularly, especially if you share it or eat near it.
- Adjust cleaning frequency if you have pets or allergies to minimize allergens.
Cleaning Wireless and Bluetooth Keyboards
Although wireless and Bluetooth keyboards share many cleaning needs with wired models, their delicate electronic components require extra care. For effective wireless keyboard maintenance, start by turning off the device and removing batteries or disconnecting power sources to prevent damage. Use a soft, lint-free cloth slightly dampened with isopropyl alcohol to gently wipe key surfaces, avoiding excess moisture that can seep inside. For Bluetooth keyboard care, avoid spraying liquids directly and instead apply cleaners on the cloth first. Use compressed air to dislodge debris between keys without opening the keyboard. Regularly check and clean charging ports with a dry brush to maintain connectivity. Following these steps guarantees your wireless or Bluetooth keyboard stays clean without compromising its sensitive electronics, giving you the freedom to use it confidently and comfortably.
Dealing With Sticky or Stubborn Keycaps
Keeping your wireless or Bluetooth keyboard clean helps prevent keycaps from becoming sticky or difficult to press, but sometimes residue or debris still builds up beneath them. When you encounter sticky substances or stubborn keycap residue, you’ll want to act carefully to avoid damage. Start by gently removing the affected keycaps if your keyboard allows, then clean the area underneath.
Regular cleaning prevents sticky keys, but carefully removing keycaps helps tackle stubborn residue without causing damage.
Here’s how to effectively deal with sticky or stubborn keycaps:
- Use isopropyl alcohol and a cotton swab to dissolve residue.
- Avoid water directly on electronic components.
- Soak keycaps in warm, soapy water if removable.
- Use a soft brush to dislodge debris without scratching.
- Let everything dry completely before reassembling.
This methodical approach helps restore smooth key function while preserving your keyboard’s freedom of use.
Tips for Maintaining a Germ-Free Keyboard
Regularly disinfecting your keyboard is essential to minimize the buildup of germs and bacteria that can accumulate from daily use. Start by unplugging your keyboard and using compressed air to remove debris between the keys. Then, apply a 70% isopropyl alcohol solution to a microfiber cloth—never spray directly—and gently wipe all surfaces. Incorporate these keyboard hygiene tips into your routine at least once a week to maintain peak cleanliness. Avoid eating near your keyboard to reduce contamination and wash your hands before use as part of effective germ prevention strategies. By following these methodical steps, you not only protect yourself from harmful microbes but also extend your keyboard’s lifespan. Staying consistent with these practices gives you freedom from worry over unseen germs.
Frequently Asked Questions
Can Keyboard Cleaning Improve Typing Speed?
Imagine trying to sprint with sneakers full of mud; that’s how typing feels on a dirty keyboard. Regular cleaning frequency can actually boost your typing performance by ensuring keys respond swiftly without sticking. While it won’t make you a typing prodigy overnight, keeping your keyboard clean prevents slowdowns and errors. So, by maintaining a clean workspace, you’re freeing yourself from unnecessary friction, letting your fingers fly more freely and accurately.
Are There Specific Keyboard Brands That Are Easier to Clean?
If you want an easier cleaning experience, membrane keyboards are generally simpler since their keys are sealed and less prone to dirt buildup. Mechanical keyboards, while offering superior feel and durability, have removable keycaps that require more effort but allow deeper cleaning. Brands focusing on spill-resistant designs or offering hot-swappable keys, like Logitech or Keychron, can give you more freedom to maintain cleanliness without hassle. Choose based on your cleaning preference and typing needs.
Does Keyboard Cleaning Affect Warranty Coverage?
Think of your keyboard as a delicate garden—tend it carefully, and it flourishes. When it comes to warranty policies, you’ll want to stick to approved cleaning methods to avoid wilting your coverage. Using harsh chemicals or soaking your keyboard might void warranties, while gentle methods like compressed air or mild wipes usually keep you safe. Always check your warranty details first, so you can clean freely without risking protection.
Can Cleaning a Keyboard Prevent Allergies?
Cleaning your keyboard regularly can help reduce allergy triggers by minimizing dust buildup, which often harbors allergens like dust mites and pollen. While cleaning won’t completely prevent allergies, it does lower the risk of exposure to these irritants, especially if you’re sensitive. Using compressed air and gentle wipes can keep your keyboard free from dust, promoting a cleaner workspace and potentially easing allergy symptoms, giving you more freedom to focus without sneezing.
Is It Safe to Use Compressed Air Cans on Keyboards?
You might worry that using compressed air cans could damage your keyboard, like blowing dust into sensitive parts. But with proper compressed air safety—holding the can upright and using short bursts—you can effectively remove debris without harm. This method is a top keyboard maintenance tip, preserving your device’s longevity and your freedom from sticky keys. Just avoid tilting the can to prevent liquid propellant from escaping and causing damage.