DIY Cleaner for Bathroom
You can make an effective DIY bathroom cleaner using vinegar and baking soda, which safely dissolves soap scum, mold, and hard water stains without harsh chemicals. Mix ingredients carefully in a labeled, airtight container, store away from heat and children, and use gloves while cleaning to protect your skin. Employ soft brushes and microfiber cloths to avoid damaging surfaces. Keep your space ventilated to prevent mold growth. To learn smart techniques and eco-friendly tips for a spotless bathroom, keep exploring these essentials.
Essential Ingredients for Homemade Bathroom Cleaner

When crafting your own bathroom cleaner, you’ll want to focus on a few key ingredients known for their effectiveness and safety. Vinegar benefits are well-documented: it naturally dissolves mineral deposits, soap scum, and grime without harsh chemicals. Combined with baking soda, you get a powerful, abrasive agent that lifts stains and neutralizes odors. This duo offers a versatile, non-toxic solution perfect for sinks, tubs, and tiles. By choosing these ingredients, you avoid exposure to synthetic fragrances and harmful additives often found in commercial products. You gain control over what touches your surfaces and environment, aligning with your desire for freedom and safety. Remember, precise measurements and proper storage will maintain your cleaner’s potency and guarantee consistent results every time.
Step-by-Step Guide to Mixing Your Cleaner
Three simple steps will guide you through mixing your homemade bathroom cleaner safely and effectively. First, gather all ingredients specified in your chosen DIY cleaner recipes to guarantee accurate proportions. Next, use a clean container and add liquids slowly, applying precise mixing techniques like gentle stirring rather than vigorous shaking to prevent spills and maintain ingredient integrity. Finally, label your mixture clearly, noting the date and contents, and store it in a cool, dry place away from children and pets. Always wear gloves and avoid inhaling fumes while mixing to protect yourself. By following these expert guidelines, you maintain control over your cleaner’s effectiveness and safety, empowering you to enjoy a fresh, chemical-free bathroom environment with freedom and confidence.
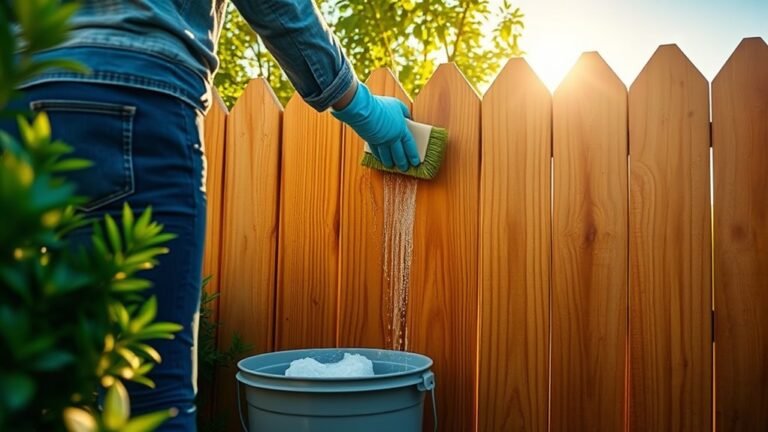
Best Tools to Use for Bathroom Cleaning

Selecting the right tools is essential for achieving a thorough and safe bathroom cleaning. You’ll want to choose durable brushes with firm bristles for scrubbing grout and tiles, alongside microfiber cloths for wiping surfaces without scratches. A sturdy squeegee helps prevent water spots on glass and mirrors, while a mop with a washable head guarantees hygienic floor cleaning. When planning your cleaning schedules, having these tools readily accessible streamlines the process, giving you more freedom. It’s wise to review product comparisons before purchasing, focusing on ergonomics and material quality to reduce strain and boost efficiency. Prioritizing safety means avoiding abrasive tools that could damage fixtures or cause injury. Equipped with the right tools, you’ll confidently maintain a spotless, safe bathroom environment.
How to Remove Soap Scum Effectively
Having the right tools at hand makes tackling stubborn bathroom challenges much easier, especially when it comes to removing soap scum. Start by applying a mixture of equal parts white vinegar and water to the affected surfaces. Let it sit for 10 minutes to break down the residue. Next, use a non-abrasive scrub brush or sponge for effective scrubbing—this prevents damage while loosening buildup. Always wear gloves to protect your skin and guarantee proper ventilation during cleaning. Rinse thoroughly with warm water to remove loosened soap scum. For soap scum prevention, consider wiping down surfaces after each use to reduce moisture and buildup. By combining consistent maintenance with precise cleaning techniques, you’ll maintain a fresh bathroom environment without relying on harsh chemicals.
Tips for Eliminating Mildew and Mold

To tackle mildew and mold effectively, you’ll want to use natural cleaners like vinegar or tea tree oil, which are both powerful and safe. It’s essential to maintain proper ventilation and reduce moisture to prevent mildew growth from returning. Always wear gloves and guarantee good airflow when applying any treatment to protect your health.
Natural Mold Removal
Although mold and mildew thrive in damp bathroom environments, you can effectively eliminate them using natural methods that are safe for your home and health. Start by mixing equal parts white vinegar and water in a spray bottle—this solution utilizes natural ingredients known for their antifungal properties. Spray the affected areas, let it sit for an hour, then scrub with a brush to remove mold residues. For stubborn spots, a paste of baking soda and water can provide extra cleaning power without harsh chemicals. Always wear gloves and guarantee proper ventilation during cleaning to protect yourself. These methods not only remove mold efficiently but also support ongoing mold prevention by reducing reliance on toxic cleaners, giving you a safer, more natural way to maintain your bathroom’s cleanliness and your freedom from harmful substances.
Preventing Mildew Growth
Since mildew thrives in moist, poorly ventilated areas, preventing its growth requires consistent control of humidity and regular cleaning. You’ll want to focus on mildew prevention by maintaining moisture control throughout your bathroom. Use exhaust fans or open windows during and after showers to reduce humidity levels effectively. Wiping down wet surfaces immediately after use also limits mildew’s ability to take hold. Avoid leaving damp towels or bath mats lying around, as they provide ideal breeding grounds. Regularly clean grout lines and corners with your DIY cleaner to eliminate early mold spores. Remember, safety is key—wear gloves and guarantee proper ventilation when cleaning. By staying proactive with moisture control and cleaning routines, you’ll keep your bathroom fresh, mold-free, and enjoy the freedom of a healthy, inviting space.
Cleaning Glass and Mirrors Without Streaks
You’ll want to choose a cleaning solution that effectively breaks down grime without leaving residue, such as a vinegar-water mix or a commercial glass cleaner. Using a microfiber cloth and applying the cleaner with a consistent, circular motion helps prevent streaks and guarantees even coverage. Always work in a well-ventilated area and avoid abrasive tools to protect both your surfaces and your health.
Best Cleaning Solutions
When aiming for spotless glass and mirrors, choosing the right cleaning solution is vital to avoid streaks and residue. You’ll want to embrace green cleaning options that are both effective and safe for your bathroom environment. Homemade recipes using simple ingredients like distilled white vinegar, water, and a few drops of essential oil provide a powerful yet gentle alternative to harsh chemicals. These solutions reduce toxic exposure, align with eco-friendly values, and offer you freedom from commercial product limitations. Avoid solutions with ammonia or abrasive agents, as they can damage surfaces or leave unwanted films. By carefully selecting your cleaner, you guarantee clear, streak-free glass while maintaining a healthy space. Always test your homemade solution on a small area first to confirm compatibility and safety.
Techniques for Streak-Free Shine
Although choosing the right cleaner is essential, mastering the technique of application plays an equally critical role in achieving a streak-free shine on glass and mirrors. To start, apply your cleaner evenly, avoiding excess liquid that can drip and cause streaks. Use gentle, circular motions to loosen dirt without scratching the surface. Next, wipe off the cleaner with a clean, dry microfiber cloth, which is key to streak free techniques because it absorbs moisture without leaving fibers behind. For shine enhancement, finish by buffing the glass with a fresh section of the cloth in straight, horizontal strokes. Always work in natural or ample light to spot any missed areas or streaks early. Prioritize safety by ensuring proper ventilation and wearing gloves if using stronger solutions.
Tools to Use
Three essential tools can make all the difference in cleaning glass and mirrors without streaks: a high-quality microfiber cloth, a squeegee with a rubber blade, and a spray bottle for even application. Microfiber cloths are your best ally—they trap dust and dirt effectively without scratching surfaces. A squeegee guarantees water and cleaner are removed swiftly, preventing streaks or residue. You might also consider gentle cleaning brushes for corners and edges where grime accumulates. When selecting your tools, prioritize materials that won’t damage glass or mirror coatings. Proper use enhances your cleaning efficiency while safeguarding surfaces. By choosing the right equipment, you gain freedom from stubborn streaks, making your DIY bathroom routine both effective and safe.
Safe Techniques for Scrubbing Tiles and Grout
Because grout and tiles are porous and prone to damage, you’ll need to use gentle scrubbing techniques combined with appropriate tools to avoid scratching surfaces or degrading grout lines. Start by selecting a soft-bristled brush or a non-abrasive sponge designed specifically for grout cleaning and tile maintenance. Apply your DIY cleaner sparingly, allowing it to sit briefly to loosen dirt without harsh agitation. Use circular motions with moderate pressure to lift grime effectively while preserving surface integrity. Avoid wire brushes or abrasive pads that can erode grout and dull tiles. Rinse thoroughly with clean water to remove residue, preventing buildup that attracts dirt. By following these safe techniques, you’ll maintain the beauty and longevity of your bathroom tiles while enjoying the freedom of a chemical-free, eco-conscious cleaning routine.
Tackling Hard Water Stains Naturally
When hard water stains start to build up on your bathroom surfaces, tackling them with natural solutions is both effective and safe. Hard water deposits contain minerals that respond well to natural acids, which gently dissolve residues without harsh chemicals. To remove these stains, you can rely on simple, accessible ingredients:
- White vinegar, rich in acetic acid, breaks down mineral buildup.
- Lemon juice provides citric acid, which brightens and cleans.
- Baking soda acts as a mild abrasive, enhancing stain removal.
- Cream of tartar, a tartaric acid source, helps lift tough spots.
- Borax boosts cleaning power while remaining eco-friendly.
Storing and Maintaining Your DIY Cleaner
After effectively removing hard water stains with your homemade cleaner, proper storage and maintenance will guarantee it remains potent and safe for future use. Choose airtight storage containers made of glass or high-quality plastic to prevent chemical degradation and contamination. Label your containers clearly with the preparation date to monitor cleaner longevity, since natural ingredients can lose efficacy over time. Store your cleaner in a cool, dark place away from direct sunlight and heat sources to preserve its active properties. Always shake the container before each use to redistribute ingredients evenly. Avoid mixing your DIY cleaner with other chemicals to prevent hazardous reactions. By following these precise steps, you maintain control over your cleaner’s effectiveness and safety, empowering you to enjoy a consistently fresh and efficient bathroom cleaning routine.
Eco-Friendly Habits for a Cleaner Bathroom
Incorporating eco-friendly habits into your bathroom routine not only reduces environmental impact but also enhances indoor air quality and personal safety. By choosing sustainable cleaning practices and eco friendly materials, you gain freedom from harsh chemicals while protecting your health and the planet.
To maintain a cleaner bathroom sustainably, consider these expert tips:
- Use DIY cleaners made with natural, non-toxic ingredients.
- Opt for reusable cleaning tools like microfiber cloths.
- Avoid single-use plastics by refilling spray bottles.
- Ventilate the bathroom regularly to reduce moisture and mold.
- Select eco friendly materials such as bamboo brushes and biodegradable sponges.
These habits guarantee effective cleaning while minimizing waste and chemical exposure—empowering you to enjoy a safer, greener bathroom environment.
Frequently Asked Questions
Can DIY Cleaners Damage Bathroom Fixtures or Surfaces?
Ever wondered if the substances you use could betray your trust? When making your own cleaner, you’ve got to mind the cleaner ingredients and their surface compatibility. Harsh acids or abrasives might erode finishes or discolor surfaces, so always match your formula to the material. By choosing safe ingredients and testing a small area first, you protect your fixtures and keep your freedom to clean confidently without damage or regret.
How Long Does Homemade Bathroom Cleaner Stay Effective?
Your homemade bathroom cleaner generally stays effective for up to two weeks, depending on ingredients and storage. To maximize cleaning longevity, store it in a cool, dark place, preferably in a sealed spray bottle to prevent contamination. Avoid direct sunlight and extreme temperatures, as these can degrade active ingredients. Always label your cleaner and shake well before use. Prioritize safety by preparing small batches, ensuring fresh, effective results every time you clean.
Are DIY Bathroom Cleaners Safe for Septic Systems?
You might be surprised to learn that nearly 25% of U.S. households rely on septic systems. When it comes to septic system compatibility, homemade cleaner ingredients like baking soda, vinegar, and essential oils are generally safe, as they break down naturally without harming beneficial bacteria. Avoid harsh chemicals or bleach, which can disrupt your system. By choosing gentle, eco-friendly ingredients, you maintain both your septic system’s health and your freedom to clean safely.
Can Essential Oils Be Added for Fragrance and Benefits?
You can definitely add essential oils for fragrance and essential oil benefits, but it’s important to use them safely. Choose fragrance options like tea tree or lavender, known for antimicrobial properties, enhancing both scent and cleaning power. Always dilute oils properly to avoid skin irritation or surface damage. Using essential oils thoughtfully lets you enjoy natural aromas while maintaining a safe, effective cleaning routine that respects your space and health.
How Often Should I Use DIY Cleaner for Best Results?
For ideal results, you should adjust your cleaning frequency based on usage and bathroom size. Generally, cleaning once or twice a week maintains hygiene and prevents buildup. However, high-traffic bathrooms may require more frequent attention. Always prioritize safety by ventilating the area and wearing gloves. Regular cleaning not only guarantees a fresh environment but also extends the life of your surfaces, giving you freedom from stubborn grime and costly repairs.