DIY Cleaner for Printer Surfaces
You can create a safe, effective DIY cleaner for your printer by mixing equal parts distilled water and isopropyl alcohol, plus a few drops of mild dish soap in a spray bottle. Use a soft microfiber cloth lightly dampened with this solution to gently wipe your printer’s exterior and glass without causing damage. Avoid spraying liquids directly on the printer. This simple method helps remove dust, smudges, and ink stains while protecting your device—plus, there’s more to know about caring for your printer.
Essential Ingredients for DIY Printer Cleaners

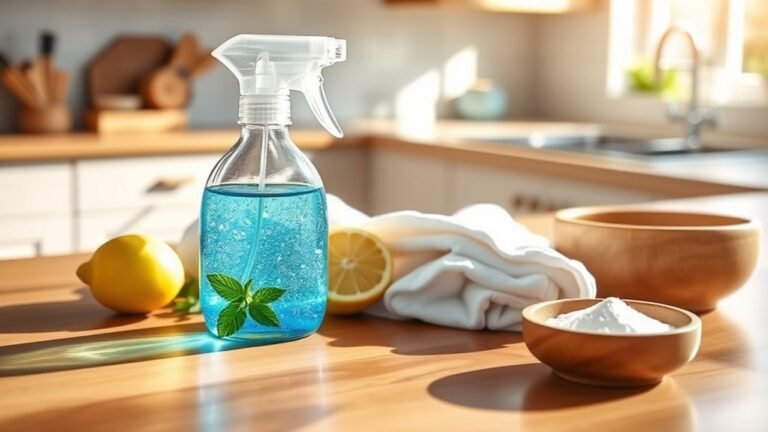
Before you start mixing your own cleaner, you’ll want to gather a few key ingredients that are safe and effective for printer surfaces. Choosing natural alternatives like distilled water, white vinegar, and isopropyl alcohol guarantees you avoid harsh chemicals that could damage delicate parts. These ingredients not only protect your printer but also give you the freedom to control what touches your device. Alongside these, grab soft cleaning tools such as microfiber cloths and cotton swabs to gently remove dust and grime without scratching. With these natural alternatives and proper cleaning tools, you can confidently maintain your printer’s cleanliness while staying eco-friendly and avoiding toxic substances. This approach gives you control and peace of mind, keeping your printer in top shape without relying on commercial cleaners.
Step-by-Step Guide to Making a Gentle Cleaning Solution
While mixing your own cleaner might seem challenging at first, it’s actually quite simple when you follow a clear process. Start by combining equal parts distilled water and isopropyl alcohol in a spray bottle. Add a few drops of mild dish soap to enhance the cleaning power without harming your printer’s surface. Shake gently to mix the solution thoroughly. This blend is perfect for homemade cleaning solutions that respect your printer’s delicate components. Using this approach aligns with effective printer maintenance tips, helping you keep your device spotless and functional without harsh chemicals. Remember, using distilled water prevents mineral buildup, ensuring your DIY cleaner stays gentle yet effective. With this easy recipe, you gain freedom from costly commercial products while maintaining your printer’s longevity.
How to Safely Clean Printer Exterior Surfaces

Now that you’ve prepared a gentle cleaning solution, you can safely tackle your printer’s exterior surfaces. Keeping your device clean not only looks great but also extends its life—key printer maintenance tips you’ll want to follow. Here’s how to do it right:
- Turn off and unplug your printer to prevent any mishaps.
- Lightly dampen a soft, lint-free cloth with your DIY cleaner.
- Wipe down all external surfaces gently, avoiding openings or vents.
- Use cotton swabs for tight spots, keeping moisture minimal.
- Follow cleaning frequency recommendations: aim for a monthly wipe to keep dust and grime away.
Best Practices for Cleaning Printer Glass and Scanners
Cleaning the printer glass and scanner requires extra care since smudges or debris can affect scan and print quality. To keep your device running smoothly, use a soft, lint-free cloth slightly dampened with a DIY cleaner made from equal parts distilled water and isopropyl alcohol. Avoid spraying liquid directly on the glass to prevent damage. Gently wipe in circular motions, removing fingerprints and dust without scratching. Remember these printer maintenance tips: clean the glass regularly and handle the scanner lid gently to prevent misalignment. For scanner care, always close the lid carefully after cleaning and keep the area free from dust. Following these steps lets you maintain sharp scans and prints while enjoying the freedom to care for your printer at home.
Tips for Removing Ink and Toner Residue at Home

When tackling ink and toner residue, using the right ingredients makes all the difference. You’ll want to prepare a simple cleaner with items like isopropyl alcohol and a soft cloth. Follow a step-by-step process to gently lift the residue without damaging your printer’s surfaces.
Effective Cleaning Ingredients
Although printer surfaces might seem delicate, you can safely remove ink and toner residue using a few common household ingredients. Opting for natural alternatives not only boosts cleaning efficiency but also lets you avoid harsh chemicals. These simple items offer freedom to clean effectively without risking damage:
- Isopropyl alcohol: dissolves ink and dries quickly without residue
- Distilled water: gentle and prevents mineral buildup
- Mild dish soap: breaks down greasy toner spots
- White vinegar: naturally cuts through stubborn stains
- Cotton swabs or microfiber cloths: perfect for precise, scratch-free application
Using these ingredients, you control the process, ensuring your printer stays pristine while embracing a safer, eco-friendly way to maintain it. This approach offers both power and peace of mind, all within your reach.
Step-by-Step Removal Process
You’ll need just a few simple steps to effectively remove ink and toner residue from your printer surfaces without causing damage. First, power off your printer and unplug it to guarantee safety. Dampen a soft, lint-free cloth with your DIY cleaner—avoid soaking it to protect internal parts. Gently wipe the affected areas, focusing on stains and smudges. For stubborn spots, apply a little more cleaner and let it sit briefly before wiping. Never use harsh scrubbing motions; surface care is key to preserving your printer’s finish. Once clean, use a dry cloth to remove any moisture. Regularly following these printer maintenance tips will keep your device looking fresh and functioning smoothly, giving you the freedom to print without worry.
Avoiding Damage: What Not to Use on Printer Components
Since printer components are delicate, using the wrong cleaning products can cause irreparable damage. You want to keep your printer running smoothly without risking costly repairs or replacements. To protect your device, avoid these common mistakes:
- Don’t use harsh printer solvents; they can eat away coatings and cause surface scratches.
- Avoid abrasive materials like rough cloths or scrubbing pads that damage delicate parts.
- Steer clear of household cleaners with ammonia or bleach, as they degrade plastic and metal.
- Never spray liquids directly onto components; moisture can short circuits or cause corrosion.
- Refrain from using compressed air cans improperly, which may blow debris deeper inside.
Stick to gentle, approved solutions to maintain your printer’s freedom to perform without harm.
Storage and Shelf Life of Homemade Printer Cleaners
When you make your own printer cleaner, proper storage is key to keeping it effective and safe to use. Choose airtight storage containers made of glass or durable plastic to prevent contamination and evaporation. Label your containers with the date you mixed the solution to track its shelf life easily. Generally, homemade printer cleaners last about one to two months when stored in a cool, dark place away from direct sunlight. Avoid storing them near heat sources, as this can degrade the ingredients and reduce cleaning power. If you notice any changes in smell, color, or consistency, it’s time to make a fresh batch. By managing storage containers wisely and respecting the shelf life, you maintain your freedom to clean efficiently without hassle or waste.
Eco-Friendly Benefits of DIY Cleaning Solutions
Proper storage not only preserves your homemade printer cleaner but also supports a more sustainable approach to maintenance. Embracing DIY cleaning solutions lets you enjoy eco friendly benefits while freeing yourself from harsh chemicals and wasteful packaging. When you choose sustainable cleaning, you:
Proper storage preserves your printer cleaner and promotes eco-friendly, chemical-free maintenance with less waste.
- Reduce plastic waste by reusing containers
- Limit exposure to toxic ingredients
- Cut down on carbon footprint through simpler ingredients
- Support healthier indoor air quality
- Save money and gain control over what you apply
Frequently Asked Questions
Can DIY Cleaners Be Used on All Printer Brands and Models?
You’ll want to be careful with printer compatibility when choosing cleaning materials. Not all DIY cleaners suit every brand or model, so it’s smart to check your printer’s manual or manufacturer guidelines first. Using the wrong cleaner might damage sensitive parts or void your warranty. If you want freedom in maintenance, stick to gentle, non-abrasive solutions and test on a small area before fully cleaning your printer surfaces.
How Often Should I Clean My Printer Surfaces With DIY Solutions?
You might think cleaning frequency is all about how dirty your printer looks, but it actually depends on surface types and usage. For plastic and glass parts, a gentle wipe every couple of weeks usually works. If you use your printer heavily or in dusty environments, you’ll want to clean more often to avoid buildup. Being mindful of your printer’s materials lets you keep it fresh without overdoing it, giving you freedom from constant worry.
Are Homemade Cleaners Safe for Wireless or Touch Screen Printers?
You’ll want to be cautious with homemade cleaning solutions when it comes to wireless or touch screen printers. While they can be effective for printer maintenance, some DIY cleaners might damage sensitive screens or interfere with wireless functions. It’s best to use gentle, alcohol-free solutions and apply them sparingly with a soft cloth. This way, you maintain your freedom to clean without risking harm to your printer’s delicate surfaces or tech features.
What Is the Best Way to Dry Printer Surfaces After Cleaning?
Drying your printer surfaces is like letting a breeze carry away the last drops of rain—gentle and thorough. To protect delicate surface materials, use a soft, lint-free microfiber cloth to dab and absorb moisture without scratching. Avoid harsh rubbing or paper towels, which can leave fibers behind. Air drying works too but takes longer. Mastering these drying techniques guarantees your printer stays spotless and free from damage, giving you the freedom to print worry-free.
Can DIY Cleaning Solutions Prevent Printer Malfunctions or Jams?
You can’t guarantee DIY cleaning solutions will completely prevent printer malfunctions or jams, but they play a big role in good printer maintenance. By sticking to a regular cleaning frequency, you reduce dust and ink buildup, helping your printer run smoothly. Just remember, consistent care keeps your device freer from issues, giving you more freedom to print without interruptions. So, keep up with cleaning, and your printer will thank you.