DIY Upholstery Cleaner for Stubborn Stains
You can easily make a DIY upholstery cleaner for stubborn stains using white vinegar, baking soda, and mild liquid soap mixed with distilled water. Start by testing the solution on a hidden fabric spot to avoid damage. Gently blot stains from the outside inward to prevent spreading, and avoid soaking the fabric. This natural cleaner is safe, cost-effective, and eco-friendly. If you want to know the best stain removal techniques and fabric protection tips, keep exploring.
Essential Ingredients for Homemade Upholstery Cleaner
Although commercial upholstery cleaners are widely available, making your own cleaner lets you control the ingredients and avoid harsh chemicals. You can embrace eco friendly solutions that not only protect your furniture but also the environment. Essential ingredients often include white vinegar, baking soda, and mild liquid soap—each offering natural stain prevention and cleaning power. Vinegar breaks down dirt and neutralizes odors, while baking soda lifts stains and absorbs moisture. A gentle soap helps remove grime without damaging fabric fibers. With these simple, versatile components, you’re free to craft a cleaner tailored to your needs, avoiding toxins and reducing waste. By choosing homemade options, you’re taking charge of your space and promoting a healthier, chemical-free home.
Step-by-Step Guide to Mixing Your Cleaner
Now that you have your essential ingredients, it’s time to mix your cleaner carefully. I’ll walk you through each step to guarantee you get the right consistency and effectiveness. Plus, you’ll learn how to store your mixture properly for future use.
Essential Ingredients Needed
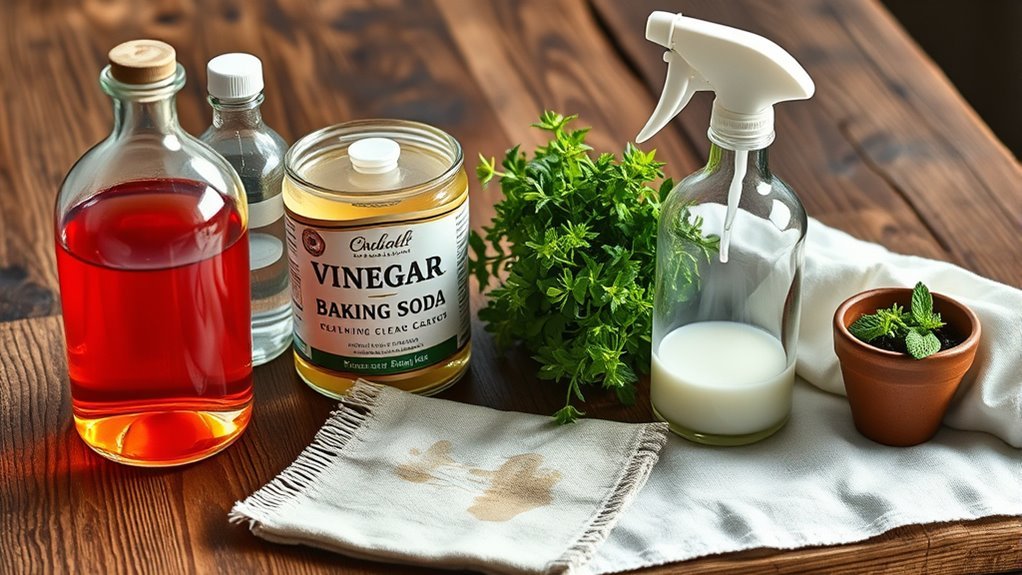
Creating your own upholstery cleaner starts with gathering a few essential ingredients that you probably already have at home. You’ll need basic cleaning agents like white vinegar and baking soda—they’re powerful, natural, and safe for most fabrics. Add distilled water to dilute the mix and avoid any residue. To give your cleaner a fresh scent and boost its cleaning power, include a few drops of essential oils such as lavender or tea tree. These oils not only smell great but also have antibacterial properties. Avoid harsh chemicals to keep your upholstery safe and your space toxin-free. With these simple, effective ingredients, you’re ready to create a cleaner that puts you in control—freeing you from store-bought products and their hidden additives.
Mixing Instructions Detailed
Start by measuring out two cups of distilled water as your base, then add half a cup of white vinegar to harness its natural cleaning power. Next, pour in one tablespoon of liquid castile soap—this boosts your cleaner’s effectiveness without harsh chemicals. Stir gently to blend, paying close attention to the mixing ratios; too much soap can create excess suds, while too little reduces cleaning power. Your goal is a balanced solution consistency—fluid enough to spray easily but thick enough to cling to stains. If the mixture feels too runny, add a tiny bit more soap, but don’t overdo it. Once mixed, your cleaner is ready to tackle stubborn upholstery stains, giving you freedom from pricey store-bought alternatives.
Storage Tips Provided
Once you’ve mixed your upholstery cleaner to the right consistency, storing it properly will keep it effective for future use. To maintain its potency, transfer your cleaner into a proper container, ideally one that’s airtight and made of durable plastic or glass. This will prevent contamination and evaporation. Label the container clearly with the date and contents so you can track its freshness. For long term storage, keep the container in a cool, dark place away from direct sunlight and heat sources. Avoid extreme temperatures, which can degrade the cleaner’s ingredients. By following these simple storage tips, you’ll have your DIY upholstery cleaner ready whenever stubborn stains appear, giving you the freedom to tackle messes without hassle or frequent remixes.
How to Test the Cleaner on Different Fabrics
Before applying your DIY upholstery cleaner broadly, you’ll want to test it on a small, hidden section of each fabric type. This step guarantees fabric compatibility, preventing damage or discoloration. Dab a bit of cleaner onto the discreet spot and wait a few minutes to observe any reaction. Next, perform a stain assessment by gently blotting a stubborn mark in that same area. Watch for changes in texture or color, which signal how the fabric responds to your cleaner. Testing this way gives you the freedom to confidently treat various upholstery pieces without risking harm. Remember, every fabric reacts differently, so thorough testing protects your furniture and helps you tailor your stain-fighting approach effectively. This simple precaution saves both time and effort down the road.
Techniques for Effective Stain Removal

Before tackling a stain, you’ll want to pre-treat the area to loosen dirt and grime. Spot cleaning is your best bet for targeting tough spots without soaking the entire fabric. Let’s look at some simple methods to get those stains out effectively.
Pre-Treatment Methods
Although tackling upholstery stains can seem challenging, effective pre-treatment methods can make a significant difference in removing them. Before diving in, you need to take into account fabric compatibility to avoid damage. Pre treatment techniques like blotting, gentle brushing, or applying a mild solution help break down stains, giving you the freedom to clean without worry.
| Pre-Treatment Technique | Why It Works |
|---|---|
| Blotting | Lifts stain without spreading |
| Gentle Brushing | Loosens dirt from fibers |
| Mild Cleaning Solution | Softens stubborn stains |
| Fabric Test Spot | Guarantees no damage occurs |
Spot Cleaning Tips
Anyone dealing with upholstery stains knows that spot cleaning is essential for quick and effective stain removal. To get the best results, you need to tailor your spot cleaning techniques to the specific upholstery fabric types you’re working with. For delicate fabrics like silk or velvet, always test your cleaner on a hidden area first and use gentle blotting motions to avoid damage. For sturdier fabrics like cotton or microfiber, you can be a bit more assertive with scrubbing. Remember to work from the outside of the stain inward to prevent spreading. Avoid soaking the fabric, as excess moisture can lead to mold or discoloration. By matching your approach to the fabric and stain type, you’ll maintain your upholstery’s freedom from stains and keep it looking fresh longer.
Tips for Maintaining Upholstery Between Cleanings
While regular deep cleaning is essential, you’ll find that simple daily habits can greatly prolong the life of your upholstery. Start by committing to regular vacuuming to remove dust and debris that wear down fabric fibers. Use attachments to reach crevices where dirt hides. Consider applying upholstery protection sprays that create a barrier against spills and stains, making future cleanings easier. Rotate cushions frequently to guarantee even wear and prevent fading in specific spots. Keep pets off your furniture or use washable covers to reduce dirt and hair buildup. Finally, avoid sitting on upholstery with sharp objects or in damp clothes, which can damage the fabric. These small steps give you freedom from constant worry over stains and keep your upholstery looking fresh longer.
Natural Alternatives for Tough Stains

When tough stains challenge your upholstery, you don’t have to rely on harsh chemicals to tackle them. Natural cleaning alternatives like white vinegar, baking soda, and lemon juice offer powerful stain-fighting properties without compromising your freedom to choose eco-friendly solutions. These ingredients work by breaking down stains gently, preserving your fabric’s integrity. For instance, a mix of vinegar and water can lift many common stains, while baking soda neutralizes odors and absorbs grease. Lemon juice’s natural acidity also helps brighten fabrics. Incorporating these natural methods not only cleans effectively but supports stain prevention by maintaining your upholstery’s condition over time. By choosing natural cleaning, you take control, avoiding harmful toxins and embracing a safer, more sustainable way to keep your furniture fresh and inviting.
Safety Precautions When Using DIY Cleaners
Natural ingredients like vinegar and lemon juice are great for cleaning, but you still need to handle them with care. When using DIY cleaners, prioritize cleaning safety by testing a small, hidden area first to verify your fabric won’t get damaged. Avoid mixing ingredients that can create harmful fumes. Always wear gloves to protect your skin, and work in a well-ventilated space. Keep your cleaner away from children and pets to prevent accidental ingestion. Remember, fabric protection is key—don’t soak upholstery; use minimal liquid to avoid weakening fibers or causing discoloration. By following these simple precautions, you’ll enjoy the freedom of homemade solutions without risking your health or ruining your furniture. Stay safe and keep your upholstery looking fresh!
Frequently Asked Questions
Can DIY Upholstery Cleaner Remove Pet Odors Effectively?
You might wonder if a DIY solution can tackle pet odor effectively. While homemade cleaners can offer decent cleaner effectiveness against mild smells, they sometimes fall short with strong or deep-set pet odors. If you want freedom from harsh chemicals and control over ingredients, DIY options work well for routine freshness. However, for stubborn, persistent pet odor, you may need a specialized cleaner designed specifically to break down those tough smells.
How Often Should Upholstery Be Professionally Cleaned?
Keeping your upholstery in its prime is like giving it a well-deserved spa day. For the best professional cleaning frequency, aim for every 12 to 18 months, depending on usage and household factors. This routine helps maintain freshness and longevity. Alongside regular vacuuming, these upholstery care tips guarantee your furniture stays inviting and comfortable, letting you enjoy your space freely without worrying about hidden grime or wear.
Is It Safe to Use DIY Cleaner on Antique Furniture?
When dealing with antique furniture, you’ve got to be careful about cleaner compatibility to avoid damaging its value. DIY cleaners might seem freeing, but they can harm delicate fabrics or finishes if not suited for antique preservation. You should test any cleaner on a small, hidden spot first and opt for gentle, natural ingredients. If you’re unsure, it’s safer to consult a professional who respects your freedom to maintain your treasured pieces properly.
What Are Signs Upholstery Needs Deep Cleaning Versus Surface Cleaning?
You might think a quick wipe fixes everything, but stain indicators like deep-set odors, discoloration, or sticky spots reveal when your upholstery needs more than surface cleaning. If you notice frequent dirt buildup despite regular cleaning frequency, it’s time for a deep clean to truly refresh your space. Trust these signs—they’re your freedom from hidden grime, ensuring your furniture feels as vibrant and clean as you deserve.
Can Upholstery Cleaning Prevent Allergies or Asthma Symptoms?
Yes, cleaning your upholstery regularly can help reduce allergy triggers like dust mites, pet dander, and mold. By keeping these allergens at bay, you’re creating a fresher environment that supports asthma relief. You’ll feel freer to breathe deeply without constant irritation. Don’t let hidden grime hold you back—clean upholstery lets you enjoy your space comfortably, giving you the freedom to live without the constant worry of allergy or asthma symptoms.