
How to Clean Your Home After Desk
Start by sorting clutter on and around your desk, separating essentials from junk. Gather cleaning tools like microfiber cloths, disinfectant wipes, and a vacuum. Clear and organize papers, then dust and wipe all surfaces carefully, including electronics and cables. Tidy cables to prevent tangles and clean the floor beneath the desk. Disinfect high-touch spots like keyboards and drawer handles. Establish a routine to maintain this order and keep your space fresh. Explore these steps in detail to restore full home harmony.
Assess the Clutter on and Around Your Desk
Before you begin cleaning, take a few minutes to thoroughly assess the clutter on and around your desk. Identify what’s essential and what’s just taking up space. Use effective decluttering techniques like sorting items into categories: keep, toss, or relocate. This method prevents overwhelm and helps you focus on what truly matters. Pay attention to loose papers, pens, cables, and miscellaneous objects that accumulate unnoticed. Implement desk organization tips such as using trays or containers to group similar items, making your workspace visually clear and functional. By carefully evaluating your desk’s state, you create a foundation for lasting order and freedom from chaos. This focused approach saves time later and enhances your productivity, turning your desk into a tool for efficiency rather than distraction.
Gather Essential Cleaning Supplies
Gathering the right cleaning supplies is essential to efficiently tackle your desk area. Start by assembling basic cleaning tools such as microfiber cloths, an all-purpose cleaner, disinfectant wipes, and a small brush for tight spaces. Include a handheld vacuum or compressed air to remove dust from keyboards and vents. Having a trash bin or recycling container nearby will help you dispose of waste immediately. To support your organization strategies, consider having storage bins, drawer organizers, and labels ready to sort items as you clean. Preparing these supplies beforehand saves time and keeps you focused, allowing you to clear and refresh your workspace effortlessly. With the right tools at hand, you’re empowered to regain control and maintain a clutter-free, productive environment.
Clear and Organize Papers and Documents

Start by separating important papers from junk to reduce clutter effectively. Next, create a filing system with clearly labeled folders or boxes to keep documents accessible and organized. This method helps you maintain order and quickly find what you need later.
Sort Important From Junk
Although it might seem overwhelming, sorting through papers is essential to maintain an organized workspace. Start by setting clear sorting strategies: create three piles labeled Important, Junk, and Unsure. Use decluttering techniques like handling one document at a time to avoid feeling swamped. Quickly decide if a paper is necessary—bills, contracts, and personal records go in Important. Flyers, outdated receipts, and duplicates belong in Junk. For Unsure items, set them aside to review later, preventing decision fatigue. Keep your process methodical by regularly discarding Junk to free up space and focus. This disciplined approach guarantees your workspace stays clutter-free and your important documents are easy to find, giving you the freedom and peace of mind to work efficiently.
Use Filing Systems
Once you’ve separated your papers into Important, Junk, and Unsure, the next step is to create a filing system that keeps your documents accessible and orderly. Start by selecting folders or binders labeled clearly by category—bills, receipts, warranties, or personal documents. Use color-coding or alphabetical order to enhance quick retrieval. The filing benefits are immediate: reduced clutter, faster access, and less stress. Implement organization techniques like regular purging of outdated files and a digital backup for critical papers. Keep your system simple to maintain freedom from overwhelm. By methodically applying these steps, you’ll transform chaotic piles into an efficient, manageable archive. This organized approach lets you focus on what matters, freeing mental space and time for your priorities.
Dust and Wipe Down Desk Surfaces
Before you start dusting, clear any remaining clutter from your desk to guarantee every surface is accessible. Choose cleaning products that are safe for your desk material to avoid damage. Use a microfiber cloth to effectively trap dust without scratching or spreading it around.
Choose Suitable Cleaning Products
Since your desk often collects dust, dirt, and smudges, choosing the right cleaning products is essential to protect its surface while guaranteeing thorough cleanliness. Opt for eco friendly products that are gentle yet effective, minimizing harmful chemicals in your environment. Multi surface cleaners are ideal because they simplify your routine, letting you clean various materials without switching products. Check labels to guarantee compatibility with your desk’s finish—wood, glass, or laminate each require specific care. Avoid abrasive cleaners that can scratch or dull surfaces. Use a soft microfiber cloth to apply the cleaner and wipe down thoroughly, lifting dust without spreading it. This method preserves your desk’s look and supports a healthier space, granting you the freedom to maintain a clean, inviting workspace effortlessly.
Remove Clutter Before Dusting
Although it might be tempting to start dusting right away, you should first clear away any clutter on your desk. Begin by sorting items into categories: keep, relocate, or discard. Effective declutter strategies involve grouping similar objects together and removing anything unnecessary to create open space. Use organization tips like designated trays or containers to contain smaller items, preventing future mess. This methodical approach guarantees you won’t just move dust around but will clean surfaces thoroughly. Clearing clutter also exposes hidden dust and grime, making your cleaning more efficient. Taking these steps not only streamlines the dusting process but also sets the foundation for a more organized, freer workspace where you can focus without distractions.
Use Microfiber Cloths
Once you’ve cleared the clutter, the next step is to tackle dust and grime on your desk surfaces using microfiber cloths. These cloths offer superior microfiber benefits—they trap dust efficiently without scratching surfaces. To get the most from your cleaning techniques, slightly dampen the cloth for sticky spots and wipe in gentle, circular motions.
| Task | Cloth Type | Technique |
|---|---|---|
| Dusting surfaces | Dry microfiber | Light, sweeping strokes |
| Removing grime | Damp microfiber | Circular, firm pressure |
| Electronics | Dry microfiber | Gentle, avoid moisture |
| Polishing | Dry microfiber | Buff with soft strokes |
Using microfiber cloths guarantees a thorough clean, leaving your desk spotless and ready for freedom to create.
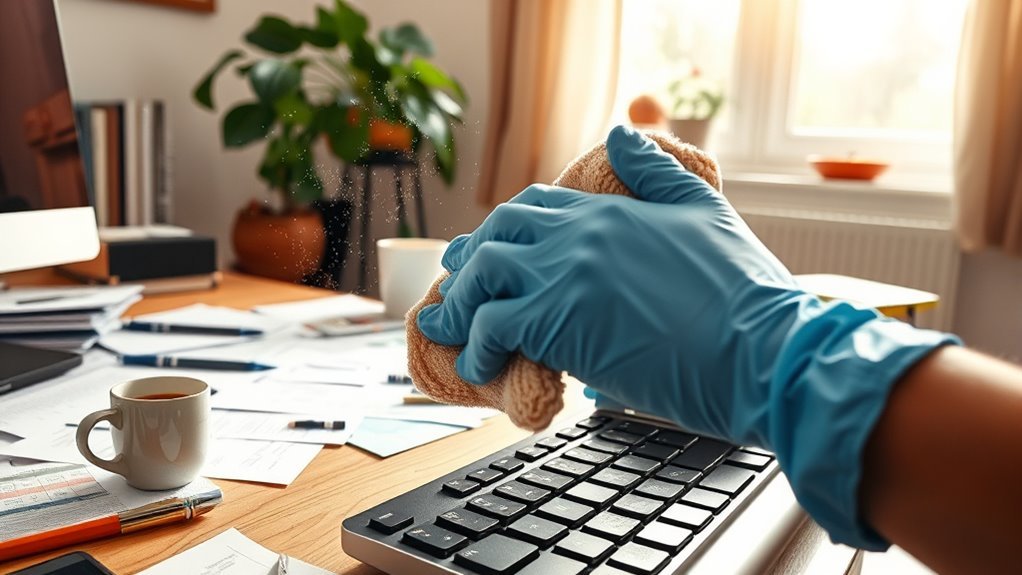
Clean Your Computer and Electronic Devices
Before you plunge into cleaning your computer and electronic devices, make sure they’re powered off and unplugged to prevent damage or injury. Start by gently wiping screens with a microfiber cloth dampened with a 50/50 mix of distilled water and isopropyl alcohol—this supports peak computer hygiene without leaving streaks. Use compressed air to blow dust from keyboards, vents, and ports, avoiding moisture buildup that can harm components. For electronic maintenance, clean mice, keyboards, and remote controls with disinfectant wipes, paying attention to crevices where grime accumulates. Avoid spraying liquids directly onto devices; instead, apply them to the cloth first. Regularly maintaining your electronics this way preserves their functionality and extends their lifespan, giving you the freedom to work and create without interruptions.
Manage and Tidy Up Cables and Chargers
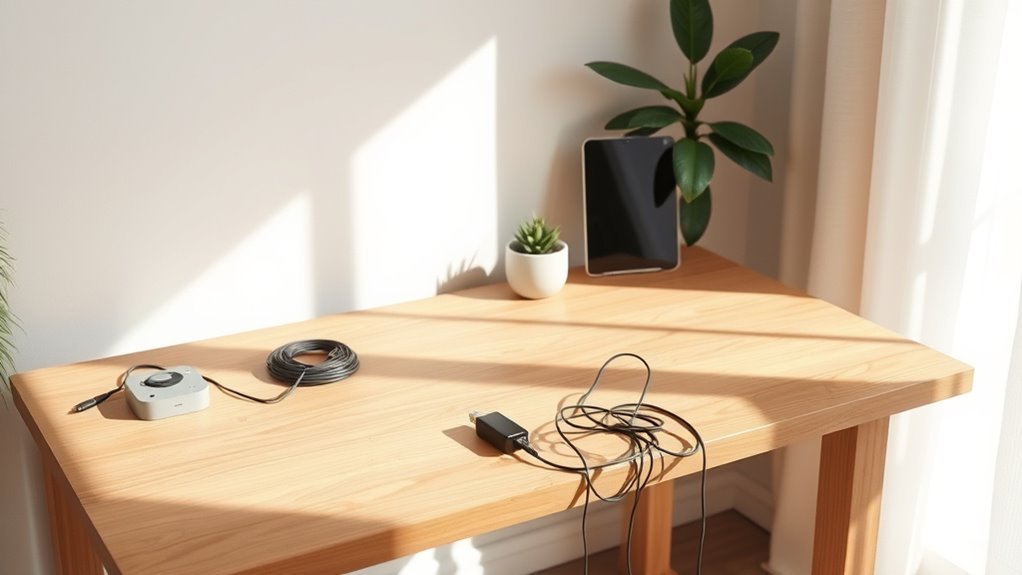
Managing cables and chargers efficiently starts with gathering all of them in one place to assess what you have. Sort cables by type and length, separating those you frequently use from extras. Next, detangle and straighten each cable to prevent knots and damage. Use cable ties or Velcro straps to bundle cables neatly—this is key for effective cable management. Label chargers and cables if needed to quickly identify each device. Store rarely used chargers in a dedicated box or drawer to reduce clutter. Arrange cables near your desk using clips or sleeves to keep them from tangling or sprawling across surfaces. By methodically organizing your cables and chargers, you create a clean, free workspace that’s easier to maintain and less stressful to navigate.
Vacuum or Sweep the Floor Area Near Your Desk
Clear away any items under and around your desk to access the entire floor surface. Effective floor cleaning near your desk requires methodical steps to free your workspace and maintain cleanliness. Follow these cleaning techniques:
- Sweep first to gather dust, crumbs, and debris into a pile, focusing on corners and edges.
- Use a vacuum with attachments to remove fine particles, especially in carpeted areas or textured floors.
- Move your desk slightly if possible to reach hidden spots and clean thoroughly.
These steps guarantee your floor stays spotless, reducing allergens and creating a fresh environment. By mastering these floor cleaning techniques, you gain freedom from clutter and dirt, enhancing your productivity and comfort in your workspace.
Disinfect High-Touch Areas and Accessories
Although you’ve cleaned the floor, the surfaces you touch most often can still harbor germs. Focus on disinfecting surfaces like your keyboard, mouse, phone, and desk handles—these high touch items accumulate bacteria quickly. Use a disinfectant wipe or spray a microfiber cloth with an EPA-approved cleaner to avoid damage. Gently wipe each item, paying special attention to crevices and buttons. Don’t forget light switches and drawer pulls near your desk. Allow surfaces to air dry to maximize disinfecting power. By methodically targeting these high touch items, you reduce the risk of transferring germs back to your hands or face. This step frees you from worrying about unseen contaminants and keeps your workspace healthier and safer.
Develop a Routine for Regular Desk and Home Cleaning
To keep your workspace consistently clean, you’ll want to establish a regular cleaning routine that includes both your desk and surrounding areas. Incorporating daily cleaning helps maintain order and promotes efficiency, freeing you from clutter’s mental weight. Use these steps to optimize your time management:
- Set a fixed time each day—morning or evening—for 10-15 minutes of focused desk tidying, wiping surfaces and organizing essentials.
- Dedicate one day weekly to deeper cleaning, including vacuuming floors and dusting shelves around your workspace.
- Schedule monthly checks to declutter paperwork and clean electronics thoroughly.
Frequently Asked Questions
How Can I Prevent Dust Buildup on My Desk Equipment?
To prevent dust buildup on your desk equipment, prioritize dust management by regularly wiping surfaces with microfiber cloths and using compressed air for tight spots. Keep your workspace organized to reduce dust traps, and consider using protective covers on your gear for equipment protection. Air purifiers and maintaining good ventilation will also help. By staying consistent with these habits, you’ll keep your equipment cleaner, extending its life and freeing you from constant cleaning chores.
What Natural Cleaners Are Safe for Electronics?
You can safely clean electronics using eco friendly alternatives like diluted vinegar solutions, which are gentle yet effective. Mix equal parts white vinegar and distilled water in a spray bottle, then lightly dampen a microfiber cloth—never spray directly on devices. This method removes grime without harsh chemicals, letting you maintain your gadgets freely and responsibly. Avoid abrasive materials to keep screens scratch-free and always power off before cleaning.
How Often Should I Replace My Cleaning Supplies?
Think of your cleaning supplies like the batteries in a trusty flashlight—essential but not eternal. To maintain peak cleaning frequency and effectiveness, replace liquids like disinfectants every six months, while sponges and cloths should be swapped out every two to four weeks, depending on use. This methodical approach to supply lifespan guarantees you’re never caught off guard, giving you the freedom to keep your space fresh and your routine efficient.
Can Plants Improve Air Quality Near My Desk?
Yes, air purifying plants can improve air quality near your desk by filtering out toxins and boosting oxygen levels. The desk plant benefits include reducing stress, increasing focus, and creating a revitalizing workspace. Choose low-maintenance options like snake plants or pothos for effective air purification. Just make sure to place them where they get enough light and water them properly to keep your environment clean and your mind clear.
What Are the Best Storage Solutions for Small Office Items?
You’ll find drawer organizers essential for keeping small office items sorted and easy to find, preventing clutter from taking over. Desktop trays offer a versatile solution, letting you stack papers or stash pens within reach without sacrificing space. Combining both lets you maximize freedom by tailoring storage to your workflow, keeping everything neat yet accessible. This methodical approach frees your mind and workspace, helping you focus and move efficiently throughout your day.