Mistakes to Avoid When Cleaning Your Keyboard
When cleaning your keyboard, don’t use excessive liquids or spray directly onto the keys to avoid damage. Always power down and disconnect it before you start. Follow the manufacturer’s cleaning guidelines and avoid abrasive materials that can scratch or dull surfaces. Removing debris between keys is important, and don’t forget to let your keyboard dry completely to prevent sticky keys or short circuits. Keep these in mind, and you’ll want to explore more tips to protect your device.
Using Excessive Liquids

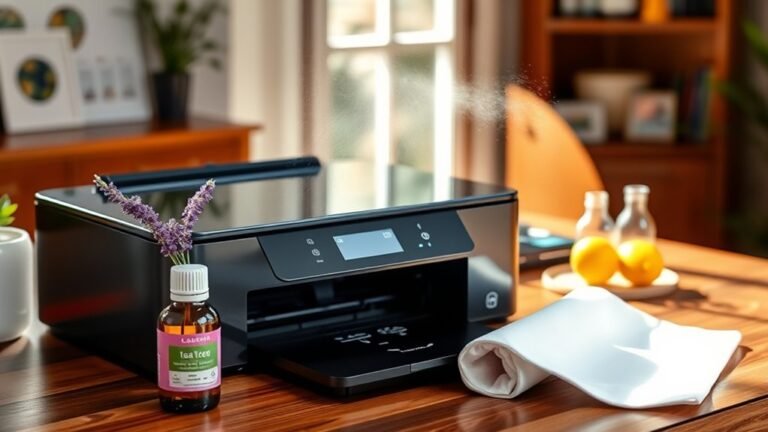
When cleaning your keyboard, it’s important not to use too much liquid. Excessive moisture can seep beneath the keys, causing keyboard damage and potentially short-circuiting the electronics inside. You want to steer clear of liquid types that are corrosive or leave residues, such as bleach or undiluted alcohol. Instead, opt for minimal amounts of isopropyl alcohol diluted with water or specialized electronic cleaning sprays designed to evaporate quickly. Always apply the liquid to a cloth, never directly onto the keyboard, to maintain control and prevent over-saturation. By managing the type and amount of liquid you use, you protect your keyboard’s functionality and extend its lifespan. This approach gives you the freedom to clean effectively without risking costly damage.
Cleaning Without Disconnecting the Keyboard
Controlling moisture is just one part of safe keyboard cleaning. When you clean without disconnecting the keyboard, you risk short-circuiting or damaging internal components. For keyboard safety, always power down your device first. Avoid spraying liquids directly onto the keys; instead, apply cleaning solutions to a microfiber cloth. Use gentle cleaning techniques like wiping surfaces and using compressed air to dislodge debris. This approach minimizes moisture exposure and prevents accidental spills from reaching sensitive electronics. Disconnecting your keyboard before deep cleaning is a simple step that protects your investment and keeps your workflow uninterrupted. By following these keyboard safety guidelines and adopting proper cleaning techniques, you maintain cleanliness while preserving your device’s function and your freedom to work or play without worry.
Ignoring Manufacturer’s Cleaning Guidelines

Although it might seem easier to use general cleaning methods, ignoring your keyboard manufacturer’s cleaning guidelines can lead to damage or void your warranty. Each keyboard model may have specific manufacturer recommendations regarding cleaning frequency and approved cleaning agents. Skipping these instructions risks harming sensitive components or coatings. To keep your keyboard in top shape while maintaining warranty coverage, check the manual or the manufacturer’s website before you start. Follow their advice on how often to clean and which tools or solutions to use. This way, you avoid unnecessary risks and guarantee your keyboard lasts longer. Paying attention to these details gives you the freedom to clean confidently without worry, preserving both function and warranty.
Using Abrasive Materials
If you use abrasive materials to clean your keyboard, you risk scratching the surface or damaging the keys. These harsh substances may seem effective at first, but they can cause permanent keyboard damage, dulling the finish and wearing down the lettering. Instead of abrasive materials like rough scrubbers, steel wool, or harsh chemicals, opt for soft, lint-free cloths and gentle cleaning solutions designed for electronics. Using the wrong tools limits your freedom to keep your keyboard spotless without harm. Protect your investment by choosing appropriate cleaning methods. Remember, keyboard damage from abrasive materials isn’t just cosmetic—it can interfere with key functionality. Stay clear of abrasive cleaners to maintain your keyboard’s look and performance effortlessly and safely.
Neglecting to Remove Debris Between Keys

While using the right materials is key to protecting your keyboard’s surface, it’s equally important to address the debris that settles between the keys. Ignoring key debris can cause sticky keys, reduced responsiveness, and even damage over time. To keep your keyboard in top shape, use appropriate cleaning tools like a soft brush, compressed air, or specialized keycap pullers to safely remove trapped particles. Avoid poking with sharp objects, as this risks damaging the mechanisms beneath. Regularly clearing out debris not only guarantees smooth typing but also extends your keyboard’s lifespan, giving you greater freedom to work or play without interruptions. Don’t let hidden dirt undermine your device’s performance—make thorough cleaning between keys a part of your routine.
Applying Cleaning Solutions Directly on the Keyboard
Because keyboards are sensitive electronic devices, you shouldn’t apply cleaning solutions directly onto them. Doing so risks liquid seeping beneath the keys, which can cause damage or malfunction. Instead, apply cleaning solutions to a soft cloth or microfiber towel first, then gently wipe the keyboard’s surface. This method gives you control over the amount of moisture used, preventing excess from reaching internal components. For keyboard maintenance, always choose mild, electronics-safe cleaning solutions to avoid damaging the materials. Avoid harsh chemicals that can wear down key labels or plastic. By following these steps, you maintain your keyboard’s function and appearance without risking harm. Taking care with cleaning solutions guarantees your keyboard stays reliable and free from damage, giving you the freedom to work or play without interruption.
Failing to Allow Proper Drying Time
You need to let your keyboard dry completely after cleaning to avoid damage from moisture. Using it too soon can cause keys to stick or even short-circuit internal components. To prevent this, follow best drying practices like air-drying in a well-ventilated area before plugging it back in.
Importance of Complete Drying
A crucial step many people overlook is allowing your keyboard to dry completely after cleaning. Proper drying techniques are important to guarantee moisture control and prevent damage. After wiping down your keyboard, set it in a well-ventilated area and avoid using heat sources that can warp components. Using a microfiber cloth to absorb excess liquid helps speed up the process without risking harm. Patience here grants you freedom from sticky keys or internal corrosion. Remember, moisture left inside your keyboard can cause malfunctions or degrade its lifespan. So, resist the urge to rush and give your keyboard ample time to dry fully. Prioritizing complete drying protects your device and keeps it functioning smoothly, letting you enjoy uninterrupted use without worry.
Risks of Premature Use
Anyone rushing to use their keyboard before it’s fully dry risks serious damage. Liquid hazards trapped inside can cause short circuits, sticky keys, or even permanent keyboard damage. You want your freedom to type uninterrupted, so patience is key.
| Risk Factor | Consequence |
|---|---|
| Residual moisture | Short circuits |
| Sticky keys | Erratic typing |
| Internal corrosion | Permanent damage |
Ignoring proper drying leaves your keyboard vulnerable. Even a small amount of moisture can disrupt electrical components. To protect your device and maintain freedom from malfunction, always allow adequate drying time after cleaning. Don’t sacrifice function for haste—wait, and keep your keyboard in top shape.
Best Drying Practices
Although it might be tempting to use your keyboard right after cleaning, skipping proper drying time can lead to costly damage. After wiping away dirt and grime, you need to let your keyboard dry thoroughly before plugging it back in or typing. Start by gently towel blotting the surface to remove excess moisture without forcing liquid deeper into the keys. Then, set your keyboard in a well-ventilated area to air dry completely. Avoid using heat sources like hair dryers, as they can warp plastic components. Giving your keyboard ample time to dry guarantees that any residual moisture evaporates, protecting internal circuits and extending its lifespan. Patience here means freedom from unexpected malfunctions and costly repairs down the road.
Frequently Asked Questions
How Often Should I Clean My Keyboard?
Think of your keyboard like a car—if you never wash it, dirt builds up and affects performance. For keyboard cleaning frequency, aim to clean it thoroughly once a month to prevent dust accumulation effects like sticky keys or malfunctions. Between deep cleans, a quick wipe once a week keeps grime at bay. This routine helps you keep your keyboard running smoothly without feeling trapped by endless maintenance.
Can I Use Compressed Air to Clean My Keyboard?
Yes, you can use compressed air to clean your keyboard—it’s a popular keyboard maintenance tip for blasting out dust and debris between keys quickly. Just hold the can upright and use short bursts to avoid moisture buildup. If you want compressed air alternatives, consider a soft brush or a vacuum cleaner with a brush attachment. These options help keep your keyboard clean without risking damage or residue buildup.
What Is the Safest Cleaning Solution for Keyboards?
When choosing a safe cleaning solution for your keyboard, you’ll want to avoid harsh chemicals. A simple mix of 70% isopropyl alcohol and water works well without damaging components. Alternatively, you can use gentle solution alternatives like mild dish soap diluted in water. Always dampen a microfiber cloth rather than spraying directly. This lets you clean safely while keeping your keyboard in great shape, giving you freedom to maintain it without worry.
Are Keyboard Covers Effective in Preventing Dirt?
You might say keyboard covers offer a subtle shield against everyday grime, making them a clever addition to your keyboard maintenance tips. They act as a gentle barrier, enhancing dust prevention methods by keeping particles at bay. While they won’t make your keyboard invincible, using a cover can greatly reduce dirt buildup, giving you more freedom from frequent cleanings and preserving your device’s sleek performance.
How Do I Clean Mechanical Keyboard Switches?
To clean mechanical keyboard switches, start by carefully performing switch removal if your keyboard supports hot-swappable switches. Use a switch puller to avoid damage. Next, remove the keycaps using a keycap puller. Clean the switches gently with compressed air or a small brush to remove dust and debris. Once clean, replace the keycaps securely. This process keeps your keyboard responsive and frees you from sticky or unresponsive keys, enhancing your typing experience.