Mistakes to Avoid When Cleaning Your Remote
When cleaning your remote, avoid using harsh chemicals or abrasive materials that could damage buttons and the casing. Don’t submerge it in water or apply excessive moisture, as this risks short circuits. Always disconnect the batteries first to prevent corrosion and leakage. Don’t press buttons too hard, and be sure to wipe away dust gently, especially around the infrared sensor. If you want to keep your remote working smoothly and looking good, it’s helpful to understand these cleaning pitfalls more thoroughly.
Using Harsh Chemicals

Although it might seem effective, using harsh chemicals to clean your remote can actually damage its surface and internal components. You want your remote to last, not to end up with faded buttons or a malfunctioning device. Harsh chemicals found in some cleaning products can eat away at the plastic casing or seep inside, causing corrosion. Instead, choose gentle cleaning products designed for electronics or simply use a soft cloth slightly dampened with water or isopropyl alcohol. This way, you maintain your freedom to use your device without worry. Remember, less aggressive cleaning keeps your remote safe and functional, giving you the freedom to enjoy your entertainment without the hassle of replacements or repairs caused by careless cleaning methods.
Submerging the Remote in Water
You might think dunking your remote in water is an easy way to clean it, but that can cause serious damage. Water can seep inside and ruin the electronics, leaving your remote useless. Instead, try using a damp cloth or specialized wipes to safely clean the surface.
Water Damage Risks
If you soak your remote in water, you risk causing serious damage that’s often irreversible. Water exposure can short-circuit the internal components, making your remote useless and forcing you to buy a new one. Maintaining moisture control is essential to keep your remote functional and extend its lifespan. Remember, electronics and water don’t mix well—avoid submerging your remote no matter how tempting it might seem to deep clean it.
| Risk | Cause | Result |
|---|---|---|
| Short-circuiting | Water intrusion | Immediate malfunction |
| Corrosion | Moisture trapped inside | Gradual damage and failure |
| Battery damage | Water exposure | Leakage or explosion risk |
| Warranty void | Unauthorized cleaning | No repair coverage |
Alternative Cleaning Methods
While submerging your remote in water might seem like an easy way to clean it thoroughly, it’s one of the riskiest methods you can try. Water can easily seep inside, damaging the electronics and rendering your remote useless. Instead, embrace freedom from harsh chemicals and opt for eco friendly cleaners paired with microfiber cloths. These cloths gently lift dirt and grime without scratching, and using green cleaning solutions keeps your space safe and sustainable. You can lightly dampen a microfiber cloth with a mild eco friendly cleaner to wipe every button and crevice, avoiding any liquid pooling inside. This method preserves your remote’s functionality while giving you peace of mind, letting you clean confidently without risking costly damage.
Ignoring Battery Compartment Cleaning
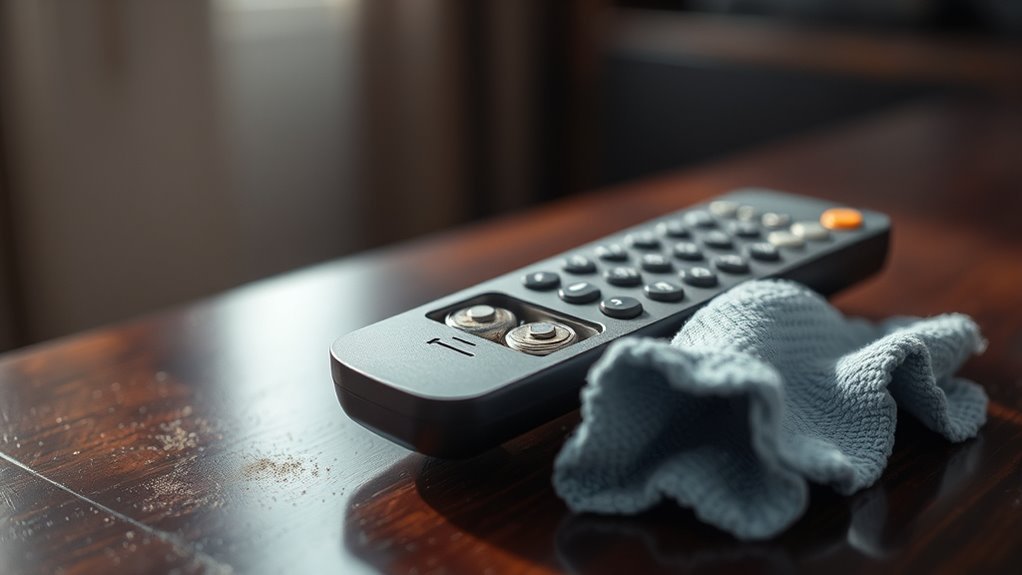
One common mistake people make is neglecting to clean the battery compartment of their remote. Over time, battery corrosion can build up, causing poor connections that lead to malfunction or complete failure. You want your remote to work smoothly without being held back by unseen grime. To avoid this, make checking and cleaning the battery compartment part of your regular cleaning frequency. Simply remove the batteries, gently wipe the terminals with a dry cloth or a cotton swab dipped in isopropyl alcohol, and verify no residue remains. Keeping this area clean gives you the freedom to enjoy uninterrupted control without unexpected battery issues. Don’t let overlooked corrosion trap you in frustration—stay ahead by maintaining every nook of your remote.
Applying Excessive Moisture
Because remotes contain sensitive electronic components, applying excessive moisture during cleaning can cause serious damage. You want to keep your device functioning smoothly without risking short circuits or corrosion. Practicing good moisture control is key to maintaining your remote’s longevity while enjoying the freedom to clean it regularly. Here’s how to approach it wisely:
- Use a lightly dampened cloth instead of spraying liquids directly.
- Limit cleaning frequency to when dirt buildup is noticeable, avoiding over-wetting.
- Ascertain the remote is completely dry before reinserting batteries or using it again.
Using Abrasive Materials

You might think scrubbing your remote with abrasive materials will make it spotless, but it can actually damage the surface and wear down the buttons. Instead, stick to soft cloths and gentle cleaning solutions to keep your remote safe and clean. Using safer alternatives helps preserve its look and functionality for longer.
Effects on Remote Surface
Although it might seem effective, using abrasive materials on your remote can seriously damage its surface. Remote surface materials like plastic or rubberized coatings are often delicate, and harsh scrubbing can wear down their finish. When you use rough sponges or brushes, you risk:
- Scratching the plastic casing, ruining its smooth feel
- Abrading printed buttons, causing symbols to fade
- Altering cleaning surface textures, making dirt stick more easily
These effects not only spoil your remote’s look but can also impact its functionality over time. You want your remote to last, maintaining both its appearance and ease of use. So, while it’s tempting to scrub tough stains aggressively, remember that protecting the surface is key to freedom from constant replacements or malfunctions.
Safer Cleaning Alternatives
Harsh scrubbing isn’t the only way to keep your remote clean—there are gentler methods that still get the job done. Instead of abrasive materials that can scratch surfaces, opt for eco friendly solutions like diluted vinegar or gentle natural cleaners. These not only protect your remote but also reduce environmental impact. Here’s a quick comparison:
| Cleaning Method | Surface Safety | Environmental Impact |
|---|---|---|
| Abrasive Materials | Can cause scratches | Often harsh chemicals |
| Natural Cleaners | Gentle on surfaces | Eco friendly |
| Microfiber Cloth | Safe for all surfaces | Reusable, low waste |
| Alcohol Wipes | Use sparingly | Biodegradable options |
Choose safer alternatives that preserve your remote’s look and your freedom to clean responsibly.
Cleaning Without Disconnecting Batteries
If you clean your remote without removing the batteries, you risk damaging the device or causing a short circuit. Keeping battery safety in mind is essential to preserving your remote lifespan. Leaving batteries inside exposes them to moisture and cleaning agents, which can lead to corrosion or leakage. Plus, an accidental button press during cleaning might drain power or cause malfunctions.
To protect your remote and enjoy the freedom of uninterrupted use, always:
- Remove batteries before cleaning to avoid electrical hazards
- Use a dry or slightly damp cloth to prevent moisture contact with battery compartments
- Inspect batteries for leaks or damage before reinserting
Neglecting to Remove Dust Before Wiping
Before you start wiping your remote, you should always remove dust first. Skipping this step can push particles deeper into crevices, making cleaning harder and potentially damaging the device. Using simple dust removal techniques like a soft brush or compressed air lets you clear out loose debris without scratching surfaces. This approach keeps your remote working smoothly and extends its lifespan. Remember, maintaining a regular cleaning frequency helps prevent dust buildup, so you’re not overwhelmed when it’s time to clean. By taking a moment for dust removal before wiping, you guarantee a more effective clean and protect your remote’s buttons and sensors. Don’t rush this part—it’s essential for freedom from sticky buttons and frustrating malfunctions.
Pressing Buttons Too Hard While Cleaning
Avoid pushing the buttons too hard when cleaning your remote, as this can damage the internal mechanisms or cause them to stick. Your remote’s button sensitivity is delicate, so a gentle cleaning technique is essential to keep it functioning smoothly. Instead of pressing down aggressively, try these tips to maintain freedom from button damage:
Pressing buttons too hard during cleaning can damage your remote’s delicate internal mechanisms—clean gently for best results.
- Use a soft cloth lightly dampened with a mild cleaner to wipe around buttons without applying pressure.
- Employ a cotton swab or soft brush to clean between buttons gently, avoiding unnecessary force.
- Hold the remote firmly but avoid squeezing it while cleaning to prevent internal parts from shifting.
Overlooking Infrared Sensor Area
The infrared sensor is an essential component of your remote that you shouldn’t neglect while cleaning. It’s the part that communicates with your device, so keeping it clear guarantees smooth operation. Overlooking this area can block signals, making your remote less responsive or completely ineffective. When applying cleaning techniques, avoid harsh chemicals or excessive moisture near the sensor to prevent damage. Instead, use a soft, dry microfiber cloth or a slightly dampened cotton swab to gently wipe away dust and grime. Taking a moment to carefully clean the infrared sensor frees you from frustrating signal issues and keeps your remote working flawlessly. Don’t let this small but mighty part get ignored—cleaning it right means more freedom to control your devices without hassle.
Frequently Asked Questions
How Often Should I Clean My Remote Control?
You should follow frequency guidelines to keep your remote control clean and germ-free without feeling trapped by a strict routine. A good cleaning schedule is once a week or every two weeks, depending on how often you use it and who else touches it. This way, you maintain freedom from germs while not overdoing it. Adjust the schedule as needed, so it fits your lifestyle and keeps your remote working smoothly.
Can I Use Disinfectant Wipes on My Remote?
Did you know your remote control can harbor more germs than a toilet seat? You can use disinfectant wipes, but confirm they’re safe for your remote’s material—usually plastic or rubber. Using the right wipes guarantees disinfectant effectiveness without damaging buttons or surfaces. Stay free from germs while keeping your device intact. Just wipe gently and avoid excess moisture to enjoy a clean, functioning remote without hassle.
What Is the Best Cloth Type for Cleaning Remotes?
When cleaning your remote, you’ll want to reach for microfiber cloths or lint-free towels. These materials are great because they won’t leave behind fuzz or scratches, letting you clean freely without worry. Microfiber cloths trap dust and grime efficiently, while lint-free towels guarantee a streak-free finish. Using these cloths gives you control and freedom to keep your remote spotless without damaging its surface or buttons.
Should I Remove the Batteries Every Time I Clean?
Oh sure, you love living on the edge—cleaning your remote without removing the batteries! But if you want to avoid battery corrosion ruining your freedom, it’s wise to pop them out first. Especially if your cleaning frequency is high, this little step prevents moisture from sneaking in and causing damage. So, for the sake of hassle-free remote control and your independence, take a moment to remove those batteries before you clean.
How Do I Dry the Remote After Cleaning?
After cleaning your remote, you’ll want to use gentle drying techniques to keep it safe. Pat it dry with a soft, lint-free cloth to absorb moisture without causing damage. Avoid using a hairdryer or placing it in direct sunlight, as heat can harm the internal components. Let your remote air dry fully before reinserting the batteries. This careful remote care guarantees your device stays functional and ready for your next adventure.