Removing Carpet From Window Effectively
To remove carpet near a window effectively, start by cutting neatly along the window frame with a sharp utility knife to avoid damaging underlying surfaces. Use pliers and a pry bar to loosen carpet edges gently, and carefully pry up tack strips and staples, guaranteeing you don’t harm the subfloor or window trim. Remove any carpet padding and adhesive residue with appropriate tools and cleaners. Thorough preparation and attention to detail will guarantee a clean removal and protect window integrity. Explore further steps to complete the process smoothly.
Assessing the Carpet and Window Area

Before you begin removing carpet from the window area, you’ll need to carefully assess both the carpet and the surrounding window structure. Start with a thorough carpet inspection, checking for any damage, adhesive types, or padding beneath that could affect removal. Note areas where the carpet meets the window frame to identify any tight seams or hidden fasteners. Simultaneously, take precise window measurements, including height, width, and depth of the frame. This data guarantees you understand how the carpet interacts with the window’s edge and helps anticipate challenges during removal. Accurate window measurements also inform any subsequent repair or replacement work. This initial assessment is critical; it empowers you with detailed knowledge, enabling you to remove the carpet efficiently and maintain the integrity of the window area.
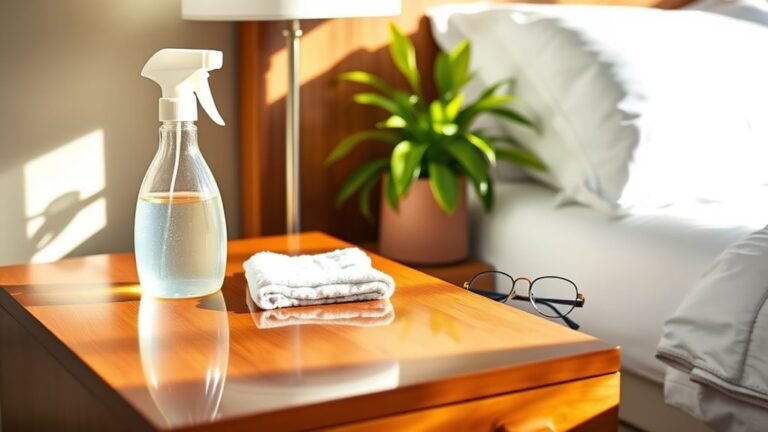
Gathering Necessary Tools and Materials
Before starting, you’ll need a checklist of essential tools like a utility knife, pry bar, and adhesive remover. Selecting the right materials guarantees efficient removal without damaging the window frame. Don’t forget to gather safety gear such as gloves and protective eyewear to prevent injuries during the process.
Essential Tools Checklist
Although removing carpet from a window area might seem straightforward, having the right tools on hand will streamline the process and prevent damage. To execute effective carpet removal techniques, you’ll need a utility knife with a sharp blade for precise cuts, pliers to grip and pull carpet sections, and a pry bar to lift stubborn edges without harming window trim. Don’t forget a heavy-duty scraper to remove adhesive residue and a putty knife for delicate areas near the window. Protective gloves guarantee safety while handling rough materials. Additionally, a vacuum or broom is essential to clean debris as you work. Considering window area considerations, these tools enable you to maintain structural integrity and finish efficiently, granting you control and freedom throughout the removal process.
Material Selection Tips
Having the right tools ready sets the stage, but selecting appropriate materials for carpet removal around a window is equally important. Different carpet types require specific handling to avoid damage to underlying flooring options. You’ll want materials that adapt well to the structure and condition of your window area.
Consider these essential materials:
- Heavy-duty utility knife for precise carpet cutting
- Pry bar for lifting tack strips without harming the floor
- Adhesive remover suitable for residual carpet glue
- Replacement flooring materials compatible with your existing floor
- Protective sheeting to safeguard window sills and frames during removal
Choosing materials based on carpet types and flooring options guarantees a smooth process, preserving your space’s integrity and easing shift to new flooring.
Safety Gear Requirements
Since carpet removal involves sharp tools and potential exposure to dust and adhesives, you’ll need specific safety gear to protect yourself effectively. Start with safety goggles to shield your eyes from dust particles and accidental splashes of adhesive solvents. Protective gloves are essential to prevent cuts from sharp tools and to minimize skin contact with irritating substances. Choose gloves made from durable, puncture-resistant materials for maximum protection. Additionally, consider wearing a dust mask to avoid inhaling airborne fibers or chemical fumes. Proper footwear with slip-resistant soles will enhance stability during the removal process. By equipping yourself with these safety essentials, you maintain control and reduce injury risk, allowing you the freedom to work efficiently and confidently throughout the carpet removal task. Prioritize safety to guarantee a smooth, hazard-free experience.
Preparing the Room for Carpet Removal
Before you start removing carpet from a window area, you’ll need to prepare the room to secure safety and efficiency. Assess the room layout and plan your furniture arrangement to create ample workspace and prevent damage. Clear the area around the window thoroughly to avoid obstructions.
- Remove or relocate furniture to a different room or center it away from the window.
- Protect immovable items and surfaces with drop cloths or plastic sheeting.
- Ascertain adequate lighting to spot carpet edges and fasteners clearly.
- Open windows or use ventilation to reduce dust buildup.
- Keep tools and safety gear within easy reach for efficient workflow.
Proper preparation streamlines the removal process and safeguards your belongings, giving you freedom to work efficiently and safely.
Cutting and Loosening the Carpet Near the Window

You’ll need a sharp utility knife and a pair of pliers to effectively cut and loosen the carpet edges near the window. Start by scoring the carpet along the window frame, applying steady pressure to avoid damaging the underlying surface. Then, use the pliers to gently pull and separate the carpet from the tack strips, ensuring clean removal without tearing.
Tools for Carpet Cutting
Three essential tools will help you efficiently cut and loosen carpet near the window: a utility knife with a sharp blade, a pair of heavy-duty scissors, and a pry bar or flathead screwdriver. These tools allow precise carpet cutting along edges, especially where window treatments meet the floor. For clean removal, you’ll also need:
- Measuring tape to mark cut lines accurately
- Knee pads for comfort during detailed work
- Gloves to protect your hands from sharp edges
- A straight edge or ruler for guiding cuts
- A dust mask to avoid inhaling fibers
Using these tools correctly guarantees you maintain control and achieve smooth carpet removal without damaging window frames or treatments.
Techniques to Loosen Edges
Having gathered the right tools, you can now focus on carefully cutting and loosening the carpet edges near the window. Start by using a sharp utility knife to score along the perimeter where the carpet meets the molding or wall base. This precise cut prevents unintended carpet stretching and damage to underlying flooring. Next, employ an edge-lifting tool or flat pry bar to gently lift the carpet edges, creating enough space to access the tack strips or adhesive beneath. Take care to lift evenly, avoiding sudden pulls that cause tearing. Gradual edge lifting enables you to detach the carpet cleanly without compromising carpet integrity. Mastering these techniques guarantees controlled carpet stretching and removal near windows, granting you freedom to proceed efficiently with carpet extraction or replacement.
Removing Carpet Tack Strips and Staples
Begin by carefully prying up the carpet tack strips using a pry bar or a flathead screwdriver, taking care not to damage the subfloor. Tack strip removal requires patience to avoid splintering wood or creating uneven surfaces. Once strips are free, focus on staple extraction; use needle-nose pliers or a staple remover to pull out embedded staples. Work systematically along the edges to verify complete removal.
Carefully pry up tack strips and methodically remove staples to protect the subfloor and ensure a smooth surface.
- Wear protective gloves and safety glasses
- Use leverage to minimize subfloor damage
- Remove staples in the direction they were driven
- Dispose of tack strips and staples safely to prevent injury
- Inspect the subfloor for remaining fasteners before proceeding
This method guarantees a clean foundation, essential for your next flooring choice and ultimate freedom in redesign.
Handling Carpet Padding and Residue

Although the carpet tack strips and staples are removed, you’ll still need to address the carpet padding and any adhesive residue left behind. Start by carefully pulling up the carpet padding; if it’s deteriorated, wear gloves to prevent irritation. For carpet padding disposal, check local regulations to guarantee proper handling, especially if it contains synthetic materials. Next, focus on adhesive residue removal: use a scraper or putty knife to gently lift stubborn spots. For stubborn adhesive, apply a commercial adhesive remover or a mixture of warm water and mild detergent, letting it soak briefly before scrubbing with a stiff brush. Avoid harsh chemicals that could damage the window frame. By methodically removing padding and residue, you guarantee a clean, smooth base, preparing your window area for subsequent restoration or refinishing steps.
Cleaning the Window Ledge and Surrounding Surfaces
Before reinstalling any materials, you’ll need to thoroughly clean the window ledge and surrounding surfaces to guarantee proper adhesion and finish. Proper window cleaning and surface preparation are essential to prevent future peeling or mold growth. Start by removing dust, dirt, and any adhesive residue left from the carpet installation. Use a vacuum with a brush attachment for loose debris, then wipe surfaces with a mild detergent solution. For stubborn grime, a gentle scrubbing pad works well without damaging the surface. Finally, dry everything completely to avoid moisture trapping.
- Vacuum dust and debris from ledge and frame
- Wipe surfaces with a mild detergent solution
- Scrub stubborn residue gently
- Rinse with clean water to remove cleaning agents
- Ascertain all areas are fully dried before proceeding
Repairing Any Damage to Walls or Window Frame
Once the window ledge and surrounding surfaces are clean and dry, you’ll need to assess any damage to the walls or window frame caused by carpet removal. Proper wall repair and frame restoration guarantee structural integrity and aesthetic freedom. Identify cracks, gouges, or loose trim. Use spackle or wood filler for minor defects, sanding smooth once dry. For frame restoration, tighten or replace screws and repaint as needed.
| Damage Type | Recommended Repair | Tools/Materials |
|---|---|---|
| Small wall cracks | Spackle + sandpaper | Putty knife, sandpaper |
| Gouges in wall | Joint compound | Drywall knife |
| Loose trim | Reattach with screws | Screwdriver, screws |
| Frame scratches | Wood filler + paint | Wood filler, paintbrush |
| Paint chipping | Sand + repaint | Sandpaper, paint |
Accurate restoration liberates you from future issues.
Tips for Installing New Flooring or Finishing Touches
When you’re ready to install new flooring or apply finishing touches, confirming the surface is perfectly prepared is critical for a lasting result. Proper substrate leveling and moisture control prevent future damage, regardless of the flooring options you select. Focus on precision during measurement and cutting to achieve clean edges, especially near window frames.
Consider these tips for ideal results:
- Choose flooring options compatible with room conditions and usage.
- Use high-quality underlayment to enhance durability and comfort.
- Seal gaps around window frames to prevent drafts and moisture intrusion.
- Install trim or baseboards precisely to conceal expansion gaps.
- Apply finishing touches like paint or sealant evenly for a polished appearance.
Following these steps confirms your new floor and finishing touches offer both freedom in design and long-term performance.
Frequently Asked Questions
Can Removing Carpet Affect Window Insulation?
Yes, removing carpet near your window can affect thermal performance. Carpets often act as an additional barrier, reducing air leakage and helping maintain indoor temperatures. When you remove the carpet, you might inadvertently increase drafts or cold spots, compromising insulation. To maintain energy efficiency, guarantee window seals are intact and consider adding weatherstripping or insulated curtains. That way, you keep your space comfortable without sacrificing freedom in your home design choices.
How to Prevent Dust From Spreading During Carpet Removal?
To control dust and maintain air quality during carpet removal, you should seal off the work area using plastic sheeting and tape to prevent dust from spreading. Use a vacuum with a HEPA filter continuously while pulling up carpet sections. Wearing a dust mask or respirator protects your lungs, and dampening the carpet slightly can reduce airborne particles. These steps guarantee a cleaner environment, letting you work freely without compromising indoor air quality.
Are There Eco-Friendly Ways to Dispose of Old Carpet?
Think of your old carpet as a worn-out map guiding you to greener pastures. You’ve got recycling options that break down synthetic fibers into raw materials, reducing landfill waste. Also, donation resources exist—nonprofits or community centers might welcome usable carpet pieces, extending their life. By choosing these eco-friendly disposal methods, you’re not just freeing space; you’re liberating the planet from unnecessary waste, embracing sustainability with precision and purpose.
Can Carpet Removal Damage Window Blinds or Curtains?
Yes, carpet removal can potentially damage your window blinds or curtains if you’re not careful. To avoid this, guarantee blinds protection by securely fastening or temporarily removing them. For curtain care, gently tie back curtains to prevent snagging or tearing during the process. Taking these precautions lets you maintain your freedom to work efficiently without risking damage to your window treatments, preserving both function and aesthetics.
How Long Does Carpet Removal Near Windows Typically Take?
When it comes to carpet removal timeline, you’ll find it’s not always a walk in the park. The duration depends on factors influencing duration like carpet size, adhesive strength, and tools used. Typically, for a window-adjacent area, it might take a few hours to half a day. You can speed things up with proper prep and technique, giving you the freedom to enjoy your refreshed space sooner.