Top 10 Tips for Cleaning Ceilings
To clean ceilings effectively, start by choosing the right tools like soft brushes or microfiber cloths with extendable handles. Dust regularly using vacuum attachments or microfiber dusters to prevent buildup. Use gentle cleaners such as diluted vinegar or mild soap, testing any solution on a small spot first to avoid damage. Protect your furniture and floors with drop cloths, and handle stains carefully using baking soda paste. Avoid excessive moisture and inspect ceilings for damage frequently. These steps help maintain a fresh, lasting ceiling finish—and more insights await.
Choose the Right Cleaning Tools

To clean your ceilings effectively, you need the right tools tailored to the surface and type of dirt. Start with cleaning brushes that have soft bristles if you’re dealing with textured or painted ceilings; they gently dislodge dirt without damaging the finish. For smooth ceilings, microfiber cloths are ideal—they trap dust and grime efficiently while being gentle enough to avoid streaks. Choose extendable handles for both tools to reach high areas safely and comfortably. Avoid abrasive materials that could scratch or remove paint. By selecting cleaning brushes and microfiber cloths suited to your ceiling’s condition, you maintain its integrity and achieve a thorough clean. This methodical approach gives you freedom to tackle ceiling cleaning confidently and efficiently.
Dust Ceilings Regularly
Once you’ve selected the proper tools for your ceiling type, maintaining cleanliness becomes more manageable by dusting regularly. Frequent dusting prevents dust accumulation, which can lead to discoloration and degrade ceiling materials over time. Use a microfiber duster or a vacuum with a soft brush attachment to gently remove particles without damaging the surface. Set a routine—ideally every few weeks—to guarantee consistent ceiling maintenance, especially in high-traffic or dusty areas. This proactive approach not only preserves your ceiling’s appearance but also improves air quality by reducing airborne dust. By staying methodical and attentive, you’ll extend the lifespan of your ceilings while enjoying the freedom of a clean, fresh environment. Regular dusting simplifies future cleaning tasks and keeps your home looking its best.
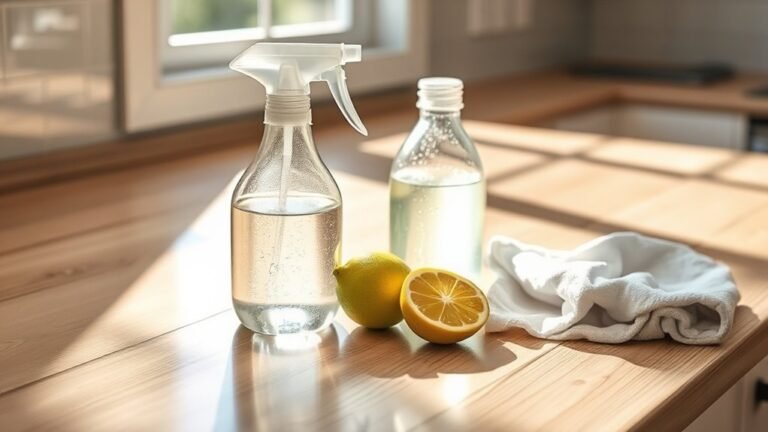
Use Gentle Cleaning Solutions
Although ceilings might seem sturdy, harsh chemicals can quickly damage their finish or texture. To protect your ceiling’s appearance, opt for gentle cleaning solutions that won’t compromise its integrity. Natural cleaners like diluted vinegar or mild soap mixed with water offer effective, eco friendly options that are safe for most surfaces. These solutions break down grime without harsh abrasives or toxins. When using natural cleaners, apply them carefully with a soft cloth or sponge, avoiding excessive moisture that might cause water stains or damage. Choosing eco friendly options also helps maintain indoor air quality and reduces environmental impact. By selecting gentle, natural solutions, you preserve both your ceiling’s look and your freedom to maintain a safe, healthy home environment.
Test Cleaners on a Small Area First
Why should you test cleaning solutions on a small, inconspicuous area of your ceiling before proceeding? It’s essential to guarantee surface compatibility and avoid damage. Different cleaning methods interact uniquely with various ceiling materials, so a quick test protects your ceiling’s finish and integrity. Here’s why you should always test first:
- Verify the cleaner won’t discolor or stain the surface
- Confirm there’s no adverse reaction like bubbling or peeling
- Assess how effective the method is on your specific dirt type
- Prevent wasting time and effort on ineffective solutions
- Maintain the ceiling’s original texture and appearance
Protect Furniture and Floors

After confirming your cleaning solution is safe for your ceiling, the next step is to protect the furniture and floors beneath. Start by moving smaller pieces of furniture out of the room or into the center, away from the walls. Use sturdy furniture covers to shield sofas, chairs, and tables from drips and dust. For floor protection, lay down heavy-duty drop cloths or plastic sheeting, guaranteeing they extend beyond the cleaning area to catch any splashes. Secure the edges with painter’s tape to prevent slipping. This methodical preparation not only preserves your belongings but also gives you freedom to work confidently without worrying about damage. Taking these preventive measures guarantees a smooth cleaning process while maintaining the integrity of your space.
Clean Popcorn Ceilings Carefully
Since popcorn ceilings are textured and delicate, cleaning them requires extra caution to avoid damage. The popcorn texture can easily crumble if handled roughly, so you’ll want to use gentle cleaning techniques to maintain its integrity. Here’s how to proceed:
Popcorn ceilings are delicate; clean gently to prevent crumbling and preserve their textured finish.
- Use a soft brush attachment on your vacuum cleaner to remove dust without disturbing the texture.
- Lightly mist the surface with water from a spray bottle to loosen dirt without soaking it.
- Gently wipe with a microfiber cloth or sponge, avoiding excessive pressure.
- Avoid harsh chemicals or abrasive tools that can strip or damage the popcorn texture.
- Test any cleaning solution on a small, inconspicuous area first to verify it won’t cause discoloration.
Remove Stains With Baking Soda Paste
While gentle cleaning helps maintain popcorn ceilings, some stubborn stains might need a more targeted approach. For effective stain removal, you can create a baking soda paste by mixing baking soda with a small amount of water until it forms a thick consistency. Apply the paste directly onto the stained area using a soft cloth or sponge, gently dabbing rather than scrubbing to avoid damaging the texture. Let the paste sit for about 10 to 15 minutes to break down the stain. Afterward, wipe the area clean with a damp cloth, removing all residue. This method is safe, non-toxic, and preserves your ceiling’s finish while tackling stains effectively. Using baking soda for stain removal gives you a natural, efficient way to refresh your ceiling without harsh chemicals.
Use a Ladder Safely
Whenever you’re cleaning ceilings, using a ladder safely is essential to prevent accidents and guarantee stability. To maintain ladder stability and proper ladder placement, follow these key steps:
- Choose a ladder that suits your ceiling height and task.
- Place the ladder on a flat, stable surface; avoid slippery or uneven areas.
- Confirm the ladder’s feet are secured, using anti-slip devices if needed.
- Position the ladder at the correct angle—about 75 degrees—for ideal support.
- Always face the ladder while climbing and avoid overreaching to maintain balance.
Avoid Excessive Moisture
After confirming your ladder is stable and secure, the next step is to be mindful of the moisture you use when cleaning ceilings. Excessive moisture can damage various ceiling materials, leading to warping, staining, or mold growth. You should always apply water or cleaning solutions sparingly, using a well-wrung cloth or sponge rather than spraying directly. This approach guarantees precise moisture control, preventing saturation. Different ceiling materials, such as drywall, plaster, or wood, react differently to moisture, so tailor your technique accordingly. For example, avoid soaking drywall, which is highly absorbent, and opt for minimal dampness on wood to preserve its finish. By carefully managing moisture, you maintain the ceiling’s integrity, avoid costly repairs, and enjoy the freedom of a clean, healthy space without damage.
Maintain Ceilings With Regular Inspections
You should regularly inspect your ceilings to catch water damage before it worsens. Pay close attention to any discoloration or damp spots that could indicate leaks. Early identification of cracks allows you to address structural issues promptly and prevent costly repairs.
Check for Water Damage
Although water damage might not be immediately visible, regularly inspecting your ceilings can help you catch early signs before they worsen. You want to be proactive in spotting water stains and ceiling leaks, as these issues can lead to costly repairs if ignored. When checking for water damage, focus on:
- Discoloration or yellowish water stains on the ceiling surface
- Peeling or bubbling paint, indicating moisture beneath
- Damp or musty odors signaling hidden leaks
- Soft or sagging ceiling areas that feel spongy to the touch
- Visible ceiling leaks after heavy rain or plumbing use
Identify Cracks Early
Since cracks can develop gradually and worsen over time, identifying them early is essential to maintaining your ceiling’s integrity. You should perform routine inspections focused on crack detection, paying close attention to hairline fractures and any changes in existing fissures. Use a flashlight at an angle to highlight imperfections that might be missed under normal lighting. Early intervention is key—addressing minor cracks promptly prevents them from expanding and causing structural damage. Taking notes or photos during inspections helps you monitor progression and decide when repairs are necessary. By staying vigilant and methodical, you preserve your ceiling’s strength and appearance, ensuring safety and freedom from costly restorations later on. Regular crack detection is a small effort that offers significant long-term benefits for your home.
Frequently Asked Questions
How Often Should Professional Ceiling Cleaning Be Scheduled?
Did you know that indoor air quality can improve by up to 50% with regular ceiling cleaning? When considering frequency recommendations, most experts suggest scheduling professional cleaning every 2 to 3 years. However, cleaning intervals may vary based on factors like location, pollution levels, and ceiling material. You’ve got the freedom to tailor these intervals to your environment, ensuring a healthier, fresher space without overdoing it or neglecting necessary maintenance.
Can Ceiling Cleaning Improve Indoor Air Quality?
Yes, ceiling cleaning can improve indoor air quality greatly. When you remove dust accumulation, you reduce airborne particles that can trigger allergies or respiratory issues. Also, regular cleaning helps prevent mold growth since mold thrives in neglected, damp areas. By keeping your ceilings clean, you’re actively maintaining a healthier environment, giving you the freedom to breathe easier and enjoy your space without worrying about hidden contaminants affecting your well-being.
Are There Specific Ceiling Types That Require Special Cleaning Methods?
Yes, certain ceiling types need special care. For acoustic tiles, you’ll want to avoid excessive moisture since it can damage them—use a dry or slightly damp cloth instead. Textured ceilings require gentle cleaning to preserve their patterns; a soft brush or vacuum with a brush attachment works best. By tailoring your methods, you’ll keep these ceilings clean without compromising their material, giving you freedom to maintain your space confidently.
What Are the Signs Ceilings Need Repainting After Cleaning?
You’ll know your ceiling needs repainting after cleaning when you spot fading paint or water stains that won’t budge. These signs indicate the surface’s protective layer has worn down, leaving it vulnerable. If the paint looks patchy or dull despite a thorough wash, it’s time to refresh. Addressing these issues promptly not only restores the ceiling’s appearance but also preserves its integrity, giving you the freedom to enjoy a clean, vibrant space.
Is Ceiling Cleaning Safe During Allergy Season?
When it comes to ceiling cleaning during the season of heightened sensitivities, you’ll want to tread carefully. Allergy triggers often lurk in dust and mold, so taking cleaning precautions is vital. Wear a mask and use gentle, non-irritating products to minimize airborne particles. Guarantee proper ventilation to keep your space fresh. With the right approach, you can maintain your ceilings safely without compromising your comfort or freedom.