Top 10 Tips for Cleaning Remote
To clean your remote, first gather soft microfiber cloths, cotton swabs, and 70% isopropyl alcohol. Always remove the batteries to avoid damage. Dust with a dry cloth and use compressed air to blow out debris. Disinfect with a damp cloth—never soak it. Clean between buttons carefully, and if you want a deep clean, gently disassemble it, clean parts, and dry thoroughly before reassembling. Keeping a regular cleaning routine helps maintain its function; there’s more to discover about each step.
Gather the Necessary Cleaning Supplies

Before you start cleaning your remote, make sure you have the right supplies on hand. Having the proper cleaning tools makes the job easier and more effective, giving you the freedom to maintain your devices without hassle. You’ll want a soft microfiber cloth to avoid scratches, cotton swabs for tight spaces, and a gentle cleaning solution like isopropyl alcohol diluted with water. Avoid harsh chemicals that could damage your remote. Considering cleaning frequency is important too; regularly wiping down your remote prevents buildup and keeps it hygienic. By gathering the right tools before you begin, you empower yourself to keep your remote in top shape on your own terms—no need to wait for professionals or waste time with ineffective methods.
Remove Batteries Before Cleaning
Before you start cleaning your remote, always remove the batteries to prevent electrical damage. This step also helps avoid corrosion risks from any moisture. Plus, it makes handling the remote safer while you clean.
Prevent Electrical Damage
Although it might seem like a small step, removing the batteries from your remote before cleaning is essential to prevent electrical damage. This simple action guarantees electrical safety by cutting power flow, reducing the risk of short circuits while you wipe away dirt or moisture. When you take out the batteries, you’re protecting the remote’s internal components from unintended electrical contact that could cause permanent damage. It also gives you the freedom to clean more thoroughly without worry. Prioritizing damage prevention means your remote stays functional longer, saving you from replacing it prematurely. So, before you start cleaning, always pop out those batteries—it’s a quick habit that safeguards your device and keeps your entertainment running smoothly.
Avoid Corrosion Risks
If you want to avoid corrosion inside your remote, removing the batteries before cleaning is a must. Leaving batteries in during cleaning exposes them to moisture, which can trigger corrosion and damage the contacts. For effective corrosion prevention, take out the batteries and set them aside in a dry place. This simple step not only protects your remote’s internal components but also supports proper battery maintenance, extending their lifespan. After cleaning, check the battery terminals for any signs of rust or residue and wipe them gently if needed. By handling your remote this way, you’re ensuring it stays functional and free from corrosive damage, giving you the freedom to enjoy your devices without interruptions or costly repairs.
Ensure Safe Handling
To keep yourself safe and protect your remote, you’ll want to remove the batteries before you start cleaning. This simple step guarantees safe handling by preventing accidental short circuits or battery leaks that could damage your device or harm you. Without batteries inside, you’re free to clean every nook without worrying about electrical issues or corrosion risks. Prioritizing remote safety means treating your device with care, allowing it to last longer and function smoothly. So, always take a moment to pop out those batteries before wiping down your remote. It’s a small action that assures safety and gives you peace of mind, letting you enjoy the freedom of a clean, fully operational remote without any hidden hazards.
Use a Soft, Dry Cloth for Dusting
You’ll want to use a soft, dry cloth to gently dust your remote without causing scratches. Avoid any moisture that could seep inside and damage the electronics. Using the right materials keeps your remote clean and safe.
Choose Gentle Materials
Many remote controls have delicate surfaces that can easily get scratched or damaged. To keep your remote looking and functioning like new, always choose gentle materials when cleaning. Opt for soft, gentle fabrics like microfiber cloths that won’t abrade the surface. Avoid harsh cleaning agents, as they can strip away protective coatings or leave residue. Instead, stick to mild, non-abrasive options if you need to use any cleaning agents at all. Using the right materials gives you the freedom to clean without worrying about causing harm. By handling your remote with care, you maintain its longevity and reliability, so it stays in your hands for the long haul, free from unnecessary wear or damage.
Avoid Moisture Damage
Choosing gentle materials is just the first step in protecting your remote control. To truly avoid moisture damage, you need to master moisture prevention with careful cleaning habits. Use a soft, dry cloth for dusting—never damp or wet—since excess moisture invites damage that’s hard to undo. Here’s how you can take control:
- Always dust off your remote with a microfiber cloth to catch particles without soaking it.
- Keep liquids away during cleaning to prevent accidental spills.
- Store your remote in a dry spot, avoiding humid environments that encourage moisture buildup.
Apply Isopropyl Alcohol for Disinfecting
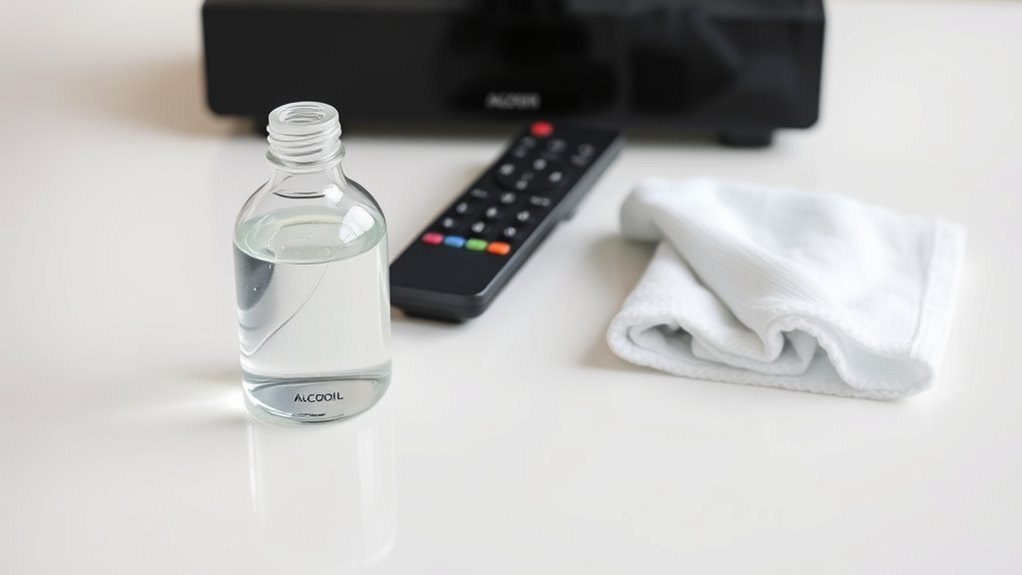
Although it might seem simple, applying isopropyl alcohol correctly is key to effectively disinfecting your remote. You want to enjoy the freedom of a clean device without risking damage. Start by dampening a soft cloth with isopropyl alcohol—avoid soaking it, since excess liquid can harm electronics. The isopropyl alcohol benefits you by quickly killing bacteria and viruses without leaving residue or moisture behind. Gently wipe down every surface of your remote to guarantee thorough disinfecting. This method is quick, efficient, and lets you take control of your environment. Remember, using the right concentration (usually 70%) maximizes effectiveness while protecting your remote. Embrace this straightforward step, and you’ll keep your remote hygienic and ready for your next binge-watching session or gaming marathon.
Clean Between Buttons With a Toothpick or Cotton Swab
When cleaning between the buttons, choose a toothpick or cotton swab that won’t scratch the surface. Be gentle to avoid pushing dirt further in or damaging the buttons. Taking care with your tools helps keep your remote working smoothly.
Choosing the Right Tool
If you want to get into those tight spaces between buttons, a toothpick or cotton swab is your best bet. Choosing the right cleaning tools can make your remote sparkling clean and give you the freedom to enjoy your devices without sticky buttons or grime. Here’s a quick guide for smart tool selection:
- Toothpick: Perfect for scraping out stubborn dirt without scratching surfaces.
- Cotton Swab: Ideal for gentle wiping and reaching tricky corners.
- Combination Use: Use both for a thorough clean—scrape then wipe.
Picking these simple, effective tools lets you conquer dirt effortlessly. When you have the right cleaning tools, maintaining your remote feels less like a chore and more like reclaiming your freedom to relax and enjoy technology.
Gentle Cleaning Techniques
Since dirt and grime often hide between your remote’s buttons, using gentle cleaning techniques with a toothpick or cotton swab helps you reach those tight spots without causing damage. You’ll want to dip your cotton swab lightly in gentle solutions like diluted isopropyl alcohol or mild soap water. This keeps the cleaning effective yet safe for delicate parts. Soft techniques let you loosen and lift debris carefully without scratching or forcing buttons. When using a toothpick, work slowly to avoid pressing too hard, which can harm the remote’s internals. These simple tools give you freedom to clean thoroughly without risking damage or overdoing it. By choosing gentle solutions and soft techniques, you maintain your remote’s function and lifespan while keeping it fresh and responsive.
Preventing Button Damage
Although it’s tempting to press hard while cleaning, you’ll want to handle your remote’s buttons with care to prevent damage. These buttons often feature durable materials designed for longevity, but excessive force can compromise button protection and functionality. To keep your remote in top shape:
- Gently use a toothpick to loosen dirt stuck between buttons without scratching the surface.
- Dip a cotton swab in rubbing alcohol, then carefully clean around each button to remove grime and oils.
- Avoid soaking the remote or using harsh chemicals that could degrade button materials.
With these simple steps, you maintain your remote’s freedom to function flawlessly, letting you enjoy effortless control without worry. Protecting your buttons means your device stays reliable longer, giving you more freedom to relax and enjoy.
Avoid Excessive Moisture to Prevent Damage
When cleaning your remote, you’ll want to steer clear of using too much moisture, as it can easily seep inside and damage the delicate electronics. Moisture damage is a common issue that can render your remote useless, so sticking to safe cleaning techniques is key. Instead of soaking your cloth or sponge, dampen it just enough to wipe away dirt and grime. Avoid spraying liquids directly onto the remote, as this invites moisture to penetrate internal circuits. Using minimal moisture not only protects the remote but also gives you freedom from worrying about costly repairs or replacements. By mastering these simple cleaning techniques, you’ll keep your remote functional and extend its lifespan without sacrificing ease or convenience.
Use Compressed Air to Remove Debris
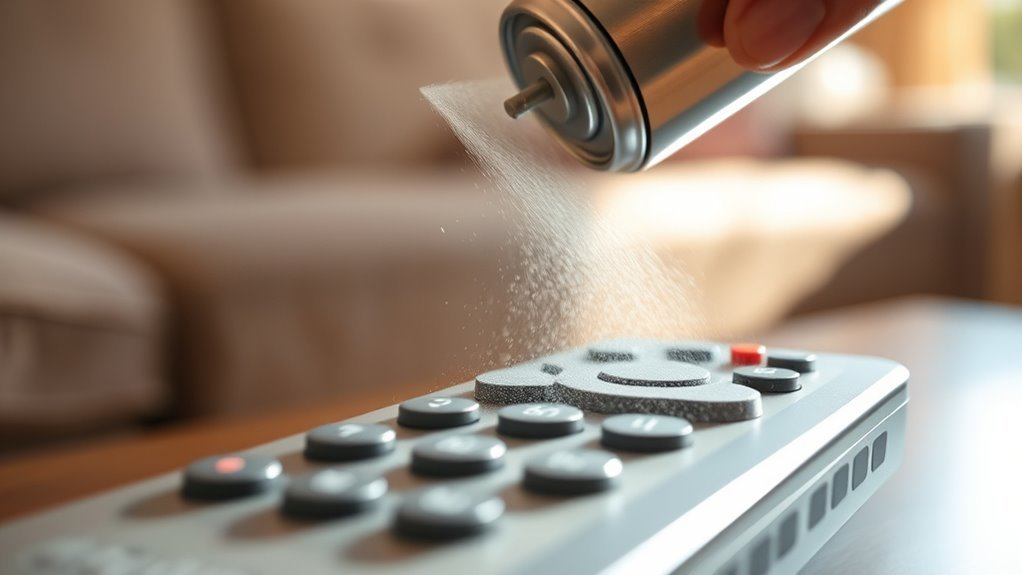
One effective way to keep your remote clean is by using compressed air to blow out dust and debris from hard-to-reach areas. This method offers a quick, mess-free debris removal that lets you regain control over your devices without hassle. Here’s why you’ll love it:
- Freedom from sticky buttons – Compressed air blasts away grime that blocks button movement, restoring smooth function instantly.
- No disassembly needed – You don’t have to take your remote apart, so you avoid the risk of damage or losing parts.
- Fast and effective – With just a few bursts, you clear out hidden dust, keeping your remote responsive and reliable.
Using compressed air for debris removal is a smart, liberating way to maintain your remote’s performance effortlessly.
Disassemble the Remote for Deep Cleaning (If Possible)
If you want to give your remote a thorough clean, disassembling it allows you to reach areas that compressed air can’t touch. When you disassemble remote controls, you gain freedom to deep clean every nook and cranny. Just be sure to keep track of all parts and screws.
| Step | Tool Needed | Tip |
|---|---|---|
| 1. Remove screws | Small screwdriver | Keep screws in a container |
| 2. Pry open case | Plastic pry tool | Avoid damaging plastic |
| 3. Separate buttons | None | Lay buttons out on soft cloth |
| 4. Clean parts | Cotton swabs, alcohol | Use gentle motions |
| 5. Inspect | Good lighting | Check for hidden grime |
Disassemble remote with care to enjoy a truly deep cleaning experience.
Dry the Remote Thoroughly Before Reassembling
Before putting your remote back together, you’ll want to make certain every component is completely dry to prevent damage or corrosion. Proper drying techniques are essential to keep your remote functioning smoothly and maintain your freedom from constant replacements.
Ensure every part is fully dry before reassembly to prevent damage and keep your remote working perfectly.
Here are three drying tips to free yourself from worries:
- Air-dry parts naturally for at least an hour in a warm, dry place—avoid direct sunlight to protect delicate components.
- Use a soft cloth or microfiber towel to gently absorb moisture without causing scratches.
- For stubborn moisture, try using a can of compressed air to blow out hard-to-reach spots.
Once everything is dry, follow precise reassembly tips to avoid forcing parts and guarantee your remote feels like new again. Taking these steps empowers you to enjoy uninterrupted control.
Establish a Regular Cleaning Routine
Making certain your remote is completely dry before reassembling helps prevent damage, but keeping it clean over time is just as important. To truly enjoy your freedom from sticky buttons and grime, you need to establish a frequency for cleaning that fits your lifestyle. Create a schedule—whether weekly, biweekly, or monthly—that’s easy to follow without feeling like a chore. By sticking to your routine, you avoid buildup and guarantee your remote stays responsive and fresh. This small effort saves you time and frustration later, letting you focus on what matters most. Remember, consistency is key: a little maintenance at regular intervals keeps your remote working smoothly and gives you one less thing to worry about.
Frequently Asked Questions
Can I Use Household Cleaners Instead of Isopropyl Alcohol?
You might be tempted to use household alternatives instead of isopropyl alcohol, but keep in mind their cleaning effectiveness can vary. While some household cleaners can remove grime, they may not disinfect as thoroughly or evaporate quickly like isopropyl alcohol. If you want freedom from harsh chemicals, choose gentle, alcohol-based wipes or sprays designed for electronics. This way, you get reliable cleaning without risking damage or residue buildup on your device.
How Often Should I Replace the Batteries in My Remote?
You should replace the batteries in your remote whenever you notice sluggish response or fading signals, as this helps maximize battery longevity. Regular remote maintenance, like removing batteries if you won’t use it for a while, can extend their life. Don’t wait for the remote to die completely—staying proactive lets you enjoy uninterrupted freedom to control your devices without hassle or delay. Keeping fresh batteries means seamless operation every time.
What Should I Do if My Remote Gets Wet?
If your remote gets wet, you’ll want to act fast to minimize water damage. First, remove the batteries immediately and dry the exterior with a soft cloth. Then, use drying techniques like placing your remote in a bowl of uncooked rice or silica gel packets to absorb moisture. Let it sit for at least 24-48 hours before testing it again. This way, you’ll give your remote the best chance to work freely again.
Are Silicone Covers Helpful for Keeping Remotes Clean?
You’d think silicone covers could turn your remote into an impenetrable fortress against dirt and spills—and honestly, they almost do! The silicone benefits are huge: they shield your remote from grime, scratches, and moisture, giving you true remote protection. If you want the freedom to use your remote anywhere without worry, a silicone cover’s a smart move. It keeps your device clean and ready, so you can enjoy hassle-free control wherever life takes you.
Can Cleaning Improve a Remote’S Signal Range or Performance?
You might not realize it, but regular remote maintenance can actually reduce signal interference, helping your remote work more reliably. Dust, grime, or sticky buttons can block signals or cause misfires, limiting your freedom to control devices smoothly. By keeping your remote clean, you guarantee it’s transmitting clearly, which can improve its signal range and overall performance. So, a little upkeep goes a long way in freeing you from frustrating glitches.