Weekly Cleaning Routine for Oven
To keep your oven in top shape, gather cleaning supplies like a sponge, gloves, and a suitable cleaner. Remove racks and drip pans, soaking them while wiping the interior with a damp cloth and mild detergent. Clean the oven door with a non-abrasive cloth and a baking soda mix for grease. Don’t forget to wipe the exterior weekly to avoid buildup. Following this routine boosts efficiency and extends oven life. You can explore more detailed tips to make it easier and effective.
Gather Your Cleaning Supplies

Before you begin cleaning your oven, gather all necessary supplies to streamline the process. Start with essential cleaning tools like a sturdy sponge, a scrub brush with firm bristles, and a microfiber cloth for wiping surfaces. You’ll also need gloves to protect your hands. Select effective detergents specifically designed for ovens; these will break down grease and burnt residues efficiently without harsh scrubbing. Avoid multipurpose cleaners that may leave residues or require excessive rinsing. If you prefer natural options, baking soda and vinegar work well for loosening grime. Having all supplies ready guarantees you won’t interrupt your workflow, letting you clean swiftly and thoroughly. This preparation grants you the freedom to maintain your oven regularly with minimal effort, keeping it in prime condition week after week.
Remove Oven Racks and Accessories
Once you’ve gathered your supplies, take out the oven racks and any accessories inside. Carefully slide each rack out, avoiding scratches or damage. Set them aside on a protective surface. Remove accessory trays, thermometers, or rotisserie parts as well. This step clears the interior, allowing thorough cleaning.
For efficient rack organization, consider stacking racks vertically or using a rack organizer designed for oven parts. This keeps them accessible and prevents misplacement. For accessory storage, designate a specific container or drawer, ensuring all pieces stay together and ready for use. Proper rack organization and accessory storage streamline your cleaning routine and maintain order in your kitchen. Taking these steps saves time and grants you freedom from clutter during your weekly oven care.
Wipe Down Oven Interior Surfaces

With the oven racks and accessories removed, you can focus on the interior surfaces. Effective oven surface maintenance begins by gently wiping down walls and the door with a damp cloth. Use a mild detergent for stubborn spots, avoiding abrasive tools to protect the finish. Follow these interior cleaning tips to keep your oven pristine and extend its lifespan:
| Step | Tool Needed | Tip |
|---|---|---|
| 1. Dust wipe | Dry microfiber cloth | Remove loose debris first |
| 2. Spot clean | Mild detergent | Apply to stains, wait 10 mins |
| 3. Scrub | Soft sponge | Avoid metal scrubbers |
| 4. Rinse | Damp cloth | Remove soap residue |
| 5. Dry | Dry towel | Prevent moisture buildup |
Routine care lets you enjoy a clean oven without hassle or harsh chemicals.
Clean Oven Racks Separately
Start by carefully removing the oven racks to avoid any damage. Soak them in a warm, soapy solution to loosen grime effectively. Once soaked, scrub the racks gently with a soft brush to clean every crevice thoroughly.
Remove Racks Carefully
Gently pull the oven racks out to avoid bending or damaging them. Prioritize rack safety by handling each rack with care, supporting its weight evenly to prevent warping. Avoid sudden movements or twisting as you slide the racks out, ensuring you maintain control throughout. If the racks feel stuck, don’t force them; instead, check for obstructions or use gentle wiggling to loosen them safely. Careful handling preserves the structural integrity of your racks, extending their usability and making cleaning more effective. Once removed, place the racks on a sturdy surface to prevent accidental drops or scratches. By practicing these precise steps, you maintain freedom from damage or injury and prepare your racks for thorough cleaning, enhancing your oven’s performance week after week.
Soak in Warm Solution
Two key ingredients—warm water and a mild detergent—create an effective solution for soaking your oven racks separately. Begin by filling a large basin or bathtub with this warm solution, ensuring the racks are fully submerged. The soaking benefits are clear: loosened grease and food residue become easier to remove, reducing the effort needed later. This method also protects the racks from harsh scrubbing, extending their lifespan. Let the racks soak for at least 30 minutes, or longer if heavily soiled. After soaking, you’ll find that residue has softened considerably, making subsequent cleaning steps quicker and more efficient. Using this warm solution approach not only simplifies your cleaning routine but also gives you more control and freedom to maintain your oven’s condition with minimal hassle.
Scrub With Gentle Brush
Once your oven racks have soaked long enough to loosen grime, you can move on to scrubbing them with a gentle brush. Focus on gentle cleaning to protect the rack’s finish while effectively removing residue. Use brush techniques that involve short, controlled strokes along the grooves and corners where buildup tends to accumulate. Avoid harsh scrubbing or abrasive tools, as these can damage the metal or coating. Rinse the racks thoroughly after scrubbing to wash away loosened debris and any cleaning solution. Dry them completely before placing them back in the oven. This methodical approach guarantees your oven racks remain clean without compromising their integrity, giving you the freedom to maintain your kitchen efficiently and confidently every week.
Address Oven Door and Glass
You’ll want to start by removing any grease build-up on the oven door to prevent stubborn stains. Use a suitable cleaner to carefully polish the glass surfaces, restoring their clarity. Regular attention here keeps your oven looking clean and guarantees you can easily monitor cooking progress.
Removing Grease Build-up
Although grease build-up on the oven door and glass may seem stubborn, addressing it regularly prevents stubborn stains and guarantees clear visibility. Start by applying a grease remover or a mixture of baking soda and water to the affected areas. Let it sit for 10–15 minutes to break down the grease. Then, use a non-abrasive sponge or cloth to gently scrub the surface, focusing on corners and edges where grease tends to accumulate. Rinse with a damp cloth to remove residues. For tougher spots, repeat the process or use a specialized oven cleaner following the manufacturer’s instructions. Incorporating these grease removal techniques into your weekly routine aligns with essential kitchen cleaning tips, helping you maintain a spotless oven door without sacrificing your time or freedom.
Polishing Glass Surfaces
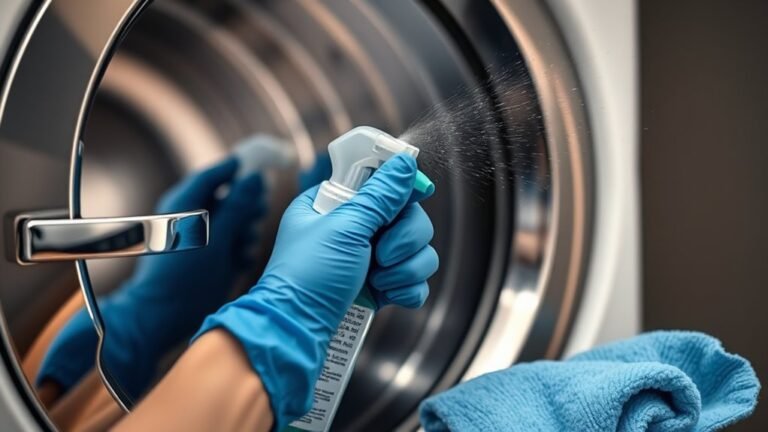
While removing grease build-up is essential, polishing the oven door and glass guarantees a streak-free, clear finish that enhances your oven’s appearance. Start by selecting the right glass cleaner options—opt for ammonia-free or vinegar-based solutions to avoid damage. Spray the cleaner evenly on the surface. Use a microfiber cloth, which is ideal for streak-free techniques, to wipe in circular motions. Avoid paper towels that can leave lint behind. For stubborn spots, gently scrub with a soft sponge before wiping clean. Always dry the glass thoroughly to prevent watermarks. This methodical approach guarantees your oven glass remains spotless and transparent, giving your kitchen a polished look while giving you the freedom to enjoy your clean, gleaming oven without residue or streaks.
Clean Oven Seals and Gaskets

Since oven seals and gaskets play an essential role in maintaining temperature and preventing heat loss, cleaning them regularly guarantees your oven operates efficiently. Start by inspecting the gasket for cracks, tears, or stiffness; these signs indicate the need for gasket replacement to maintain a proper seal. Use a damp cloth with mild soap to wipe down the seals gently, removing grease and debris without damaging the material. Avoid harsh chemicals or abrasive tools that could degrade the gasket. Regular oven seal maintenance not only preserves heat retention but also reduces energy consumption, giving you more freedom from costly repairs. By keeping your seals clean and intact, you ascertain consistent cooking results and extend your oven’s lifespan. Make this step a non-negotiable part of your weekly cleaning routine.
Clear and Clean Oven Drip Pans
Start by carefully removing the oven drip pans to avoid damaging them. Soak the pans in warm, soapy water to loosen baked-on grime. After soaking, scrub with a non-abrasive sponge, then rinse thoroughly before drying.
Removing Drip Pans
Begin by carefully sliding out the oven drip pans to avoid spilling any trapped grease or debris. Different drip pan types—such as aluminum, porcelain-coated, or disposable—require specific handling methods. To remove them effectively, follow these steps:
- Confirm the oven is cool to prevent burns or warping of pans.
- Gently lift the pan’s edges, avoiding force that could bend or damage it.
- Place the drip pans on a sturdy surface for inspection and cleaning.
Regular removal supports thorough maintenance, preventing buildup that could cause smoke or fires. Incorporate these maintenance tips: check for cracks, replace disposable pans weekly, and avoid abrasive tools on coated surfaces. Removing drip pans properly not only preserves your oven’s efficiency but also grants you the freedom to maintain a cleaner, safer cooking environment.
Soaking Techniques
Although oven drip pans can accumulate stubborn grease and food residue, soaking them properly makes cleaning much easier. You’ll want to select effective soaking methods and appropriate cleaning solutions to break down grime without damaging the pans. Start by filling a basin with hot water and adding a degreasing agent or baking soda for a natural option. Submerge the pans fully and let them soak for at least 30 minutes. Here’s a quick reference for soaking:
| Cleaning Solution | Soaking Time | Notes |
|---|---|---|
| Dish Soap + Hot Water | 30-60 minutes | Mild grease removal |
| Baking Soda + Water | 45 minutes | Natural, non-toxic |
| Vinegar + Water | 30 minutes | Cuts through tough stains |
| Commercial Degreaser | 20-30 minutes | Strong, follow label instructions |
These techniques free you from scrubbing strain and prepare pans for the next cleaning step.
Scrubbing and Rinsing
Once your oven drip pans have soaked sufficiently to loosen grime, you’ll want to scrub them carefully to remove any remaining residue. Employ effective scrubbing techniques by using a non-abrasive sponge or brush to avoid damaging the pans’ surface. Follow these steps for thorough cleaning:
- Scrub gently in circular motions to lift stubborn stains without scratching.
- Rinse the pans under warm running water, ensuring all soap and loosened debris are washed away.
- Dry completely with a clean cloth or let air dry to prevent rust.
Adopting these scrubbing techniques and rinsing methods guarantees your drip pans stay spotless and free from buildup, giving you the freedom to maintain your oven easily and efficiently each week.
Use Natural Cleaning Solutions
When tackling oven cleaning, using natural solutions not only reduces exposure to harsh chemicals but also offers effective grease and grime removal. You can rely on natural alternatives like a mixture of baking soda and water to create a gentle paste. Apply it to the oven’s interior surfaces and let it sit for 20 minutes before scrubbing. Vinegar, another eco friendly solution, works well to dissolve residue; just spray it over the baking soda paste and watch it fizz, loosening grime for easier cleaning. These natural alternatives provide a safe, non-toxic way to maintain your oven’s cleanliness without compromising your indoor air quality. Incorporating these methods into your routine lets you enjoy a fresh, clean oven while supporting your freedom from harmful chemical exposure.
Maintain the Oven Exterior
Keeping your oven’s interior spotless with natural solutions is just one part of maintaining overall cleanliness. To preserve your oven’s exterior shine and guarantee effective oven surface care, follow these steps:
- Wipe down the exterior with a damp microfiber cloth daily, targeting smudges and fingerprints to prevent buildup.
- Use a mild detergent or a vinegar-water solution weekly to clean stubborn grease without damaging the surface.
- Dry thoroughly with a soft cloth to avoid streaks and maintain that polished look.
Consistent attention to these details not only enhances your oven’s appearance but also extends its lifespan. By integrating this methodical exterior care into your routine, you’ll enjoy both a functional appliance and a kitchen that feels truly free of grime.
Schedule Your Weekly Cleaning Time
Although it might seem challenging to find time in your busy schedule, setting a specific day and time each week for oven cleaning guarantees the task doesn’t get overlooked. Establishing a consistent cleaning schedule streamlines your time management and prevents buildup that demands more effort later. Choose a moment when your kitchen is least active, such as early morning or late evening, to avoid interruptions. Use reminders or calendar alerts to reinforce this habit, ensuring it becomes automatic rather than an afterthought. By treating oven cleaning as a fixed appointment, you gain control over your environment without sacrificing freedom. This methodical approach lets you maintain a spotless oven effortlessly, freeing up time for what truly matters in your daily routine.
Frequently Asked Questions
How Often Should I Deep Clean My Oven Beyond Weekly Routines?
Think of your oven like a car—it needs oil changes beyond regular washes. For deep cleaning frequency, aim every 3-6 months, depending on use. This keeps grime from building up and maintains performance. Adjust cleaning schedules if you cook greasy or spill often. Sticking to this methodical approach frees you from stubborn messes and extends your oven’s life, giving you more freedom to enjoy cooking without constant worry.
Can I Use Commercial Oven Cleaners With Self-Cleaning Ovens?
You should be cautious about oven cleaner compatibility with self-cleaning ovens. Most commercial oven cleaners contain harsh chemicals that can damage the oven’s interior coating and impair self-cleaning efficiency. It’s best to rely on the self-clean cycle for routine cleaning, which uses high heat to burn off residues safely. If stubborn spots remain, use mild, non-abrasive cleaners specifically labeled safe for self-cleaning ovens to maintain your appliance’s freedom and longevity.
What Safety Precautions Should I Take When Cleaning the Oven?
You want to feel free, not trapped by oven fumes or burns. For oven safety, always guarantee good ventilation—open windows or turn on fans. Use gloves and eye protection to shield yourself from harsh cleaning chemicals. Choose proper cleaning tools like non-abrasive sponges to avoid damage. Never mix cleaners, and unplug or turn off your oven before starting. These steps keep you safe while maintaining your oven’s shine and your freedom.
How Do I Prevent Smoke or Odors During Oven Cleaning?
To prevent smoke or odors during oven cleaning, you’ll want to focus on odor elimination and smoke reduction. First, remove loose debris to minimize burning particles. Use a mild, non-toxic cleaner to avoid harsh fumes. Ventilate the area well by opening windows or turning on exhaust fans. Avoid high-temperature self-cleaning cycles if possible, as they can produce smoke. Regular cleaning keeps buildup low, helping you maintain a fresh, smoke-free environment.
Are There Any Cleaning Tips for Gas vs. Electric Ovens?
Cleaning gas and electric ovens is like tuning two different instruments—you’ll need specific cleaning methods for each. For gas ovens, avoid excessive water near burners and use non-abrasive cleaners to prevent damage. Electric ovens benefit from gentle scrubbing and avoiding harsh chemicals on heating elements. Regular maintenance tips include checking seals and wiping spills promptly. Tailoring your approach guarantees efficient cleaning while preserving your oven’s freedom to perform smoothly.

