How to Clean a Nectar Collector: A Step-by-Step Guide
Cleaning a nectar collector is straightforward and essential for maintaining its performance and longevity. By following a few simple steps, you can ensure that your device remains clean and free from residue. This guide will walk you through the best methods to effectively clean your nectar collector, keeping it in optimal condition for your next use.
Understanding Your Nectar Collector

A nectar collector typically consists of three main components: the mouthpiece, the body, and the tip. The mouthpiece is where you inhale the vapor, the body serves as the main structure of the collector, and the tip is heated to vaporize the concentrate. Understanding these parts is crucial, as each requires specific cleaning methods to ensure optimal performance.
Cleaning your nectar collector is not merely a matter of hygiene; it is vital for preserving the flavor of your concentrates. Residue buildup can alter the taste of your product and affect the overall experience. Additionally, a clean collector ensures that airflow is not restricted, allowing for better vapor production. Regular maintenance is essential to prolong the life of your device and enhance its functionality.
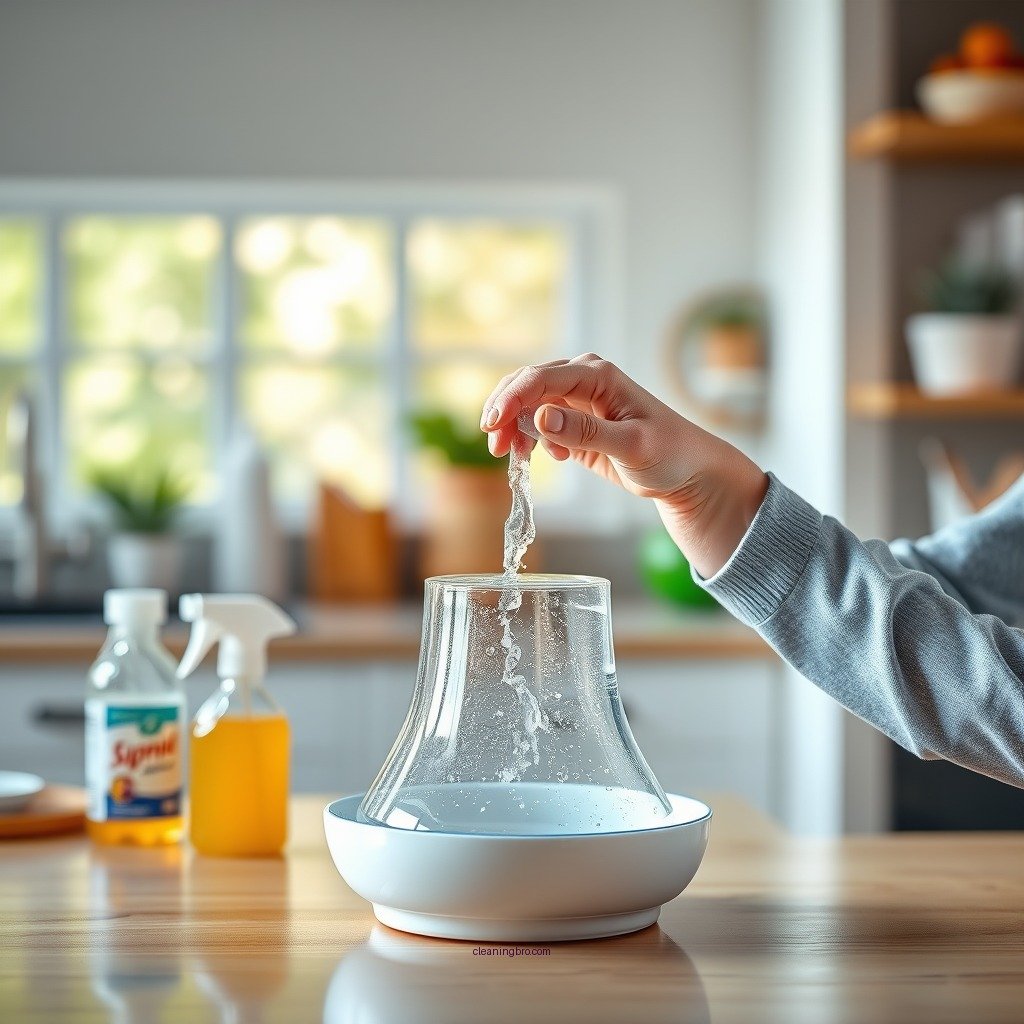
Materials Needed for Cleaning


To effectively clean your nectar collector, you will need the following materials:
– Isopropyl Alcohol (91% or higher): This is the most efficient cleaning agent for dissolving stubborn concentrates.
– Cotton Swabs: Useful for reaching small areas and detailed cleaning.
– Pipe Cleaners: Ideal for cleaning the insides of the body and mouthpiece.
– Hot Water: For rinsing and soaking.
– Container: A small dish or bowl to soak the parts in cleaning solution.
If you prefer alternative cleaning agents, consider using vinegar or specialized glass cleaners designed for smoking devices. However, these alternatives may not be as effective in removing heavy buildup compared to isopropyl alcohol.
Disassembling Your Nectar Collector

Disassembling your nectar collector should be done with care to avoid damaging delicate components. Follow these step-by-step instructions:
1. Remove the Tip: Gently twist and pull the tip away from the body. Be careful not to apply too much force, as this can break the tip.
2. Detach the Body: If your nectar collector has multiple sections, twist them apart. Be mindful of any seals or gaskets that may need to be preserved.
3. Take Off the Mouthpiece: Pull the mouthpiece away from the body, ensuring you do not bend or break it.
When handling these components, it is advisable to work on a soft surface or cloth to prevent accidental damage.
Cleaning the Body and Tip
Once disassembled, it’s time to clean the individual parts. Here’s a detailed method for cleaning the body and tip:
1. Soaking: Fill your container with isopropyl alcohol and submerge the body and tip. Allow them to soak for at least 30 minutes to loosen any residue.
2. Scrubbing: After soaking, use cotton swabs or pipe cleaners to scrub the insides of the body and tip. Pay special attention to any areas with visible buildup.
3. Rinsing: Thoroughly rinse each component under warm water to remove any leftover alcohol and residue. It’s essential to ensure that no cleaning agents remain, as they can affect the taste of your concentrates.
For particularly stubborn residue, you may need to repeat the soaking and scrubbing process.
Reassembling and Drying
After cleaning, it’s crucial to reassemble your nectar collector correctly:
1. Drying: Allow all components to air dry completely. This step is vital to prevent moisture buildup, which can lead to mold or unpleasant odors.
2. Reassembly: Once dry, carefully reattach the mouthpiece, body, and tip by reversing the disassembly steps. Ensure that each piece fits snugly but do not force them together.
Best practices for drying include placing the components on a clean, dry towel or rack where air can circulate freely.
Maintenance Tips for Longevity
To keep your nectar collector in top shape, consider the following maintenance tips:
– Regular Cleaning: Aim to clean your nectar collector after every few uses or whenever you notice a buildup of residue. Regular maintenance will keep it functioning effectively and preserve the flavors of your concentrates.
– Proper Storage: Store your nectar collector in a protective case or pouch to prevent accidental damage. Avoid placing heavy items on top of it.
– Handle with Care: When using or cleaning your nectar collector, handle it gently to avoid breaking the glass or other materials.
Implementing these practices can significantly extend the life of your nectar collector and enhance your overall experience.
Troubleshooting Common Issues
Sometimes, even with regular cleaning, you may encounter issues with your nectar collector. Here are some common signs that indicate it needs cleaning:
– Unpleasant Flavors: If you notice an off-putting taste, it’s likely due to residual concentrates.
– Reduced Vapor Production: If airflow seems restricted, a buildup of residue may be blocking the passage.
For persistent residue or unpleasant flavors that do not improve with regular cleaning, consider soaking the affected components longer or using a more potent cleaning solution.
Maintaining a clean nectar collector not only enhances your experience but also extends the life of your device. By following these steps, you can easily keep your collector in prime condition. For further information, consider exploring cleaning products or joining community discussions for additional tips.
Common Cleaning Agents for Nectar Collectors
| # | Cleaning Agent | Effectiveness | Safety |
|---|---|---|---|
| 1 | Isopropyl Alcohol | High | Safe with Rinsing |
| 2 | White Vinegar | Moderate | Safe |
| 3 | Baking Soda | Low | Safe |
| 4 | Glass Cleaner | Moderate | Use with Caution |
| 5 | Lemon Juice | Low | Safe |
| 6 | Salt and Water | Moderate | Safe |
| 7 | Specialized Cleaners | High | Safe with Rinsing |
Effectiveness of Cleaning Agents for Nectar Collectors
Comparing Cleaning Options for Nectar Collectors
| Feature | ⭐ Isopropyl Alcohol | Vinegar | Baking Soda |
|---|---|---|---|
| Effectiveness | High | Moderate | Low |
| Speed of Cleaning | Fast | Moderate | Slow |
| Safety | Safe with Rinsing | Safe | Safe |
| Residue Removal | Excellent | Good | Fair |
| Cost | Low | Low | Very Low |
| Availability | Widely Available | Widely Available | Commonly Found |
| Environmental Impact | Moderate | Low | Low |
| Ease of Use | Very Easy | Easy | Moderate |
| 🏆 Best For | Effective and Quick Cleaning | Natural Cleaning | Budget-Friendly Option |
In summary, keeping your nectar collector clean is essential for the best experience with your concentrates. By understanding the components, using the right cleaning materials, and following the cleaning steps outlined above, you can maintain your device’s performance and flavor quality. Regular maintenance not only enhances your sessions but also extends the lifespan of your collector. For further tips, consider engaging with community forums or exploring specialized cleaning products designed for nectar collectors.
Frequently Asked Questions
How often should I clean my nectar collector?
You should clean your nectar collector after every use to maintain optimal performance and flavor. Regular cleaning prevents residue buildup, ensuring a smoother experience and prolonging the life of your device. If you notice any discoloration or sticky residue, it’s a sign that a deep clean is necessary.
What is the best method to clean a nectar collector?
The best method to clean a nectar collector involves using isopropyl alcohol and coarse salt. Fill a container with isopropyl alcohol, add salt for abrasiveness, and submerge the collector. Shake gently to dislodge any buildup, then rinse thoroughly with warm water to remove any remaining alcohol and impurities.
Why is it important to clean my nectar collector regularly?
Regular cleaning of your nectar collector is crucial for maintaining the flavor and quality of your concentrates. Residue can alter taste and create harsh hits, diminishing your overall experience. Additionally, a clean collector reduces the risk of bacterial growth and ensures safe usage.
Which cleaning products are safe to use for a nectar collector?
Safe cleaning products for a nectar collector include isopropyl alcohol, vinegar, and specialized glass or pipe cleaners. Avoid harsh chemicals that could leave harmful residues. Always ensure that any cleaning solution is thoroughly rinsed off before using the collector again.
How can I prevent resin buildup in my nectar collector?
To prevent resin buildup in your nectar collector, consider using a silicone or quartz tip that is easier to clean than glass. Additionally, taking smaller dabs can minimize residue, and regular maintenance after each use will help keep your collector clean and functional. Using a dab mat can also help catch excess material and reduce mess.
References
- https://www.healthline.com/health/cleaning-tips
https://www.healthline.com/health/cleaning-tips - https://pubmed.ncbi.nlm.nih.gov/
https://pubmed.ncbi.nlm.nih.gov/ - Google Scholar Google Scholar
https://scholar.google.com/scholar?q=how+to+clean+a+nectar+collector - https://www.ncbi.nlm.nih.gov/pmc/articles/PMC7323036/
https://www.ncbi.nlm.nih.gov/pmc/articles/PMC7323036/ - https://www.sciencedirect.com/topics/earth-and-planetary-sciences/cleaning
https://www.sciencedirect.com/topics/earth-and-planetary-sciences/cleaning - https://www.bbc.com/news/health-51175834
https://www.bbc.com/news/health-51175834 - https://www.cdc.gov/healthywater/drinking/cleaning.html
https://www.cdc.gov/healthywater/drinking/cleaning.html - https://www.nature.com/articles/s41598-020-71016-9
https://www.nature.com/articles/s41598-020-71016-9 - Google Scholar Google Scholar
https://scholar.google.com/scholar?q=nectar+collector+cleaning - https://www.who.int/news-room/fact-sheets/detail/clean-water-and-sanitation
https://www.who.int/news-room/fact-sheets/detail/clean-water-and-sanitation


