How to Clean and Deodorize Your Remote
To clean and deodorize your remote, first remove the batteries to prevent damage. Use a soft microfiber cloth dampened with a 70% isopropyl alcohol and water solution to gently wipe surfaces, avoiding excess moisture near buttons. Employ cotton swabs for crevices and a soft brush for dust removal. Disinfect carefully with alcohol wipes, then air dry thoroughly before reassembling. Regular cleaning helps maintain hygiene and button function. For detailed methods and ongoing care tips, further guidance is available.
Gather Your Cleaning Supplies
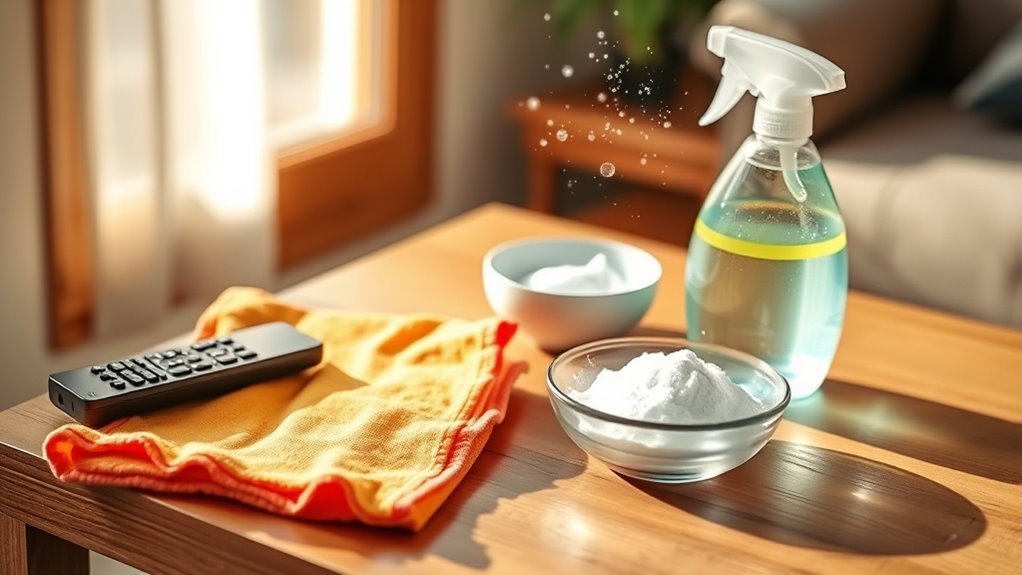
Before you begin cleaning your remote, you’ll need to gather specific supplies to guarantee an effective and safe process. Start by selecting appropriate cleaning tools such as soft microfiber cloths, cotton swabs, and a small brush to reach crevices. Disinfecting wipes are essential for removing germs and securing sanitization without damaging the remote’s surface. Avoid abrasive materials that could scratch or degrade the plastic casing. Additionally, have a small container of isopropyl alcohol (70% or higher) ready, as it evaporates quickly and disinfects efficiently. Ascertain your workspace is well-lit and ventilated to prevent inhaling fumes or missing spots. By preparing these supplies beforehand, you’ll maintain freedom from harmful residues and extend your remote’s lifespan through precise, controlled cleaning. It is also important to remove batteries before cleaning to prevent damage to the remote and ensure safety during the process.
Remove Batteries and Disconnect the Remote
To guarantee safety and prevent damage during cleaning, start by removing the batteries from your remote. This step is essential for battery safety and to avoid short circuits or corrosion while you work. Carefully open the battery compartment, noting the orientation of each battery to confirm correct reinstallation. If your remote has a detachable connection, disconnect it as specified in the manual to avoid stress on internal components. Removing power sources eliminates risks of accidental activation and protects delicate circuits during cleaning. Prioritize this step as part of regular remote maintenance to extend device lifespan. Handling your remote with care now grants you the freedom to clean thoroughly without worry, preserving its functionality and your peace of mind. Remember to avoid harsh chemicals and use gentle cleaning methods to prevent damage and maintain device longevity.
Dust Off Loose Debris

Start by gently brushing the remote’s surface and crevices with a soft bristle brush to dislodge dust and particles. Next, carefully shake the remote over a trash bin to remove any remaining loose debris. These steps help guarantee dirt doesn’t interfere with your cleaning process. Using microfiber cloths is an effective way to further remove dust without scratching the remote’s surface.
Use Soft Bristle Brush
One effective way to remove loose debris from your remote is by using a soft bristle brush. This tool offers several soft bristle brush benefits, including gentle yet thorough cleaning without scratching delicate surfaces or dislodging buttons. When selecting from cleaning brush types, choose one with fine, densely packed bristles designed for electronics. These brushes efficiently sweep dust and particles from crevices that cloths can’t reach. To maximize effectiveness, lightly brush across the remote’s surface and between buttons, allowing the bristles to loosen embedded debris. Avoid excessive pressure to maintain the remote’s integrity. Incorporating this method into your routine guarantees a cleaner device, enhancing both hygiene and functionality while preserving your freedom from frequent deep cleans or replacements.
Shake Out Loose Dirt
After loosening debris with a soft bristle brush, you’ll want to remove any remaining particles by shaking out your remote. Hold the remote firmly and invert it over a trash bin or cloth. Apply controlled, gentle shakes and taps to dislodge dirt accumulation trapped inside crevices and between buttons. This step is essential in remote maintenance, as accumulated dust and debris can impair button responsiveness and harbor bacteria. Avoid aggressive shaking that might damage internal components. If your remote has a removable battery cover, open it first to facilitate better clearance of particles. Regularly performing this simple action helps maintain peak device performance and extends its lifespan. Shaking out loose dirt is a practical, no-cost method that supports your freedom from frequent replacements or repairs.
Clean the Surface With a Gentle Solution
To effectively clean your remote’s surface, you’ll need a gentle solution that removes dirt without damaging delicate components. Opt for gentle cleaners like a diluted mixture of isopropyl alcohol (70%) and distilled water, which balances cleaning strength with surface protection. Avoid harsh chemicals or abrasive materials that could erode buttons or screen finishes. Lightly dampen a microfiber cloth with your solution—never soak it—to prevent moisture seeping into internal electronics. Wipe the remote systematically, applying minimal pressure to preserve its integrity. This method guarantees grime and oils lift effectively, maintaining your remote’s functionality and appearance. By choosing gentle cleaners and applying them carefully, you gain the freedom to maintain your device confidently without risking damage or voiding warranties. Establishing a regular disinfection routine helps prevent germ buildup and keeps your remote healthier over time.
Use Cotton Swabs for Hard-to-Reach Areas
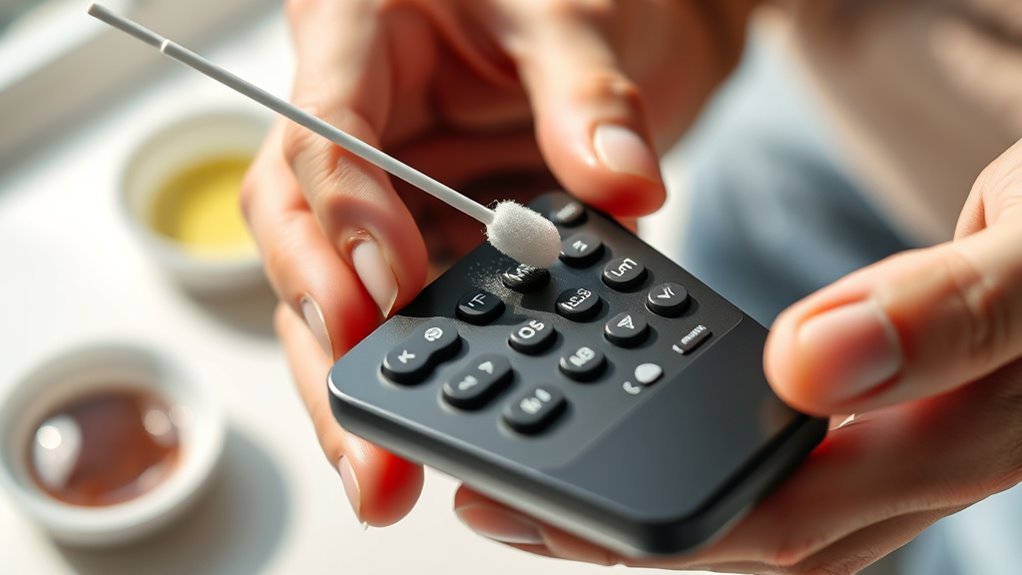
Several tiny crevices and gaps on your remote can trap dust and grime that a cloth can’t reach. To effectively clean these hard-to-reach areas, use cotton swabs. Their precise tip allows you to target dirt without damaging sensitive components. Here’s how to proceed:
- Lightly dampen the cotton swab with isopropyl alcohol or a mild cleaning solution.
- Gently insert the swab into seams, button edges, and between keys.
- Rotate the swab to pick up accumulated debris.
- Replace the cotton tip if it becomes too dirty and repeat as necessary.
Using cotton swabs gives you the freedom to clean intricate parts thoroughly, maintaining your remote’s functionality and appearance without risking damage. For best results, always use a gentle cleaning solution to avoid harming your remote’s surface.
Disinfect the Remote Safely
You’ll want to pick disinfectants that are effective yet gentle to avoid degrading the remote’s plastic or damaging the buttons. Avoid spraying liquids directly; instead, apply the solution to a microfiber cloth or cotton swab. This method guarantees thorough disinfection while protecting the remote’s functionality. For best results, use isopropyl alcohol solutions at around 70% concentration applied on a microfiber cloth to clean and disinfect safely.
Choose Safe Cleaning Solutions
Although many cleaning products promise thorough disinfection, not all are suitable for your remote’s delicate electronics and surface materials. Choosing safe cleaning solutions is essential to maintain functionality and prevent damage. Opt for natural cleaners or approved cleaning alternatives that won’t corrode or infiltrate the internal components. Here’s what you should consider:
- Use isopropyl alcohol (70%) diluted properly for effective disinfection without residue.
- Avoid bleach or abrasive chemicals that can degrade plastics and buttons.
- Choose water-based natural cleaners with antimicrobial properties for gentle cleaning.
- Apply solutions sparingly with a microfiber cloth to control moisture exposure.
Prevent Damage to Buttons
To prevent damage to your remote’s buttons during disinfection, limit moisture exposure and avoid excessive pressure when cleaning. Use a lightly dampened microfiber cloth with an appropriate cleaning solution to maintain ideal button protection. Avoid spraying liquids directly onto the remote, as excess moisture can seep beneath buttons, causing malfunctions. When wiping, apply gentle, even strokes to preserve button responsiveness and prevent wear. For button care, consider using isopropyl alcohol wipes with a concentration of 70% or less, as they disinfect effectively without degrading rubber or plastic components. Regularly inspect buttons for signs of damage or sticking, and clean promptly to maintain functionality. Following these precise steps guarantees your remote stays hygienic without sacrificing button integrity, giving you freedom to use it confidently and safely.
Dry and Reassemble the Remote
Allow the remote components to air dry completely before reassembling to prevent moisture damage or electrical shorts. Proper drying techniques are essential for safe and effective remote assembly. Follow these steps:
- Place all parts on a clean, dry towel in a well-ventilated area.
- Avoid using heat sources like hair dryers, which can warp plastic or damage electronics.
- Confirm all components, including buttons and circuit boards, are fully dry—no visible moisture or dampness.
- Reassemble the remote carefully, aligning buttons and securing screws without forcing parts.
Using these precise drying techniques guarantees your remote functions reliably, preserving freedom from malfunction. Taking time to dry thoroughly eliminates risks and extends the device’s life without compromising performance.
Tips to Keep Your Remote Fresh Longer
Since your remote is handled frequently, it’s prone to accumulating dirt, oils, and odors that can affect its cleanliness and functionality. To keep your remote fresh longer, implement regular maintenance by wiping it down with a microfiber cloth and using a mild disinfectant weekly. Avoid eating or applying lotions before use, as residues can build up. When not in use, store your remote in a fresh storage environment—preferably a clean, dry place away from direct sunlight and heat sources—to prevent moisture and odor accumulation. Consider using small silica gel packets in the storage area to control humidity. These practical steps will extend your remote’s lifespan, ensuring peak performance and a cleaner, odor-free experience every time you pick it up. Establishing a regular cleaning routine is essential to maintain hygiene and reduce the risk of germ transmission.
Frequently Asked Questions
Can I Use Alcohol Wipes on All Types of Remotes?
You can use alcohol wipes on most remotes, but it depends on the remote material. Hard plastics usually tolerate alcohol well, but soft-touch or rubberized surfaces might degrade with frequent use. To protect your device, consider cleaning frequency—limit alcohol wipes to occasional deep cleans and opt for a damp cloth for regular maintenance. Always check manufacturer guidelines to avoid damaging sensitive coatings or electronics and keep your remote functioning freely.
How Often Should I Clean My Remote Control?
Just like you wouldn’t skip oil changes on your car, regular remote maintenance is key to keeping your device responsive. For cleaning frequency, aim for once a week if you use it daily, or at least monthly in less busy households. This prevents grime buildup and guarantees smooth operation. You want your remote to feel as fresh as the freedom of changing channels effortlessly, without sticky buttons slowing you down.
What Should I Do if My Remote Gets Wet Inside?
If your remote gets wet inside, act quickly to prevent water damage. First, remove the batteries to avoid short circuits. Then, gently blot excess moisture with a lint-free cloth. Use silica gel packets or uncooked rice to absorb remaining moisture—seal the remote in a bag with them for 24-48 hours. After drying, perform remote troubleshooting by testing all buttons. If issues persist, professional repair or replacement might be necessary.
Are There Specific Cleaners to Avoid for Remotes?
You should avoid harsh cleaning materials like bleach, ammonia, or abrasive solvents when cleaning remotes, as they can trigger unwanted chemical reactions that damage plastic components or circuitry. Instead, opt for isopropyl alcohol diluted with water or specialized electronic cleaners. These choices effectively sanitize without risking corrosion or residue buildup. Being cautious with your cleaning agents guarantees your remote stays functional and extends its lifespan, giving you the freedom to enjoy seamless control.
Can Deodorizing Sprays Damage Remote Buttons?
Yes, deodorizing sprays can damage remote buttons by causing residue buildup or degrading the plastic and rubber components. For effective remote maintenance, consider deodorizing alternatives like using a mild vinegar solution or placing activated charcoal nearby to absorb odors without direct contact. These options preserve the remote’s functionality and extend its lifespan, giving you the freedom to enjoy a clean, odor-free environment without risking damage to your device’s sensitive buttons.